Simple Steps to Drilling Holes in Cabinets for Knobs

Adding knobs to cabinets is a simple and effective way to update the look of your kitchen or bathroom. Whether you’re installing new cabinets or just want to give your existing ones a fresh look, drilling holes for knobs is a straightforward process that anyone can do. In this article, we’ll outline the simple steps you can follow to drill holes in cabinets for knobs and achieve a professional-looking result.
Before you begin, gather the necessary tools and materials. You’ll need a drill with a suitable drill bit, a measuring tape or ruler, masking tape or painter’s tape, a pencil or marker, and the knobs you want to install. It’s important to choose a drill bit that matches the diameter of the screws provided with your knobs, as using a different size can result in loose knobs or stripped screw holes.
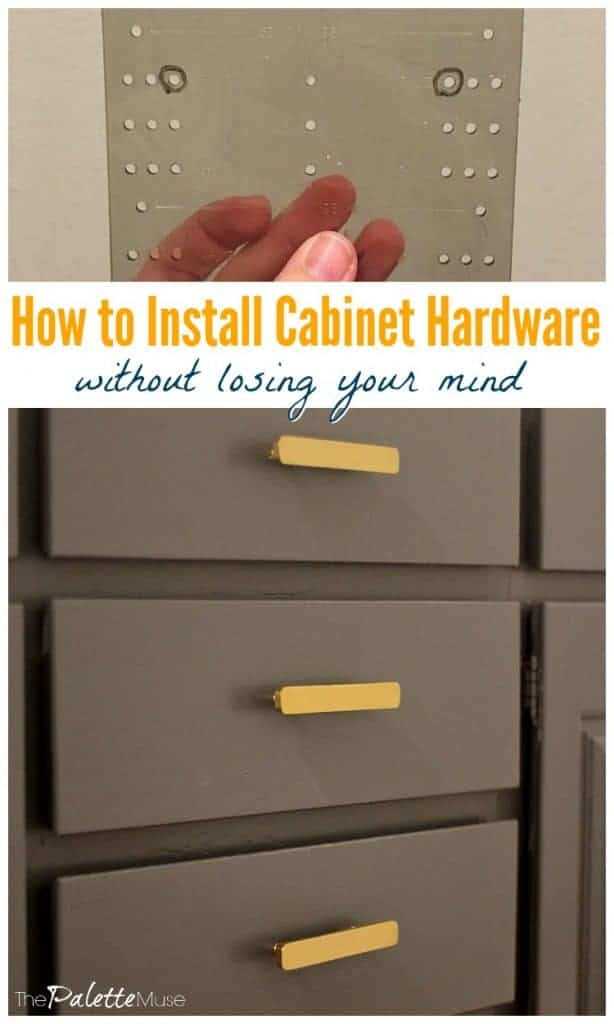
Start by measuring and marking the location of the knobs on the cabinet doors or drawers. Consider the height and placement of the knobs for ergonomic and aesthetic reasons. It’s a good idea to use masking tape or painter’s tape to create a guide for drilling to ensure that the holes are drilled at the desired location. Once you’ve marked the position of the holes, place the tape over the marks, pressing it firmly to adhere to the surface of the cabinet.
Next, drill the holes using a drill bit that matches the diameter of the screws provided with your knobs. Start drilling slowly and steadily, applying light pressure to avoid splintering or damaging the cabinet’s surface. Use a block of wood behind the cabinet door or drawer to prevent tear-out as the drill bit exits the wood. If you’re drilling through laminate or other material, consider using a backing plate to prevent chipping or cracking.
Gather the necessary tools
Before you begin drilling holes in your cabinets for knobs, it is important to gather all the necessary tools. Having the right tools will ensure that you can complete the task efficiently and without damaging your cabinets. Here are some essential tools you will need:

- Drill: You will need a drill to create the holes for the knobs. Make sure your drill is suitable for woodworking and has a drill bit of the appropriate size for your knobs.
- Masking tape: Using masking tape will help prevent the wood from splintering when you drill the holes. It will act as a protective barrier on the surface of the cabinet.
- Measuring tape or ruler: Accurate measurements are crucial when drilling holes for knobs. Use a measuring tape or ruler to mark the exact position where you want the knobs to be placed.
- Pencil: A pencil will allow you to make precise markings on your cabinets. Use it to mark the center point of each hole.
- Level: To ensure that your knobs are aligned properly, use a level to check if they are straight. This will give your cabinets a professional and polished look.
- Safety goggles: Protect your eyes by wearing safety goggles while drilling. This will prevent any debris or wood particles from causing eye injuries.
- Drill bit stop collars (optional): If you want to control the depth of the holes you are drilling, you can use drill bit stop collars. These can be attached to the drill bit to limit the depth of the holes.
- Clean cloth: After you finish drilling, use a clean cloth to wipe away any dust or wood shavings from the cabinets.
Having these tools ready before you start drilling will make the process smoother and ensure that you achieve the desired results.
Measure and mark the hole placement

Before drilling holes in your cabinets for knobs, it’s important to accurately measure and mark the hole placement. This will ensure that your knobs are evenly spaced and aligned.
You will need:
- Measuring tape or ruler
- Pencil or marker
Follow these steps to measure and mark the hole placement:

- Start by measuring the height of your cabinet door. This will help determine the vertical placement of the knob. Use a measuring tape or ruler to measure from the top or bottom edge of the door to the desired location of the knob.
- Once you have determined the vertical placement, use a pencil or marker to make a small dot on the door at that location. This will serve as a guide when drilling the hole.
- Next, measure the width of the door to determine the horizontal placement of the knob. You can either measure from the edge of the door or use a template to ensure consistent spacing between knobs.
- Using the measurement you obtained, make a small dot on the door at the desired location for the knob. Repeat this step for each knob you plan to install.
- Double-check all of your measurements and markings before proceeding to drill the holes. Make any necessary adjustments to ensure proper alignment and spacing.
By carefully measuring and marking the hole placement, you can ensure that your knobs will be installed correctly and enhance the overall appearance of your cabinets.
Choose the appropriate drill bit
When drilling holes in cabinets for knobs, it is important to choose the appropriate drill bit to ensure a clean and precise hole. The right drill bit will depend on the material of your cabinets and the size of the hole you need.
Step 1: Determine the material of your cabinets. Most cabinets are made of wood or laminate, but metal, glass, and other materials are also used. The material will determine the type of drill bit you need.
Wood Cabinets

If your cabinets are made of wood, a standard twist drill bit will work well. These bits have a pointed tip and spiral flutes that help remove material as you drill. Choose a bit with a diameter that matches the size of the knob’s screw.
Laminate Cabinets
For laminate cabinets, a carbide-tipped drill bit is recommended. Laminate is a hard, smooth material that can chip or crack if not drilled properly. Carbide-tipped bits are designed to cut through laminate without damaging the surface.
Metal Cabinets
If your cabinets are made of metal, you will need a bit specifically designed for metal drilling. High-speed steel (HSS) drill bits are commonly used for metal and can be used for drilling holes for knobs. Be sure to use a lubricant while drilling to prevent overheating and prolong the life of the bit.
Glass Cabinets
Glass cabinets require a special drill bit called a glass or tile drill bit. These bits are designed with a diamond or carbide tip that can cut through glass without cracking it. It is important to apply gentle pressure and use a lubricant while drilling on glass to prevent damage.
Step 2: Choose the size of the drill bit. The size will depend on the screw diameter of your cabinet knobs. Measure the screw diameter and choose a bit that matches or is slightly larger to allow for easier installation.

Remember to always wear safety glasses and work in a well-ventilated area when drilling holes in cabinets. Take your time and use steady pressure to ensure a clean and precise hole for your knobs.
Make a pilot hole
Before drilling the final hole for the cabinet knob, it is recommended to make a pilot hole. A pilot hole serves several purposes:
- Prevents splitting: Making a pilot hole helps to prevent the wood from splitting or cracking when the larger drill bit goes through.
- Accurate placement: A pilot hole ensures that the final hole is accurately placed, allowing the knob to be properly aligned with other knobs on the cabinet.
- Easier drilling: By creating a pilot hole, it makes it easier for the larger drill bit to go through the wood without resistance.
To make a pilot hole, follow these steps:
- Choose an appropriate drill bit: Select a drill bit that is slightly smaller in diameter than the final hole size for the knob. It should be just big enough for the screw of the knob to fit through.
- Mark the drilling spot: Use a pencil or marker to mark the exact spot where you want to drill the hole for the knob.
- Secure the cabinet: If necessary, remove the cabinet door and place it on a stable surface. Use clamps to secure it in place to prevent it from moving while drilling.
- Drill the pilot hole: Attach the selected drill bit to the drill and position it on the marked spot. Apply steady pressure and begin drilling the hole. Go slowly and occasionally pull the drill bit out to remove wood shavings.
- Check the depth: After drilling the pilot hole, check the depth to ensure it is sufficient for the screw of the knob to fit securely. If needed, adjust the drill bit size or deepen the hole.
Once the pilot hole is made, you can proceed to drill the final hole for the cabinet knob.

Drill the final hole
Once you have marked the desired location for the knob and have confirmed the measurements, it is time to drill the final hole.
Before drilling, make sure you have the appropriate drill bit size for your knob. Most knobs require a 3/16-inch drill bit, but it is always best to double-check the manufacturer’s instructions.
Start by positioning your drill over the mark, holding it steady with one hand, and applying light pressure. It is important to maintain control and go slowly to prevent any accidents or damage to the cabinet surface.
Begin drilling with a slow speed to create a small pilot hole. This will help guide the drill bit and prevent it from slipping. Once the pilot hole is created, you can increase the speed and continue drilling until the desired depth is reached.
As you drill, periodically stop and remove any wood or debris from the hole using a brush or vacuum. This will prevent the build-up of material and allow for a cleaner finish.
Once the hole is drilled, use a chamfer tool or sandpaper to smooth the edges of the hole. This will remove any roughness or splinters and provide a professional-looking finish.
Take this opportunity to double-check the size and depth of the hole, ensuring it is suitable for your knob. If needed, you can adjust the size by using a larger drill bit or sanding down the hole for a better fit.
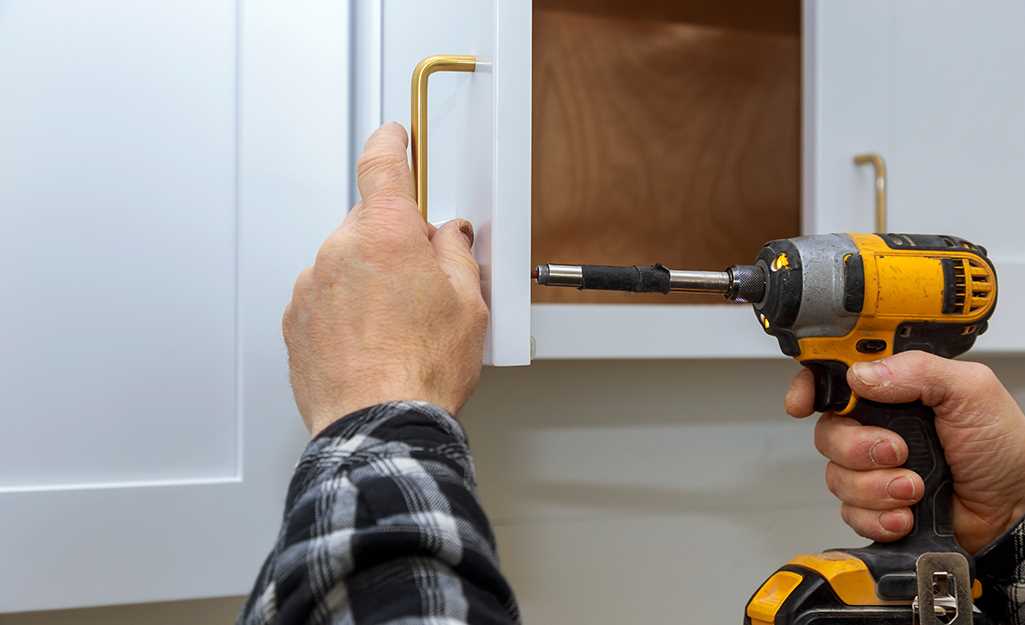
After drilling the final hole, place the knob in position and secure it using the provided screw. Use a screwdriver or drill with a screwdriver bit to tighten the screw until the knob feels secure.
Repeat these steps for any additional holes you need to drill for your cabinet knobs. Take your time and be patient, as precision and accuracy are key to achieving a professional finish.
Set the depth of the hole
Before drilling the hole, it is important to set the depth to ensure that the knob fits securely on the cabinet door or drawer. Follow these steps to correctly set the depth of the hole:
- Gather the necessary tools:
- Depth stop collar
- Drill bit
- Measure the depth:
- Set the depth stop collar:
- Practice on a scrap piece:
Place the depth stop collar on the desired drill bit, ensuring it is tight and secure. Measure the length of the knob screw and add it to the thickness of the cabinet door or drawer front. This measurement will be the depth of the hole.
Slide the depth stop collar onto the drill bit at the previously measured depth. Tighten the collar using the provided screws or tightening mechanism. This will prevent the drill bit from going deeper than necessary.
It is always a good idea to practice drilling on a scrap piece of wood before drilling the actual cabinet. This will allow you to check the fit of the knob and make any necessary adjustments before drilling into the cabinet.
Remember, the depth of the hole will vary depending on the size and style of the knob. Take your time to ensure that you have accurately set the depth before drilling into your cabinets.
Clean up the hole and cabinet surface
After drilling the holes for your cabinet knobs, it’s important to clean up the hole and the cabinet surface to ensure a smooth and finished look. Follow these steps to clean up the hole and cabinet surface:
- Use a vacuum or a small brush to remove any wood shavings or debris from the hole.
- Wipe down the cabinet surface around the hole with a clean, damp cloth to remove any dust or dirt.
- If there are any rough edges around the hole, use sandpaper to smooth them out. Start with a higher grit sandpaper (such as 120) and gradually work your way to a finer grit (such as 220) for a smooth finish.
- Once the hole and cabinet surface are clean and smooth, inspect the area to make sure it’s free from any imperfections or bumps.
- If necessary, touch up the cabinet surface with matching paint or stain to conceal any marks or scratches.
Note: It’s important to handle the cabinet knobs with care during this process to prevent any damage. If needed, you can cover the knobs with a cloth or plastic bag to protect them while cleaning up the hole and cabinet surface.
Attach the knob to the hole
Once the hole for the knob has been drilled, you are ready to attach the knob to the cabinet.
Materials:
- Knob
- Screw
- Screwdriver
Instructions:
- Take the knob and insert the screw into the hole on the back of the knob.
- Hold the knob from the front side of the cabinet where the hole was drilled.
- From the inside of the cabinet, align the screw with the hole.
- Using a screwdriver, tighten the screw until the knob feels secure.
- Repeat the process for each knob that needs to be attached to the cabinet.
Make sure to test the knob’s movement and secureness before considering the installation complete. If the knob feels loose, tighten the screw further. If the knob does not move smoothly, adjust the alignment of the screw and hole until it functions properly.
Congratulations! You have successfully attached the knob to the hole in your cabinet.
FAQ:
What tools do I need to drill holes in cabinets for knobs?
You will need a power drill, drill bits, masking tape, a ruler or measuring tape, and a pencil.
Can I use a regular drill bit to drill holes in cabinets for knobs?
No, it is recommended to use a special drill bit called a Forstner bit, as it creates clean and precise holes for knobs.
How do I measure the correct placement for the holes?
Start by measuring the width of the cabinet door or drawer front. Divide this measurement in half to find the center. Mark the center point with a pencil. Then, measure the vertical distance from the top or bottom edge of the door or drawer front to determine the desired height for the knob. Mark this height with a pencil as well.
What precautions should I take when drilling holes in cabinets for knobs?
It is important to tape off the area where the hole will be drilled to prevent any potential chipping or splintering of the wood. Use slow and steady pressure when drilling to avoid any accidents or damage to the cabinet. Additionally, wear protective eyewear and work gloves for safety.
Video:


Meet Harrison Clayton, a distinguished author and home remodeling enthusiast whose expertise in the realm of renovation is second to none. With a passion for transforming houses into inviting homes, Harrison's writing at https://thehuts-eastbourne.co.uk/ brings a breath of fresh inspiration to the world of home improvement. Whether you're looking to revamp a small corner of your abode or embark on a complete home transformation, Harrison's articles provide the essential expertise and creative flair to turn your visions into reality. So, dive into the captivating world of home remodeling with Harrison Clayton and unlock the full potential of your living space with every word he writes.


