Simple methods to tighten a drill bit

When using a drill, one of the most frustrating problems that can occur is a loose drill bit. This can not only affect the performance of the drill, but it can also be dangerous. A loose drill bit can slip out of the chuck, causing damage or injury. Therefore, it is important to know how to properly tighten a drill bit to ensure a safe and efficient drilling experience.
One of the simplest methods to tighten a drill bit is to use a chuck key. Most drills come with a chuck key that is used to tighten the chuck. To tighten the drill bit, simply insert the chuck key into the chuck and turn it clockwise. This will tighten the jaws of the chuck around the drill bit, securing it in place.
Another method to tighten a drill bit is to use a pair of pliers. If you don’t have a chuck key, or if the chuck key is not working properly, you can use a pair of pliers to tighten the chuck. Simply grip the chuck with the pliers and turn it clockwise to tighten the jaws around the drill bit.
It is important to note that when tightening a drill bit, you should not overtighten it. Overtightening can cause damage to the chuck or the drill bit. It is recommended to tighten the drill bit until it is snug, and then give it a little extra turn to ensure that it is securely in place.
Effective Techniques for a Stronger Drill Bit
1. Choosing the Right Drill Bit
When it comes to tightening a drill bit, one of the most crucial steps is selecting the right type of drill bit for the job. Ensure that you choose a bit that is suitable for the material you are planning to drill into. Different types of materials require specific types of drill bits. For example, a masonry drill bit should be used for drilling into concrete or brick, while a twist drill bit is ideal for drilling into metal.

2. Properly Securing the Drill Bit
Once you have selected the appropriate drill bit, it is important to ensure it is properly secured in the drill chuck. Start by loosening the chuck, then insert the drill bit into the chuck and tighten it securely. Be sure to use both hands to tighten the chuck and avoid over-tightening, as this can damage the bit. A bit that is securely tightened will provide better stability and reduce the chances of slipping or breaking during use.
3. Using the Correct Speed and Pressure
To prevent a drill bit from slipping or breaking, it is important to use the correct speed and pressure while drilling. Different materials require different drilling speeds and pressures. For example, when drilling into wood, a higher speed and light pressure are typically recommended. On the other hand, when drilling into metal or hard surfaces, a slower speed and more pressure may be necessary. Using the correct speed and pressure will help to prevent the drill bit from overheating or becoming damaged.
4. Regularly Sharpening the Drill Bit
Over time, drill bits can become dull, which can affect their performance and strength. Regularly sharpening the drill bit can help to maintain its strength and effectiveness. You can use a drill bit sharpener or a bench grinder to sharpen the bit. When sharpening, be sure to follow the manufacturer’s instructions and take proper safety precautions. A sharp drill bit will not only be more effective but will also reduce the chances of it getting stuck or breaking during use.
5. Proper Drill Bit Maintenance
In addition to sharpening, it is important to properly maintain your drill bit to ensure its longevity and strength. After each use, clean the bit to remove any debris or build-up that may affect its performance. Store your drill bits in a secure and dry location to prevent rust or damage. Regularly inspect the drill bit for any signs of wear or damage and replace it if needed. Proper maintenance will help to extend the life of your drill bit and keep it performing at its best.
Summary
In conclusion, following these effective techniques for a stronger drill bit will help to improve its performance and longevity. Choosing the right drill bit, properly securing it in the chuck, using the correct speed and pressure, regularly sharpening it, and maintaining it properly are all important steps to ensure that your drill bit remains strong and efficient. By implementing these techniques, you can rely on your drill bit to tackle any project with ease and precision.

Understanding the Importance of Tightening a Drill Bit
The drill bit is a critical component in any drilling operation. It is responsible for cutting into materials and making holes. However, if not properly tightened, the drill bit can become loose during operation, leading to several issues and potential dangers. It is important to understand the significance of tightening a drill bit to ensure efficient and safe drilling.
1. Avoiding Slippage
When a drill bit is not tightly secured in the drill chuck, it can slip or wobble during drilling. This can result in inaccurate drilling and imprecise holes. Additionally, slippage can cause damage to the material being drilled, leaving behind rough edges or even splitting the material. Properly tightening the drill bit helps to reduce the chances of slippage and ensures precise drilling.
2. Preventing Injury
A loose drill bit can lead to unexpected accidents and injuries. If the drill bit slips during operation, it can cause the drill to kick back or lose control, potentially resulting in finger or hand injuries. Tightening the drill bit securely in the chuck minimizes the risk of injury by providing stability to the drill during use.
3. Maximizing Efficiency
Loose drill bits can reduce the efficiency of drilling operations. When a drill bit is not tightly fastened, it can cause vibration, leading to inefficient drilling and poor hole quality. By tightening the drill bit properly, it ensures that the power from the drill is efficiently transferred to the cutting edge of the bit, making drilling faster and more effective.
4. Extending Drill Bit Lifespan
A loose drill bit can experience excessive wear and tear during operation. The movement and vibrations caused by a loose bit can lead to premature dulling or even breaking of the drill bit. By properly tightening the drill bit, friction and movement are reduced, reducing wear and extending the lifespan of the drill bit.

5. Achieving Safety Standards
Tightening a drill bit is not only important for operational efficiency but also for safety compliance. Many workplace safety guidelines and regulations require drill bits to be securely fastened before use. Following these guidelines ensures a safe working environment and helps prevent accidents or injuries.
Overall, understanding the importance of tightening a drill bit is crucial for optimal drilling performance, safety, and longevity of the drill bit. By ensuring the drill bit is properly tightened, you can avoid slippage, prevent injuries, maximize efficiency, extend the lifespan of the drill bit, and comply with safety standards.
Choosing the Right Size of Drill Bit for a Firm Hold
When it comes to drilling holes with a drill bit, one of the most important factors to consider is choosing the right size. Using the wrong size of drill bit can result in a loose hold, causing the drill bit to wobble and potentially damaging your workpiece.
Determining the Size of Drill Bit

The size of a drill bit is measured in diameter and usually indicated in inches or millimeters. To determine the right size, you can follow these steps:
- Check the drill bit size chart: Refer to a drill bit size chart to see the standard sizes available. This will give you a starting point for selecting the appropriate size.
- Consider the material: Depending on the material you are drilling into, you may need to choose a specific size. For example, drilling into thin metal may require a smaller drill bit size compared to drilling into wood.
- Measure the hole size: If you already have a hole that needs to be drilled, measure its diameter using a caliper or ruler. Match the drill bit size to the diameter of the hole.
Using the Right Size for a Firm Hold
Using a drill bit that is the right size for your intended task will ensure a firm hold and minimize the risk of the bit slipping or wobbling. Here are a few considerations:
- Smaller drill bits: Smaller drill bits are better suited for delicate or precise work. They provide a tighter hold, making them ideal for tasks that require accuracy.
- Larger drill bits: Larger drill bits are typically used for bigger holes or when a looser fit is acceptable. They are commonly used for tasks that require more strength and stability, such as drilling into hardwood or thick metal.
It’s important to note that the size of the hole you need to drill should match the size of the drill bit you are using. If the hole is too small for the drill bit, it may cause the bit to overheat or break. On the other hand, if the hole is too big, the bit may not fit securely, resulting in an unstable hold.
Conclusion
Choosing the right size of drill bit is crucial for achieving a firm hold and ensuring successful drilling. By considering factors such as the drill bit size chart, material being drilled, and existing hole size, you can select the appropriate size for your specific task. Remember to use smaller drill bits for delicate work and larger drill bits for heavier duty tasks. With the right size drill bit, you can achieve accurate, stable, and secure holes every time.
Adjusting the Chuck’s Tightness for Added Stability


One of the simplest methods to tighten a drill bit and improve stability is by adjusting the chuck’s tightness. The chuck is the part of the drill that holds the drill bit in place.
To tighten the chuck, follow these steps:
- Switch off the power: Before adjusting the chuck, always make sure the drill’s power is turned off and the cord is unplugged to prevent any accidents.
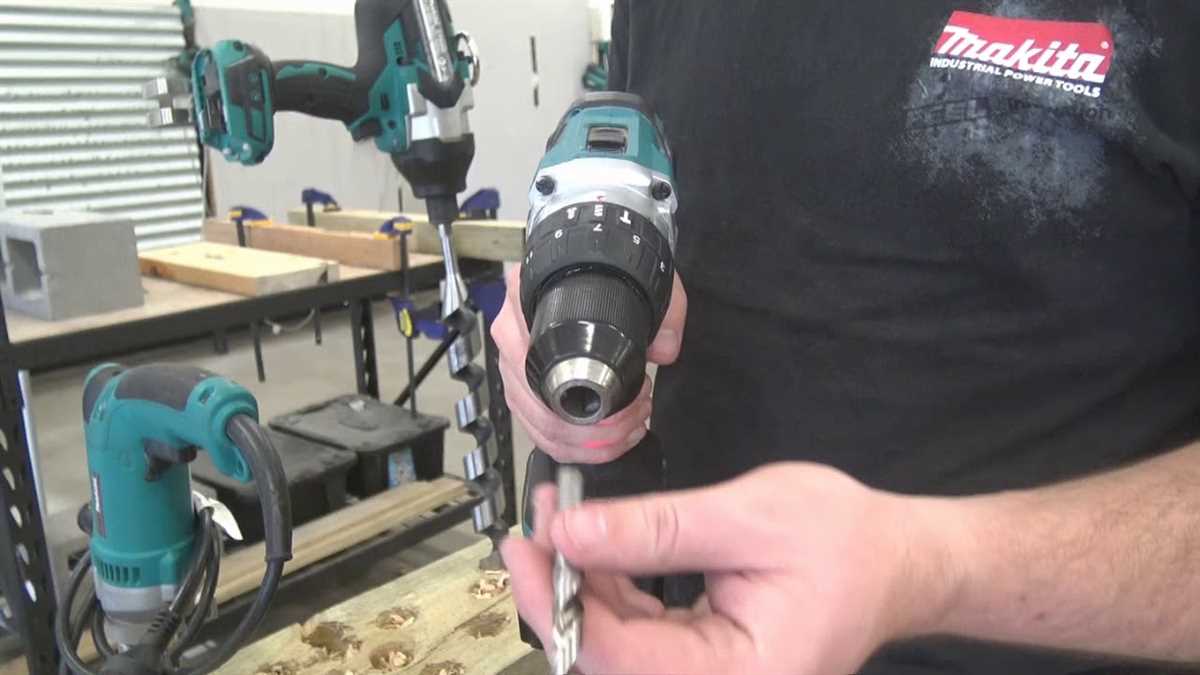
- Locate the chuck: The chuck is usually located at the front of the drill and is cylindrical or conical in shape.
- Hold the drill bit: Use one hand to hold the drill bit firmly in place.
- Tighten or loosen the chuck: With your other hand, rotate the chuck clockwise to tighten it or counterclockwise to loosen it. Make sure to apply enough pressure to secure the drill bit in place.
- Check for stability: Once the chuck is tightened, test the stability of the drill bit by gently moving it back and forth. If there is any wobbling or movement, the chuck may need to be tightened further.
It is important to note that over-tightening the chuck can damage the drill bit or the chuck itself. Therefore, it is recommended to tighten it just enough to eliminate any play or movement.
If you are still experiencing stability issues after adjusting the chuck, there may be other factors affecting the drill’s performance. Consider checking the drill’s alignment, replacing worn-out parts, or consulting a professional for further assistance.
Using a Key or Keyless Chuck to Secure the Drill Bit
When tightening a drill bit, you have the option to use either a key or a keyless chuck to secure the bit in place. Here, we will discuss the steps for both methods.
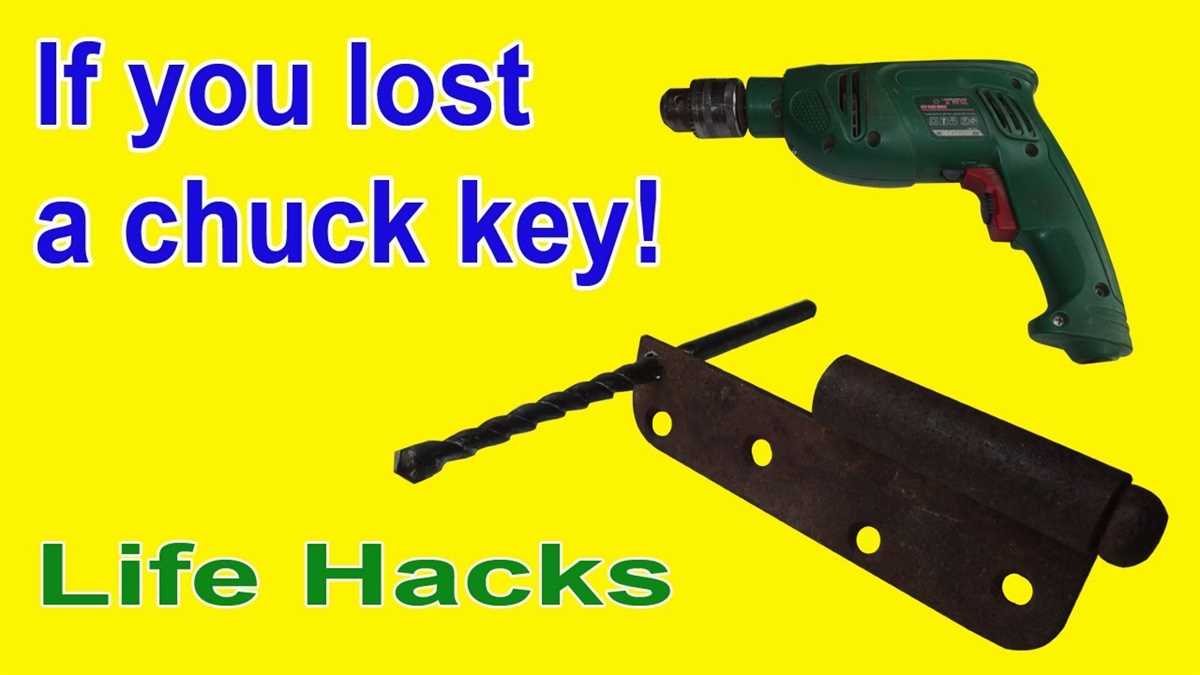
Using a Keyed Chuck
- Check if your drill has a keyed chuck. This type of chuck requires a key to tighten or loosen the bit.
- Insert the drill bit into the chuck, making sure it is centered and straight.
- Locate the chuck key. This is a small wrench that typically fits into the holes on the chuck.
- Insert the chuck key into one of the holes on the chuck and turn it clockwise to tighten the chuck jaws.
- Continue tightening until the drill bit is securely held in place. Do not overtighten as it may damage the chuck or the bit.
- To remove the drill bit, turn the chuck key counterclockwise to loosen the chuck jaws.
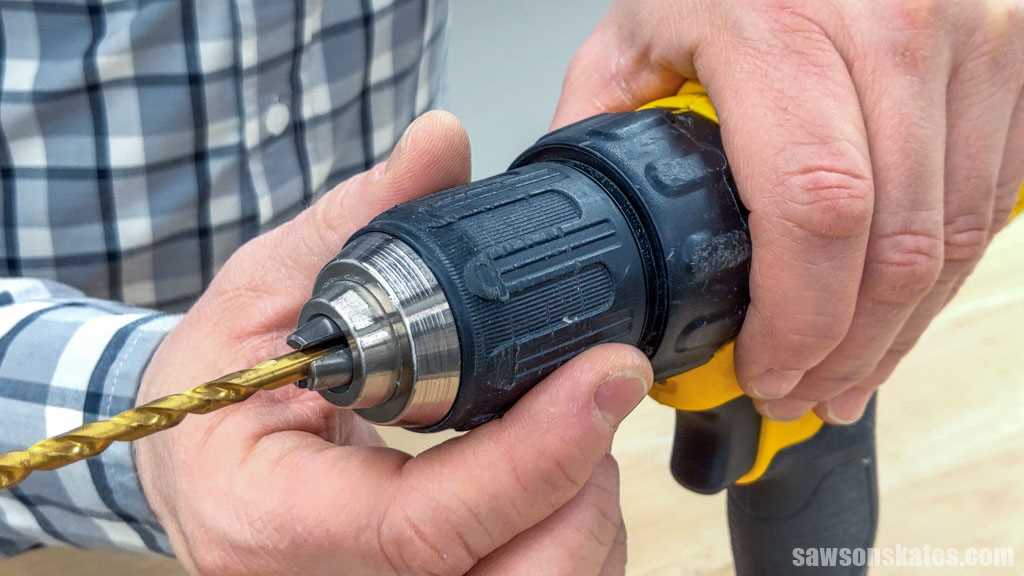
Using a Keyless Chuck
- Check if your drill has a keyless chuck. This type of chuck does not require a key as it can be tightened by hand.
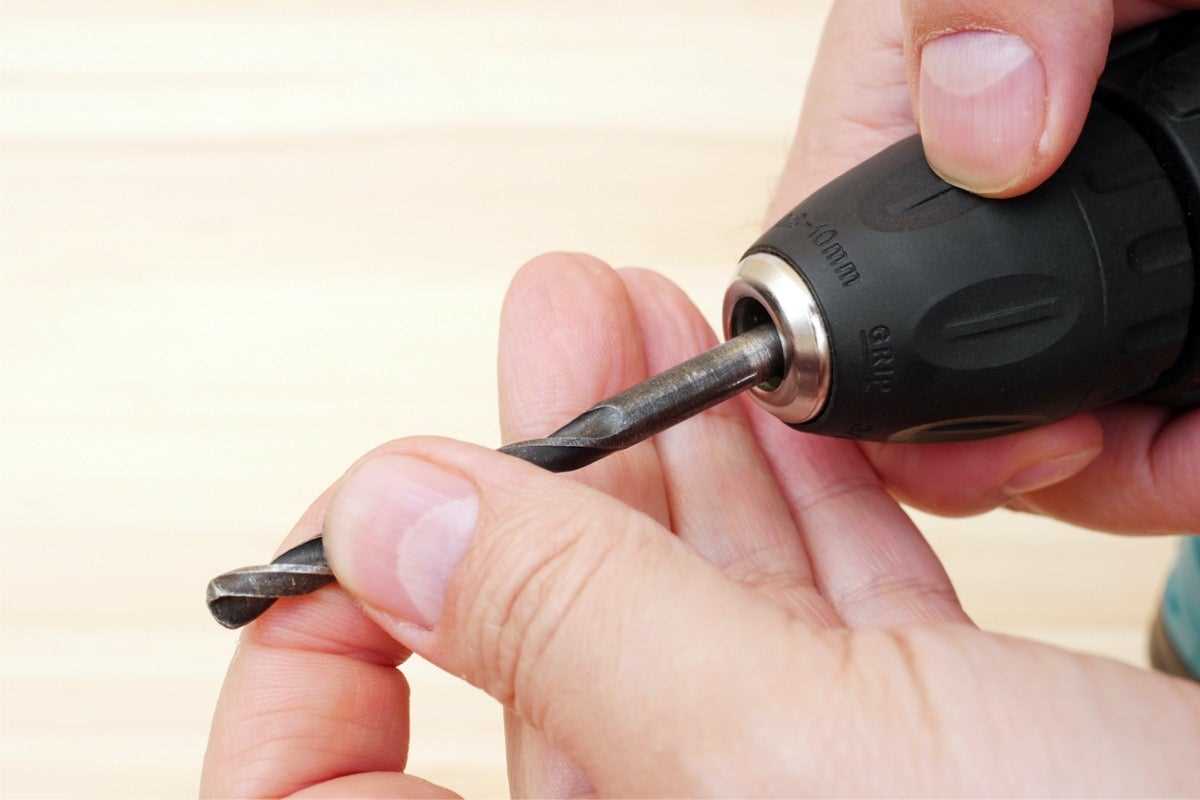
- Insert the drill bit into the chuck, making sure it is centered and straight.
- Hold the drill firmly with one hand and use the other hand to twist the chuck in a clockwise direction.
- Continue twisting until the chuck jaws are securely tightened around the drill bit.
- To remove the drill bit, twist the chuck counterclockwise while holding the drill firmly with one hand.
Note: Always make sure that the drill is turned off and unplugged before securing or removing a drill bit. This will help prevent any accidents and ensure your safety.
By following these steps, you can easily tighten a drill bit using either a key or a keyless chuck. Choose the method that is appropriate for your drill and enjoy your DIY projects with a securely held drill bit.
Applying Enough Pressure When Tightening the Drill Bit
When using a drill, it is important to ensure that the drill bit is properly tightened. This can help prevent accidents and ensure that the drill bit operates effectively. One common mistake that people make when tightening a drill bit is not applying enough pressure. In order to avoid this, it is important to follow these simple steps:
Step 1: Align the Drill Bit

Before tightening the drill bit, make sure it is properly aligned with the chuck. This will help ensure that the drill bit is secured evenly and tightly. If the drill bit is not aligned correctly, it may cause the bit to wobble or come loose during use.
Step 2: Use a Firm Grip
When tightening the chuck, it is important to use a firm grip on the drill. This will help you apply enough pressure to secure the drill bit in place. If you have a keyless chuck, use one hand to hold the drill and the other hand to rotate the chuck to tighten the drill bit.
Step 3: Apply Even Pressure
As you tighten the chuck, apply even pressure on all sides. This will help ensure that the drill bit is secured evenly. Avoid applying excessive pressure, as this can damage the chuck or the drill bit.
Step 4: Check for Tightness
After tightening the drill bit, give it a gentle tug to check for tightness. The drill bit should not move or wiggle. If it does, repeat the tightening process until the drill bit is securely in place.
Remember, using a drill with a loosely tightened drill bit can be dangerous and may result in the bit coming loose during operation. By following these steps and applying enough pressure when tightening the drill bit, you can ensure safe and efficient drilling.
Checking for Worn-out Parts to Ensure a Proper Grip
Before tightening a drill bit, it’s important to check for any worn-out parts that may affect its grip. Here are some steps to follow:
1. Inspect the Chuck
- Examine the chuck for any signs of damage or wear.
- If the chuck jaws are visibly worn or have become misaligned, it may be necessary to replace the chuck.
- Make sure the chuck is clean and free from any debris that could interfere with its grip.
2. Check the Drill Bit Shank
- Inspect the shank of the drill bit for any signs of wear or damage.
- If the shank appears bent, cracked, or worn down, it’s recommended to replace the drill bit.
- Ensure that the shank is clean and free from any dirt or rust that could affect its grip in the chuck.
3. Verify the Chuck Key
- Check the chuck key for any signs of wear or damage.
- If the teeth on the chuck key are worn or damaged, it may not provide a secure grip on the chuck.
- If necessary, obtain a new chuck key to ensure a proper grip.
4. Lubricate the Chuck
- Apply a small amount of lubricating oil to the chuck to ensure smooth operation.
- Be sure to wipe off any excess oil to prevent it from getting onto the drill bit or workpiece.
5. Take Safety Measures
- Always wear safety goggles when inspecting or working with power tools to protect your eyes from any debris or flying objects.
- Ensure the power drill is switched off and unplugged before performing any inspections or adjustments.
By following these steps and checking for worn-out parts, you can ensure a proper grip when tightening a drill bit, which will help improve the accuracy and efficiency of your drilling tasks.
Regular Maintenance for Long-lasting Drill Bit Tightness
Proper maintenance of your drill bits is essential for ensuring they stay tight and secure during use. By following a few simple steps, you can extend the lifespan of your drill bits and maintain their functionality. Here are some tips for regular maintenance:
1. Clean After Use
After each use, make sure to clean your drill bits thoroughly. Use a soft cloth or brush to remove any debris or residue that may have accumulated during drilling. This will prevent buildup and ensure better bit retention in the chuck.
2. Inspect for Damage
Regularly inspect your drill bits for any signs of damage, such as wear or dullness. Damaged drill bits can lead to poor performance and reduced bit retention. Replace any worn or damaged bits to maintain optimal tightness.
3. Use Proper Lubrication
Apply lubrication to your drill bits before use to reduce friction and heat generation. This will help preserve their sharpness and improve their performance. Use a suitable lubricant recommended by the manufacturer for maximum effectiveness.
4. Store Properly
When not in use, store your drill bits in a clean and organized manner. Keep them in a designated case or container to protect them from damage and prevent them from getting lost. Storing them properly will also help maintain their tightness over time.
5. Handle with Care
Avoid dropping or mishandling your drill bits, as this can cause damage to the cutting edges and reduce their functionality. Handle them with care and use them in a controlled manner to prolong their lifespan and keep them tight.
6. Replace Worn Chuck
If your drill bit is not staying tight even after regular maintenance, it may be a sign of a worn chuck. Consider replacing the chuck or consulting a professional for further assistance. An improperly functioning chuck can cause the drill bit to loosen, compromising your safety.
By following these maintenance tips, you can ensure that your drill bits stay tight and perform optimally for a longer period of time. Regular maintenance will not only save you money on replacements but also enhance your drilling experience.
Exploring Alternative Techniques for Drum Tightening
Introduction
Drum tightening is an essential part of maintaining the performance and longevity of a drum kit. While there are traditional methods for tightening drumheads, exploring alternative techniques can provide additional options for drummers. This article will discuss some alternative techniques for drum tightening that can be used to achieve desired results.
1. Using a Drum Key
A drum key is a small tool that is commonly used for tightening drumheads. By inserting the drum key into the tension rods on the drumhead, drummers can apply precise tension to each rod, ensuring an even and consistent drum sound. To tighten the drumhead, turn the drum key clockwise, making small adjustments to each rod until the desired tension is reached.
2. Using a Tension Watch
A tension watch is a device that measures the tension of a drumhead. By using a tension watch, drummers can ensure that each rod is tightened to the same tension, resulting in a balanced drum sound. To use a tension watch, place it on the drumhead and gradually tighten each rod until the desired tension is achieved. The tension watch will provide feedback on the tension levels, allowing for precise adjustments.
3. Using Drum Dots or Moongels
Drum dots and moongels are adhesive gel pads that can be placed on the drumhead to dampen the vibrations and reduce unwanted overtones. By strategically placing drum dots or moongels on the drumhead, drummers can achieve a tighter and more controlled drum sound. Experiment with different placements to find the desired tone.
4. Using Drum O’s
Drum O’s are small metal rings that can be placed on the drumhead to reduce the resonance and control the sustain. By placing the Drum O’s around the edge of the drumhead, drummers can achieve a tighter and more focused sound. Experiment with different numbers and placements of Drum O’s to find the desired sound.
Conclusion
While traditional drum tightening methods are effective, exploring alternative techniques can provide additional options for drummers to achieve the desired drum sound. Whether it’s using a drum key, tension watch, drum dots, moongels, or Drum O’s, there are various techniques that can be used to tighten a drumhead and achieve a tighter and more controlled drum sound. Experiment with these techniques to find the one that works best for you and your drum kit.
FAQ:
What are some simple methods to tighten a drill bit?
There are a few simple methods to tighten a drill bit. One method is to use a chuck key to secure the bit in place. Another method is to use pliers or a wrench to tighten the chuck around the bit. Additionally, some drills have a keyless chuck that can be tightened by hand.
How do you use a chuck key to tighten a drill bit?
To use a chuck key to tighten a drill bit, insert the chuck key into the holes on the chuck and rotate it in a clockwise direction. This will tighten the jaws of the chuck around the bit and secure it in place.
Can you use pliers or a wrench to tighten a drill bit?
Yes, you can use pliers or a wrench to tighten a drill bit. Simply grip the chuck with the pliers or wrench and rotate it in a clockwise direction to tighten the chuck around the bit.
What should you do if your drill has a keyless chuck?
If your drill has a keyless chuck, you can tighten the drill bit by hand. Simply grab the chuck and rotate it in a clockwise direction until it feels secure. This eliminates the need for a chuck key or other tools.
Video:

Best Welder Ever Made

Meet Harrison Clayton, a distinguished author and home remodeling enthusiast whose expertise in the realm of renovation is second to none. With a passion for transforming houses into inviting homes, Harrison's writing at https://thehuts-eastbourne.co.uk/ brings a breath of fresh inspiration to the world of home improvement. Whether you're looking to revamp a small corner of your abode or embark on a complete home transformation, Harrison's articles provide the essential expertise and creative flair to turn your visions into reality. So, dive into the captivating world of home remodeling with Harrison Clayton and unlock the full potential of your living space with every word he writes.


