Repairing Drill Holes in Wood: A Comprehensive Guide

Drill holes in wood are a common occurrence, whether you’re a professional woodworker or a DIY enthusiast. These holes can be made for a variety of reasons, such as installing hardware or creating a cavity for wires. However, they can also be a source of frustration when they need to be repaired.
Fortunately, repairing drill holes in wood is a relatively simple process that can be done by anyone with basic woodworking skills. In this comprehensive guide, we will explore various methods for restoring the integrity and aesthetics of wood surfaces that have been marred by drill holes.
Step 1: Assess the damage. Before you can begin repairing a drill hole, you need to assess the extent of the damage. Is the hole shallow or deep? Is the wood splintered or cracked around the hole? Understanding the nature of the damage will help you determine the best course of action for repairs.
Step 2: Select the right repair technique. Depending on the type and size of the drill hole, different repair techniques may be more effective. For small and shallow holes, wood putty or a dowel can be used to fill the void. For larger or deeper holes, a technique known as plug-cutting may be necessary.
Step 3: Execute the repair. Once you have selected the appropriate repair technique, it’s time to execute the repair. This may involve filling the hole with putty, cutting a plug to fit the hole, or using other specialized tools and materials. It’s important to follow the instructions for your chosen repair technique carefully to ensure a successful outcome.

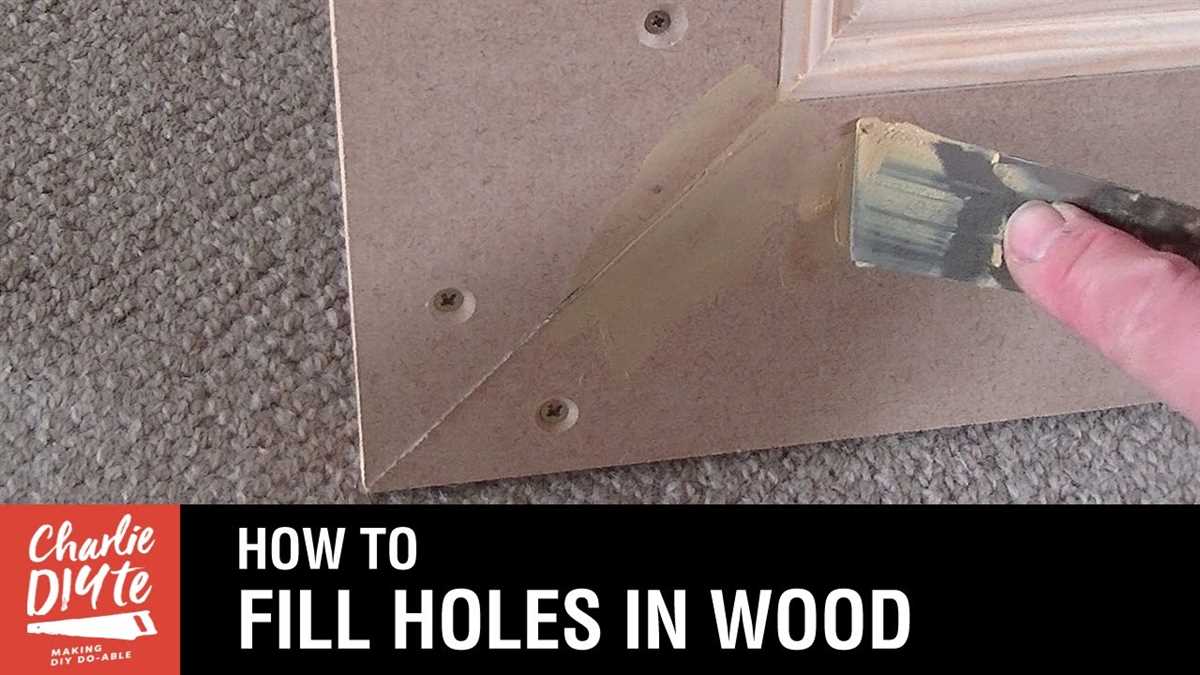
Step 4: Sand and finish. After the repair has been made, it’s important to sand the area to ensure a smooth and seamless finish. This will help the repaired hole blend in with the surrounding wood. Finally, apply a wood finish or stain to match the color of the surrounding wood and protect the repaired area.
By following these steps and utilizing the right techniques and materials for the job, you can effectively repair drill holes in wood and restore the beauty and functionality of your woodworking projects.
Understanding the Basics of Drill Holes in Wood
Drill holes in wood are a common occurrence in many woodworking projects. Whether you are building a piece of furniture or working on a home improvement project, understanding the basics of drill holes in wood is essential. In this article, we will explore the different types of drill holes, their sizes, and how they are made.
Types of Drill Holes

There are several types of drill holes that you may encounter in woodworking:

- Pilot Holes: These are small holes drilled into the wood to guide the larger drill bit. They are typically used to prevent splitting and ensure accurate placement of screws or nails.
- Countersink Holes: These holes are created to allow the screw head to sit flush with the surface of the wood. They are cone-shaped and provide a clean and finished look.
- Through Holes: As the name suggests, these holes are drilled completely through the wood. They are commonly used for attaching two or more pieces of wood together.
- Shallow Holes: Shallow holes are used for creating recesses or pockets in the wood. They are often used to hide screws or create a space for decorative elements.
Sizes of Drill Holes
Drill holes come in various sizes, and the size of the hole you need will depend on the project and the type of fasteners you are using. The most common sizes for drill holes are:
- 1/16 inch
- 1/8 inch
- 3/16 inch
- 1/4 inch
- 5/16 inch
- 3/8 inch
- 1/2 inch
It’s important to choose the right size drill bit for your project to ensure a proper fit for the fasteners and prevent any wood splitting.
Making Drill Holes
Making drill holes in wood requires a drill and the appropriate drill bit. Here are some steps to follow:
- Mark the desired location of the drill hole on the wood.
- Select the appropriate drill bit size.
- Secure the wood in place using clamps if necessary.
- Place the drill bit on the marked spot and apply gentle pressure.
- Start the drill at a low speed and gradually increase the speed as the hole is being drilled.
- Keep the drill level and straight to ensure a clean and accurate hole.
- Once the hole is drilled, remove the drill bit and check if the size and depth are correct.
By following these steps and understanding the basics of drill holes in wood, you will be able to create clean and precise holes for your woodworking projects.
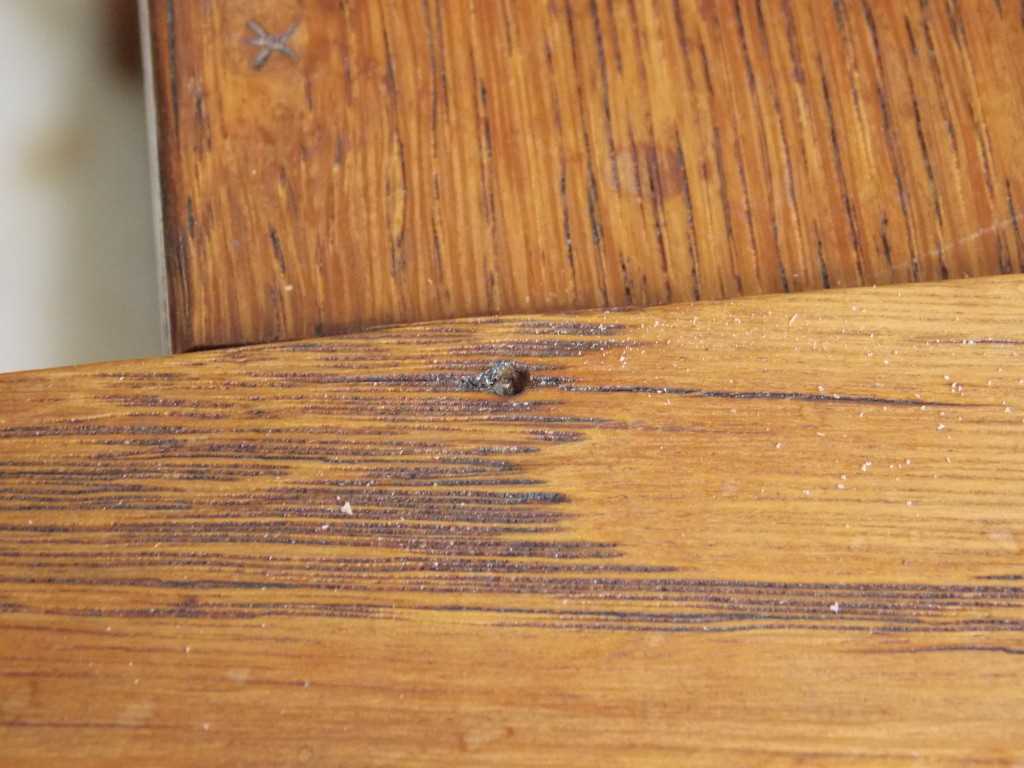
Evaluating the Damage: Types of Drill Holes
Introduction
Before you start repairing drill holes in wood, it’s important to evaluate the damage and understand the different types of drill holes you may encounter. This will help you determine the best approach for repairing them.

Types of Drill Holes
There are several types of drill holes that can occur in wood, each with its own characteristics and challenges. Here are the most common types:
- Straight Holes: These are drill holes that go straight through the wood without breaking the surface. They are the easiest to repair as they don’t require much filling or sanding.
- Counterbore Holes: Also known as flat-bottomed holes, counterbore holes are wider at the top and narrower at the bottom. They are typically used for recessed screw heads. Repairing counterbore holes involves filling both the wider top section and the narrower bottom section.
- Countersunk Holes: These holes have an angled top section that allows the screw head to sit flush with the wood surface. Repairing countersunk holes requires filling the angled section and sanding it down to create a smooth, even surface.
- Shallow Holes: Shallow holes are typically small and don’t go all the way through the wood. They can be easily repaired by filling them with wood putty or filler and sanding them down.
- Deep Holes: Deep holes are larger and go deeper into the wood. Repairing deep holes may require filling them in layers, allowing each layer to dry before adding the next. Sanding is also required to ensure a level surface.
- Multiple Holes: Multiple holes can occur when drilling in close proximity to each other or in a pattern. Repairing multiple holes requires treating each hole individually and ensuring they are filled and sanded down properly.
Conclusion
Understanding the different types of drill holes in wood is essential for effective repairs. By evaluating the damage and identifying the specific type of hole, you can choose the appropriate repair technique and achieve a seamless result.
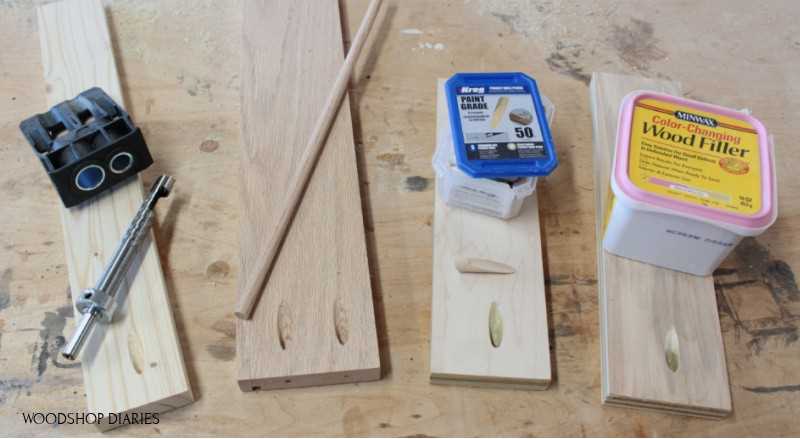
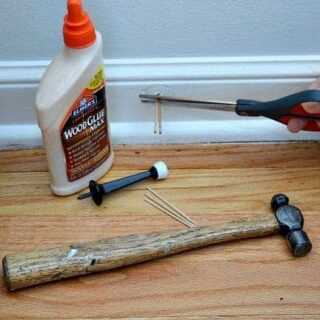
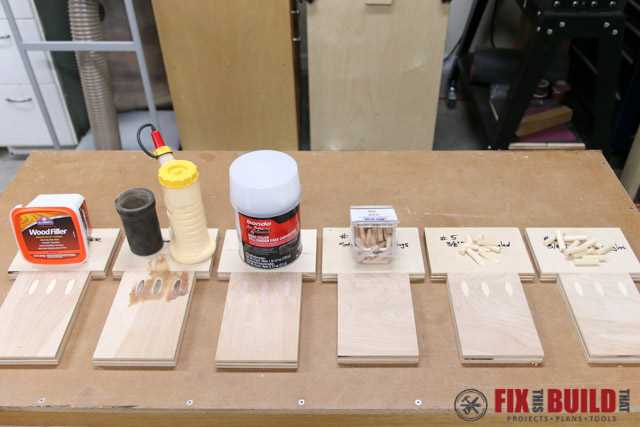
Essential Tools and Materials for Repair
- Drill: A power drill is essential for drilling new holes or widening existing holes in wood. A drill with multiple speed settings and a variety of drill bits is recommended for different types of repairs.
- Wood Filler: Wood filler is used to fill drill holes and other imperfections in wood surfaces. It comes in various colors to match different wood types and can be sanded and painted after application.
- Sanding Block: A sanding block is necessary to smooth the surface of the wood after filling the drill holes. It helps to create a seamless finish and prepares the wood for painting or staining.
- Paint or Stain: After repairing the drill holes, it might be necessary to paint or stain the wood to match the surrounding area. Choose a paint or stain color that matches the wood and finish of the furniture or structure.
- Putty Knife: A putty knife is used to apply wood filler into the drill holes and level it with the surface of the wood. It helps to create a smooth and even finish.
- Screwdriver: In some cases, the repair process might involve removing screws from the wood. A screwdriver with the appropriate head size is necessary for this task.
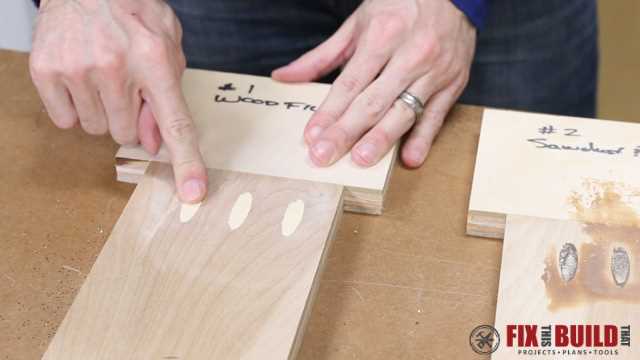
- Sawdust: Mixing sawdust with wood filler can help achieve a better color match when filling drill holes. Collecting sawdust from the same type of wood being repaired is ideal.
- Disposable Gloves: Wear disposable gloves when working with wood filler, paint, or stain to protect your hands from chemicals and to prevent any unwanted marks on the wood.
- Safety Glasses: Safety glasses are essential when drilling, sanding, or working with any tools to protect your eyes from debris and dust.
- Dust Mask: When sanding or working with wood dust, wear a dust mask to avoid inhaling particles that could be harmful to your respiratory system.
Step-by-Step Guide to Repairing Small Drill Holes
Materials You’ll Need:
- Wood filler or putty
- Sanding block or sandpaper
- Putty knife or scraper
- Paint or stain (optional)
- Paintbrush or sponge (optional)
Step 1: Preparation
Clean the area around the small drill hole using a damp cloth or sponge. Make sure the surface is free from dust, dirt, and debris.
Step 2: Fill the Hole
Take a small amount of wood filler or putty and press it into the drill hole using a putty knife or scraper. Fill the hole completely, ensuring no air pockets remain.

Step 3: Smooth the Surface
Use a sanding block or sandpaper to smooth out the surface of the filled hole. Gently sand the area until it is level with the surrounding wood. Be careful not to sand too aggressively, as this can damage the wood.
Step 4: Repeat if Necessary
If the filled hole is not completely level, repeat steps 2 and 3 until the surface is smooth and even.
Step 5: Optional Finishing Touches
If desired, you can paint or stain the repaired area to match the surrounding wood. Use a small paintbrush or sponge to apply the paint or stain, following the manufacturer’s instructions. Allow the paint or stain to dry completely before using or moving the repaired item.
Step 6: Clean Up
Dispose of any excess wood filler or putty and clean your tools according to the manufacturer’s instructions.

Conclusion
Repairing small drill holes in wood is a simple process that can be accomplished with just a few basic materials. By following this step-by-step guide, you can quickly and effectively repair small drill holes in wood and restore the appearance of your furniture or other wooden items.
Fixing Medium-Sized Drill Holes: Troubleshooting Tips
Medium-sized drill holes in wood can be a bit more challenging to fix compared to small drill holes. However, with the right techniques and tools, you can successfully repair these holes and restore the appearance of your wooden surface. Here are some troubleshooting tips to help you get started:
1. Evaluate the size and depth of the hole
Before you begin the repair process, it’s important to assess the size and depth of the drill hole. Medium-sized holes are usually between 1/4 inch (6mm) to 1/2 inch (12mm) in diameter. Determine if the hole goes all the way through the wood or if it’s only partially drilled.
2. Prepare the necessary materials
To fix medium-sized drill holes, you’ll need a few essential materials such as wood putty or filler, a putty knife or scraper, sandpaper, and paint or stain that matches the wood’s color. Make sure you have these materials readily available before starting the repair process.
3. Clean the hole
Thoroughly clean the drill hole to remove any debris or loose wood particles. You can use a small brush or compressed air to clear out the hole. This step ensures better adhesion of the wood filler or putty to the wood surface.
4. Fill the hole with wood filler
Apply wood filler or putty to the hole using a putty knife or scraper. Make sure to overfill the hole slightly to compensate for any shrinkage during the drying process. Smooth the surface of the filler with the scraper, ensuring it is level with the surrounding wood surface.
5. Allow the filler to dry
Follow the manufacturer’s instructions to determine the drying time of the wood filler. Generally, it takes a few hours for the filler to dry completely. Avoid touching or applying pressure to the filled hole until it’s fully dried to prevent any damage to the repair.
6. Sand the filled area
Once the filler has dried, use fine-grit sandpaper to smooth the filled area. Sand in a circular motion, gradually blending the filled area with the surrounding wood surface. Be careful not to sand too aggressively, as it may create an uneven surface or damage the surrounding wood.
7. Apply paint or stain
If needed, apply paint or stain that matches the color of the wood to the repaired area. Use a small brush or applicator to carefully blend the color and texture of the repaired section with the rest of the wood surface. Allow the paint or stain to dry completely before proceeding.
8. Seal the repair
To protect the repaired area and ensure its longevity, consider applying a sealant or finish to the wood surface. This will prevent moisture, dirt, and contaminants from penetrating the repair and causing further damage. Follow the manufacturer’s instructions for the chosen sealant or finish.
9. Regularly inspect and maintain the repaired area
After completing the repair, regularly inspect the fixed area to check for any signs of damage, deterioration, or changes. Make sure to follow proper maintenance procedures for the wood surface, such as cleaning and treating it periodically, to prevent future issues.
By following these troubleshooting tips, you can effectively fix medium-sized drill holes in wood and restore the integrity and appearance of your wooden surfaces.
Dealing with Large Drill Holes: Advanced Techniques
1. Preparing the Area
Before you begin repairing large drill holes in wood, it is important to properly prepare the area. Start by cleaning the surface around the hole to remove any dust, debris, or loose wood particles. This can be done using a brush, vacuum cleaner, or compressed air.
2. Choosing the Right Filler Material
When it comes to repairing large drill holes, it is important to choose the right filler material. Wood putty or epoxy wood filler are commonly used for this purpose. Wood putty is a quick-drying material that can be easily molded and sanded, while epoxy wood filler is more durable and provides a stronger bond.
3. Filling the Hole
To fill a large drill hole, start by applying the chosen filler material using a putty knife or a similar tool. Fill the hole completely, making sure to slightly overfill it to compensate for any shrinkage. Smooth out the surface of the filler material using the putty knife and remove any excess.
4. Sanding and Finishing
After the filler material has dried completely, use sandpaper to smooth out the surface. Start with a coarse grit sandpaper to level the filled area and then switch to a finer grit sandpaper for a smoother finish. Once the surface is smooth, you can apply a wood stain or paint to match the surrounding wood.
5. Using Reinforcement if Necessary
In some cases, large drill holes may require additional reinforcement to ensure a strong and long-lasting repair. This can be achieved by inserting dowels or wooden plugs into the hole before filling it with the chosen filler material. The dowels or plugs should be glued in place and trimmed flush with the surface after the filler material has dried.
6. Table of Materials and Tools
| Materials | Tools |
|---|---|
| Wood putty or epoxy wood filler | Putty knife or similar tool |
| Sandpaper (coarse and fine grit) | Brush or vacuum cleaner |
| Wood stain or paint | Compressed air (optional) |
| Dowels or wooden plugs (if necessary) | |
| Wood glue |
Note: It is recommended to wear appropriate safety gear, such as goggles and a respirator, when working with filler materials and sanding wood.
By following these advanced techniques, you can effectively repair large drill holes in wood and restore the appearance and integrity of the surface.
Preventing Future Drill Hole Damage: Best Practices
1. Choose the right drill bit
Before drilling into wood, make sure to select the appropriate drill bit for the job. Using the wrong drill bit can cause damage to the wood, resulting in larger and more noticeable holes. Consult the manufacturer’s instructions or seek advice from a professional to ensure you are using the correct drill bit for the type of wood you are working with.
2. Measure and mark carefully
Accurate measurements and markings are crucial to preventing unnecessary damage when drilling into wood. Use a ruler or tape measure to measure the exact location and depth of the hole you need to make. Mark the spot with a pencil or masking tape to ensure precision and avoid drilling in the wrong place.
3. Use a pilot hole
When drilling large or deep holes, it is recommended to first create a pilot hole. This is a small-diameter hole drilled before the main hole to guide the larger drill bit and prevent the wood from splitting or splintering. The pilot hole should have a diameter slightly smaller than the main drill bit to ensure proper guidance.
4. Drill at a slow speed
Drilling at high speeds can increase the likelihood of damaging the wood, causing it to splinter or chip. It is best to set your drill to a slow speed when working with wood. This allows for better control and reduces the risk of creating oversized or uneven holes.
5. Use a backing board
If you are drilling near the edge of a piece of wood, it is advisable to use a backing board to prevent tear-out or splintering. Place a scrap piece of wood behind the area where you will be drilling to provide support and minimize damage to the surrounding wood fibers.
6. Clean the drill bit frequently
Wood shavings and debris can accumulate on the drill bit during use, making it less effective and more likely to cause damage. Clean the drill bit regularly with a soft cloth or brush to remove any build-up. This will help maintain the sharpness of the bit and ensure a clean and smooth drilling process.
7. Practice proper drilling technique
Proper drilling technique is key to preventing future drill hole damage. Apply steady, even pressure while drilling and avoid forcing the drill bit into the wood. Let the drill do the work and maintain control throughout the process. If you feel any resistance or hear unusual sounds, stop drilling immediately to assess the situation and prevent damage.
8. Seal the drill holes
After drilling holes in wood, it is recommended to seal them to prevent moisture and other elements from entering and causing damage. Use a suitable wood filler or putty to fill the holes and ensure a smooth surface. Once the filler has dried, sand the area lightly to blend it with the surrounding wood.
9. Regular maintenance
To prevent future drill hole damage, it is important to maintain your tools in good condition. Keep your drill bits sharp and clean, and check for any signs of wear or damage. Replace any worn or damaged drill bits to ensure optimal performance and reduce the risk of causing accidental damage to the wood.
By following these best practices, you can minimize the risk of damage when drilling holes in wood and ensure a successful and professional-looking outcome.
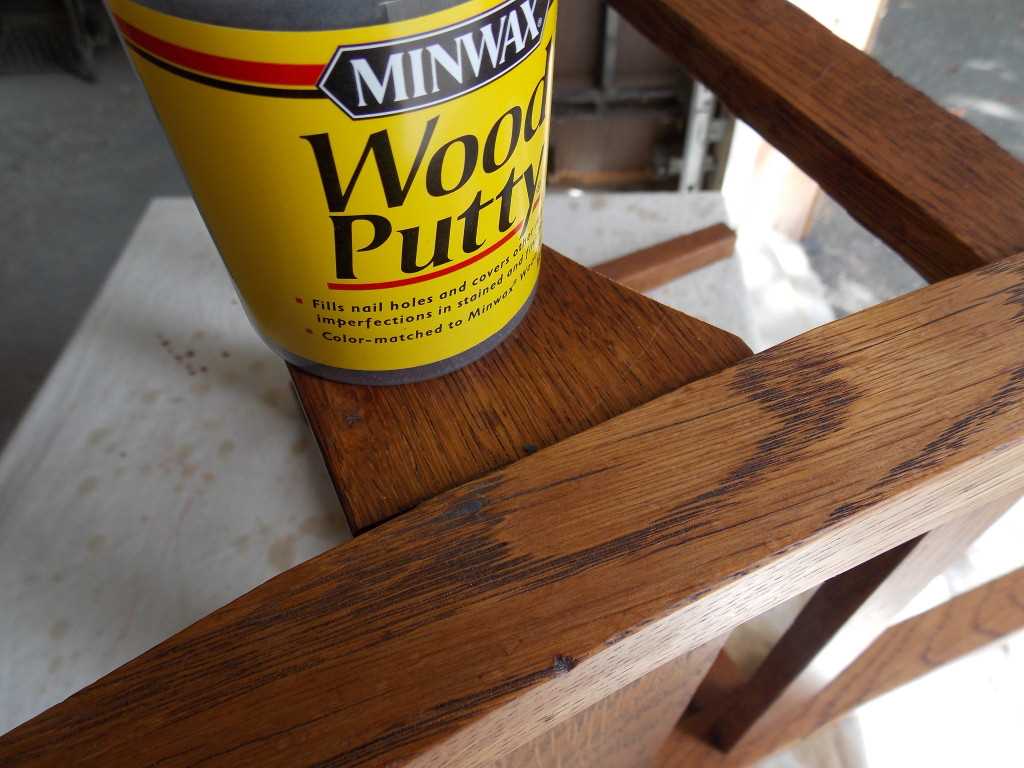
Final Touches: Finishing and Polishing the Repaired Area
After successfully repairing the drill holes in the wood, it’s essential to give the repaired area a finished and polished appearance. This final step will not only make the repair blend seamlessly with the rest of the wood but also protect it from further damage and wear.
1. Sanding
Start by sanding the repaired area to ensure it’s smooth and level with the surrounding wood. Use fine-grit sandpaper and sand in the direction of the wood grain. This will prevent any scratches and keep the surface uniform.
2. Cleaning
After sanding, remove any dust or debris from the repaired area using a clean, dry cloth or a vacuum. This will ensure a clean surface for the next steps.
3. Staining
If the repaired area doesn’t match the color of the surrounding wood, you can use a wood stain to blend it in. Choose a stain that matches the color of your wood and carefully apply it to the repaired area using a clean cloth or brush. Allow the stain to dry according to the manufacturer’s instructions.
4. Sealing
To protect the repaired area and give it a polished look, apply a wood sealer or finish. You can choose between various options such as polyurethane, lacquer, or varnish. Apply the sealer evenly using a brush, working in long, smooth strokes. Allow the sealer to dry completely before proceeding to the next step.
5. Polishing
Once the sealer is dry, you can give the repaired area a final polish for a smooth and shiny finish. Use a soft cloth or polishing pad and rub the repaired area in circular motions. This will remove any imperfections and bring out the natural beauty of the wood.
With these final touches, your repaired drill holes will be virtually indistinguishable from the rest of the wood surface. Remember to follow the manufacturer’s instructions for each product used and take your time to achieve the best results.
FAQ:
What are some common methods for repairing drill holes in wood?
There are a few common methods for repairing drill holes in wood. One method is to use wood filler to fill in the hole and then sand it down to make it smooth. Another method is to use a wooden dowel or plug to fill in the hole, and then cut or sand it down to match the surface of the wood.
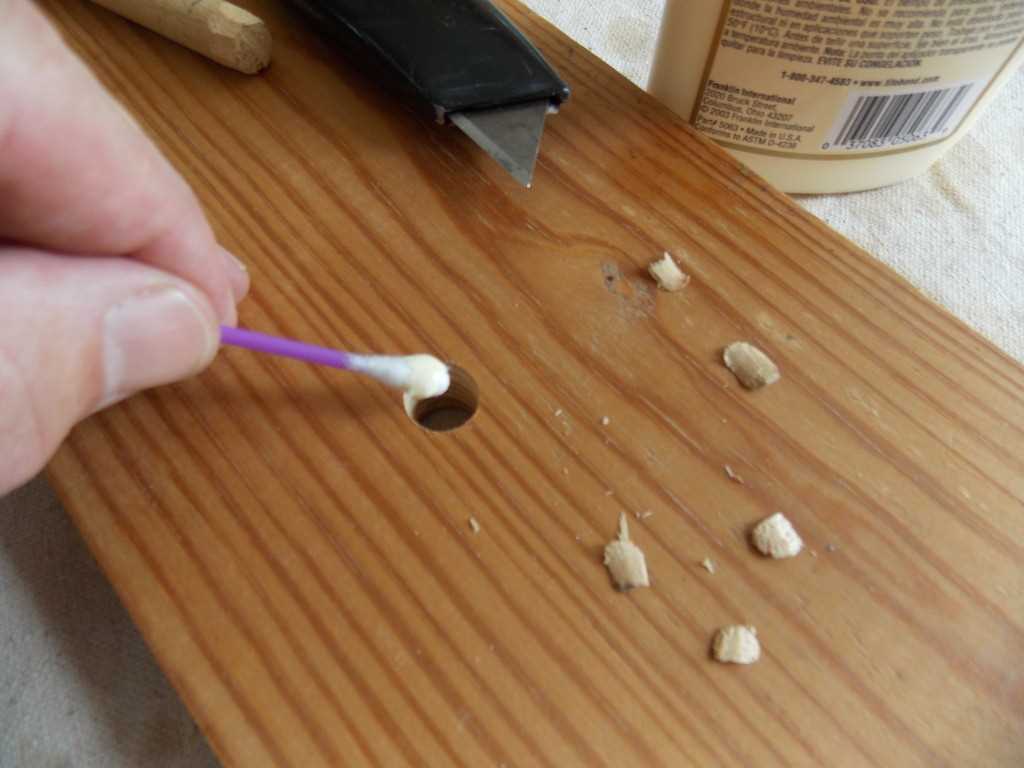
Can I use toothpicks to repair small drill holes in wood?
Yes, toothpicks can be a simple and cheap solution for repairing small drill holes in wood. Simply dip the toothpick in wood glue and insert it into the hole, then break off the excess and smooth it over with sandpaper. This can help fill the hole and create a solid surface.
What tools will I need to repair drill holes in wood?
To repair drill holes in wood, you will typically need a few basic tools. These may include wood filler, sandpaper, a putty knife or scraper, a chisel or drill bit (for creating a recess), wood glue, a wooden dowel or plug, and a saw or sanding tool for cutting or shaping the dowel.
How do I know which method to use for repairing drill holes in wood?
The method you choose for repairing drill holes in wood depends on a few factors. Consider the size of the hole, the type of wood, and the desired end result. For small holes, toothpicks or wood filler may be sufficient. For larger holes, using a wooden dowel or plug may provide a sturdier repair.
Can I repair drill holes in wood without leaving any visible marks?
While it may be difficult to completely repair drill holes in wood without leaving any visible marks, there are techniques that can help minimize their appearance. Using a wood filler that closely matches the color of the wood, and sanding it down to be smooth and level with the surface, can help make the repair less noticeable.
Video:


Meet Harrison Clayton, a distinguished author and home remodeling enthusiast whose expertise in the realm of renovation is second to none. With a passion for transforming houses into inviting homes, Harrison's writing at https://thehuts-eastbourne.co.uk/ brings a breath of fresh inspiration to the world of home improvement. Whether you're looking to revamp a small corner of your abode or embark on a complete home transformation, Harrison's articles provide the essential expertise and creative flair to turn your visions into reality. So, dive into the captivating world of home remodeling with Harrison Clayton and unlock the full potential of your living space with every word he writes.


