Proper Lubrication for Your Electric Drill: A Step-by-Step Guide

When it comes to maintaining your electric drill, proper lubrication is essential. Over time, the moving parts of your drill can become stiff and inefficient, leading to decreased performance and potential damage. Regular lubrication can help to prevent this by keeping the parts moving smoothly and reducing friction.
Step 1: Gather Your Materials
Before you begin lubricating your electric drill, make sure you have all the necessary materials on hand. You’ll need a lubricating oil appropriate for your drill, a clean cloth, and a small brush or applicator. It’s important to choose the right type of lubricating oil for your drill, as using the wrong oil can cause damage or reduce performance.
Pro tip: Check your drill’s manual or consult with the manufacturer to determine the appropriate lubricating oil to use.
Step 2: Clean the Drill

Before applying any lubricating oil, it’s important to clean your drill to remove any dirt, dust, or debris that could interfere with the lubrication process. Use a clean cloth to wipe down the exterior of the drill and remove any visible dirt. If necessary, you can use a small brush or applicator to reach into smaller crevices and remove stubborn grime.
Step 3: Apply the Lubricating Oil
Once your drill is clean, it’s time to apply the lubricating oil. Start by applying a small amount of oil to the moving parts of the drill, such as the chuck and gears. Be sure to follow any specific instructions provided by the manufacturer. Avoid applying too much oil, as excess lubrication can attract dirt and debris, leading to potential clogs or damage.
Pro tip: Use small, precise movements to ensure that the oil is evenly distributed and reaches all of the necessary components.
Note: It’s important to regularly check your drill’s lubrication levels and add oil as needed. This will help to ensure optimal performance and extend the lifespan of your drill.
By following these simple steps, you can keep your electric drill in top condition and ensure it continues to perform at its best. Regular lubrication will help to prevent stiff or damaged parts, reducing the risk of breakdowns and increasing the longevity of your drill.

The Importance of Proper Lubrication for Your Electric Drill
1. Extend the Lifespan of Your Electric Drill
Proper lubrication is essential for maintaining the longevity and performance of your electric drill. By regularly lubricating the moving parts, you can prevent wear and tear that can lead to the drill’s premature failure. Lubrication helps to reduce friction between the various components, minimizing the heat and friction that can cause damage to the drill’s motor and other sensitive parts.
2. Optimize Performance
A well-lubricated electric drill operates more smoothly and efficiently, allowing you to work with greater precision and speed. Lubrication helps to ensure that the moving parts operate at their best, minimizing resistance, and maximizing the power and performance of your drill. This is particularly important if you use your drill for heavy-duty tasks that require a high level of performance.
3. Prevent Corrosion and Rust
Without proper lubrication, the metal components of your electric drill can be susceptible to corrosion and rust. Moisture, dirt, and debris can accumulate on the drill’s surfaces, leading to rust formation and increased friction that can damage the drill over time. By regularly lubricating your drill, you create a protective barrier that helps to ward off moisture and prevent the formation of rust, keeping your drill in top condition.
4. Reduce Noise and Vibration
Applying lubrication to the moving parts of your electric drill can help to reduce noise and vibration during operation. The lubricant acts as a cushion between the components, absorbing and dampening the vibrations that can be transmitted to the handle and your hand. This not only makes for a more comfortable working experience but also helps to minimize hand fatigue and strain.

5. Avoid Costly Repairs
Properly lubricating your electric drill can help you avoid costly repairs and replacements. By taking the time to regularly lubricate your drill, you can keep it in optimal working condition and prevent any potential damage or breakdowns. Over time, the cost of lubricating your drill is minimal compared to the expenses associated with repairing or replacing a damaged electric drill.
Conclusion
Proper lubrication is crucial for maintaining the performance and longevity of your electric drill. By extending its lifespan, optimizing performance, preventing corrosion, reducing noise and vibration, and avoiding costly repairs, regular lubrication ensures that your drill remains a reliable tool for all your drilling needs.
Why Lubrication Matters for Your Electric Drill
Proper lubrication is essential for maintaining the performance and longevity of your electric drill. Lubricating your drill regularly can help prevent issues such as excessive heat, motor wear, and decreased efficiency. By ensuring that all moving parts are properly lubricated, you can ensure that your drill operates smoothly and efficiently.
1. Reduces Friction
Friction is one of the main causes of wear and tear on your drill’s motor and other moving parts. When parts rub against each other without proper lubrication, it can result in excessive heat and premature wear. By applying lubricant to these friction points, you can reduce the amount of heat generated and minimize the risk of damage.

2. Extends Lifespan
Regular lubrication can significantly extend the lifespan of your electric drill. By reducing friction and wear on the motor and other components, lubrication helps to prevent premature breakdowns and maximizes the tool’s overall durability. This not only saves you money on frequent repairs or replacements but also ensures that your drill continues to perform reliably for years to come.
3. Improves Performance
A well-lubricated electric drill operates more efficiently, delivering better performance. The reduced friction and heat allow the drill to spin more smoothly, resulting in increased drilling speed and torque. It also helps to prevent the drill from getting stuck or jammed during operation, allowing you to work more efficiently and effectively.
4. Prevents Corrosion
Lubrication helps to protect your electric drill from corrosion and rust. By creating a protective barrier, lubricant prevents moisture and other corrosive elements from reaching the drill’s internal components. This is particularly important if you often use your drill in humid or wet environments. Regular lubrication can help prolong the life of your drill by preventing damage caused by corrosion.
In conclusion, proper lubrication is crucial for maintaining the performance and longevity of your electric drill. Regularly lubricating your drill can help reduce friction, extend its lifespan, improve performance, and prevent corrosion. Make sure to follow the manufacturer’s recommendations for lubrication frequency and use the appropriate lubricant for your specific drill model.
Understanding the Components of Your Electric Drill
An electric drill is a versatile power tool that is commonly used for drilling holes and driving screws. To properly maintain and operate your electric drill, it is important to understand its various components. Here are the key components of an electric drill:

1. Chuck
The chuck is the part of the drill that holds the drill bit or screwdriver bit. It is usually located at the front of the drill and can be tightened or loosened to secure or release the bit. Chucks come in different sizes and can accommodate different types of bits.
2. Trigger
The trigger is the part of the drill that is used to control the speed of the drill. By pressing and releasing the trigger, you can adjust the speed of the drill to match the task at hand.
3. Handle
The handle is the part of the drill that you hold onto while operating the tool. It provides a comfortable grip and allows you to control the drill with ease. Some drills have a separate side handle for added stability.
4. Motor
The motor is the heart of the electric drill. It powers the rotation of the chuck and provides the necessary torque to drill holes or drive screws. Motors can vary in power and efficiency, so it is important to choose a drill with a motor that suits your needs.
5. Battery
If you have a cordless electric drill, it will be powered by a rechargeable battery. The battery is usually removable and can be charged separately. The capacity and voltage of the battery determine how long the drill can operate on a single charge.
6. Speed control
Many electric drills have a speed control dial or switch that allows you to adjust the speed of the drill. This is especially useful when working with different materials or when using different bit sizes.
7. LED light
Some electric drills come equipped with an LED light that illuminates the work area. This can be particularly helpful when working in dimly lit conditions.
8. Depth stop
A depth stop is a feature found on some drills that allows you to set a specific depth for your drilling. This can be useful when you need to drill holes to a certain depth without drilling too far.
9. Clutch
The clutch is a mechanism that allows you to adjust the torque or rotational force of the drill. It helps prevent overdriving screws and allows for more precise control over the drilling process.
Understanding these components of your electric drill will not only help you operate the tool safely and efficiently, but also allow you to make informed decisions when purchasing a new drill or performing maintenance on your existing one.
Choosing the Right Lubricant for Your Electric Drill
Proper lubrication is essential for maintaining the performance and longevity of your electric drill. Using the right lubricant can prevent wear and tear, reduce heat and friction, and ensure smooth operation. With so many options available, it’s important to choose the right lubricant that meets the specific needs of your electric drill.
Consider the Type of Lubricant
When choosing a lubricant for your electric drill, you’ll need to consider the type of lubricant that is suitable for both the drill and the application. Here are some common types of lubricants:
- All-purpose grease: This type of lubricant is versatile and can be used for various applications. It provides excellent protection against wear and corrosion.
- Silicone lubricant: Silicone lubricants are ideal for reducing friction and preventing rusting. They are also resistant to high temperatures, making them perfect for drills used in heavy-duty applications.
- Penetrating oil: Penetrating oils are designed to loosen rusted parts and lubricate hard-to-reach areas. They are perfect for drills that require deep penetration and extended lubrication.
Consider the Application
The type of lubricant you choose should also depend on the specific application of your electric drill. Consider the following factors:
- Speed and temperature: If your drill operates at high speeds or generates a lot of heat, you’ll need a lubricant that can withstand these conditions. Look for lubricants that are specifically designed for high-speed or high-temperature applications.
- Environment: If you often use your drill in wet or humid environments, you’ll need a lubricant that is resistant to water and corrosion. Look for lubricants that have a high degree of water resistance.
- Safety: Some lubricants may contain chemicals that can be harmful to you or the environment. Consider using environmentally friendly or biodegradable lubricants if safety is a concern.
Follow Manufacturer Recommendations
It’s important to always refer to the manufacturer’s recommendations for lubrication. They may specify a particular type or brand of lubricant that is optimal for your electric drill. Following these recommendations will ensure that you’re using the right lubricant and prevent any potential damage or voiding of the warranty.
Remember, proper lubrication is crucial for the performance and longevity of your electric drill. By choosing the right lubricant and following the manufacturer’s recommendations, you can keep your drill in excellent working condition for years to come.
Step 1: Disconnect and Prepare Your Electric Drill
Before you start lubricating your electric drill, it’s crucial to ensure your safety. Follow these steps to properly disconnect and prepare your electric drill:
- Turn off the power: Before doing anything else, make sure to switch off the power supply to your drill. This can be done by either unplugging the drill from the power outlet or turning off the main power switch.
- Remove the battery: If your electric drill is cordless, remove the battery pack to eliminate any risk of accidental start-up.
- Inspect the drill: Take a few moments to visually inspect your drill for any obvious signs of damage or excessive wear. Check for any loose or missing parts that may need attention before proceeding.
- Clean the drill: Use a clean, dry cloth or a soft brush to remove any dirt, dust, or debris from the surface of the drill. This will help ensure that you apply the lubricant to a clean surface and prevent any particles from interfering with the drill’s performance.
- Gather your lubricant: Depending on the type of drill you have, you may need to use a specific lubricant. Refer to the manufacturer’s instructions or consult the drill’s user manual to determine the appropriate lubricant. Make sure you have the lubricant readily available before proceeding to the next steps.
By following these steps, you will be well-prepared to safely and effectively lubricate your electric drill. In the next step, we will guide you through the process of lubricating the drill’s key components.
Step 2: Clean and Remove Old Lubricant
Before applying new lubricant to your electric drill, it is important to clean off any old lubricant or debris that may have accumulated. This will ensure that the new lubricant can effectively protect the moving parts of the drill and provide smooth operation.
Tools and Materials:
- Clean cloth or rag
- Degreaser or cleaning solvent
- Brush (optional)
Instructions:
- Unplug the electric drill from the power source to ensure safety.
- Take a clean cloth or rag and dampen it with a degreaser or cleaning solvent. Make sure the cloth is not dripping wet.
- Gently wipe down the exterior of the drill, paying attention to any areas where old lubricant or debris may be present.
- If necessary, use a brush to loosen and remove stubborn dirt or grime. Be careful not to use a brush with bristles that are too stiff, as this could scratch or damage the drill’s surface.
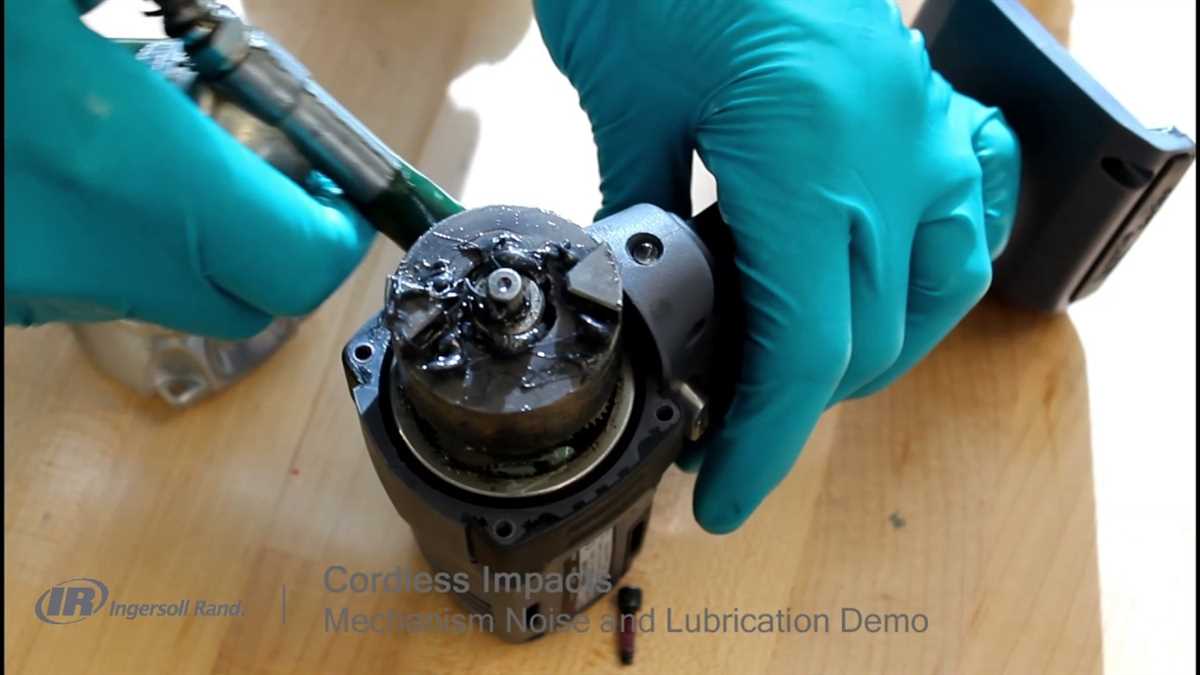
- After wiping down the exterior, open up any access panels or compartments on the drill to expose the internal parts.
- Using the damp cloth, clean the internal parts of the drill, including gears, bearings, and other moving components.
- Make sure to remove any excess lubricant or dirt from these parts as well.
- Once you have thoroughly cleaned the drill and removed old lubricant, allow it to air dry for a few minutes.
It is important to ensure that the drill is completely dry before applying new lubricant, as any moisture left behind can cause the lubricant to break down or become less effective.
Note: If you are unsure about how to access and clean the internal parts of your specific electric drill model, refer to the manufacturer’s instructions or consult a professional for assistance.
Step 3: Apply New Lubricant to the Moving Parts
Now that you have cleaned the old lubricant from your electric drill, it’s time to apply a fresh coat of lubricant to the moving parts. This will help reduce friction and prevent wear and tear on the drill.
Here’s how you can apply new lubricant to the moving parts of your electric drill:
- Refer to the user manual of your electric drill to determine the recommended lubricant for your specific model. Different drills may require different types of lubricants, so it’s important to use the right one.
- Purchase the recommended lubricant for your electric drill. You can find it at most hardware stores or online.
- Apply a small amount of lubricant to a clean cloth or rag.
- Gently wipe the lubricant onto the moving parts of your electric drill. Make sure to cover all the areas that require lubrication.
- If your electric drill has gears, make sure to apply lubricant to the gear teeth as well.
- Use a clean cloth or rag to remove any excess lubricant. You want to apply enough to provide adequate lubrication, but not so much that it becomes messy.
Once you have applied the new lubricant, your electric drill should be ready to use. Regularly check the moving parts for any signs of wear and reapply lubricant as needed.
Step 4: Reassemble Your Electric Drill and Test for Smooth Operation
Once you have finished lubricating the necessary parts of your electric drill, it’s time to reassemble it and test its operation to ensure that everything is working smoothly. Follow these steps:
- Replace all removed components: Carefully reattach any parts that were removed during the lubrication process, such as the chuck, motor housing, and handle. Make sure to align them correctly and fasten them securely.
- Tighten any screws or fasteners: Check all screws and fasteners to ensure they are properly tightened. Loose screws can lead to vibrations and compromise the operation of your drill. Use a screwdriver or wrench to tighten them if necessary.
- Inspect the drill’s exterior: Take a moment to inspect the outside of your electric drill for any signs of damage or wear. Look for cracks in the housing or any other abnormalities that may affect its performance. If you notice any issues, consider contacting a professional for repair.
- Power on the drill: Plug in your electric drill or ensure it has a fully charged battery. Turn on the drill and let it run for a few seconds to test its operation. Pay attention to any unusual noises, vibrations, or resistance that could indicate a problem.
- Test the drill’s functionality: Perform a few test operations with your drill, such as drilling into a scrap piece of wood or other suitable material. Pay attention to how smoothly the drill operates and whether it feels different from before lubrication. If you notice any issues, consider double-checking the lubrication and the assembly process.
Note: If you encounter any problems or the drill does not operate as expected, it may be necessary to repeat the lubrication process or seek professional assistance.
Regular Maintenance and Lubrication Schedule for Your Electric Drill
Introduction
Maintaining and lubricating your electric drill regularly is essential to ensure its optimal performance and long-term durability. By following a proper maintenance schedule, you can prevent malfunctions, extend the lifespan of your drill, and guarantee safe and efficient operation.
Maintenance and lubrication checklist
To help you keep your electric drill in top condition, here is a step-by-step maintenance and lubrication schedule:
- Before each use: Inspect the power cord and plug for any signs of damage or wear.
- After each use: Remove any accumulated dirt or debris from the drill, paying particular attention to the chuck, switch, and ventilation slots.
- Every 10 hours of use: Clean the chuck and lubricate it with a small amount of high-quality grease, following the manufacturer’s recommendations.
- Every 20 hours of use: Check the carbon brushes for wear and replace them if necessary.
In addition to the above checklist, it is also important to regularly inspect and clean the drill’s motor housing and cooling fins to prevent overheating. Consult your drill’s user manual for specific instructions on how to access and clean these components.
Choosing the right lubricant
When lubricating your electric drill, it is crucial to use the appropriate lubricant to ensure optimal performance and prevent damage. Some key factors to consider when choosing a lubricant include:
- Compatibility with the drill’s components: Select a lubricant that is recommended by the drill manufacturer and suitable for the specific materials and mechanisms of your drill.
- Viscosity: The lubricant should have a viscosity that allows it to penetrate and coat the moving parts effectively without causing excessive friction or drag.
- Temperature range: Consider the operating temperature range of your drill and choose a lubricant that can withstand those conditions.
If you are unsure about the right lubricant to use, consult the drill’s user manual or contact the manufacturer for guidance.
Conclusion
By following a regular maintenance and lubrication schedule for your electric drill, you can ensure its optimal performance, extend its lifespan, and maintain safe operation. Take the time to inspect and clean your drill regularly, lubricate the necessary parts, and use the right lubricant recommended by the manufacturer. This will help you get the most out of your electric drill and avoid costly repairs or replacements.
FAQ:
Why is proper lubrication important for an electric drill?
Proper lubrication is important for an electric drill because it helps reduce friction and wear on the moving parts, ensuring smooth and efficient operation.
How often should I lubricate my electric drill?
The frequency of lubrication for an electric drill depends on how often you use it. As a general rule, it is recommended to lubricate your drill every 3 to 6 months, or sooner if you notice any signs of friction or decreased performance.
What kind of lubricant should I use for my electric drill?
It is important to use a high-quality lubricant specifically designed for power tools. Look for lubricants that are formulated to withstand high temperatures and pressures. Some popular options include lithium-based greases or synthetic lubricants.
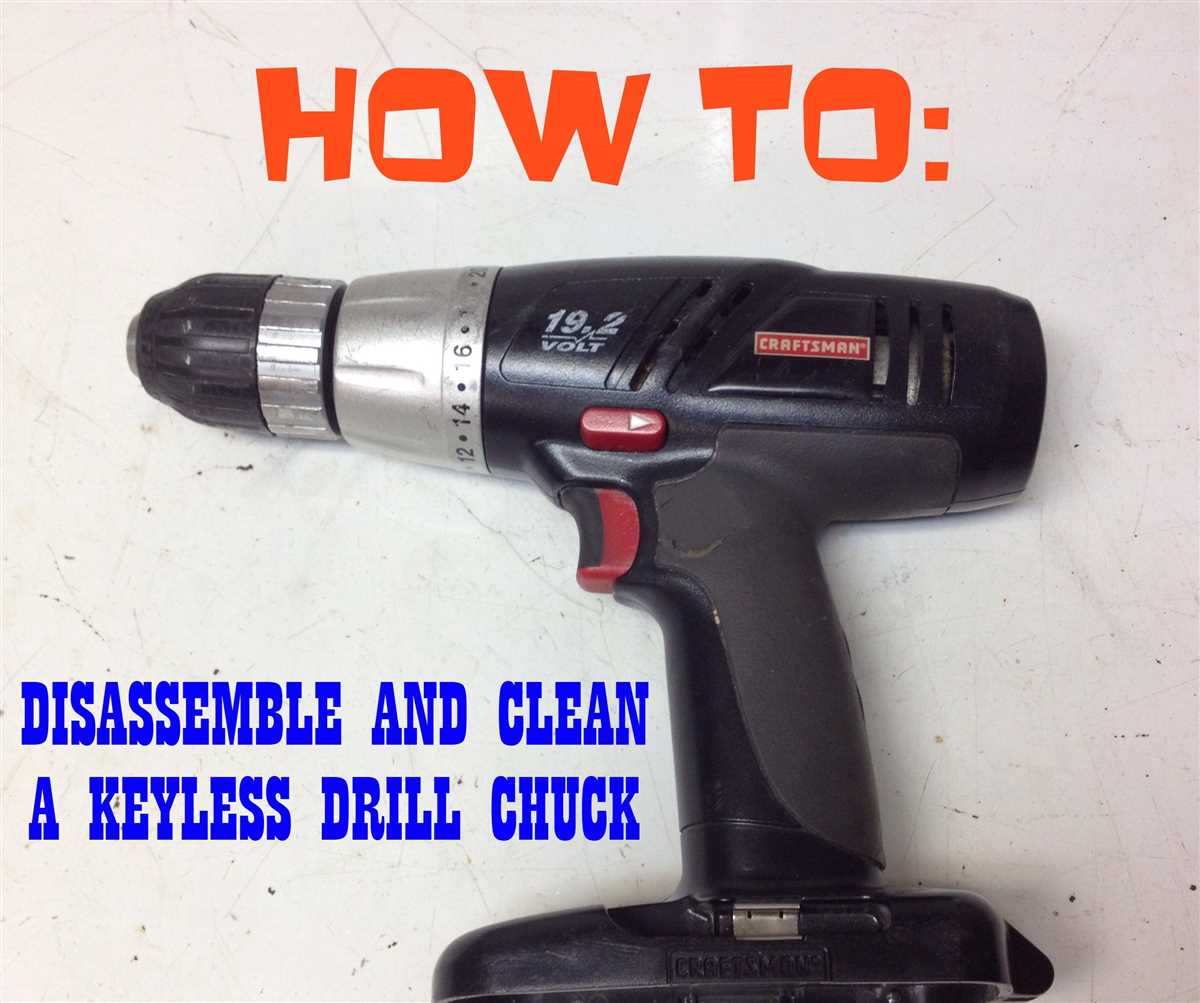
How do I lubricate the chuck of my electric drill?
To lubricate the chuck, first, make sure the drill is turned off and unplugged. Then, apply a small amount of lubricant to the inside of the chuck jaws. Open and close the chuck a few times to distribute the lubricant evenly. Wipe off any excess lubricant before using the drill again.
Can I use WD-40 as a lubricant for my electric drill?
No, WD-40 is not recommended as a lubricant for electric drills. While it can help loosen rust or debris, it is not designed to provide long-lasting lubrication. It is best to use a lubricant specifically formulated for power tools to ensure optimal performance and longevity.
What are the signs that my electric drill needs lubrication?
Some signs that your electric drill may need lubrication include increased friction or resistance when operating the drill, unusual noises or vibrations, or a noticeable decrease in performance. If you notice any of these signs, it is a good idea to lubricate your drill to prevent further damage.
Video:


Meet Harrison Clayton, a distinguished author and home remodeling enthusiast whose expertise in the realm of renovation is second to none. With a passion for transforming houses into inviting homes, Harrison's writing at https://thehuts-eastbourne.co.uk/ brings a breath of fresh inspiration to the world of home improvement. Whether you're looking to revamp a small corner of your abode or embark on a complete home transformation, Harrison's articles provide the essential expertise and creative flair to turn your visions into reality. So, dive into the captivating world of home remodeling with Harrison Clayton and unlock the full potential of your living space with every word he writes.


