Mastering the Art of Using an Electric Nail Drill: A Step-by-Step Guide

Are you tired of spending hours in the salon for a professional-quality manicure? Do you want to take your nail game to the next level? Look no further than the electric nail drill. This powerful tool can help you achieve salon-worthy nails in the comfort of your own home. In this step-by-step guide, we will walk you through the process of using an electric nail drill like a pro.
Step 1: Prepare your nails
Before you start using an electric nail drill, it’s important to prepare your nails. Start by removing any old nail polish and trimming your nails to your desired length. Next, use a nail file to shape your nails. This will help you achieve the desired shape for your manicure. Finally, gently push back your cuticles with a cuticle pusher or a wooden stick.
Step 2: Select the right drill bit
When using an electric nail drill, it’s crucial to choose the right drill bit for the job. There are various types of drill bits available, each designed for specific nail treatments. For example, a carbide drill bit is ideal for removing gel polish, while a diamond drill bit is perfect for shaping and filing natural nails. Take your time to familiarize yourself with the different drill bits and their uses.

Step 3: Start with a low speed
Before you begin drilling your nails, it’s important to start with a low speed on your electric nail drill. This will help you avoid accidentally damaging your nails. Gradually increase the speed as you become more comfortable and confident with the tool. Remember, it’s better to start slow and gradually increase the speed rather than starting too fast and risking damage to your nails.
Step 4: Practice proper technique
When using an electric nail drill, it’s crucial to practice proper technique to achieve the best results. Hold the drill with a firm grip, but don’t apply too much pressure. Let the drill do the work for you. Use short, gentle movements to avoid overheating or damaging the nail. Take breaks if needed to prevent overheating and ensure the safety of your nails.
By following these steps and practicing regularly, you can master the art of using an electric nail drill. Say goodbye to expensive salon visits and hello to salon-worthy nails in the comfort of your own home. Happy drilling!

How to Use an Electric Nail Drill: A Step-by-Step Guide
Step 1: Prepare Your Tools and Workspace
Before you begin using an electric nail drill, make sure you have all the necessary tools and a clean and well-lit workspace. Here’s what you’ll need:
- Electric nail drill
- Nail drill bits
- Nail file
- Buffing block
- Nail polish remover
- Clean towels or tissues
- Disinfectant spray or wipes
- Protective eyewear and face mask
Step 2: Sterilize and Prepare Your Nails
- Wash your hands thoroughly with soap and water.
- Remove any old nail polish using nail polish remover.
- Trim your nails to your desired length using nail clippers.
- File your nails to your desired shape using a nail file.
- Buff the surface of your nails using a buffing block to remove any ridges or imperfections.
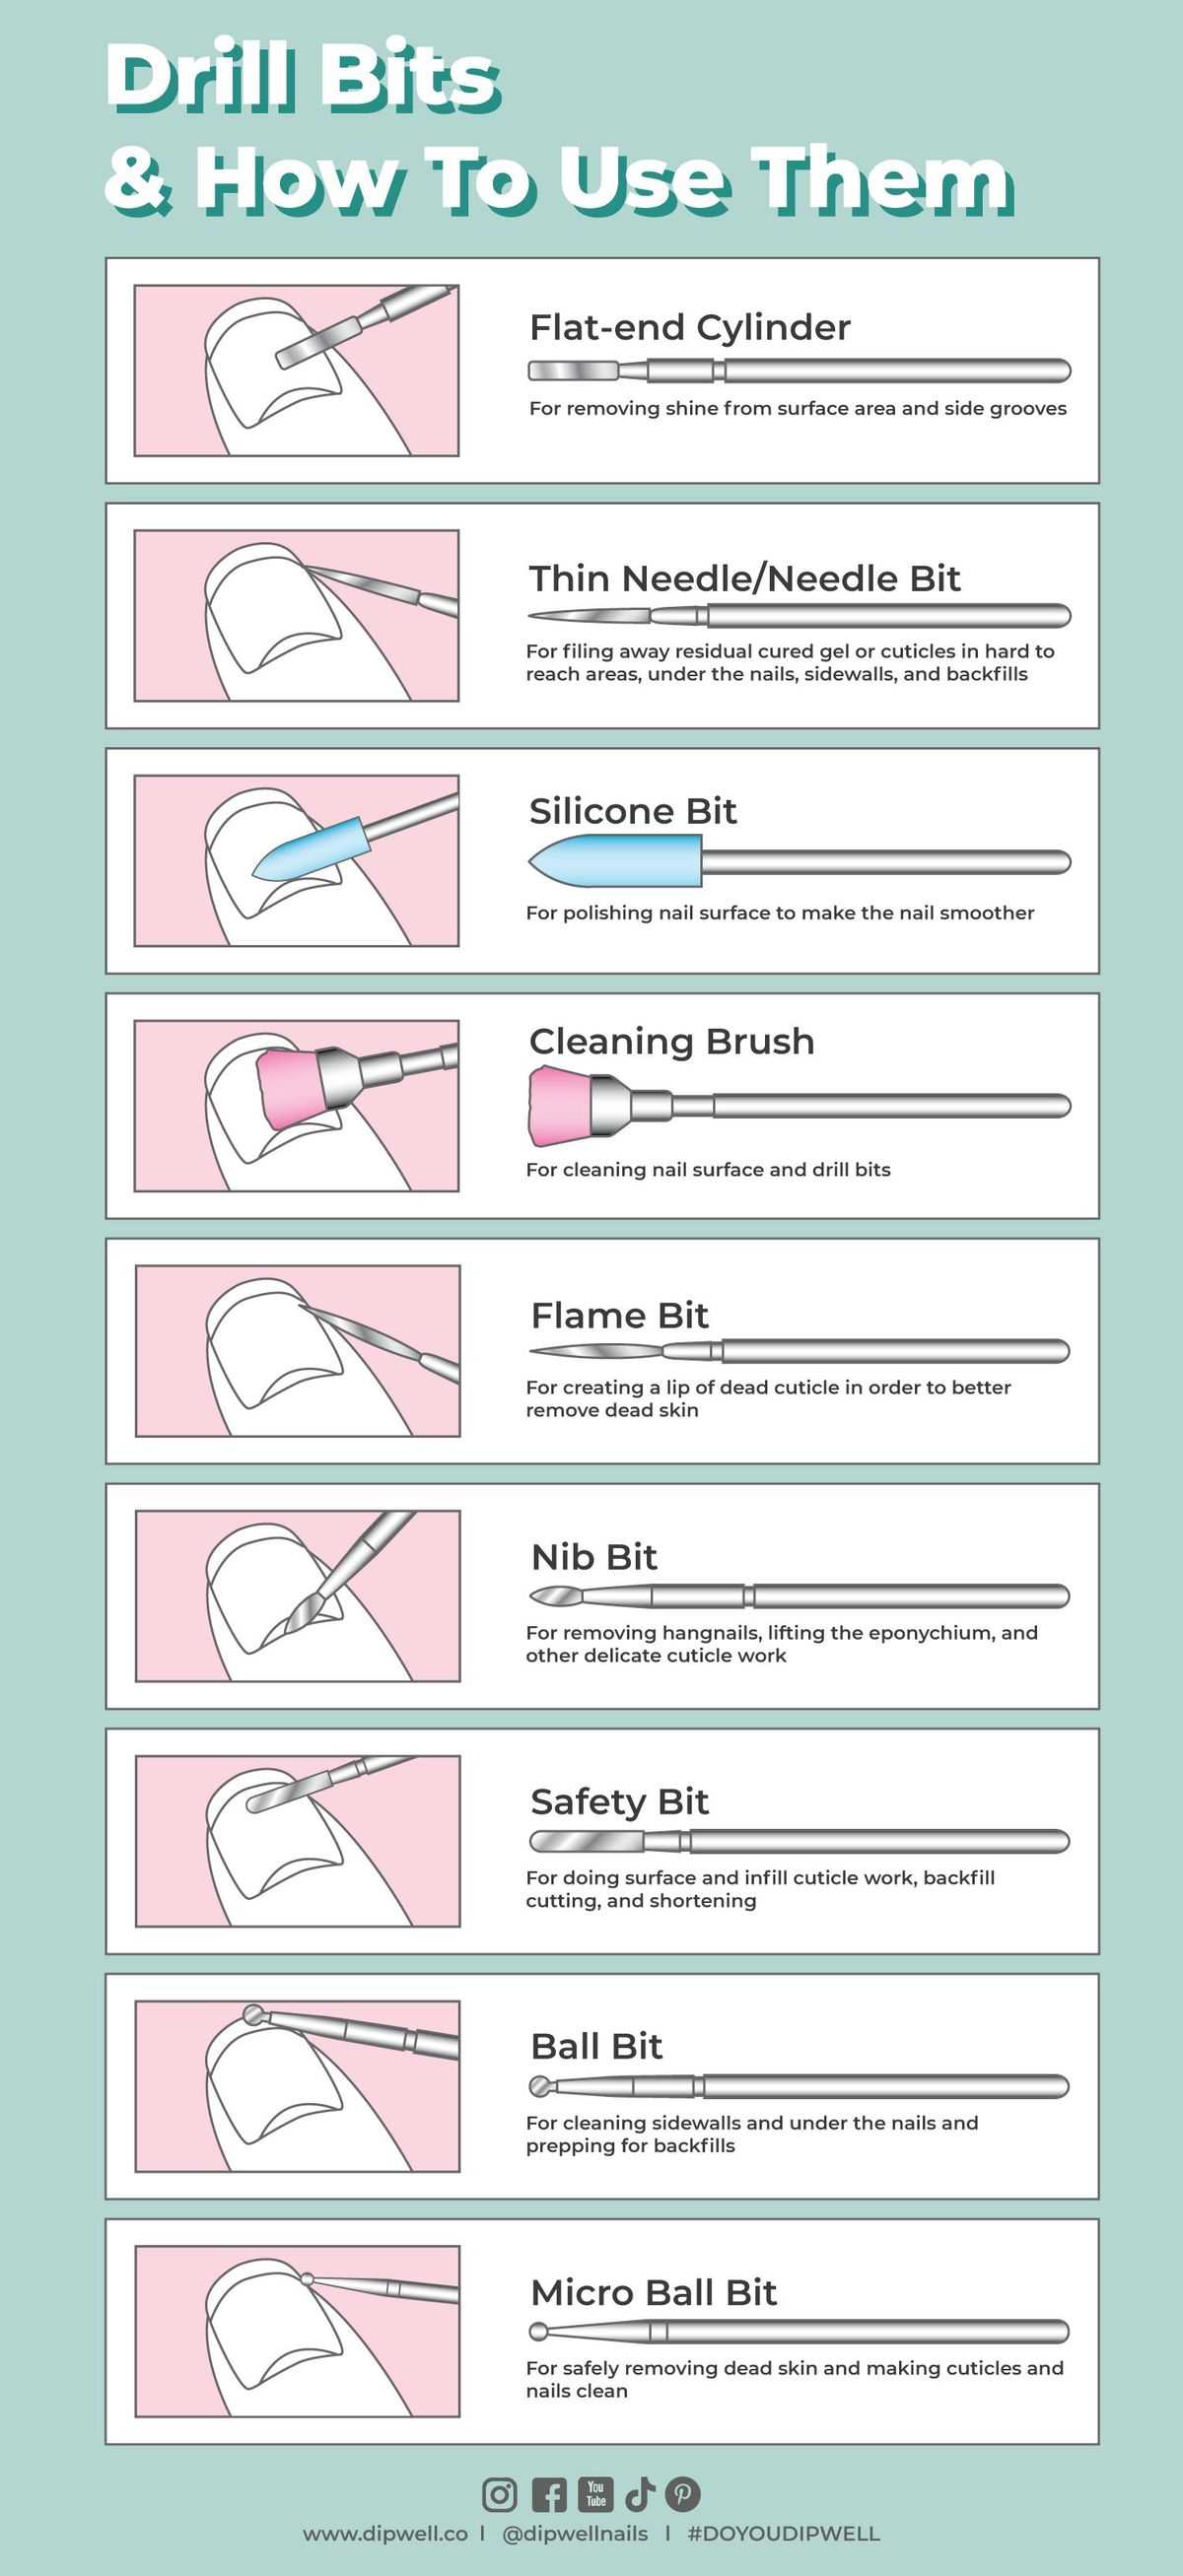
Step 3: Choose the Right Drill Bit
Depending on the type of work you want to do on your nails, choose the appropriate drill bit. Different drill bits serve different purposes, such as shaping, filing, or removing gel or acrylic nails.
Step 4: Load and Set Up the Drill Bit
Insert the chosen drill bit into the electric nail drill according to the manufacturer’s instructions. Make sure it is securely in place.
Step 5: Start the Drill at a Low Speed
Before you start using the electric nail drill on your nails, set the drill at a low speed. This will help prevent any damage to your natural nails. As you gain experience and confidence, you can gradually increase the speed.
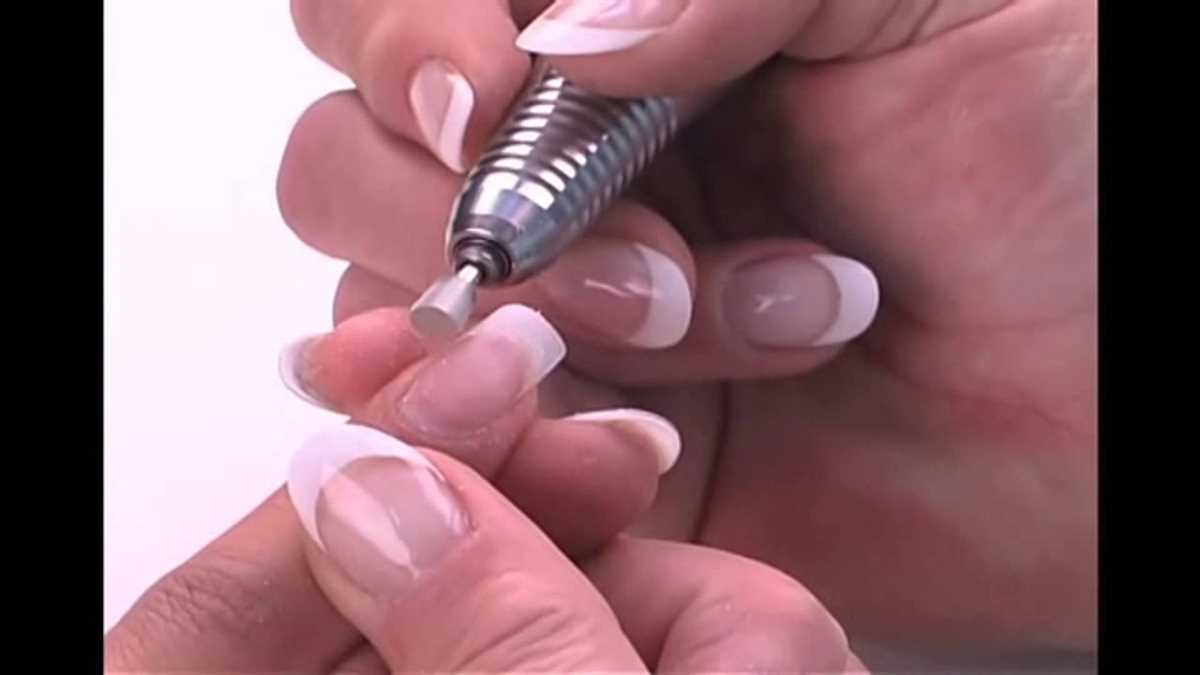
Step 6: Begin the Drilling Process
Hold the electric nail drill like a pencil and gently place the drill bit on the area you want to work on. Apply light pressure and start moving the drill in a back-and-forth or circular motion, depending on the task you are performing.

Step 7: Be Gentle and Take Breaks
It’s important to be gentle and avoid applying too much pressure while using the drill. Excessive pressure can cause damage to your nails. Additionally, take breaks in between if you feel any discomfort or heat from the drill.
Step 8: Clean and Disinfect the Tools
After you have finished using the electric nail drill, clean and disinfect the drill bit and any other tools you used. This will help prevent the spread of germs and maintain the longevity of your tools.
Step 9: Moisturize and Care for Your Nails
Once you have completed your nail drilling, apply cuticle oil or lotion to moisturize your nails and cuticles. This will help keep them healthy and nourished.
Step 10: Practice and Perfect Your Technique
Using an electric nail drill requires practice to become comfortable and proficient. Take your time, practice different techniques, and experiment with different drill bits to find what works best for you.

| Common Mistakes to Avoid | Tips for Using an Electric Nail Drill Safely |
|---|---|
|
|
Choosing the Right Electric Nail Drill
When it comes to choosing the right electric nail drill, there are a few important factors to consider. Here are some key points to keep in mind:
1. Power and Speed
One of the first things to consider when choosing an electric nail drill is the power and speed options it offers. Higher power and adjustable speed settings will allow you to work on a variety of nail types and achieve different results.
2. Size and Weight
Considering the size and weight of the electric nail drill is crucial, especially if you plan on using it for extended periods. Look for a drill that feels comfortable in your hand and is lightweight enough to prevent hand and wrist strain.
3. Bit Compatibility
Make sure the electric nail drill you choose is compatible with a wide range of nail drill bits. This way, you can easily swap out bits for different purposes, such as shaping, filing, or buffing nails.

4. Noise and Vibration
Noise and vibration can be significant factors to consider, especially if you’ll be using the drill for long periods or in a professional setting. Look for a drill that has low noise and vibration levels to ensure a more comfortable and pleasant experience.
5. Corded or Cordless
Deciding between a corded or cordless electric nail drill is a matter of personal preference. Corded drills provide a continuous power source, while cordless drills offer more maneuverability and freedom of movement.
6. Price and Warranty
Consider your budget and look for an electric nail drill that offers good value for money. It’s also essential to check the warranty and customer support offered by the manufacturer to ensure your investment is protected.
Overall, choosing the right electric nail drill involves considering factors like power, size, bit compatibility, noise, corded or cordless options, and price. By carefully evaluating your needs and preferences, you can find the perfect drill that suits your requirements and helps you achieve the professional nail results you desire.
Gathering the Necessary Tools
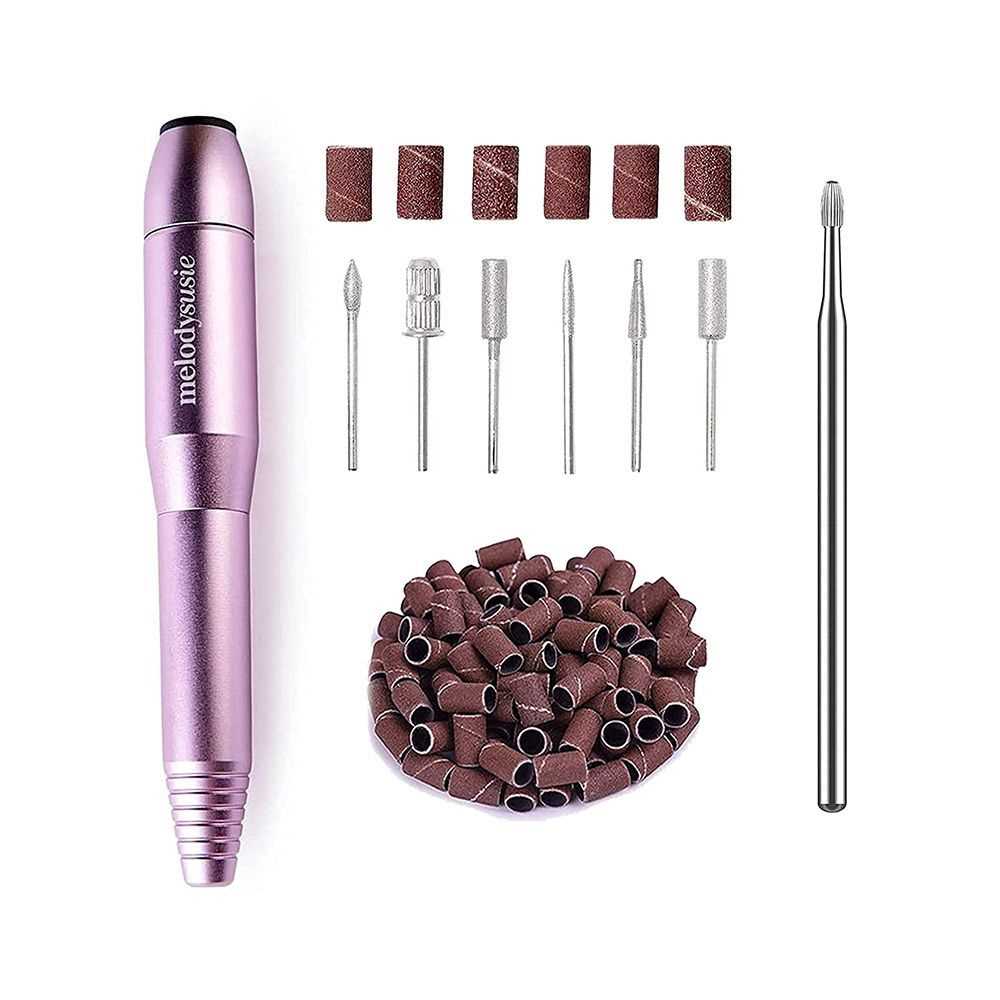
Before starting to use an electric nail drill, it is important to gather all the necessary tools and materials. Having everything prepared will ensure a smooth and efficient nail drilling experience. Here are the essential tools you will need:
- Electric Nail Drill: This is the main tool used for nail drilling. Make sure to choose a high-quality, professional-grade electric nail drill.
- Drill Bits: Different drill bits serve different purposes. It is important to have a variety of drill bits, such as sanding bands, ceramic bits, and diamond bits, to cater to different nail needs.
- Cuticle Pusher: A cuticle pusher helps to push and remove excess cuticle before drilling. It should have a sharp but gentle edge to avoid damaging the nails.
- Nail File: A nail file is used to shape and smooth the nails. It should have a medium grit to efficiently file the nails without causing damage.
- Nail Buffer: A nail buffer is used to polish and shine the nails after filing. It should have different sides with increasing grits for achieving a smooth and glossy finish.
- Nail Brush: A nail brush is used to clean the nails and remove any dust or debris left from drilling.
- Nail Drill Stand: A nail drill stand provides a stable platform to hold the electric nail drill when not in use, ensuring convenience and safety.
- Optional: Nail Dust Collector: A nail dust collector is an optional but highly recommended tool. It helps to eliminate the dust and debris produced during drilling, keeping the work area clean and reducing the risk of inhaling harmful particles.
Having these tools ready before starting will make the nail drilling process more efficient and enjoyable. It is also important to keep the tools clean and properly maintained to ensure their longevity and performance.
Preparing Your Nails
Before using an electric nail drill, it is important to properly prepare your nails. Preparing your nails ensures that the process goes smoothly and reduces the risk of damage. Follow these steps to prepare your nails:
1. Clean Your Nails
Start by ensuring that your nails are clean and free of any dirt or polish. Use a gentle nail polish remover to remove any existing polish.
2. Trim and Shape
Next, trim your nails to your desired length using a nail clipper. Be sure to file the edges with a nail file to create a smooth and even shape. This step will help prevent any snagging or catching during the drilling process.
3. Push Back Cuticles
Using a cuticle pusher, gently push back your cuticles. This will create a clean and even surface for the drill to work on. Be careful not to apply too much pressure or damage the delicate skin around your nails.
4. Buff the Surface
Before using the electric drill, use a nail buffer to gently buff the surface of your nails. This will remove any ridges or unevenness, creating an optimal surface for the drill to work on. Be sure to use light, gentle strokes to avoid damaging your nails.
5. Use a Moisturizer
After preparing your nails, it’s important to moisturize them. Apply a hydrating cuticle oil or hand cream to nourish your nails and cuticles. This will help prevent dryness and keep your nails looking healthy.
6. Protect Your Skin
Lastly, before you start using the electric nail drill, apply a thin layer of petroleum jelly or tape around your nails to protect the surrounding skin. This will prevent any accidental scraping or cutting during the drilling process.
By following these steps, you can ensure that your nails are properly prepared for using an electric nail drill. Preparing your nails will not only make the process easier and safer but also help achieve better results.
Setting Up the Electric Nail Drill
Before you can start using an electric nail drill, you need to set it up properly. Here are the steps to do it:
1. Check the Power Adapter
Make sure that the power adapter of your electric nail drill is compatible with the power outlet you are using. Check the voltage and plug type to ensure a proper fit.
2. Insert the Drill Bit
Most electric nail drills come with interchangeable drill bits. To insert the drill bit, hold the front part of the drill and rotate the chuck counterclockwise to loosen it. Insert the desired drill bit, then tighten the chuck by rotating it clockwise.
3. Adjust the Speed
Electric nail drills usually have adjustable speed settings. Adjust the speed according to your desired level of control and the task you are performing. Start with a low speed and gradually increase it if needed.
4. Attach the Handpiece
Attach the handpiece to the main body of the electric nail drill. Most handpieces simply slide into place and lock securely. Make sure it is properly attached before moving on.
5. Secure the Power Cord
Ensure that the power cord is securely connected to both the power outlet and the electric nail drill. This will prevent any accidental disconnections while you are working.
6. Test the Drill
Before you start using the electric nail drill on your nails, do a quick test run on a disposable surface or a practice nail. Check if the drill is functioning properly and if the speed is appropriate for your needs.
7. Prepare a Safe Workspace
Set up a clean and organized workspace for using the electric nail drill. Make sure you have enough light and ventilation and that all necessary tools and materials are within reach.
By following these steps, you can ensure that your electric nail drill is properly set up and ready for use. This will help you achieve better results and minimize the risk of accidents.
Using the Electric Nail Drill Safely
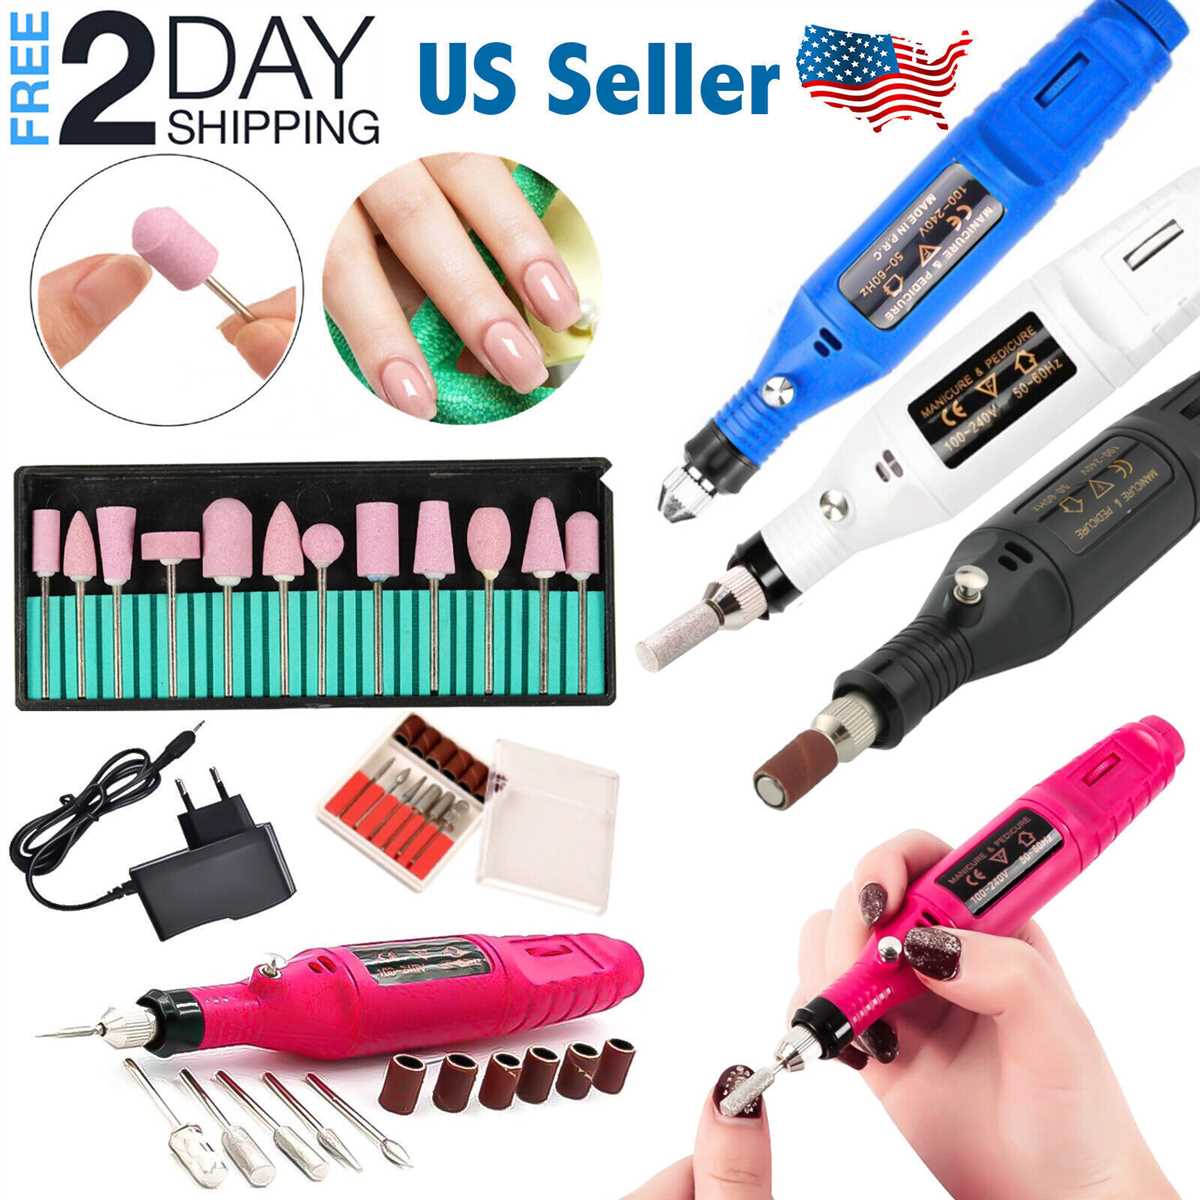
1. Choose a Safe and Reliable Electric Nail Drill
Before starting to use an electric nail drill, it is important to invest in a safe and reliable one. Look for a drill that is specifically designed for nails and has adjustable speed settings. Avoid purchasing cheap, low-quality drills, as they may not be as safe or effective.
2. Use the Drill on Dry Nails
It is essential to use the electric nail drill on dry nails. Wet or damp nails can increase the risk of injury or damage to the nails. Make sure your nails are completely dry before using the drill.
3. Start with the Lowest Speed Setting
When using the electric nail drill, always start with the lowest speed setting. This will allow you to get a feel for the drill and avoid any accidents or damage to your nails. Gradually increase the speed as needed, but never go too fast.
4. Keep the Drill at a Low Angle
Hold the electric nail drill at a low angle to reduce the risk of injury or damage. Avoid applying too much pressure or pressing the drill too hard against your nails. Use gentle and controlled movements to achieve the desired results.
5. Take Breaks and Avoid Overuse
Using an electric nail drill for an extended period can cause heat buildup and discomfort. Take regular breaks to allow the drill to cool down and prevent any potential harm to your nails. Additionally, avoid overusing the drill to protect the health of your nails.
6. Use Safety and Protective Gear
It is important to use safety and protective gear while using an electric nail drill. Wear safety goggles to protect your eyes from any flying debris. Additionally, consider using a dust mask or respirator to prevent inhaling any nail dust particles.
7. Keep the Drill Clean and Sanitized
Regularly clean and sanitize your electric nail drill to maintain its effectiveness and prevent the spread of bacteria or infections. Follow the manufacturer’s instructions for cleaning and disinfecting the drill to ensure proper hygiene.
8. Read and Follow the Instructions
Before using an electric nail drill, carefully read and understand the instructions provided by the manufacturer. Familiarize yourself with the drill’s features, functions, and safety precautions to ensure safe and effective use.
Summary
Using the electric nail drill safely is crucial to protect your nails and prevent any accidents or injuries. Choose a safe and reliable drill, work on dry nails, start with the lowest speed setting, keep the drill at a low angle, take breaks, use safety gear, keep the drill clean, and follow the instructions provided. By following these safety guidelines, you can master the art of using an electric nail drill effectively and safely.
Starting the Nail Drilling Process
Before you begin using an electric nail drill, it’s important to make sure you have all the necessary tools and supplies. Here are the steps to get started:
- Gather your equipment: Make sure you have your electric nail drill, drill bits, nail file, and any other tools you may need. It’s also important to have safety glasses to protect your eyes.
- Prepare your nails: If you’re working on natural nails, make sure they are clean and dry. If you’re working on artificial nails, remove any polish or gel before starting.
- Choose the right drill bit: Different drill bits are designed for different purposes. Select the appropriate drill bit based on the task you want to accomplish, such as shaping, removing gel, or filing.
- Adjust the drill speed: Most electric nail drills have adjustable speed settings. Start with a low speed and gradually increase it as needed.
- Protect your skin: Before you start drilling, apply a thin layer of petroleum jelly or cuticle oil around your nails to protect your skin from heat or friction caused by the drill.
Once you have completed these steps, you are ready to start using your electric nail drill. Remember to always start with caution and practice on a small area before moving on to larger tasks. Safety should be your top priority throughout the nail drilling process.
Finishing and Cleaning Up
Once you have finished using the electric nail drill to shape, smooth, and remove any excess cuticles or calluses, it’s important to take the necessary steps to finish and clean up your nails.
1. Buffing
Using a buffing attachment or buffer block, gently buff the surface of your nails to smooth them out and create a polished finish. This will help remove any ridges or imperfections in the nail bed.
2. Filing
If necessary, use a fine-grit nail file to shape and refine your nails further. Be gentle and go slowly to avoid damaging or weakening the nails.
3. Cuticle Care
Apply a cuticle oil or moisturizing cream around the nail beds to nourish and hydrate the cuticles. Gently push back the cuticles using a cuticle pusher or orangewood stick.
4. Cleaning
Use a clean, dry brush or cotton pad to remove any dust or debris from the nail surface and surrounding skin. Pay extra attention to the edges and corners of the nails.
5. Sanitizing
It’s important to sanitize your tools and work area after each use to prevent the spread of bacteria or fungus. Clean your electric nail drill attachments, files, and other tools using an appropriate sanitizing solution.
6. Moisturizing
Finish off your nail care routine by applying a hydrating hand cream or cuticle oil to keep your nails and skin moisturized. This will help prevent dryness and promote healthy nail growth.
7. Maintenance
To maintain your nails and keep them looking their best, make sure to follow a regular nail care routine. This includes keeping them clean, moisturized, and trimmed, as well as avoiding excessive use of the electric nail drill.
Tips for Mastering the Art of Using an Electric Nail Drill
1. Start with a Proper Set-Up
Before using an electric nail drill, it’s important to make sure you have a proper set-up. This includes a stable surface to work on, good lighting, and all the necessary tools and equipment within reach.
2. Choose the Right Drill Bit
There are different types of drill bits for different purposes, so choose the right one for the task at hand. For example, a coarse bit is suitable for removing gel polish or acrylic nails, while a fine bit is ideal for shaping and refining the nails.
3. Start with a Low Speed
When using an electric nail drill, always start with a low speed setting and gradually increase it as needed. This will help prevent any damage to the nails or skin.
4. Use a Gentle Touch
Avoid applying too much pressure when using the drill. Instead, use a gentle touch and let the drill do the work. Applying too much pressure can cause discomfort or damage to the nails.
5. Keep the Drill Moving
When using the drill, make sure to keep it moving at all times. This will help prevent any heat buildup and reduce the risk of burning the nails.
6. Maintain a Proper Angle
Hold the drill at a slight angle to the nail to avoid damaging the nail bed. This will also help you achieve a more precise and controlled result.
7. Practice and Experiment
Mastering the art of using an electric nail drill takes practice. Take the time to familiarize yourself with the different drill bits and techniques. Experiment with different speeds and pressures to find what works best for you.
8. Take Breaks and Rest
Using an electric nail drill can be tiring for your hands and fingers. Remember to take regular breaks and rest your hands to prevent strain or fatigue.
9. Clean and Sanitize
After each use, make sure to clean and sanitize your drill bits and equipment. This will help maintain hygiene and prevent the spread of bacteria or infections.
10. Seek Professional Help if Needed
If you’re unsure about using an electric nail drill or encountering any difficulties, it’s best to seek professional help. A nail technician or expert can provide guidance and assistance.
FAQ:
What is an electric nail drill?
An electric nail drill is a tool used in nail salons and at home for various nail work, such as filing, shaping, and removing calluses. It is a versatile and efficient device that operates on electricity to perform nail services.
Is it safe to use an electric nail drill at home?
Using an electric nail drill at home can be safe if you follow the proper techniques and guidelines. It is recommended to start with low speeds, use gentle pressure, and not overwork a single area. Additionally, wearing safety goggles and using a dust extractor can help minimize any potential risks.
Can an electric nail drill cause damage to the natural nails?
Yes, an electric nail drill can potentially cause damage to the natural nails if used improperly. It is crucial to be cautious and avoid excessive drilling or using too much pressure. It is recommended to educate yourself on proper techniques or seek professional assistance before using an electric nail drill on your natural nails.
Video:


Meet Harrison Clayton, a distinguished author and home remodeling enthusiast whose expertise in the realm of renovation is second to none. With a passion for transforming houses into inviting homes, Harrison's writing at https://thehuts-eastbourne.co.uk/ brings a breath of fresh inspiration to the world of home improvement. Whether you're looking to revamp a small corner of your abode or embark on a complete home transformation, Harrison's articles provide the essential expertise and creative flair to turn your visions into reality. So, dive into the captivating world of home remodeling with Harrison Clayton and unlock the full potential of your living space with every word he writes.


