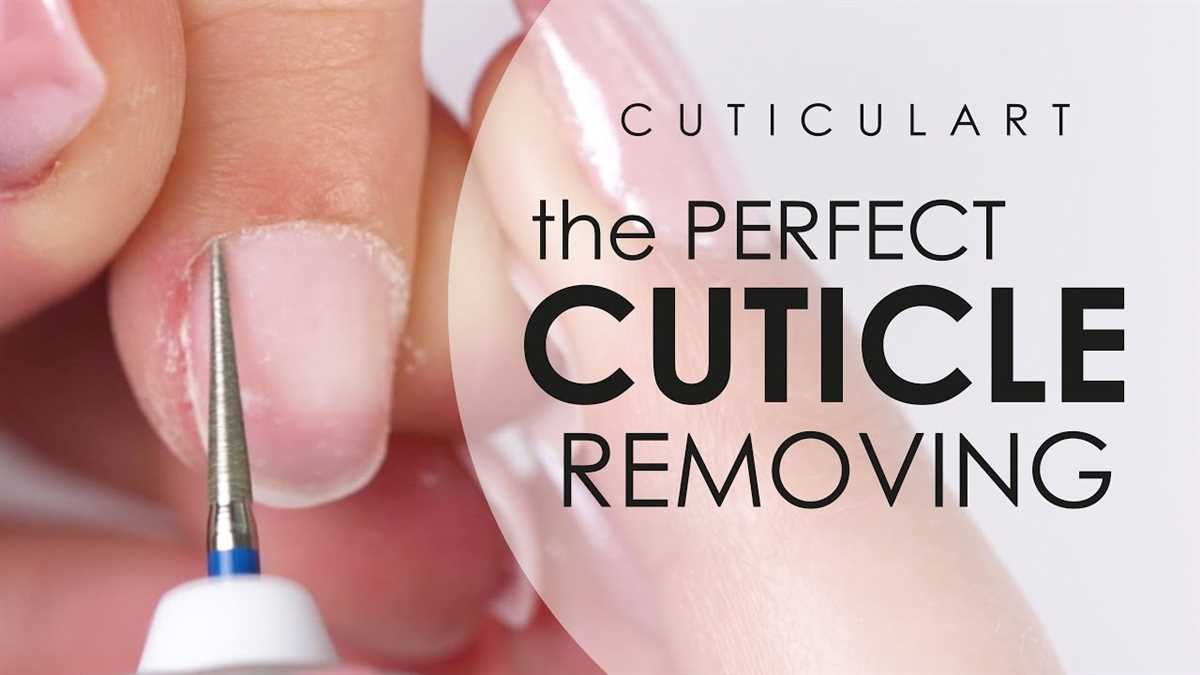
Mastering the Art of Using a Nail Drill for Cuticles

Having well-groomed cuticles is an important part of maintaining healthy and beautiful nails. Using a nail drill can be a helpful tool for achieving the perfect cuticle shape. However, it’s crucial to use this tool correctly to avoid any damage or discomfort.
Firstly, it’s essential to choose a high-quality nail drill with adjustable speed settings. This will allow you to control the intensity and minimize the risk of overdoing it. Start by setting the speed to the lowest setting and gradually increase it if necessary.
Before using the nail drill, it’s important to soften the cuticles. Soaking your hands in warm water or using a cuticle softener can help loosen the skin and make it easier to remove. Always remember to be gentle and never apply too much pressure.
When using the nail drill, it’s best to start with a fine-grit bit to avoid any damage or pain. Begin by gently pushing back the cuticles with a cuticle pusher, and then use the nail drill to remove any excess skin or dead cuticles. Remember to work slowly and in small sections to achieve precise results.
After using the nail drill, apply a moisturizing cuticle oil or cream to nourish and hydrate the skin. This will help keep the cuticles healthy and prevent them from becoming dry or irritated. It’s also important to clean and disinfect your nail drill after each use to maintain hygiene.

Mastering the art of using a nail drill for cuticles takes time and practice. By following these tips and being patient, you’ll be able to achieve perfectly manicured cuticles and enjoy beautiful, healthy nails.
The Importance of Nail Drill Safety
Using a nail drill for cuticles can be a helpful tool for achieving a professional manicure. However, it is important to prioritize safety when using this tool to prevent any potential injuries or harm. Nail drill safety should always be a top priority for both professionals and individuals using a nail drill at home.
1. Protect your skin and cuticles
When using a nail drill, it’s crucial to protect your skin and cuticles from any potential damage. To do this, make sure to keep your hand steady and avoid applying excessive pressure. In addition, it’s essential to use a drill bit that is properly sized for the task at hand. Using the wrong drill bit can cause unnecessary harm and damage to your cuticles.
2. Use a low-speed setting
Another important aspect of nail drill safety is to use a low-speed setting. High speeds can increase the risk of injuries and accidents, especially for those who are new to using a nail drill. Start with the lowest speed setting and gradually increase it as you become more comfortable and experienced with the tool.
3. Avoid overheating
Overheating can cause discomfort and even injury. To prevent overheating, it’s crucial to take breaks during your nail drilling session. Allow your hand and the drill to cool down periodically to avoid any potential burns or discomfort.
4. Keep the drill clean
Keeping your nail drill clean is not only important for hygiene but also for safety. Regularly clean your drill bits and sanitize the drill itself to prevent the buildup of bacteria and other harmful agents that can cause infections. Follow the manufacturer’s instructions for cleaning and maintenance.

5. Educate yourself
Before using a nail drill for cuticles, it’s essential to educate yourself on how to properly and safely use the tool. Attend a training session or seek guidance from a professional to ensure that you are using the nail drill correctly and effectively. This knowledge will not only improve your safety but also enhance your overall manicure experience.
Conclusion
By prioritizing nail drill safety, you can enjoy the benefits of using this tool while minimizing the risk of injury or harm. Protecting your skin and cuticles, using a low-speed setting, avoiding overheating, keeping the drill clean, and educating yourself are all crucial steps in ensuring a safe and enjoyable nail drilling experience.
Protecting Your Cuticles
When using a nail drill for cuticles, it is important to take steps to protect your cuticles and prevent any potential damage or irritation. Follow these tips to ensure the health and safety of your cuticles:
1. Moisturize
Before using the nail drill, apply a moisturizing cuticle oil or cream to your nails and cuticles. This will help keep them hydrated and pliable, reducing the risk of damage during the drilling process. It’s also a good idea to moisturize your cuticles regularly, even when you’re not using the nail drill, to keep them healthy and prevent dryness.
2. Use a low speed
When using the nail drill, make sure to set it to a low speed. High speeds can cause excessive friction and heat, which can damage the delicate cuticle area. Starting at a low speed gives you more control and allows you to gradually work on the cuticles without causing any harm.

3. Be gentle
Take care to be gentle when using the nail drill around your cuticles. Apply light pressure and avoid aggressive movements that could cause tearing or scraping of the skin. It’s important to remember that the goal is to remove excess skin and not to remove the cuticles entirely.
4. Clean and disinfect
Ensure that the nail drill bits and other tools you use are properly cleaned and disinfected before each use. This helps prevent the spread of bacteria and reduces the risk of infection. Use a designated cleaning solution or rubbing alcohol to sanitize your tools.
5. Take breaks
If you’re using the nail drill for an extended period of time, make sure to take regular breaks. This allows your cuticles to rest and recover, reducing the risk of irritation or damage. Take a few minutes to stretch your hands and apply some more cuticle oil during these breaks.
6. Seek professional help
If you’re unsure about using a nail drill on your cuticles or if you’re experiencing any problems or pain, it’s best to seek professional help. A nail technician or a dermatologist can guide you on the proper use of a nail drill and address any concerns you may have.
8. Maintain a healthy diet

Keeping your cuticles healthy goes beyond just the external care. Make sure to maintain a balanced diet that includes essential vitamins and nutrients to promote nail and cuticle health. Foods rich in vitamins A, C, and E, as well as biotin, can help keep your cuticles strong and healthy from within.
By following these tips and taking proper precautions, you can effectively use a nail drill for cuticles while keeping your cuticles safe and maintaining their health.
Choosing the Right Nail Drill Bit
When it comes to using a nail drill for cuticles, choosing the right nail drill bit is crucial for achieving the desired results. With so many options available, it can be overwhelming to know which one to choose. Here are some factors to consider when selecting a nail drill bit:
Material
The material of the nail drill bit is an important factor to consider. The most common materials used for nail drill bits are ceramic, carbide, and diamond. Ceramic bits are gentle, making them suitable for sensitive cuticles. Carbide bits are durable and great for removing gel or acrylic nails. Diamond bits are the most versatile and can be used for various purposes.
Size
Another factor to consider is the size of the nail drill bit. Different sizes are available to accommodate different nail types and cuticle sizes. Smaller bits are ideal for precision work, while larger bits are more suitable for removing bulk or shaping the nails.

Shape
The shape of the nail drill bit also plays a role in its functionality. Some common shapes include ball, flame, cone, and cylinder. Each shape has its own purpose and can be used for specific techniques such as cuticle filing, nail surface smoothing, or removing calluses.
Grit
The grit of the nail drill bit determines its coarseness. Higher grit numbers indicate finer bits, while lower grit numbers indicate coarser ones. Finer bits are suitable for buffing and polishing, while coarser bits are better for removing product buildup or hard gel.
Safety
Lastly, it’s important to consider the safety features of the nail drill bit. Look for bits with smooth edges to prevent injury, and make sure they are properly sterilized before each use to avoid contamination.
| Material | Size | Shape | Grit | Safety |
|---|---|---|---|---|
| Carbide | Various | Various | Coarse to fine | Smooth edges, sterilizable |
| Diamond | Various | Various | Coarse to fine | Smooth edges, sterilizable |
| Ceramic | Various | Various | Coarse to fine | Smooth edges, sterilizable |
In conclusion, choosing the right nail drill bit is essential for achieving professional results. Consider factors such as the material, size, shape, grit, and safety features before making a decision. Remember that practice and experimentation are key to finding the perfect nail drill bit for your specific needs.
Preparing Your Cuticles for the Nail Drill
Step 1: Clean your hands and nails
Before using a nail drill on your cuticles, it’s important to start with clean hands and nails. Wash your hands thoroughly with soap and warm water to remove any dirt and bacteria that may be present. Ensure that your nails are free of any polish or product residue.

Step 2: Soak your fingertips
Soaking your fingertips in warm water helps to soften the cuticles, making them easier to work with. Fill a small bowl or basin with warm water and add a gentle hand soap or a few drops of cuticle oil if desired. Soak your fingertips for about 5 minutes to hydrate and loosen the skin.
Step 3: Gently push back the cuticles
Using a cuticle pusher or an orangewood stick, gently push back the softened cuticles. Start at one side of the nail and work your way around, being careful not to apply too much pressure to avoid damaging the skin. This step helps expose the excess cuticle that can be safely removed using a nail drill.
Step 4: Trim excess cuticles
Inspect the cuticles and use a pair of cuticle scissors to trim any excess skin that appears dry or overgrown. Be cautious not to cut too much or cut live tissue, as this can cause pain and potential infection. Take your time and make small, precise cuts if necessary.
Step 5: Apply cuticle oil or cream
After using the nail drill on your cuticles, it’s important to rehydrate the area to prevent dryness and maintain health. Apply a few drops of cuticle oil or a small amount of cuticle cream to each nail and gently massage it into the cuticles. This will provide nourishment and help keep them soft and supple.
By following these steps, you can effectively prepare your cuticles for the nail drill, ensuring a safer and more comfortable experience. Remember to always use caution and consult a professional if you are unsure about using a nail drill on your cuticles.

Applying Cuticle Softener
Cuticle softener is a product commonly used in nail care to help soften and hydrate the cuticles before using a nail drill. This step is important as it makes the cuticles easier to push back and remove, reducing the risk of injury and pain.
Steps to apply cuticle softener:
- Start by sanitizing your hands and nails to prevent any potential infections.
- Shake the cuticle softener bottle to ensure it is well mixed.
- Apply a small amount of the cuticle softener onto each nail.
- Gently massage the product into the cuticles using circular motions.
- Leave the cuticle softener on for the recommended time mentioned on the product label. This usually ranges from 1 to 5 minutes.
- Use a cuticle pusher or an orangewood stick to gently push back the softened cuticles. Be careful not to apply too much pressure to avoid causing any damage to the nail bed.
- After pushing back the cuticles, wipe off any excess cuticle softener with a clean, lint-free cloth or a paper towel.
Note: It is important to follow the instructions provided by the manufacturer of the cuticle softener you are using, as different products may have specific application guidelines and recommended wait times.
Tips for using cuticle softener:
- Perform a patch test on a small area of skin before applying the cuticle softener to ensure you do not have any adverse reactions to the product.
- Do not leave the cuticle softener on for longer than the recommended time, as it may cause skin irritation or over-softening of the cuticles.
- Always wash your hands thoroughly after using the cuticle softener to remove any residue.
- Moisturize your hands and nails after using the cuticle softener to keep them hydrated and prevent dryness.
| Product | Description |
|---|---|
| Cuticle Softening Oil | A lightweight oil that helps soften and moisturize the cuticles. |
| Cuticle Remover Gel | A gel formula that gently dissolves dead skin cells and softens the cuticles. |
| Cuticle Softening Cream | A creamy formula enriched with vitamins and natural extracts to soften and nourish the cuticles. |
Using a cuticle softener before using a nail drill can make the process of removing and shaping the cuticles much easier and more comfortable. It is an essential step in achieving professional-looking nails.
Trimming Excess Cuticles
Excess cuticles can make your nails appear messy and unpolished. Trimming them is an important step in achieving well-groomed nails. Follow these steps to safely trim your cuticles using a nail drill.
Step 1: Prepare the Nail Drill
Before you begin, make sure your nail drill is properly sanitized and equipped with a small, fine-grit bit. This will help prevent any damage to your cuticles and nails.
Step 2: Soften the Cuticles
Soften your cuticles by soaking your hands in warm, soapy water for 5-10 minutes. This will help make the cuticles easier to push back and trim.
Step 3: Push Back the Cuticles
Using a cuticle pusher or orangewood stick, gently push back the softened cuticles. Take your time and be gentle to avoid any discomfort or injury.
Step 4: Start Trimming
Turn on your nail drill and set it to a low speed. Carefully trim any excess cuticles by lightly moving the drill bit along the edges of your nails. Be cautious not to apply too much pressure, as this can cause bleeding or injury.
Step 5: Cleanse and Moisturize
Once you have finished trimming the excess cuticles, cleanse your nails with a gentle nail cleanser to remove any debris or residue. Apply a cuticle oil or moisturizer to hydrate and nourish the newly exposed cuticles.
Step 6: Post-Trim Care
Remember to take good care of your cuticles after trimming them. Moisturize regularly and avoid picking or biting your cuticles to maintain healthy, well-maintained nails.
By following these steps, you can effectively trim excess cuticles using a nail drill. However, if you are unsure or uncomfortable using a nail drill, it’s always best to seek professional assistance from a nail technician.
Proper Techniques for Using a Nail Drill on Cuticles
1. Preparing the nail drill
Before using a nail drill on cuticles, it’s important to ensure that the drill is properly prepared. Start by selecting the appropriate drill bit for cuticle work. Generally, a fine-grit, tapered, or cone-shaped bit works well for this purpose. Make sure the drill is properly sanitized and disinfected to prevent the spread of bacteria and minimize the risk of infection.
2. Prepping the cuticles
Prior to using the nail drill, it’s essential to prepare the cuticles for the procedure. Begin by soaking the fingers in warm water for a few minutes to soften the cuticles. Use a cuticle pusher or an orangewood stick to gently push back the cuticles and remove any excess skin. This will ensure that the drill doesn’t cause any unnecessary discomfort or damage to the surrounding nails.
3. Setting the correct speed
When using a nail drill on cuticles, it’s crucial to set the correct speed. Start with a low-speed setting to minimize the risk of accidental injury. As you become more comfortable and experienced with using the drill, you can gradually increase the speed. However, always make sure to listen to your client’s feedback and adjust the speed accordingly to ensure their comfort and safety.
4. Proper technique
When using the nail drill on cuticles, it’s important to maintain a light touch and gentle pressure. Avoid applying excessive force or drilling too deeply into the cuticles, as this can cause pain and damage. Use circular motions to carefully remove dead skin and smooth rough edges. Remember to periodically clean the drill bit to remove any buildup of debris or cuticle material.
5. Post-care and moisturizing
After using the nail drill on cuticles, it’s essential to provide proper post-care and moisturizing. Gently wipe away any debris or dust with a clean, damp cloth. Apply a moisturizing cuticle oil or cream to nourish and hydrate the treated area. Encourage your client to regularly apply cuticle oil to maintain healthy and moisturized cuticles.
6. Safety precautions
When using a nail drill on cuticles, always prioritize safety. Make sure to wear protective eyewear to prevent any debris from getting into your eyes. Keep the drill handpiece stable and secure to avoid any accidents or slippage. If you’re unsure about any aspect of using the nail drill, seek guidance from a professional or undergo proper training.
By following these proper techniques for using a nail drill on cuticles, you can effectively remove dead skin, shape cuticles, and create a smooth and polished nail surface. Remember to always prioritize safety and client comfort while using any nail tools or equipment.
Adjusting the Speed and Rotation
When using a nail drill for cuticles, it’s important to adjust the speed and rotation according to your needs and the task you are performing. Here are some tips on how to adjust these settings:
1. Speed
Most nail drills come with adjustable speed settings, allowing you to control the speed of the drill bit. Start with a low speed and gradually increase it as needed. Higher speeds are typically used for removing gel or acrylic overlays, while lower speeds are more suitable for delicate tasks such as filing and shaping the cuticles.
2. Rotation
Nail drills can have both clockwise and counterclockwise rotation options. The direction of rotation can affect the precision and comfort of the work. You can experiment with both directions to see which one feels more natural and comfortable for you. Some nail technicians prefer using counterclockwise rotation for shaping the cuticles, while others find clockwise rotation more effective.
It’s important to note that the direction of rotation should always be consistent for the same task. Switching between clockwise and counterclockwise rotation can lead to uneven or rough results.
3. Safeguarding
Before adjusting the speed or rotation, make sure to follow the manufacturer’s instructions and recommendations. Some nail drills may have specific guidelines or safeguards in place to prevent damage to the tool or injury to the user. Take the time to read the manual and understand how to correctly adjust these settings.
Always start with the lowest speed setting and gradually increase it as needed. This will help you maintain control and prevent accidents or injuries. If you’re unsure about the appropriate speed or rotation for a specific task, consult with a professional or experienced nail technician.
Remember, practice makes perfect, and it may take some time to find the right speed and rotation that works best for you. Take your time and be patient as you master the art of using a nail drill for cuticles.
Working in Small Circular Motions
When using a nail drill for cuticle work, it is important to work in small circular motions. This technique allows for precise and controlled movements, ensuring that the cuticle is gently pushed back or removed without damaging the surrounding skin.
Here are some tips for effectively using small circular motions with a nail drill:
- Select the appropriate drill bit: Depending on the type of cuticle work you are doing, choose a drill bit that is suitable for the task. For example, a fine-grit tapered diamond bit works well for gently pushing back the cuticles, while a larger cylindrical bit may be better for removing excess skin.
- Start at a low speed: Begin by setting your nail drill to a low speed setting. This allows for better control and reduces the risk of accidentally damaging the skin. As you become more comfortable and confident with the tool, you can gradually increase the speed.
- Hold the drill at an angle: Position the drill at a slight angle, making sure that the spinning part of the bit is in contact with the cuticle or skin. This angle allows for a more effective removal of dead skin cells and helps to prevent slipping or snagging.
- Work in small sections: Work on one small section of the cuticle at a time, moving the drill in gentle circular motions. Avoid applying too much pressure as this can cause discomfort and potentially harm the skin.
- Keep the drill moving: Continuously move the drill in circular motions while working on the cuticle. This helps to evenly distribute the pressure and prevents the creation of grooves or ridges in the nail surface.
- Take breaks: It is important to give your nail and the surrounding skin a break from the drill every so often. This allows the area to cool down and reduces the risk of overheating or discomfort. You can use this time to assess the progress of your work and make any necessary adjustments.
By working in small circular motions with a nail drill, you can achieve smooth and well-groomed cuticles without causing damage or discomfort to yourself or your clients. Practice patience and be mindful of the pressure you apply to ensure the best results.
Aftercare for Cuticles Post Nail Drill
Using a nail drill is a great way to remove dead skin and overgrown cuticles, but it’s important to take proper care of your cuticles after using this tool. Following these aftercare steps will help ensure healthy and beautiful cuticles.
1. Hydrate
After using a nail drill, it’s crucial to hydrate your cuticles to prevent them from becoming dry and brittle. Apply a cuticle oil or cream to nourish and moisturize your cuticles. Massage the product into your cuticles and nails, promoting blood circulation and stimulating healthy growth.
2. Avoid Excessive Water Exposure
While it’s important to keep your cuticles hydrated, it’s equally important to avoid excessive water exposure. Prolonged contact with water can soften your cuticles, making them prone to damage and infection. When doing household chores or washing dishes, wear gloves to protect your nails and cuticles.
3. Protect from Harsh Chemicals
Avoid exposing your cuticles to harsh chemicals, such as strong cleaning agents or nail polish removers containing acetone. These chemicals can strip away moisture and weaken your cuticles. If you need to use such products, make sure to apply a protective barrier, such as a cuticle oil or cream, prior to use.
4. Maintain a Healthy Diet
Your overall health and diet play a significant role in the health of your nails and cuticles. Ensure you’re consuming a balanced diet rich in vitamins and minerals, particularly those that promote nail and cuticle health, such as biotin, vitamin E, and iron. Consider incorporating foods like eggs, salmon, spinach, and nuts into your diet.
5. Avoid Biting or Picking at Cuticles
Resist the urge to bite or pick at your cuticles as it can lead to infection or damage. Instead, if you notice any hangnails or rough edges, carefully trim them with sterilized cuticle nippers. Be gentle and avoid cutting too close to the nail bed to prevent injury.
6. Regular Maintenance
Once you’ve used a nail drill to clean your cuticles, it’s essential to maintain their health through regular care. This includes regular trimming, filing, and moisturizing. Make it a routine to trim your cuticles whenever they start to grow out or become dry.
| Product | Description |
|---|---|
| Cuticle Oil | A nourishing oil specifically formulated to hydrate and protect the cuticles. |
| Cuticle Cream | A rich cream that moisturizes and softens the cuticles. |
| Cuticle Nippers | Sterilized tools designed to trim excess cuticles and hangnails. |
By following these aftercare steps and maintaining a consistent routine, you can keep your cuticles healthy, hydrated, and looking their best.
FAQ:
What is a nail drill and how does it work?
A nail drill is a tool used in nail salons and at home for various nail treatments, including cuticle care. It has a spinning, cylindrical attachment that is used to file down and shape the nails quickly and efficiently. The drill is powered by an electric motor, and the speed and direction of rotation can be adjusted.
Is it safe to use a nail drill for cuticles?
When used correctly, a nail drill can be safe for cuticle care. However, it is important to use the drill at a low speed and be gentle to avoid injuring the delicate skin around the nails. It is advisable to seek professional guidance or watch tutorials before using a nail drill on your cuticles.
What are the benefits of using a nail drill for cuticles?
Using a nail drill for cuticles can provide several benefits. It allows for quick and precise removal of excess cuticle tissue, which can improve the appearance of the nails. It can also help in preparing the nails for nail polish or extensions by creating a smooth surface. Additionally, using a nail drill can save time and effort compared to manual cuticle care.
How often should I use a nail drill for cuticles?
The frequency of using a nail drill for cuticles depends on individual needs and preferences. Some people may require weekly or bi-weekly treatment to keep their cuticles in good condition, while others may only need it monthly. It is important to observe how your cuticles respond to the treatment and adjust the frequency accordingly to prevent overuse.
Can a nail drill damage the nails or cuticles?
Improper use of a nail drill can potentially damage the nails and cuticles. If used at a high speed or with excessive pressure, the drill can cause burns, cuts, or thinning of the nails. It is crucial to be cautious and gentle when using a nail drill, and to start with a low speed and gradually increase if necessary. Regular maintenance and cleaning of the drill can also prevent any potential damage.
Are there any alternatives to using a nail drill for cuticles?
Yes, there are alternative methods for cuticle care if you prefer not to use a nail drill. You can use cuticle removers or softening creams to gently push back and remove the excess cuticle tissue. Regularly moisturizing the cuticles and using a cuticle oil can also help in keeping them soft and healthy. Manual manicure tools like cuticle pushers and nippers can be used for precise cuticle trimming.
Video:


Meet Harrison Clayton, a distinguished author and home remodeling enthusiast whose expertise in the realm of renovation is second to none. With a passion for transforming houses into inviting homes, Harrison's writing at https://thehuts-eastbourne.co.uk/ brings a breath of fresh inspiration to the world of home improvement. Whether you're looking to revamp a small corner of your abode or embark on a complete home transformation, Harrison's articles provide the essential expertise and creative flair to turn your visions into reality. So, dive into the captivating world of home remodeling with Harrison Clayton and unlock the full potential of your living space with every word he writes.


