Mastering the Art of Using a Manual Hand Drill

When it comes to woodworking and DIY projects, having the right tools is essential. While power tools can make tasks easier and more efficient, there is something to be said about the art of using a manual hand drill. This versatile tool allows for precision and control, making it a must-have for any craftsman or hobbyist.
Using a manual hand drill requires a certain level of skill and technique. Unlike power drills, which rely on electricity or battery power, a manual hand drill is powered solely by the strength and skill of the user. This makes it ideal for smaller, more delicate jobs, where precision is key.
One of the first things to master when using a manual hand drill is the art of drilling straight holes. This may seem simple, but it requires practice and a steady hand. By applying consistent pressure and keeping the drill bit perpendicular to the surface, you can ensure a precise, straight hole every time.
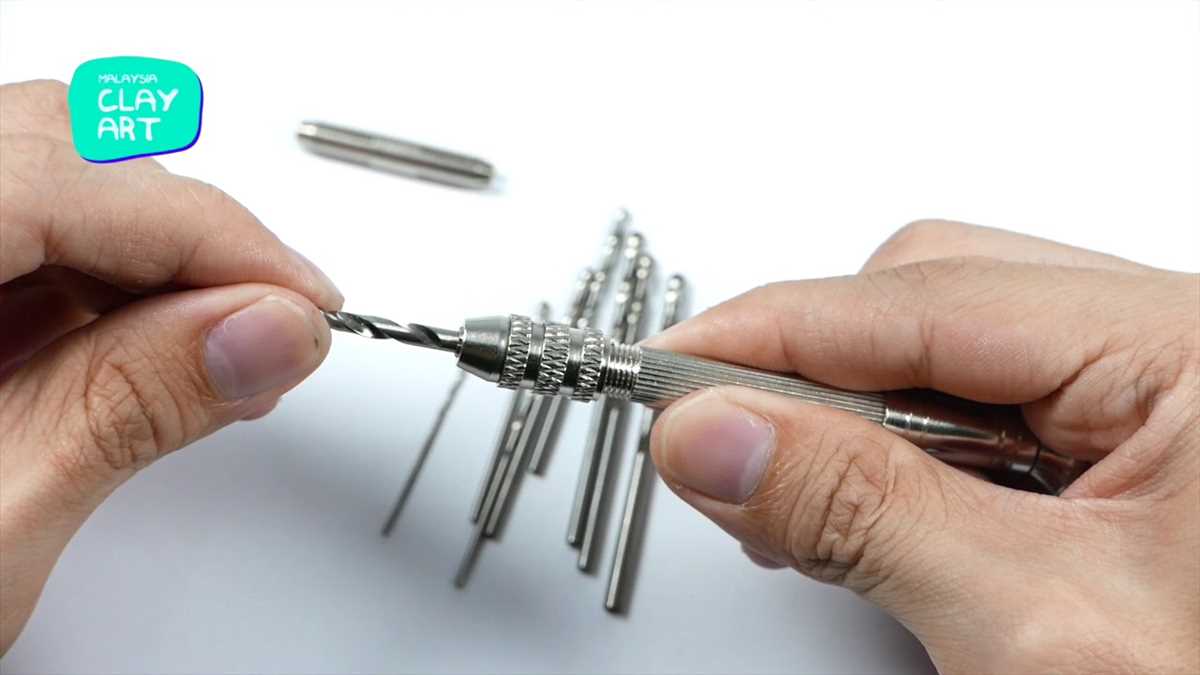
Another important aspect of using a manual hand drill is choosing the right drill bit for the job. Different materials require different drill bits, so it’s essential to select the appropriate one for the task at hand. Whether you’re working with wood, metal, or plastic, choosing the right drill bit can make all the difference in the outcome of your project.
Overall, mastering the art of using a manual hand drill is a valuable skill for any woodworker or DIY enthusiast. With practice and patience, you can achieve precise, beautiful results with this versatile tool. So, if you’re ready to take your woodworking skills to the next level, it’s time to pick up a manual hand drill and get started.

Section 1: Understanding the Basics
1.1 Introduction
Welcome to the first section of our guide on mastering the art of using a manual hand drill. In this section, we will cover the basics of using a manual hand drill, including its components and how to properly grip and handle the tool. Whether you’re a beginner or have some experience, it’s essential to understand the fundamentals before moving on to more advanced techniques.
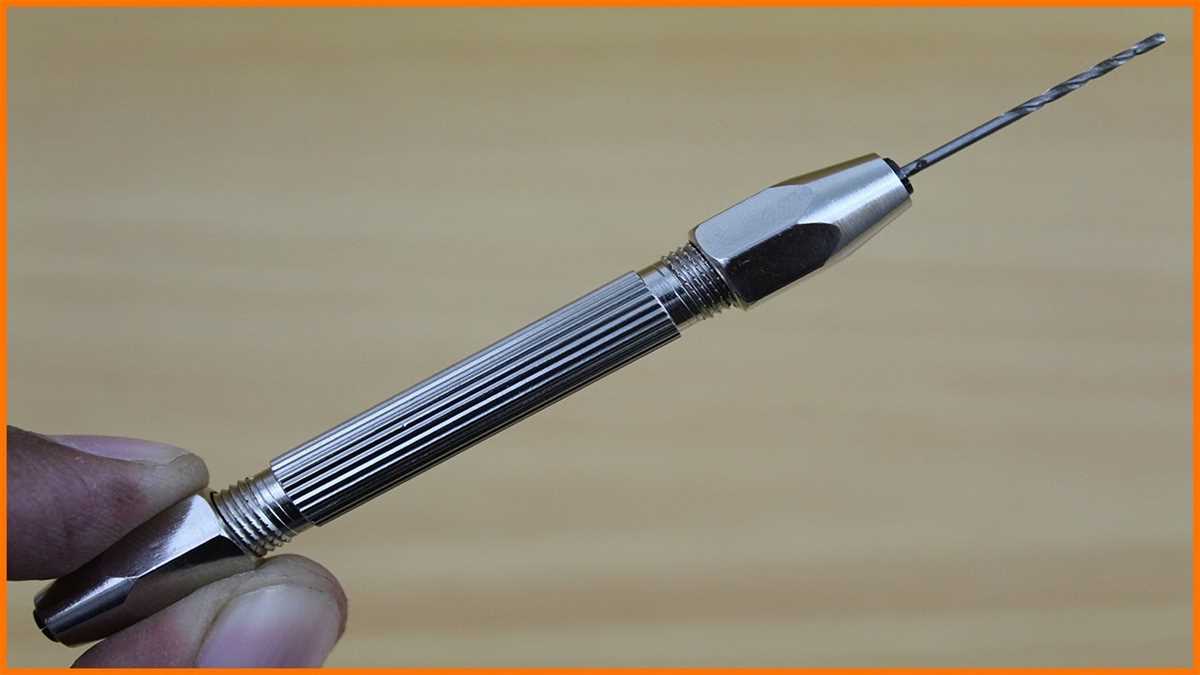
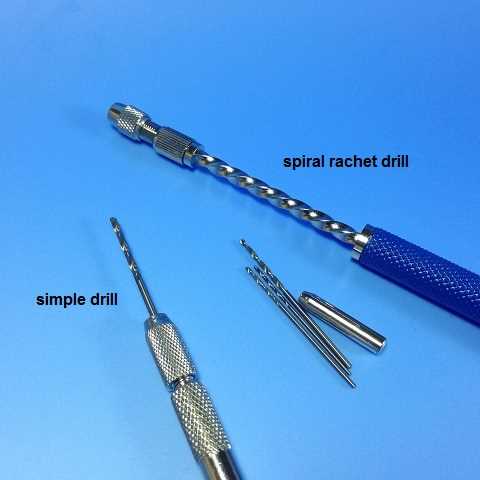
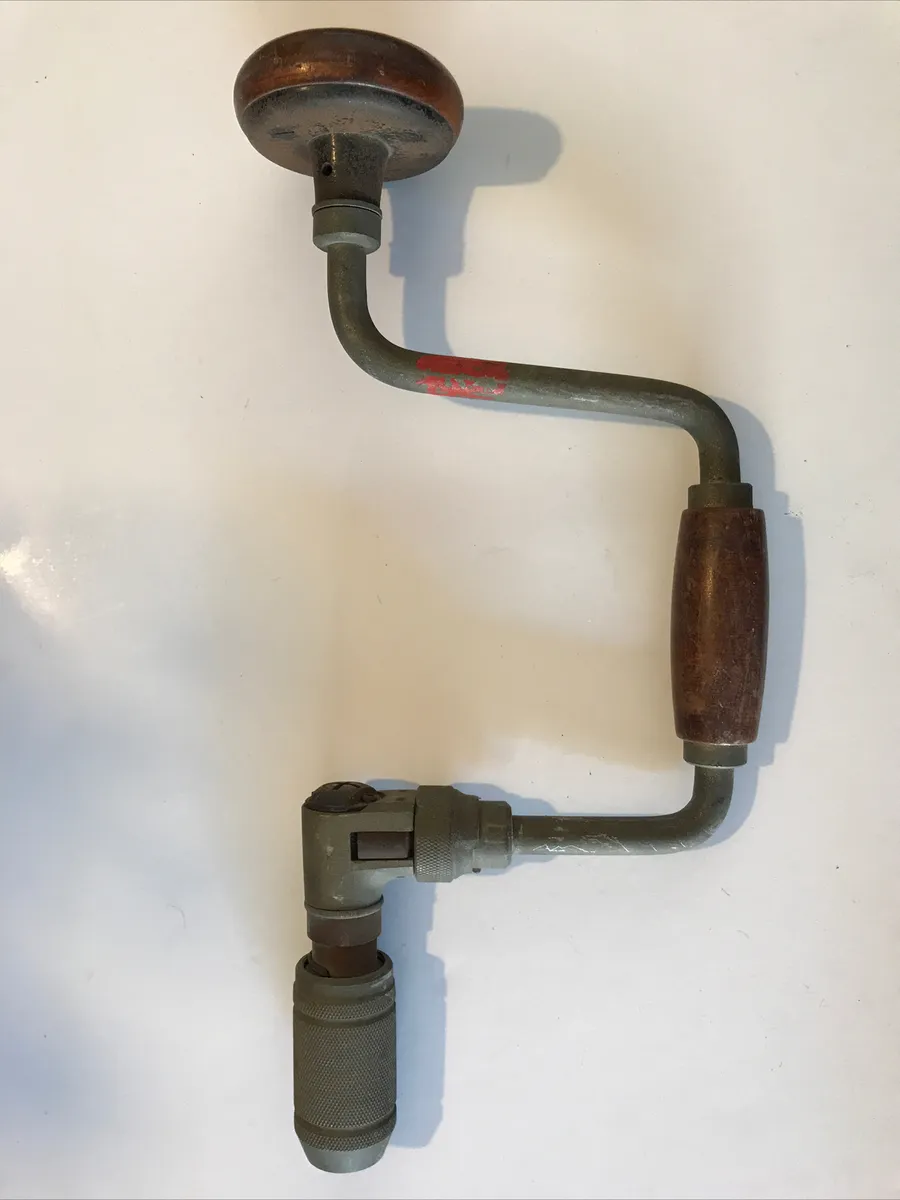
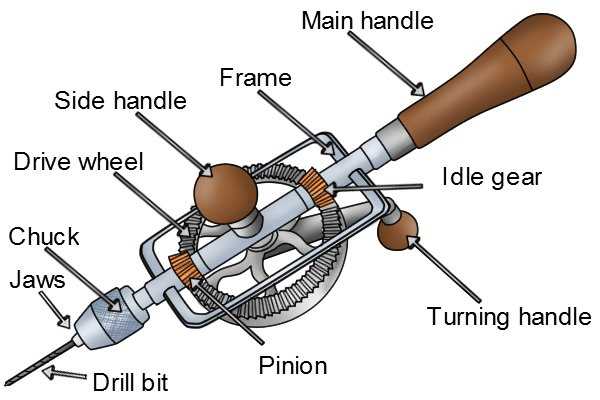
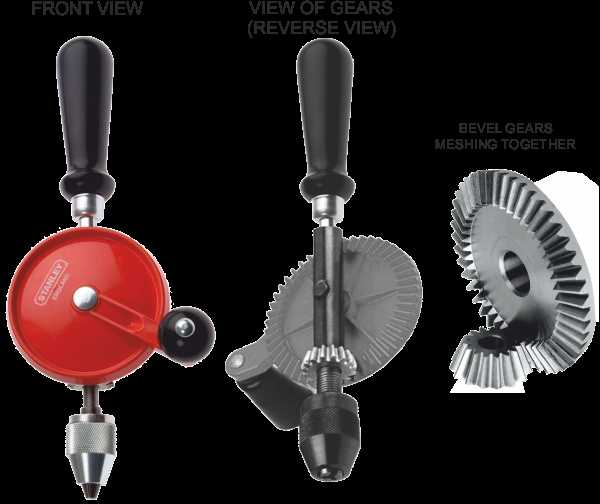
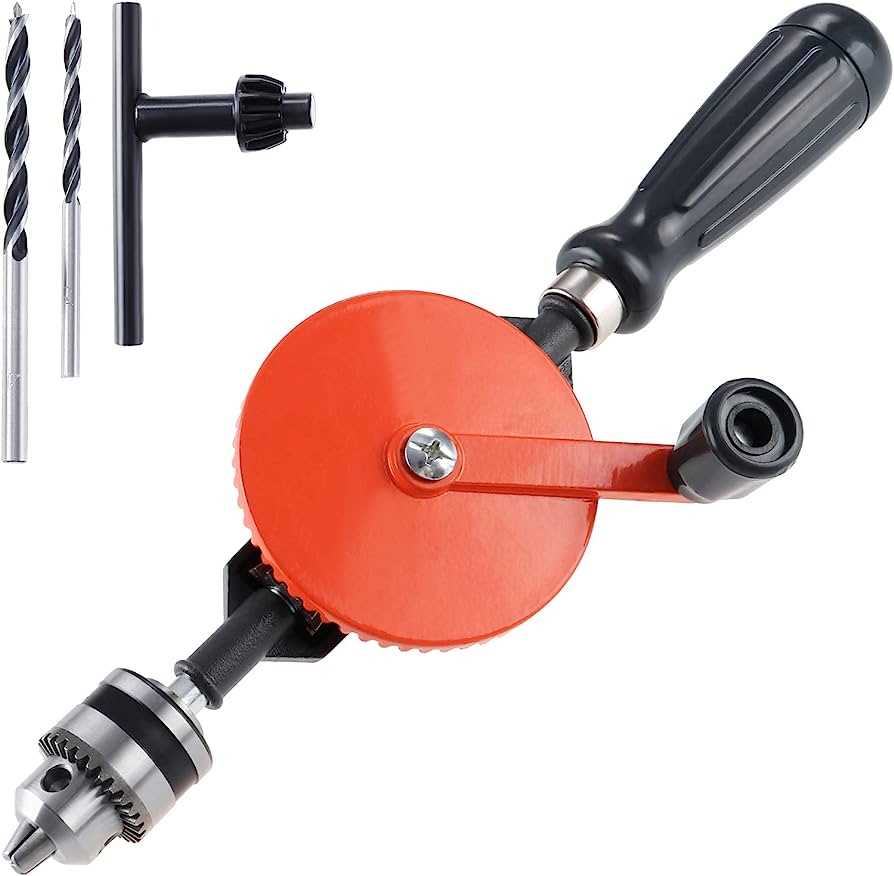
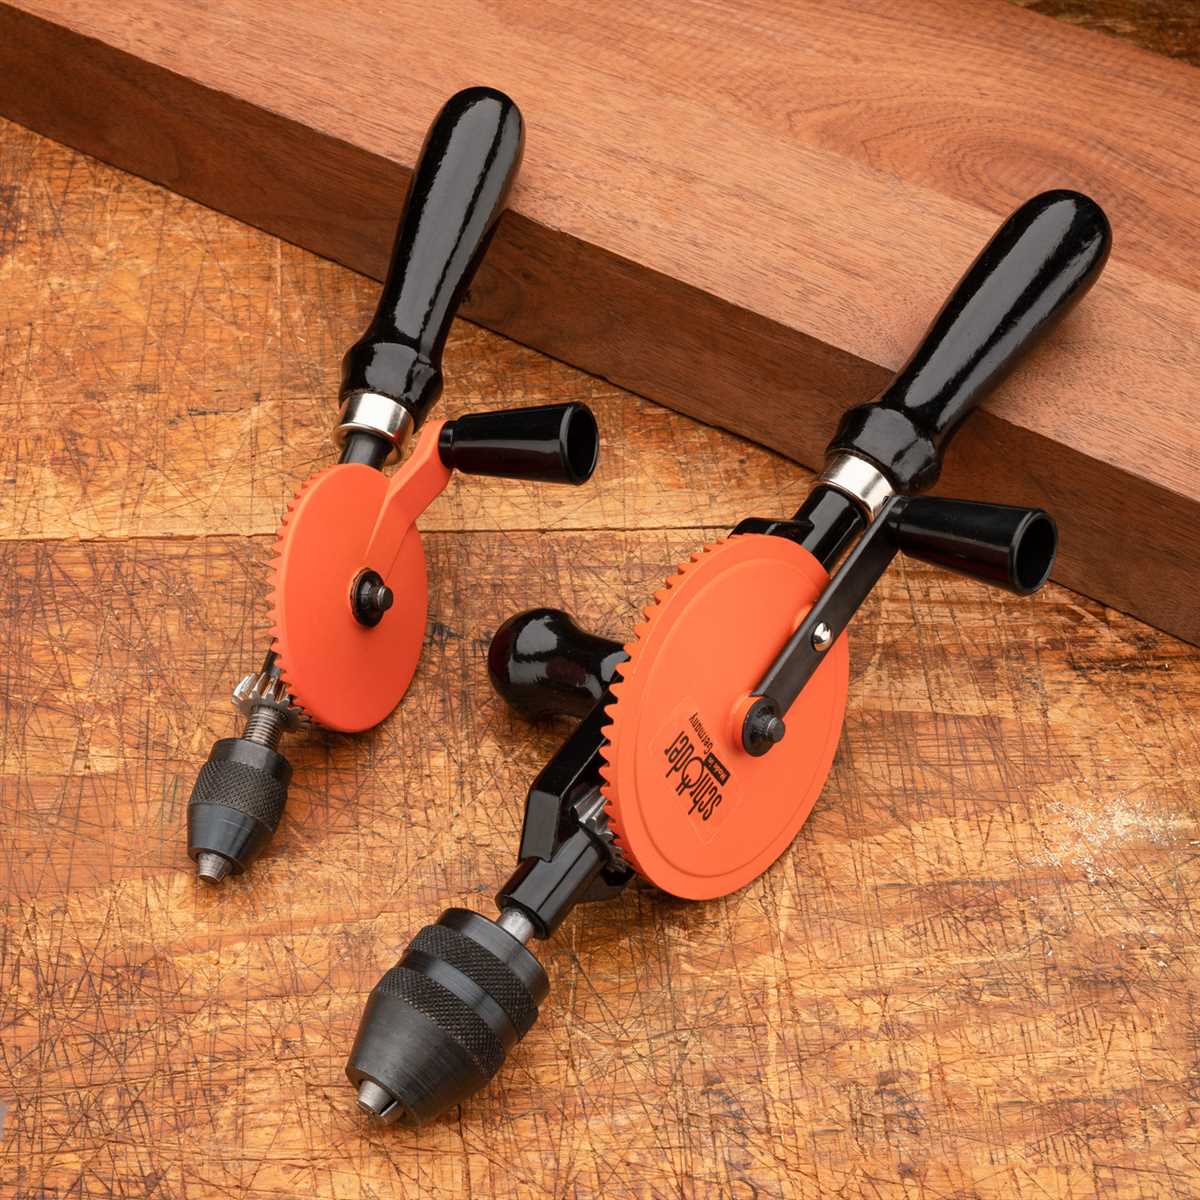
1.2 Components of a Manual Hand Drill
A manual hand drill typically consists of the following components:
- Chuck: The chuck is the part of the drill that holds the drill bit securely in place.
- Handle: The handle provides a grip for the user and allows for precise control over the drilling process.
- Gear mechanism: The gear mechanism in a manual hand drill allows for efficient transfer of rotational force from the handle to the chuck.
- Drill bit: The drill bit is the cutting tool that creates the hole in the material being drilled.
Understanding these components will help you better utilize the manual hand drill and make adjustments as necessary during your drilling tasks.
1.3 Proper Grip and Handling
When using a manual hand drill, it’s important to have a proper grip and handle the tool correctly to ensure safety and efficient drilling. Here are some key points to keep in mind:
- Hold the handle firmly with your dominant hand.
- Place your non-dominant hand on the crank or gear mechanism for stability.
- Apply consistent and even pressure while turning the handle to maintain control.
- Keep your body in a stable position and maintain a balanced stance.
- Avoid excessive force that may lead to slipping or loss of control.
- Wear appropriate protective gear, such as safety glasses, to protect your eyes from debris.
By following these guidelines, you’ll be able to handle the manual hand drill safely and effectively.

Choosing the Right Drill Bit
When using a manual hand drill, it is important to choose the right drill bit for the task at hand. The drill bit you select will ultimately determine the size and type of hole you can drill.
Consider the Material
Before choosing a drill bit, consider the material you will be drilling into. Different materials require different types of drill bits to achieve the best results.
- For wood, a standard twist bit is suitable. These bits have a sharp, pointed tip and spiral flutes that help remove chips and shavings.
- For metal, a HSS (high-speed steel) bit is recommended. HSS bits are designed to withstand the high temperatures generated by drilling into metal.
- For masonry or concrete, a carbide-tipped bit is necessary. These bits are specifically designed to handle the hardness and density of such materials.
Determine the Hole Size
The size of the hole you need to drill will also influence your choice of drill bit. Different drill bits come in various sizes to accommodate different hole diameters.
- For small holes, a twist bit in the range of 1/16 inch to 3/8 inch will suffice.
- For larger holes, a spade bit or hole saw can be used. These bits have a flat blade or circular saw-like teeth, respectively, to cut larger diameter holes.
Consider the Depth
When choosing a drill bit, consider the depth of the hole you need to drill. Some bits are designed for shallow holes, while others are suitable for drilling deeper holes.
- For shallow holes, a standard twist bit is suitable.
- For deeper holes, an auger bit or a brad point bit can be used. These bits have a longer fluted section that allows for deeper drilling.
Check the Shank Type
Finally, check the shank type of the drill bit. The shank is the part of the bit that fits into the drill’s chuck. Different drills require different shank types.

- For a manual hand drill, a round shank bit is typically used. These bits have a cylindrical shape that easily fits into the drill’s chuck.
- For a power drill, a hex shank or SDS (Slotted Drive System) shank bit may be required, depending on the drill model.
By considering the material, hole size, depth, and shank type, you can choose the right drill bit for your manual hand drill and ensure successful drilling results.
Adjusting the Drill Speed
One of the key factors in mastering the art of using a manual hand drill is adjusting the drill speed. The speed at which the drill spins can greatly affect the outcome of your drilling project. Here are some tips on how to adjust the drill speed for different types of materials and tasks:
1. Understanding the Drill Speed Settings
Most manual hand drills come with adjustable speed settings. These settings control how fast the drill bit spins. Depending on the model, you may have a simple high/low speed switch, or a more precise speed control dial.
2. Low Speed for More Control
When drilling through delicate or brittle materials such as wood or plastic, it is recommended to use a slower drill speed. This allows for better control and reduces the chances of damaging or cracking the material. It’s also useful when starting a hole or making small, precise pilot holes.
3. High Speed for Faster Drilling
When drilling through harder materials such as metal or masonry, a higher drill speed is usually required to cut through efficiently. The increased speed helps to generate more torque and reduces the chances of the drill bit getting stuck or breaking.

4. Experiment and Adjust
Every drilling project is different, and the optimal drill speed may vary based on factors such as the type of material, the size of the drill bit, and the desired outcome. It’s important to experiment and adjust the drill speed as needed to achieve the best results.
5. Safety Considerations
Always wear appropriate safety gear, such as safety glasses and gloves, when using a manual hand drill. Additionally, be mindful of the heat generated by the drill motor, especially when operating at higher speeds. If the drill feels too hot, take a break to let it cool down.
6. Consult the Manual
If you’re unsure about the optimal drill speed for a specific task or material, consult the manufacturer’s manual or do some research online. Many manufacturers provide recommended drill speed guidelines for different types of materials.
Remember, practice makes perfect when it comes to using a manual hand drill. By understanding how to adjust the drill speed and experimenting with different settings, you’ll soon become a master of this versatile tool.
Section 2: Proper Grip and Stance
Having the correct grip and stance is essential when using a manual hand drill. Proper technique ensures stability and control, allowing you to drill accurately and effectively. Follow these steps to achieve the proper grip and stance:

1. Hand and Finger Placement
Hold the handle of the manual hand drill firmly with your dominant hand. Place your index finger on the trigger button, ready to press it when you start drilling. Wrap your remaining fingers around the handle for added support.
Position your non-dominant hand near the top or front of the hand drill, depending on your preference. Use this hand to provide stability and balance during drilling. You can place your thumb on the side of the handle to apply additional pressure if needed.
2. Stance
Stand with your feet shoulder-width apart, maintaining a stable and balanced stance. This stance will provide a solid foundation and prevent any unnecessary movement while drilling.
3. Posture

Maintain proper posture throughout the drilling process. Stand with your back straight and your shoulders relaxed. Avoid hunching over the hand drill as this can strain your neck and back.
4. Eye Protection
Always wear safety goggles or glasses to protect your eyes from any flying debris or particles that may occur during drilling. Safety should be a priority at all times when using hand tools.
5. Clothing and Accessories
Ensure that you are wearing appropriate clothing and have removed any loose accessories that may get caught in the drill. Avoid wearing loose sleeves, jewelry, or anything that may interfere with your grip or drill movement.
By following these guidelines for grip, stance, and safety precautions, you will be able to use a manual hand drill with confidence and precision. Remember to always read the manufacturer’s instructions and familiarize yourself with the specific features and functions of your hand drill before use.

Holding the Drill Correctly
Using a manual hand drill requires proper hand positioning to ensure accuracy, precision, and safety. Here are some guidelines on holding the drill correctly:
1. Firm Grip
Hold the handle of the drill firmly but not too tightly. A secure grip will allow you to maintain control over the tool while drilling. Avoid gripping too tightly as it may lead to hand fatigue or strain.
2. Two-Handed Grip
For better stability and control, always use a two-handed grip when operating a manual hand drill. Place one hand on the handle at the back and use the other hand to stabilize the top of the drill.
3. Thumb Placement
Position your thumb against the side of the handle to provide additional support and control. This will help you maintain a steady and controlled drilling motion.
4. Body Positioning
Stand or sit in a comfortable position with your feet shoulder-width apart for better balance. Align your body with the direction in which you plan to drill. This will improve your stability and reduce the chances of accidents or injuries.
5. Eye Protection
Always wear safety goggles or protective glasses before using a hand drill. This will shield your eyes from any flying debris or particles that may be produced during the drilling process.
6. Secure Workpiece
Ensure that the workpiece you are drilling is securely held in place. Use clamps or a vise to secure the workpiece to a stable surface. This will prevent it from slipping or moving, reducing the risk of accidents.
7. Start Slowly
When starting a drill, begin with a slow speed and gradually increase the speed as needed. This will give you better control and prevent the drill bit from slipping or causing damage to the workpiece.
8. Proper Posture
Maintain good posture while drilling to prevent strain on your back and neck. Keep your shoulders relaxed and avoid stooping or hunching over the workpiece. This will help you maintain focus and precision.
Remember to follow these guidelines for holding the drill correctly to ensure effective and safe use of a manual hand drill.
Maintaining a Stable Stance
When using a manual hand drill, it is important to maintain a stable stance to ensure accuracy and safety. Here are some tips for maintaining a stable stance while using a manual hand drill:
1. Stand with your feet shoulder-width apart.
Having a wide stance provides a solid base and improves stability. Make sure your weight is evenly distributed between both feet.
2. Position your body perpendicular to the drilling surface.
Align your body with the direction of the drill to ensure stability. This will help you apply equal pressure and maintain control over the drilling process.
3. Bend your knees slightly.
Engaging your leg muscles by bending your knees will provide additional stability and allow you to exert more force when necessary.
4. Keep your core muscles engaged.
Tightening your abdominal and back muscles will help you maintain balance and stability. This is especially important when drilling through tougher materials.
5. Use your non-dominant hand for support.
Place your non-dominant hand on the drilling surface to provide additional support and stability. This will help prevent any accidental slips or movements.
6. Use a vice or clamp to secure the drilling surface.
If possible, clamp or secure the drilling surface in place to minimize movement. This will help maintain stability and ensure the accuracy of your drilling.
7. Take breaks and rest when needed.
Using a manual hand drill can be physically demanding, especially for longer drilling sessions. Make sure to take breaks and rest when needed to maintain concentration and stability.
By following these tips and maintaining a stable stance, you can improve your drilling accuracy and safety when using a manual hand drill.
Section 3: Preparing the Workpiece
3.1 Cleaning the Workpiece
Before starting your project, it is important to clean the workpiece thoroughly. Use a cloth or a brush to remove any dust, dirt, or debris that may be on the surface. This will ensure a smooth and accurate drilling process.
3.2 Marking the Drilling Area
Once the workpiece is clean, mark the area where you want to drill. Use a pencil or a small marking tool to create a clear and visible guide for the drill bit. This will help you maintain accuracy and prevent any unwanted mistakes.
3.3 Securing the Workpiece
Before you begin drilling, it is essential to secure the workpiece in place. Use clamps or a vise to hold the workpiece firmly on a stable surface. This will prevent any movement or slipping during the drilling process, ensuring safety and precision.
3.4 Choosing the Right Drill Bit
Depending on the material of your workpiece, choose the appropriate drill bit. For softer materials like wood or plastic, a regular twist bit will work fine. For harder materials like metal, use a high-speed steel bit or a cobalt bit. Make sure the drill bit is sharp to ensure clean and efficient drilling.
3.5 Filing or Sanding the Edges (if necessary)
If your workpiece has rough edges or sharp corners, consider filing or sanding them before drilling. This will prevent chipping or splintering of the material, ensuring a smooth and professional finish.
3.6 Wear Safety Gear
Prior to drilling, always wear appropriate safety gear such as safety goggles, gloves, and a dust mask. This will protect you from any potential hazards, such as flying debris or harmful particles.
3.7 Double-Check Measurements
Before you start the drilling process, double-check your measurements to ensure accuracy. Use a ruler or a measuring tape to verify the distance and alignment of your drill points. This step will help prevent any mistakes or rework.
3.8 Clear the Drilling Area
Clear any obstructions or clutter from the drilling area. Make sure there are no loose objects or tools that can interfere with the drilling process. A clutter-free workspace will make it easier to handle the hand drill and reduce the risk of accidents.
3.9 Review the Drilling Technique
If you are new to using a manual hand drill, take a moment to review the proper drilling technique. Familiarize yourself with the hand drill’s mechanics and learn the correct grip and positioning. This will help you achieve consistent and accurate drilling results.
3.10 Final Inspection
Before you start drilling, give the workpiece a final inspection. Ensure that everything is in order, from the cleanliness of the workpiece to the stability of the setup. Taking a moment to double-check will save you time and effort in the long run.
Marking the Drill Hole
Before you begin drilling with your manual hand drill, it is important to properly mark the spot where you want to create a hole. This will help ensure accuracy and prevent any unnecessary mistakes. Here are some tips on how to effectively mark the drill hole:
- Measure and mark: Use a tape measure or ruler to accurately measure the distance from the edge of the material to where you want the hole to be. Once you have determined the measurements, use a pencil or a marker to make a clear and visible mark at that spot.
- Use a center punch: For harder materials like metal or wood, it can be helpful to use a center punch to create a small indentation at the drill hole spot. This will act as a guide for the drill bit and help prevent it from slipping or wandering off track while drilling.
- Consider using a template: If you need to create multiple holes at consistent intervals, it may be beneficial to create a template. This can be a piece of cardboard or any other material with pre-drilled holes. Simply align the template with your workpiece and mark the desired drill hole locations through the holes in the template.
Remember, taking the time to accurately mark the drill hole can save you a lot of time and frustration in the long run. It is worth the extra effort to ensure your holes are in the right place.
Clamping the Workpiece Securely
When using a manual hand drill, it is essential to clamp the workpiece securely to ensure stability and accurate drilling. Without proper clamping, the workpiece may move or shift, leading to imprecise holes or potential injuries.
There are various clamping methods available that can be used depending on the size and shape of the workpiece. Here are a few common techniques:
1. Bench Vise
A bench vise is a versatile clamping tool often found in workshops. It consists of two jaws, one stationary and one movable, that can be tightened to hold the workpiece firmly in place. To clamp the workpiece securely using a bench vise, follow these steps:
- Open the bench vise by turning the handle counterclockwise.
- Position the workpiece between the jaws of the vise.
- Apply pressure to the handle clockwise to tighten the jaws around the workpiece.
- Ensure that the workpiece is held securely and does not move when pressure is applied.
2. C-Clamp
A C-clamp is another type of clamping device used to secure workpieces. It consists of a C-shaped frame with a screw thread that allows for adjustable clamping pressure. To clamp the workpiece securely using a C-clamp, follow these steps:
- Position the workpiece in the desired location.
- Place the C-clamp around the workpiece, ensuring that the stationary jaw is resting against a stable surface.
- Turn the screw attached to the movable jaw clockwise to tighten the clamp and secure the workpiece.
- Check that the workpiece is held firmly and does not move when pressure is applied.
3. Magnetic Clamp
A magnetic clamp is a useful tool for clamping workpieces made of metal. It uses a powerful magnet to hold the workpiece securely in place. To clamp the workpiece securely using a magnetic clamp, follow these steps:
- Ensure that the workpiece surface is clean and free from debris.
- Place the magnetic clamp on the desired location on the workpiece.
- Press down firmly on the clamp to engage the magnet and create a strong bond with the workpiece.
- Verify that the workpiece is firmly attached and does not move when pressure is applied.
Regardless of the clamping method used, it is essential to position the workpiece securely and double-check for any movement before starting to drill. Taking the time to accurately clamp the workpiece will result in more precise drilling and a safer working environment.
Section 4: Drilling Techniques
1. Preparing the Workpiece
Before you start drilling with a manual hand drill, it’s important to prepare the workpiece. Here are some essential steps:
- Marking the Hole: Use a pencil or a marker to mark the exact spot where you want to drill the hole. This will help you maintain accuracy.
- Securing the Workpiece: Make sure the workpiece is securely clamped or viced to prevent it from moving while you drill. This will ensure stability and prevent accidents.
- Using a Pilot Hole: For thicker or harder materials, it’s advisable to make a small pilot hole before drilling the final hole. This will help guide the drill bit and prevent slipping or wandering.
2. Choosing the Right Drill Bit
Choosing the right drill bit is crucial for successful drilling. Here are some important considerations:
- Material: Different materials require different drill bits. For example, a wood drill bit is not suitable for drilling into metal or masonry. Understand the material you are working with and choose the appropriate drill bit.
- Size: The size of the hole you want to create will determine the size of the drill bit you should use. Measure the diameter of the hole or use a hole saw to determine the right drill bit size.
- Type: There are various types of drill bits available, including twist bits, spade bits, and hole saws. Choose the type that best suits your specific drilling needs.
3. Using the Manual Hand Drill
Once you have prepared the workpiece and chosen the appropriate drill bit, it’s time to start drilling. Here’s how to use a manual hand drill:
- Tighten the Chuck: Loosen the chuck by turning it counterclockwise. Insert the shank of the drill bit into the chuck and tighten it by turning the chuck clockwise.
- Position the Drill Bit: Place the tip of the drill bit on the marked spot on the workpiece. Make sure the drill bit is perpendicular to the surface.
- Apply Pressure: Apply gentle pressure on the handle of the manual hand drill to start drilling. Maintain a steady and controlled motion to prevent the drill bit from slipping or jamming.
- Clearing the Chips: Periodically lift the drill bit out of the hole to clear the chips and prevent clogging. You can use a small brush or blow away the chips to keep the drilling process smooth.
- Finishing the Hole: Once the drill bit has reached the desired depth, gradually reduce the pressure and slow down the drilling speed. This will help prevent any damage to the workpiece.
4. Safety Tips
When using a manual hand drill, it’s important to prioritize safety. Here are some safety tips to keep in mind:
- Eye Protection: Always wear safety goggles to protect your eyes from flying debris and particles.
- Work Area: Ensure you have a well-lit and clutter-free work area. Remove any obstacles that may impede your movement or cause accidents.
- Secure Grip: Keep a firm grip on the manual hand drill to maintain control and prevent slippage.
- Proper Posture: Stand or position yourself in a way that allows for stability and balance while drilling.
- Avoid Excessive Force: Let the drill bit do the work. Applying excessive force can lead to broken drill bits or damage to the workpiece.
5. Troubleshooting
If you encounter any issues while drilling with a manual hand drill, here are some troubleshooting tips:
- Drill Bit Breakage: If the drill bit breaks, it could be due to excessive force or using the wrong drill bit for the material. Replace the broken drill bit with a new one and adjust your drilling technique.
- Drill Bit Wandering: If the drill bit wanders off the marked spot, it could be due to improper alignment or lack of a pilot hole. Use a pilot hole or reposition the drill bit and try again.
- Drill Bit Jamming: If the drill bit gets stuck or jams in the hole, it could be due to excessive pressure or incorrect drilling technique. Release the pressure and try rotating the drill bit counterclockwise to dislodge it.
Conclusion
Mastering the art of using a manual hand drill requires practice and attention to detail. By following the proper drilling techniques, choosing the right drill bit, and prioritizing safety, you can achieve accurate and efficient drilling results. Remember to troubleshoot any issues that may arise and continue refining your skills for optimal performance.
FAQ:
Why should I use a manual hand drill instead of a power drill?
A manual hand drill offers more control and precision than a power drill. It is also quieter and more portable, making it ideal for small projects or working in tight spaces where a power drill may not be suitable.
What types of materials can I drill with a manual hand drill?
A manual hand drill can be used to drill through various materials such as wood, plastic, metal, and even glass. However, the type and size of the drill bit being used will depend on the material you are working with.
How do I choose the right drill bit for my manual hand drill?
Choosing the right drill bit for your manual hand drill is important to ensure smooth and efficient drilling. Consider the material you are drilling through and select a drill bit that is specifically designed for that material. Additionally, take into account the size of the hole you need and choose a drill bit with the appropriate diameter.
Can a manual hand drill be used for larger projects?
While a manual hand drill is typically best suited for small projects, it can still be used for larger projects with some limitations. For larger holes or drilling through tougher materials, a power drill may be more efficient. However, a manual hand drill can still be used for precise drilling or as a backup option when a power drill is not available.
Video:


Meet Harrison Clayton, a distinguished author and home remodeling enthusiast whose expertise in the realm of renovation is second to none. With a passion for transforming houses into inviting homes, Harrison's writing at https://thehuts-eastbourne.co.uk/ brings a breath of fresh inspiration to the world of home improvement. Whether you're looking to revamp a small corner of your abode or embark on a complete home transformation, Harrison's articles provide the essential expertise and creative flair to turn your visions into reality. So, dive into the captivating world of home remodeling with Harrison Clayton and unlock the full potential of your living space with every word he writes.


