Mastering the Art of Drilling Perfectly Vertical Holes: A Step-by-Step Guide

Drilling perfectly vertical holes may seem like a simple task, but achieving accuracy and precision requires a combination of skill, technique, and the right tools. Whether you are a DIY enthusiast or a professional contractor, knowing how to drill vertical holes is a fundamental skill that can greatly enhance your woodworking, construction, or plumbing projects.
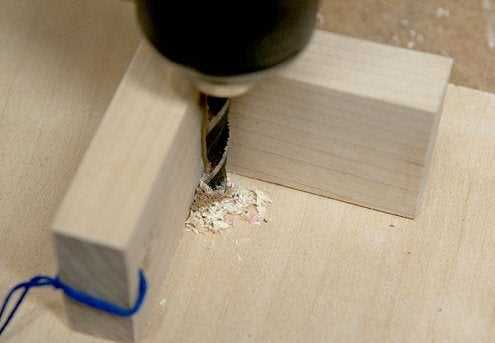
There are several key steps that need to be followed in order to achieve the desired result. First, it’s important to choose the right drill bit for the job. Different materials require different types of drill bits, so selecting the appropriate one for the material you are working with is essential.
Next, proper alignment is crucial for drilling vertical holes. Using a drill press or guide can help ensure that your holes are perfectly perpendicular to the surface you are drilling into. Additionally, marking the drilling point with a pencil or a center punch can provide a reference point and improve accuracy.
Finally, maintaining a steady hand and applying consistent pressure while drilling is essential for achieving straight and vertical holes. It’s important to maintain control over the drill and avoid any unnecessary movements that could result in slanted or uneven holes.
Mastering the art of drilling perfectly vertical holes may take some practice, but with the right tools and techniques, you can achieve professional-level results. By following this step-by-step guide, you’ll be able to tackle any project that requires precise and straight drilling with confidence and accuracy.

Importance of Verticality in Drilling
When it comes to drilling, achieving perfect verticality is of utmost importance. A slight deviation from the vertical axis can have significant consequences, especially in certain industries such as construction, mining, and oil drilling.
Safety
One of the primary reasons why verticality is crucial in drilling is safety. When drilling vertically, the chances of accidents and mishaps are significantly reduced. A properly drilled vertical hole ensures stability and prevents the risk of collapse or other hazardous incidents.
Precision and Accuracy
Vertical drilling ensures precision and accuracy in various applications. In construction, for example, verticality is crucial for the installation of foundations, pilings, and other structural elements. A slight deviation from verticality can compromise the integrity of the structure, leading to future problems and costly repairs.
Efficiency
Drilling vertically allows for efficient execution of tasks. When the hole is perfectly vertical, it becomes easier to insert pipes, cables, or any other objects needed for various applications. This saves time, effort, and resources, resulting in improved productivity.
Functionality
Vertical drilling is essential in ensuring the functionality of certain systems. For example, in geothermal drilling, verticality is crucial for the proper installation and functioning of geothermal heat pumps. Deviations from verticality can affect heat exchange efficiency and overall system performance.

Compliance with Regulations
Many industries have specific regulations and standards regarding the verticality of drilled holes. Compliance with these regulations is important for legal and safety reasons. Non-compliance can lead to penalties, legal issues, and even reputational damage for companies involved in such activities.
Economic Impact
Achieving verticality in drilling has a direct economic impact. Accurate and precise drilling reduces the need for corrective measures, repairs, and rework. This translates into cost savings and increased profitability for companies involved in drilling operations.
In summary, verticality in drilling is of utmost importance due to its impact on safety, precision, efficiency, functionality, compliance, and overall economic outcomes. It is a fundamental aspect that should be prioritized and mastered in various drilling applications.
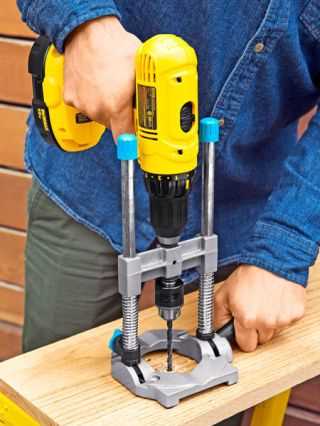
Essential Tools for Drilling Perfectly Vertical Holes
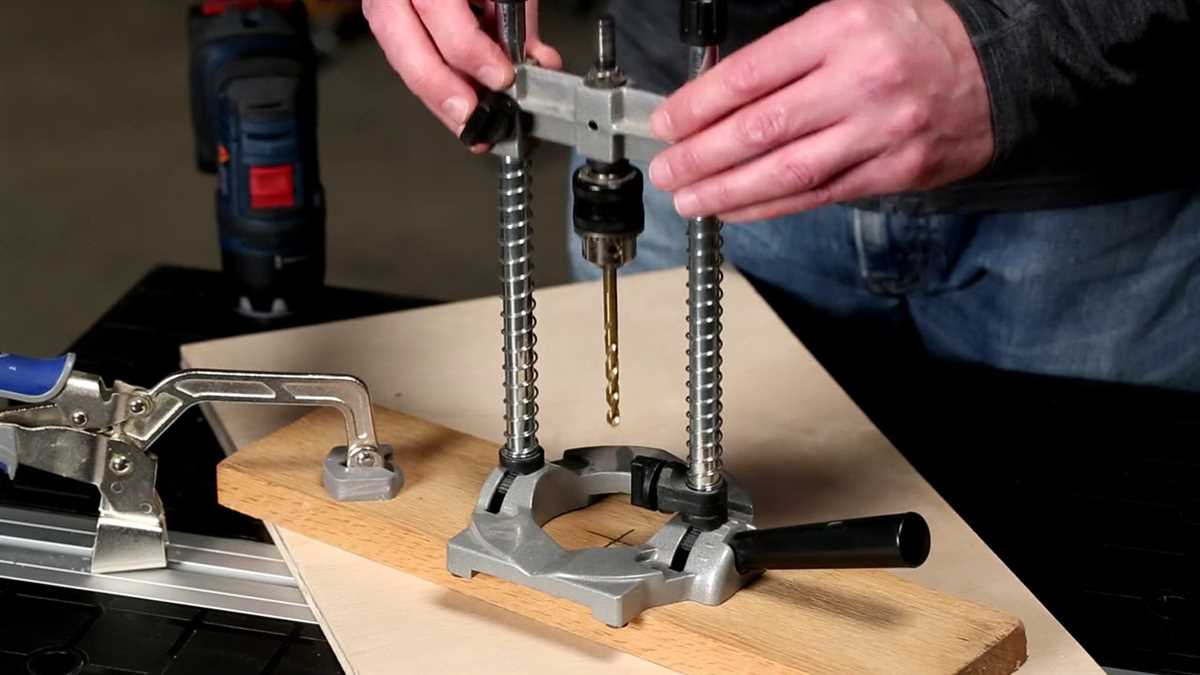

1. Drill Press
One of the most important tools for drilling perfectly vertical holes is a drill press. A drill press is a fixed machine that allows for precise drilling and provides stability during the drilling process. It is equipped with an adjustable table, a motor, and a drill bit that can be lowered or raised to the desired depth.
2. Level
A level is an essential tool for ensuring that the drill press is properly aligned and that the holes are drilled vertically. It is used to check the horizontal and vertical alignment of the drill press and adjust it if necessary. A level with a bubble vial is commonly used for this purpose.
3. Drill Bits
Choosing the right drill bits is crucial for drilling perfectly vertical holes. Twist drill bits are the most commonly used type for woodworking projects. They come in various sizes and can be used with different materials. It is important to select a drill bit that matches the size and material of the hole you want to drill.
4. Clamps
Clamps are used to secure the workpiece to the drill press table, providing stability and preventing movement during drilling. They help to ensure that the holes are drilled vertically and accurately. There are different types of clamps available, such as C-clamps and quick-release clamps, that can be used depending on the size and shape of the workpiece.
5. Depth Stop
A depth stop is a device that allows you to set the drilling depth and ensures that all the holes are drilled to the same depth. It helps to maintain consistency and precision in drilling vertical holes. Depth stops can be adjusted and locked in place to achieve the desired depth.

6. Safety Equipment
When working with power tools, safety should always be a priority. Essential safety equipment for drilling vertical holes includes safety glasses or goggles to protect your eyes from flying debris, ear protection to reduce noise, and dust masks to prevent inhalation of particles. It is important to wear appropriate safety gear to minimize the risk of accidents or injuries.
7. Workbench or Stand
A sturdy and stable workbench or stand is important for operating the drill press. It provides a secure base and helps to maintain the stability of the drill press during drilling. A workbench or stand with adjustable height can be beneficial for comfortable and efficient drilling.
8. Measuring Tools
Precision is key when drilling perfectly vertical holes. Measuring tools such as a tape measure, ruler, or digital caliper can be used to ensure accurate placement of the holes. These tools can help you measure the distance, width, and depth of the holes to achieve the desired result.
9. Drill Vise
A drill vise is a clamping device that attaches to the drill press table and holds the workpiece securely in place during drilling. It provides stability and prevents the workpiece from moving or spinning, allowing for more precise and vertical drilling. A drill vise can be adjusted to different angles to accommodate various drilling positions.

10. Lubricant
Using a lubricant, such as cutting oil or lubricating wax, can help to reduce friction and heat during drilling. Applying a small amount of lubricant to the drill bit and the workpiece can make the drilling process smoother and prevent the drill bit from overheating. It also prolongs the life of the drill bit and ensures cleaner and more accurate holes.
Preparing the Drilling Area
Before you begin drilling your perfectly vertical holes, it’s important to properly prepare the drilling area to ensure safety and accuracy. Follow these steps to ensure the best results:
1. Clear the Work Area
Remove any obstacles or debris from the area where you will be drilling. This includes tools, equipment, and any other items that could interfere with the drilling process. Clearing the work area will help prevent accidents and ensure a clean drilling environment.
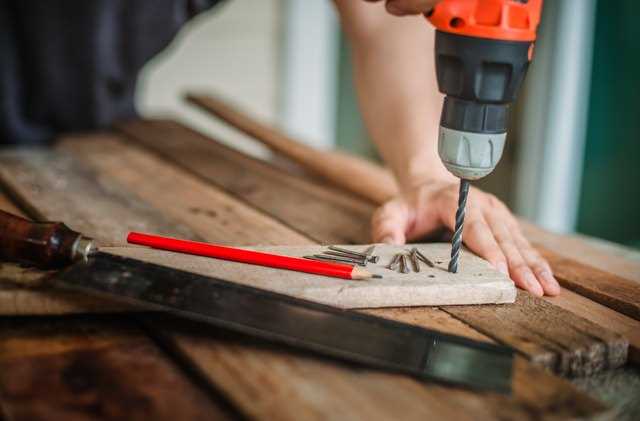
2. Mark the Hole Locations
Using a pencil or marker, mark the exact locations where you want to drill your holes. Measure and mark the spots based on your project requirements. It’s advisable to use a level or plumb line to ensure that the marks are perfectly vertical.
3. Measure and Mark the Drilling Depths
Determine the drilling depths for each hole and mark them on the drill bit using a piece of tape or a marker. This will help you drill each hole to the desired depth and ensure consistency across all holes.
4. Set Up a Stable Work Surface
Place your workpiece on a stable surface that will provide support during the drilling process. This could be a workbench, table, or any other sturdy surface. Ensure that the work surface is level and secure to prevent any movement or vibration during drilling.
5. Gather the Necessary Tools and Equipment
Before you start drilling, gather all the necessary tools and equipment. This typically includes a power drill, appropriate drill bits, safety goggles, dust mask, and any other tools or accessories required for your specific project. Having everything ready beforehand will save you time and ensure a smooth drilling process.
6. Take Safety Precautions
Wear appropriate safety gear, including safety goggles and a dust mask, to protect your eyes and lungs from flying debris and dust. Read and follow the manufacturer’s instructions for the power drill and any other equipment you will be using. Ensure that the work area is well-lit and ventilated to create a safe environment.
By properly preparing the drilling area, you will set yourself up for success when it comes to drilling perfectly vertical holes. Taking the time to clear the work area, mark hole locations and depths, set up a stable work surface, gather the necessary tools and equipment, and take safety precautions will ensure a smooth and accurate drilling process.
Choosing the Right Drill Bit for the Job
Choosing the right drill bit is essential when it comes to achieving perfectly vertical holes. The type of drill bit you use will depend on the material you are drilling into and the size of the hole you need. Here are some factors to consider when choosing the right drill bit for the job:
- Material: Different drill bits are designed to work best with specific materials. For example, a masonry drill bit is designed to drill through materials like concrete or brick, while a wood drill bit is better suited for drilling through wood. Make sure to choose a drill bit that is compatible with the material you are drilling into.
- Size: The size of the hole you need will determine the size of the drill bit you should use. Drill bits come in a variety of sizes, typically measured in inches or millimeters. Consider the diameter of the hole you need and choose a drill bit that matches that size.
- Shank type: The shank is the part of the drill bit that is inserted into the drill. There are various shank types available, including round, hexagonal, and SDS. Make sure to choose a drill bit with a shank type that is compatible with your drill.
It is also important to consider the quality and durability of the drill bit. High-quality drill bits will last longer and provide better results. Look for drill bits made from materials like high-speed steel or carbide, as they are known for their durability.
Additionally, make sure to regularly inspect your drill bits for any signs of wear or damage. Dull or damaged drill bits can affect the accuracy and quality of your holes. If you notice any issues, replace the drill bit immediately to maintain optimal performance.
| Drill Bit Type | Best for Materials | Best for Hole Sizes | Shank Type |
|---|---|---|---|
| Twist Drill Bit | Metal, Wood, Plastic | 1/16″ – 1/2″ | Round |
| Masonry Drill Bit | Concrete, Brick, Stone | 1/8″ – 1″ | Round, Hexagonal, SDS |
| Spade Bit | Wood | 1/4″ – 1 1/2″ | Round |
| Forstner Bit | Wood | 3/8″ – 2 1/8″ | Round, Hexagonal |
Choosing the right drill bit is the first step towards drilling perfectly vertical holes. Consider the material, size, and shank type when making your selection. Remember to use high-quality drill bits, regularly inspect them for damage, and replace them when necessary. By choosing the right drill bit and properly maintaining it, you can achieve professional-quality results in your drilling projects.
Setting Up the Drill for Vertical Drilling
Before you begin drilling, it is important to properly set up your drill to ensure that you can achieve perfectly vertical holes. Here are the steps to follow:
1. Choose the Right Drill
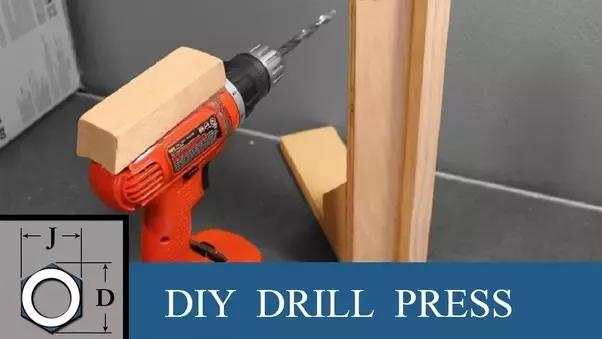
Make sure you have the correct type of drill for the task at hand. For vertical drilling, a drill press is ideal. However, if you don’t have access to a drill press, you can use a handheld drill with a level and a guide.
2. Secure the Workpiece
Ensure that the workpiece is securely fastened or clamped down to prevent any movement while drilling. This will help maintain the verticality of the hole.
3. Mark the Hole
Use a pencil or marker to mark the exact location where you want to drill the hole. This will serve as a guide and help you maintain accuracy throughout the drilling process.
4. Measure and Adjust
Measure the distance from the edge of the drill bit to the edge of the drill base or guide. This distance will determine the depth of the hole. Adjust the drill’s depth stop or set a piece of tape on the drill bit to mark the desired depth.
5. Level the Drill
Use a level to ensure that the drill is perfectly vertical before drilling. If you are using a drill press, adjust the table or platform until it is level. If you are using a handheld drill, use a level against the side of the drill or create a guide with a level to ensure verticality.
6. Secure the Drill
If you are using a drill press, lock the drill in place before drilling. If you are using a handheld drill, make sure to hold it steady and apply even pressure throughout the drilling process.
7. Start Drilling
Position the drill bit over the marked spot and slowly begin drilling. Use a continuous and even downward pressure while maintaining a steady speed. Take breaks if needed to prevent overheating.
By following these steps, you can ensure that your drill is properly set up for vertical drilling, resulting in accurate and precise holes every time.
Techniques for Maintaining Verticality During Drilling
1. Proper Setup and Alignment
Before starting the drilling process, it is crucial to ensure that the drilling equipment is properly set up and aligned. This includes checking the verticality of the drilling rig and making necessary adjustments to ensure it is perfectly vertical. An inclinometer or a spirit level can be used to measure the vertical alignment of the rig.
2. Stabilization and Support
To maintain verticality during drilling, it is important to have proper stabilization and support systems in place. This can be achieved by using stabilizers or guide shoes, which help to keep the drill bit on the right trajectory. Stabilizers are typically attached to the bottom of the drill string and provide additional stability and control.
3. Monitoring and Adjustments
Continuous monitoring of the drilling process is essential to ensure verticality is maintained. This can be done by using a gyroscope or an electronic inclination tool that provides real-time data on the inclination and direction of the drill bit. If any deviation from the vertical is detected, immediate adjustments should be made to correct the trajectory.
4. Proper Drill Bit Selection
The choice of drill bit can greatly affect the ability to maintain verticality during drilling. It is important to select a high-quality drill bit that is designed for vertical drilling. Diamond bits or PDC (Polycrystalline Diamond Compact) bits are often used for vertical drilling as they provide better control and stability.
5. Slow and Steady Drilling
Drilling too quickly can increase the likelihood of losing verticality. It is recommended to drill slowly and steadily, allowing the drill bit to penetrate the formation smoothly. This helps to minimize any unexpected movements or deviations from the desired vertical path.
6. Regular Surveying
Performing regular surveying throughout the drilling process is crucial to ensure verticality is maintained. This involves using surveying tools to measure the inclination and direction of the wellbore. Based on the survey data, any necessary adjustments can be made to keep the wellbore on the desired vertical path.
7. Core Orientation
Core orientation is a method used to determine the orientation of rock formations and helps to maintain verticality while drilling. By orienting the cores extracted during drilling, the correct trajectory can be established and maintained. This technique is particularly useful in geologically complex areas.
8. Proper Mud Weight
The mud weight plays a crucial role in maintaining verticality during drilling. By adjusting the mud weight, the hydrostatic pressure can be controlled to stabilize the wellbore. This helps to prevent any deflection or deviation from the vertical path.
9. Wellbore Cleaning
Regular and proper wellbore cleaning is essential to maintain verticality. Accumulated debris or cuttings in the wellbore can cause the drill string to deviate from the desired trajectory. Effective wellbore cleaning can be achieved by using drilling fluids and proper circulation techniques.
10. Quality Control and Supervision
Finally, maintaining verticality during drilling requires quality control and supervision. Experienced drillers should oversee the drilling operations and ensure that all techniques and methods are being followed correctly. Regular inspections, wellbore surveys, and analysis of drilling parameters can help identify any potential issues and allow for prompt corrective actions.
Common Challenges and Troubleshooting Tips
1. Drilling at an Angle
One common challenge when drilling is maintaining a perfectly vertical hole. This can happen due to the drill bit slipping or the drilling surface being uneven. To address this issue, follow these troubleshooting tips:
- Double-check that the drill bit is securely tightened in the chuck before drilling.
- Apply pressure evenly and steadily while drilling to minimize any rocking or tilting of the drill.
- Use a level or a plumb line to ensure the drill is aligned vertically before drilling.
2. Bit Getting Stuck
If the drill bit gets stuck in the hole while drilling, there are a few troubleshooting steps you can take:
- Reverse the drill’s direction to try and back the bit out of the hole.
- Apply WD-40 or another lubricant to the stuck bit to reduce friction.
- Tap the end of the bit lightly with a hammer to try and loosen it.
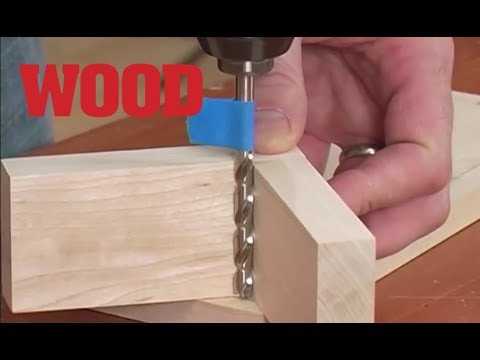
3. Chipping or Splintering of the Material
When drilling into certain materials, such as wood or tile, there is a risk of chipping or splintering. To minimize this issue, follow these troubleshooting tips:
- Apply masking tape over the drilling area to reduce splintering.
- Use a slower drill speed to minimize the chances of chipping.
- Use a specialized drill bit designed for the specific material you are working with.
4. Drill Bit Dulling or Breaking
Over time, drill bits can become dull or even break. To prevent this from happening, consider the following tips:
- Ensure the drill is set to the appropriate speed for the material you are drilling.
- Use cutting fluid or lubricant to reduce heat and friction that can dull or damage the bit.
- Regularly inspect the drill bit for signs of wear and replace it if necessary.
5. Dust and Debris
When drilling, dust and debris can accumulate, making it difficult to see and potentially causing damage to the drill or the work surface. Try these troubleshooting steps:
- Use a vacuum or dust collection system to capture dust and debris as you drill.
- Wear safety goggles and a mask to protect yourself from the dust.
- Clean the drill bit and the drilled hole regularly to remove any accumulated debris.
6. Drill Overheating
If the drill becomes too hot while drilling, it can decrease its performance and potentially damage the motor. To avoid overheating, follow these troubleshooting tips:
- Allow the drill to rest periodically, especially when working on challenging materials.
- Use cutting fluid or lubricant to reduce heat and friction.
- Ensure the drill is set to the appropriate speed for the material being drilled.
| Problem | Troubleshooting Tip |
|---|---|
| Drilling at an Angle | Double-check the drill bit is tightened, apply even pressure, and use a level. |
| Bit Getting Stuck | Reverse the drill’s direction, lubricate the stuck bit, or tap it lightly with a hammer. |
| Chipping or Splintering | Apply masking tape, use a slower drill speed, or choose a specialized drill bit. |
| Drill Bit Dulling or Breaking | Use appropriate drill speed, lubricate the bit, and regularly inspect for wear. |
| Dust and Debris | Use a vacuum, wear safety goggles and a mask, and clean the drill bit and hole regularly. |
| Drill Overheating | Allow the drill to rest, use cutting fluid, and set the appropriate drill speed. |
FAQ:
What is the importance of drilling vertical holes?
Drilling vertical holes is important in various industries such as construction and manufacturing as it ensures accuracy, stability, and precise alignment of structures and components.
Why is it important to secure the drilling surface?
Securing the drilling surface is important as it prevents movement or vibrations during the drilling process, ensuring accuracy and stability of the hole being drilled.
Can a regular handheld drill be used to drill vertical holes?
A regular handheld drill can be used to drill vertical holes, but it is more challenging to achieve perfect verticality compared to using a drill press or drilling machine.
Video:


Meet Harrison Clayton, a distinguished author and home remodeling enthusiast whose expertise in the realm of renovation is second to none. With a passion for transforming houses into inviting homes, Harrison's writing at https://thehuts-eastbourne.co.uk/ brings a breath of fresh inspiration to the world of home improvement. Whether you're looking to revamp a small corner of your abode or embark on a complete home transformation, Harrison's articles provide the essential expertise and creative flair to turn your visions into reality. So, dive into the captivating world of home remodeling with Harrison Clayton and unlock the full potential of your living space with every word he writes.


