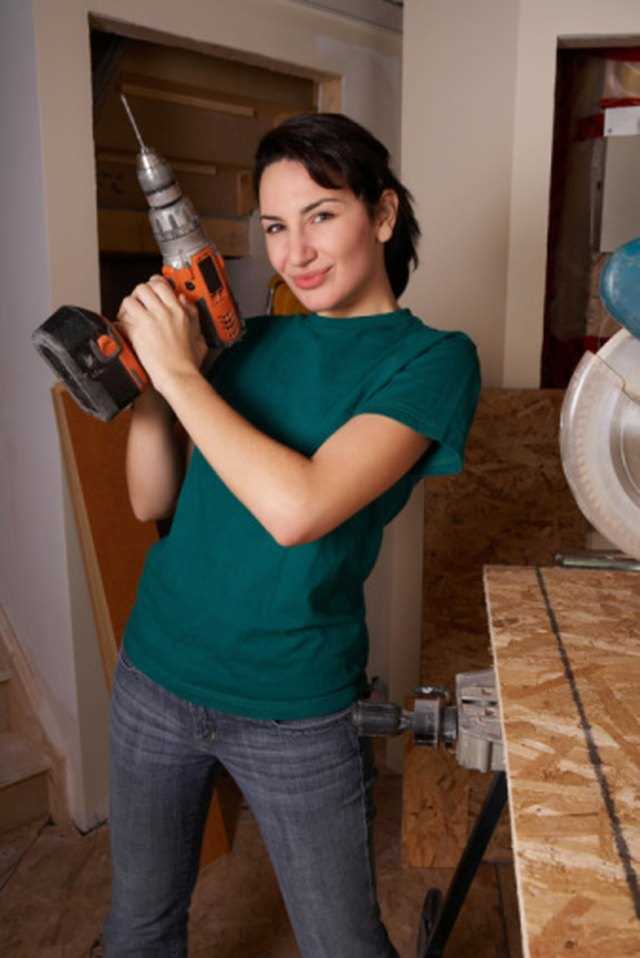
Mastering the art of drilling into plaster walls

Drilling into plaster walls can be a daunting task for many homeowners. The fear of damaging the wall or causing cracks can make even the most experienced DIYers hesitant to take on the job. However, with the right tools and techniques, drilling into plaster walls can be a simple and stress-free process.
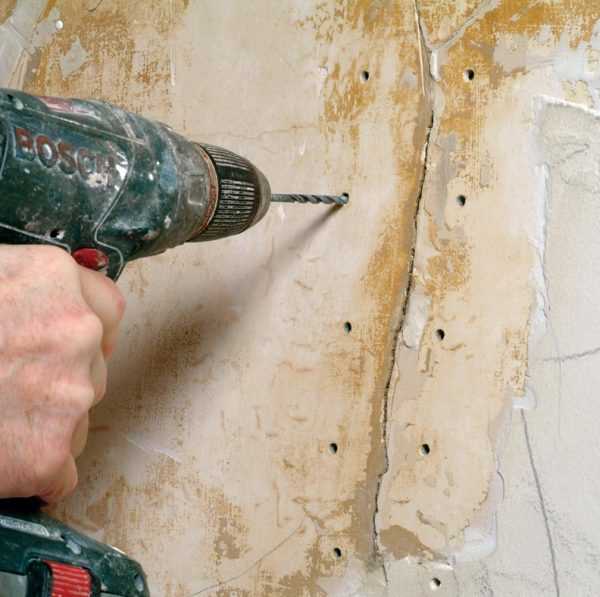
One of the most important steps in drilling into plaster walls is choosing the right drill bit. A masonry bit is the best option for drilling into plaster, as it is designed to drill through hard materials like concrete and stone. It is important to use a sharp drill bit and to avoid applying too much pressure, as this can cause the plaster to crack. Starting with a small pilot hole and gradually increasing the size can also help prevent damage to the plaster.
Another crucial aspect to consider when drilling into plaster walls is the location of electrical wiring and plumbing. Before starting any drilling, it is important to use a stud finder to locate studs and avoid drilling into electrical wires or pipes. This can help prevent any accidents or damage to the electrical system in your home.
Once you have chosen the right drill bit and located the proper drilling location, it is important to take your time and use a steady hand. Plaster is a delicate material, and rushing through the drilling process can result in cracks or crumbling. By taking your time and applying even pressure, you can ensure a clean and precise hole every time.
The importance of proper tools and techniques for drilling into plaster walls
Introduction
Drilling into plaster walls is a common task when it comes to hanging pictures, shelves, or installing other fixtures. However, it’s important to use the proper tools and techniques to ensure success and avoid damaging the plaster.

Tools
Using the right tools is crucial when drilling into plaster walls. Here are some essential tools to have:
- Drill: A good quality drill is necessary to handle the tough plaster material. It is recommended to use a drill with a variable speed setting for better control.
- Masonry drill bit: A special masonry drill bit is required to effectively penetrate the plaster without causing excessive damage or cracking.
- Screwdriver: Depending on the project, having a screwdriver on hand may be necessary to drive screws into the wall after drilling.
- Stud finder: If you are drilling into a plaster wall to hang something heavy, it’s important to locate the studs for added stability. A stud finder can help identify the studs behind the plaster.
- Level: To ensure that your fixtures are straight and level, a level tool is essential.
Techniques
In addition to having the right tools, using proper techniques when drilling into plaster walls is vital. Here are some tips to follow:
- Locate studs: Before drilling, use a stud finder to locate the studs behind the plaster. This will provide a strong and secure anchor point for your fixtures, especially if they are heavy.
- Mark the spot: Once you have located the spot where you want to drill, mark it with a pencil. This will ensure accuracy and prevent unnecessary damage to the surrounding area.
- Start with a small pilot hole: Instead of drilling directly with a large drill bit, start by making a small pilot hole with a smaller drill bit. This will help prevent the plaster from cracking or chipping.
- Use low speed: When drilling into plaster, it’s important to use a low speed setting on your drill. High speed can cause the plaster to crack or crumble.
- Apply gentle pressure: Apply gentle and even pressure when drilling into plaster. Pushing too hard can cause the drill bit to get stuck or the plaster to break.
- Use a vacuum cleaner: To minimize the amount of dust created while drilling, it’s a good idea to have a vacuum cleaner nearby. You can use it to suck up any dust particles that are generated.
Conclusion
When it comes to drilling into plaster walls, using the proper tools and techniques is essential. By investing in quality tools and following the right procedures, you can ensure success and avoid unnecessary damage to your walls. Remember to always exercise caution and patience when working with plaster to achieve the best results.
Preparing your workspace and protecting the area
Before you begin drilling into plaster walls, it’s important to prepare your workspace and take steps to protect the surrounding area. This will help prevent any unwanted damage and make the drilling process easier and more efficient.

Clean the area
Start by clearing the area around the wall from any furniture, decorations, or other objects that may obstruct your work. This will give you more space to maneuver and help prevent anything from getting damaged during the drilling process.
Cover the floor and nearby surfaces
Next, cover the floor and any nearby surfaces with a drop cloth or plastic sheeting to protect them from dust, debris, and potential damage. Plaster dust can be messy and difficult to clean, so taking the time to cover your workspace will save you a lot of time and effort in the long run.
Use painter’s tape
If you’re drilling near delicate areas such as windows or door frames, consider using painter’s tape to protect the surface. Apply the tape around the edges of the area you want to protect, creating a barrier that will prevent any accidental damage while drilling.
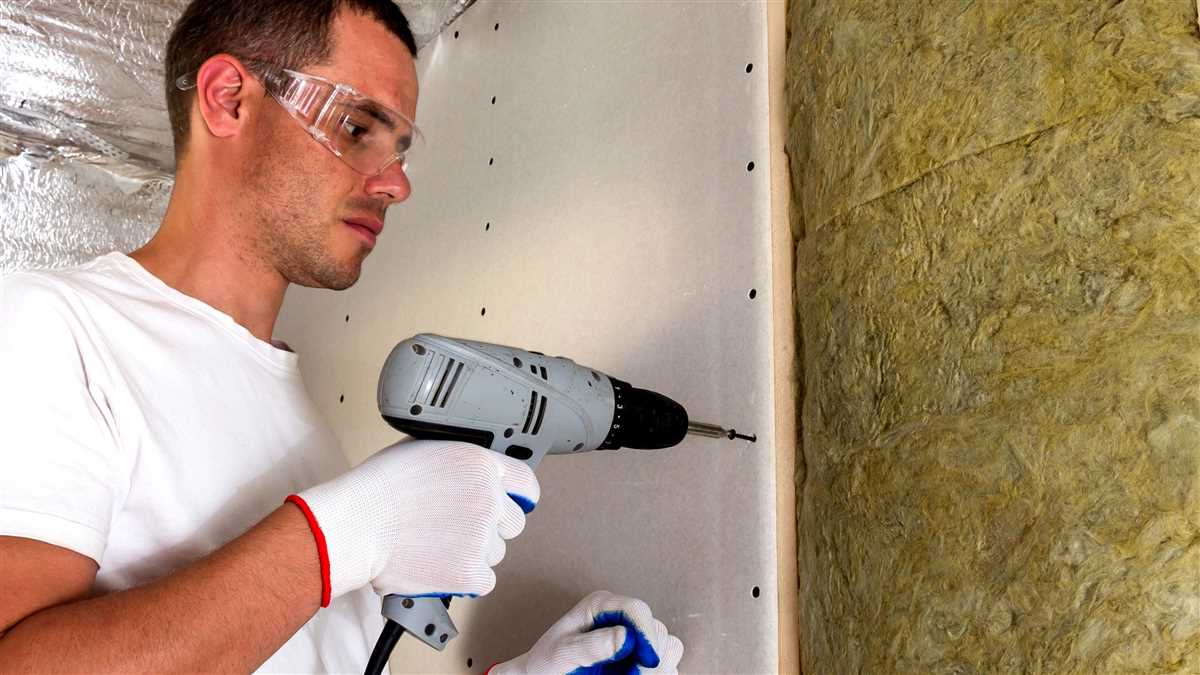
Wear safety gear
When drilling into plaster walls, it’s important to protect yourself as well. Wear safety goggles to shield your eyes from any flying debris, and consider wearing a dust mask to prevent inhalation of plaster dust.
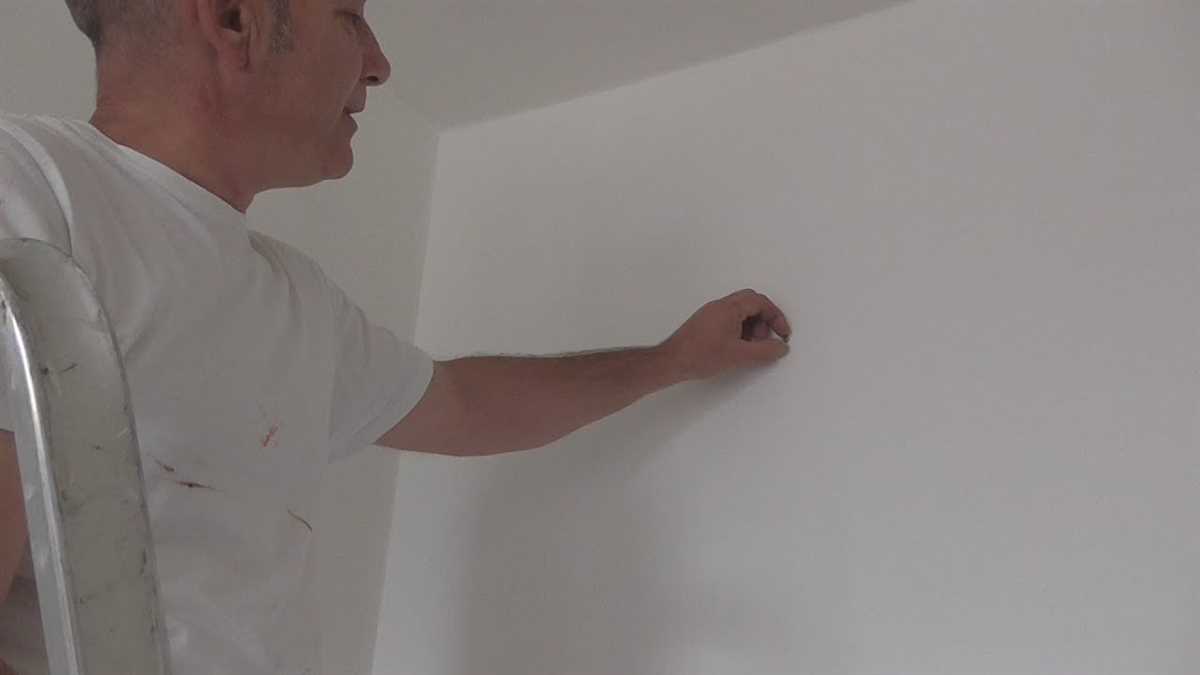
Mark the drilling spot
Before you start drilling, take the time to mark the exact spot where you want to drill. Use a pencil or a small piece of painter’s tape to create a clear and visible target. This will help you drill more accurately and prevent any unnecessary mistakes.

Secure your drill
It’s important to secure your drill with an appropriate bit and make sure it is in good working condition. Check the drill’s power source, tighten any loose parts, and ensure that the drill bit is well-suited for drilling into plaster walls.
Clear the area of obstacles
Before drilling, make sure there are no electrical wires, plumbing pipes, or other obstacles behind the wall in the area where you plan to drill. Use a stud finder or a similar tool to detect any potential obstructions and adjust your drilling location if necessary.
By following these steps to prepare your workspace and protect the area, you’ll be ready to start drilling into plaster walls with confidence and ease.
Understanding the composition of plaster and common challenges
Plaster is a common material used in the construction of walls and ceilings. It is a mixture of cement, sand, and water, along with other additives to improve its strength and workability. Plaster has been used for centuries due to its ability to create smooth and durable surfaces.
Composition of plaster
The main component of plaster is cement, which provides the strength and binding properties. Sand is added to the mixture to improve workability and reduce shrinkage. Water is necessary for the chemical reaction that occurs during the curing process, where the plaster hardens and becomes solid. Additional additives such as lime or gypsum may be included to enhance certain properties of the plaster.

Challenges when drilling into plaster walls
Drilling into plaster walls can present several challenges due to the composition and nature of the material. It is important to understand these challenges in order to avoid potential damage or issues.
- Brittleness: Plaster can be brittle, especially if it is old or has not been properly maintained. This means that it can crack or chip easily if not handled carefully during drilling.
- Hardness: Plaster is a relatively hard material, which can make it more difficult to drill into compared to other wall materials like drywall. This may require the use of specialized tools or techniques.
- Dust and debris: When drilling into plaster, it is common to generate dust and debris. This can be messy and may require appropriate measures to minimize the spread of dust, such as using a dust extraction system or covering nearby furniture and surfaces.
- Hidden obstacles: Behind plaster walls, there may be electrical wires, pipes, or other obstacles that can be accidentally damaged while drilling. It is crucial to use a stud finder or other detection tools to locate these obstacles before drilling.
- Plaster repair: If the drilling results in damage to the plaster, it may be necessary to repair the affected area. This can involve patching the hole, applying a new layer of plaster, and matching the texture and finish of the surrounding area.
By understanding the composition of plaster and the common challenges associated with drilling into it, you can approach the task with caution and take the necessary precautions to ensure a successful outcome.
Finding the right drill bit for plaster walls
Drilling into plaster walls requires the use of the right drill bit to avoid causing damage to the material. Plaster walls are often more delicate than other wall materials, such as drywall or concrete, and using the wrong drill bit can result in cracks or crumbling plaster.
Types of drill bits for plaster walls
There are several types of drill bits that are suitable for drilling into plaster walls. The following are some of the most commonly used:
- Masonry drill bits: These are designed for drilling through hard materials like plaster and concrete. They are made of hardened steel and have a pointed tip for easy penetration.
- Tungsten carbide drill bits: These drill bits are known for their durability and ability to drill through tough materials, including plaster. They have a carbide tip that can withstand high heat and friction.
- Tile drill bits: While primarily designed for drilling into tiles, these drill bits can also be used for plaster walls. They have a carbide tip that makes them suitable for drilling through hard materials.
Considerations when choosing a drill bit

When selecting a drill bit for plaster walls, there are a few factors to consider:
- Size: Choose a drill bit that is appropriate for the size of the hole you need to create. It’s important to select a bit that is slightly smaller than the final size you require to prevent excessive damage to the plaster.
- Type of plaster: Different types of plaster may require different drill bits. For example, gypsum plaster is softer and may not require as heavy-duty a bit as lime plaster. Consider the composition and hardness of the plaster when choosing a drill bit.
- Speed and pressure: Use a slower speed when drilling into plaster walls to minimize the risk of cracking or damaging the material. Apply gentle, even pressure to avoid putting too much strain on the plaster.
- Practice: If you are new to drilling into plaster walls, consider practicing on a small, inconspicuous area first to get a feel for the material and refine your technique.
By using the appropriate drill bit and following these considerations, you can effectively drill into plaster walls without compromising their integrity.
Techniques for minimizing damage and creating clean holes
1. Use the right drill and bit
Using the appropriate drill and drill bit can make a significant difference in the quality of the hole you create. For drilling into plaster walls, it is recommended to use a rotary drill with a hammer function. This helps to ensure precise drilling and prevents the plaster from cracking. Additionally, choose a drill bit specifically designed for masonry or plaster walls to achieve clean holes.
2. Mark the drilling points accurately
Before starting to drill, it is essential to mark the drilling points accurately. Use a tape measure and a pencil to ensure that the marks are aligned and at the correct height and width. This will prevent unnecessary holes and minimize damage to the plaster surface.
3. Start with a pilot hole
To prevent the plaster from chipping or cracking when drilling, it is advisable to start with a pilot hole. Use a smaller drill bit than the final hole size and gently drill into the marked point. This will help guide the larger drill bit and reduce the risk of damage to the plaster.
4. Use a low drill speed
When drilling into plaster walls, it is best to use a low drill speed. This allows for better control and reduces the risk of the drill bit skipping or causing unnecessary damage. Slower speeds also generate less heat, which can help prevent the plaster from cracking or disintegrating.
5. Apply gentle pressure and monitor the drilling process
When drilling into plaster walls, it is important to apply gentle and consistent pressure. Pushing too hard can cause the plaster to crack or chip. Additionally, it is crucial to monitor the drilling process carefully. If you notice any signs of cracking or crumbling, stop drilling immediately and readjust your technique.
6. Clean the hole after drilling
Once you have created the hole, it is essential to clean it thoroughly. Use a brush or a vacuum cleaner to remove any dust or debris from the drilled hole. This will ensure a clean and secure anchor point for any screws or anchors you plan to insert.
7. Practice on a spare piece of plaster
If you are new to drilling into plaster walls or are unsure of your skills, it is a good idea to practice on a spare piece of plaster before drilling into the actual wall. This will help you familiarize yourself with the drilling process and allow you to refine your technique without the risk of damaging the wall.
8. Seek professional help if needed
If you are uncertain about drilling into plaster walls or are dealing with a delicate or ornate plaster surface, it is best to seek professional help. A professional can provide expert advice and perform the drilling task with precision, minimizing any potential damage to the plaster.
| Technique | Description |
|---|---|
| Use the right drill and bit | Choose a rotary drill with a hammer function and a drill bit designed for masonry or plaster walls. |
| Mark the drilling points accurately | Use a tape measure and pencil to ensure precise alignment and prevent unnecessary damage to the plaster surface. |
| Start with a pilot hole | Begin drilling with a smaller drill bit to guide the larger drill bit and reduce the risk of damage. |
| Use a low drill speed | Drill at a slow speed to maintain control and prevent cracking or disintegration of the plaster. |
| Apply gentle pressure and monitor the drilling process | Use consistent and gentle pressure, and stop drilling if any damage or cracking occurs. |
| Clean the hole after drilling | Remove dust and debris from the drilled hole with a brush or vacuum cleaner. |
| Practice on a spare piece of plaster | Practice drilling on a spare piece of plaster before working on the actual wall. |
| Seek professional help if needed | If unsure or dealing with delicate plaster, consult a professional for assistance. |
Dealing with electrical wiring and other obstacles behind plaster walls
1. Identify potential obstacles
Before drilling into a plaster wall, it is important to identify any potential obstacles that may be present behind the wall. Electrical wiring, pipes, and other hidden fixtures can pose a risk if drilled into. To avoid accidents or damage, ensure to locate these obstacles before proceeding with any drilling.
2. Use a stud finder
A stud finder is a handy tool that can help you locate the wooden studs behind the plaster wall. This can give you an indication of where the electrical wiring may be running, as it often follows the path of the studs. By knowing the location of the studs, you can avoid drilling near them and minimize the risk of hitting any electrical wires.
3. Turn off the power
If you are uncertain about the location of electrical wiring behind the plaster wall, it is recommended to turn off the power to the specific area or even the entire house. This will eliminate the risk of accidentally drilling into live wires and potentially causing an electric shock or fire.
4. Use caution when drilling
When drilling into a plaster wall, it is essential to proceed with caution. Start with a small drill bit and gradually increase the size if needed. Use a steady hand and apply gentle pressure to avoid damaging any obstacles behind the wall. If you encounter resistance or feel like you might be drilling into something other than plaster, stop immediately and reassess the situation.
5. Consult a professional
If you are uncertain about dealing with electrical wiring or other obstacles behind plaster walls, it is recommended to consult a professional. Electricians or experienced contractors can help you safely navigate the challenges of drilling into plaster walls, ensuring the integrity of the wall and the safety of your home.
Patching and repairing holes in plaster walls
Whether you’ve accidentally created a hole while hanging a picture frame or need to repair the damage caused by plumbing or electrical work, patching and repairing holes in plaster walls is a necessary skill for any homeowner. Fortunately, with the right tools and techniques, you can achieve professional-looking results.
Materials you will need:
- Drywall joint compound
- Plaster patching compound
- Sanding block or sandpaper
- Putty knife
- Paintbrush or roller
- Primer
- Paint
Steps to patch and repair holes:
- Clean the area: Use a damp cloth to clean the area around the hole and remove any loose plaster or debris.
- Prepare the hole: Use a putty knife to widen and smooth out the edges of the hole. This will help the patching compound adhere better.
- Apply the patching compound: Fill the hole with plaster patching compound using a putty knife. Make sure to press the compound firmly into the hole and smooth it out evenly.
- Sand the patched area: Once the patching compound is dry, use a sanding block or sandpaper to smooth the patched area until it blends with the surrounding wall.
- Prime and paint: Apply a coat of primer to the patched area to ensure a uniform finish. Once the primer is dry, paint the patched area to match the rest of the wall.
Tips:
- For larger holes, you may need to use drywall joint compound instead of plaster patching compound.
- Make sure to follow the manufacturer’s instructions when using patching compounds and primers.
- If the hole is too large or the damage extends beyond the plaster, you may need to consult a professional.
Conclusion:
Patching and repairing holes in plaster walls is a relatively simple process that can be done by most homeowners. By following the steps outlined above and using the right materials, you can achieve seamless repairs and maintain the integrity of your plaster walls.
Tips for safely hanging heavy objects on plaster walls
1. Determine the type of plaster
Before hanging any heavy objects on your plaster walls, it’s important to determine the type of plaster you have. Plaster walls can be made of three main types of plaster: lime plaster, gypsum plaster, or cement plaster. Knowing the type of plaster will help you choose the right hardware and techniques for hanging heavy objects.
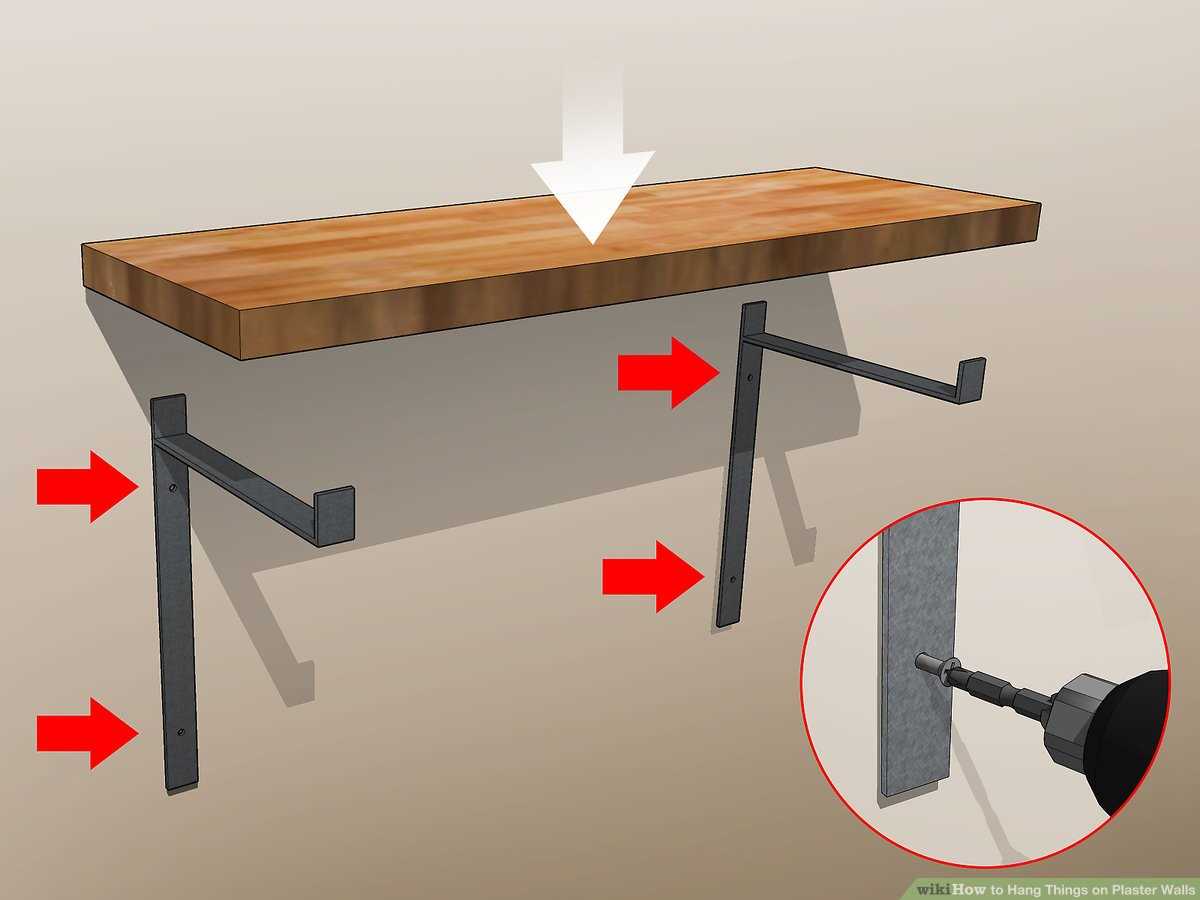
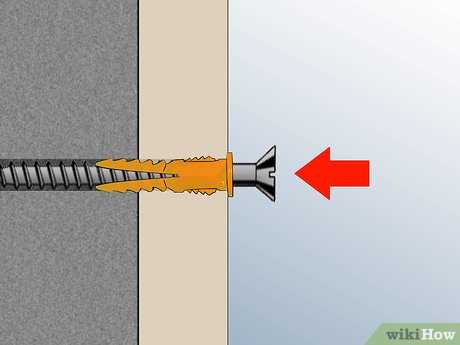
2. Use anchors or toggle bolts
When hanging heavy objects on plaster walls, it’s crucial to use anchors or toggle bolts to distribute the weight evenly and prevent damage to the plaster. These hardware options provide a secure hold and are designed to support heavy items. Make sure to choose anchors or toggle bolts that are suitable for the weight of the object you are hanging.
3. Locate studs
If possible, try to locate the studs in your plaster walls before hanging heavy objects. Studs offer additional support and stability, making them ideal for hanging heavy items. Use a stud finder or knock on the wall to listen for a solid sound, indicating the presence of a stud.
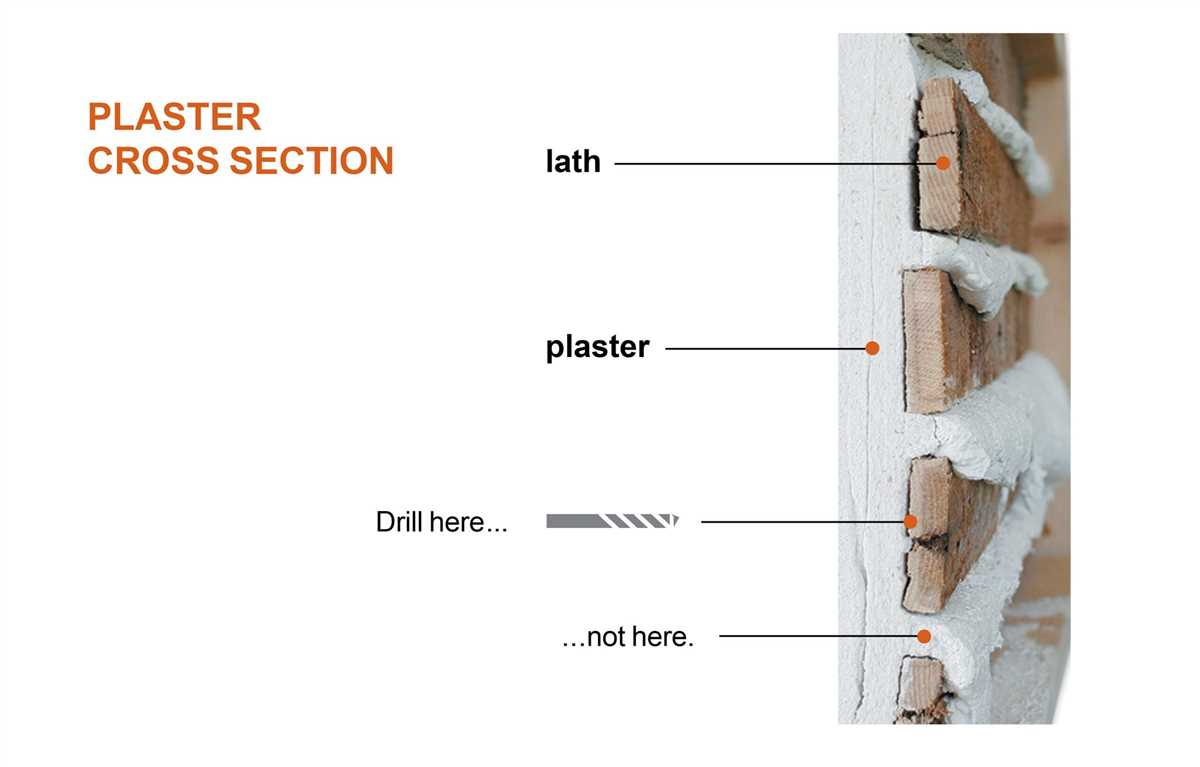
4. Avoid hanging directly on lath
Plaster walls are typically constructed with a layer of lath underneath the plaster. It’s important to avoid hanging heavy objects directly on the lath as it may not be able to support the weight. Instead, use anchors or toggle bolts that go through the plaster and secure into the underlying studs or wall framing.
5. Distribute the weight
When hanging heavy objects on plaster walls, it’s important to distribute the weight evenly to avoid putting stress on one area. If possible, use multiple anchors or toggle bolts spaced apart to distribute the weight across a larger surface area.
6. Use a level
Before drilling any holes or attaching hardware to your plaster walls, use a level to ensure that the object will hang straight. Measure and mark the desired location, check the level, and adjust if necessary. This will help you achieve a visually appealing result.
7. Test the weight capacity
Before hanging your heavy object on the plaster wall, it’s a good idea to test the weight capacity by applying gentle pressure or hanging a lighter object first. This will ensure that the anchors or toggle bolts are securely attached and can support the weight.
8. Seek professional help if needed
If you are unsure about the process of hanging heavy objects on plaster walls or if you have extremely heavy items to hang, it’s best to seek professional help. A professional contractor or handyman will have the experience and knowledge to ensure a safe and secure installation.
By following these tips, you can safely hang heavy objects on your plaster walls without causing damage or compromising their integrity.
Maintenance and care for plaster walls to avoid future drilling challenges
Regular cleaning
Keeping plaster walls clean can help maintain their strength and durability, preventing the need for frequent drilling. Dust and dirt can accumulate over time, weakening the plaster and making it more challenging to drill into. Regularly dusting the walls with a soft cloth or vacuuming them with a soft brush attachment can help remove any dirt and dust particles.
Avoid excessive moisture
Excessive moisture can weaken plaster walls and make them more susceptible to damage and crumbling. To avoid future drilling challenges, it’s important to prevent moisture buildup on the walls. Be cautious when using water near the walls, such as during cleaning or painting, and make sure to dry them thoroughly afterwards.
Inspect for cracks and damage
Perform regular inspections of your plaster walls to identify any cracks or damage. If you notice any cracks, it’s important to repair them promptly to prevent further deterioration. Use a plaster patching compound to fill in any cracks or holes, following the manufacturer’s instructions. This will help maintain the integrity of the plaster and make drilling easier in the future.
Use the right tools and techniques when drilling
When it is necessary to drill into your plaster walls, it’s important to use the correct tools and techniques to minimize any potential damage. Use a drill bit specifically designed for plaster or masonry walls, as regular wood or metal drill bits may not be suitable. It’s also essential to drill slowly and apply gentle pressure to avoid causing cracks or crumbling.
Consider using alternative hanging methods
If you frequently need to hang objects on your walls, and drilling into plaster is challenging for you, consider using alternative hanging methods that don’t require drilling. For example, adhesive hooks or picture hanging strips can be used to hang lightweight items without causing damage to the plaster. There are also removable wall anchors available that can provide a secure hold without the need for drilling.
Conclusion
By following these maintenance and care tips, you can help prevent future drilling challenges with your plaster walls. Regular cleaning, avoiding excessive moisture, inspecting for cracks, using the right drilling tools and techniques, and considering alternative hanging methods can all contribute to maintaining the strength and integrity of your plaster walls.
FAQ:
What tools do I need to drill into plaster walls?
To drill into plaster walls, you will need a drill, a masonry drill bit, a pencil, a level, a screwdriver, and anchors or screws to secure your object to the wall.
How do I find a stud behind a plaster wall?
To find a stud behind a plaster wall, you can use a stud finder or tap the wall lightly to listen for a solid thud, which indicates a stud.
Are there any precautions to take when drilling into plaster walls?
Yes, there are a few precautions you should take when drilling into plaster walls. First, make sure you wear safety goggles and a mask to protect yourself from dust. It’s also a good idea to turn off the power in the area you will be drilling to avoid electrical hazards.
How do I repair a hole in a plaster wall?
To repair a hole in a plaster wall, you will need to clean the hole, apply a patching compound, smooth it out, and let it dry. Then, you can sand the area and repaint it to match the rest of the wall.
Is it possible to hang heavy objects on plaster walls?
Yes, it is possible to hang heavy objects on plaster walls. However, you will need to use anchors or screws specifically designed for plaster walls and make sure they are securely attached to the wall.
Can I use a regular drill bit to drill into plaster walls?
No, it is not recommended to use a regular drill bit to drill into plaster walls. Plaster is a hard material, and using a masonry drill bit will make the drilling process much easier and prevent damage to the plaster.
How do I determine the right size of the drill bit for drilling into plaster walls?
To determine the right size of the drill bit for drilling into plaster walls, you can measure the diameter of the anchors or screws you will be using and choose a drill bit that is slightly smaller in size.
Video:


Meet Harrison Clayton, a distinguished author and home remodeling enthusiast whose expertise in the realm of renovation is second to none. With a passion for transforming houses into inviting homes, Harrison's writing at https://thehuts-eastbourne.co.uk/ brings a breath of fresh inspiration to the world of home improvement. Whether you're looking to revamp a small corner of your abode or embark on a complete home transformation, Harrison's articles provide the essential expertise and creative flair to turn your visions into reality. So, dive into the captivating world of home remodeling with Harrison Clayton and unlock the full potential of your living space with every word he writes.


