Learn the Basics of Drilling Pilot Holes for Perfectly Straight Screw Installation

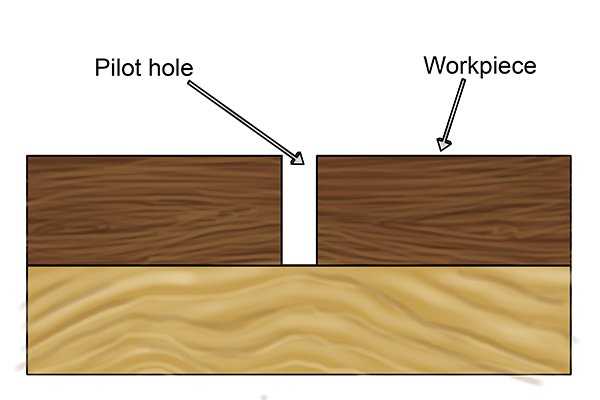
When it comes to woodworking or DIY projects, one of the keys to achieving a professional finish is ensuring that your screws are perfectly straight and secure. A simple but important technique to achieve this is to drill pilot holes before driving in the screws. Pilot holes are small-diameter holes that are drilled into the surface before inserting a screw. They provide a guide for the screw and help prevent the wood from splitting or the screw from going off course.
Drilling pilot holes is especially important when working with hardwoods or softwoods that are prone to splitting. It not only helps prevent damage to the wood, but it also ensures that the screw goes in smoothly and at the right angle. Pilot holes are also essential when working with large or long screws, as they can be more difficult to drive in without a pre-drilled hole.
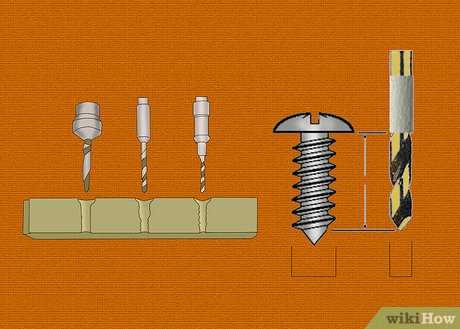
To drill a pilot hole, start by selecting a drill bit that is slightly smaller in diameter than the screw you plan to use. It should be just wide enough to accommodate the screw without compromising its grip. Next, mark the spot where you want to insert the screw and hold the drill perpendicular to the surface. Apply steady pressure and drill the hole to the desired depth.
)
Important Reasons for Using Pilot Holes
- Prevent Wood from Splitting: Pilot holes help prevent wood from splitting when screws are being driven into it. This is especially important when working with hardwoods or softwoods that have a tendency to split.
- Ensure Proper Alignment: Pilot holes ensure that screws are properly aligned, especially when using a power drill. They allow the screws to go in straight without wobbling or veering off course.
- Reduce Friction: The use of pilot holes reduces friction and makes it easier to drive in screws. This can be particularly helpful when working with dense or tough materials.
- Prevent Cracks: Pilot holes help prevent cracks from forming on delicate materials, such as thin pieces of wood or plastic. By allowing the screw to enter cleanly, the risk of cracking is minimized.
- Allow for Easy Removal: When screws need to be removed, pilot holes make the process easier and less damaging. They provide a guide for the screw to follow, preventing it from getting stuck or damaging the surrounding material.
- Improve Screw Holding Power: By creating a pilot hole, the threads of the screw can engage more easily with the material, providing better holding power. This is especially important when working with materials that are prone to breaking or splitting.
- Prevent Screw Breakage: Pilot holes help prevent screw breakage by reducing the stress placed on the screw. By allowing the screw to go in smoothly, the risk of it snapping or breaking is greatly reduced.
- Save Time and Effort: While it may seem like an extra step, using pilot holes can actually save time and effort in the long run. It helps prevent mistakes, such as stripped screws or damaged materials, that can take even more time to fix.
Types of Screws That Benefit from Pilot Holes
- Hardwood Screws: When working with hardwood materials, such as oak or maple, pilot holes are essential. Hardwood is dense and can easily split when screws are inserted without a pilot hole. By creating a pilot hole, you ensure that the screw will go in smoothly and without damaging the wood.
- Softwood Screws: Softwoods, like pine or cedar, also benefit from pilot holes. Although softwoods are generally easier to work with, they can still split if a screw is inserted without a pilot hole. Creating a pilot hole allows the screw to go in more smoothly and reduces the risk of splitting.
- Large Screws: Large screws, such as those used for heavy-duty applications or when securing thick materials, often require pilot holes. These screws can be difficult to drive directly into the material without a pilot hole, and they may cause the wood to crack or split. Pilot holes ensure that the force is evenly distributed, making it easier to drive in the screw.
- Exterior Screws: When installing screws in outdoor projects or in materials exposed to the elements, pilot holes are highly recommended. The expansion and contraction of the material due to temperature changes can cause the screw to loosen over time. By using a pilot hole, you create a snug fit that reduces the risk of the screw becoming loose or falling out.
Tools and Materials Needed for Drilling Pilot Holes
Before you start drilling pilot holes, there are a few essential tools and materials you’ll need to have on hand. These include:

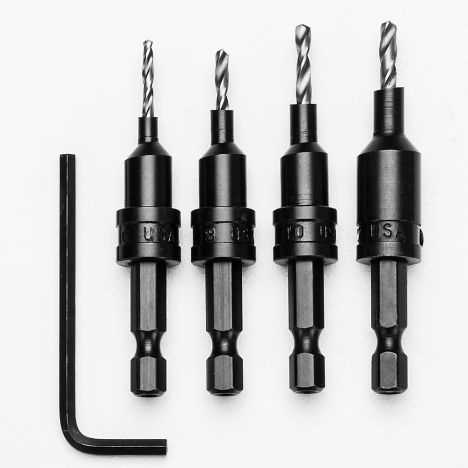
- Power drill or hand drill
- Drill bits
- Measuring tape
- Pencil or marking pen
- Clamps or vise grip
- Workbench or sturdy surface
- Protective eyewear
Let’s take a closer look at each of these items:
Power drill or hand drill
A power drill or hand drill is the main tool you’ll need for drilling pilot holes. While a power drill is faster and more efficient, a hand drill also works well for smaller projects or when you don’t have access to a power source.
Drill bits
Drill bits are attachments that fit into your drill and create the hole in the material. When drilling pilot holes, it’s important to use the correct size drill bit for the screw you plan to use. For example, if you’re using a 1/4-inch screw, you’ll want to use a 1/8-inch drill bit for the pilot hole.
Measuring tape
A measuring tape is essential for determining the correct placement and depth of your pilot holes. It helps ensure that your screws are evenly spaced and aligned, resulting in a professional-looking finish.

Pencil or marking pen
A pencil or marking pen is used to mark where your pilot holes will be drilled. This helps you keep track of your measurements and ensures accuracy.
Clamps or vise grip
Clamps or a vise grip are useful for securing your workpiece to a workbench or sturdy surface. This prevents it from moving while you drill the pilot holes and helps maintain stability.
Workbench or sturdy surface
A workbench or sturdy surface provides a stable base for drilling pilot holes. Make sure the surface is flat and secure before starting your project.
Protective eyewear
Wearing protective eyewear is crucial for your safety while drilling pilot holes. It helps protect your eyes from flying debris and ensures that you can see clearly throughout the drilling process.

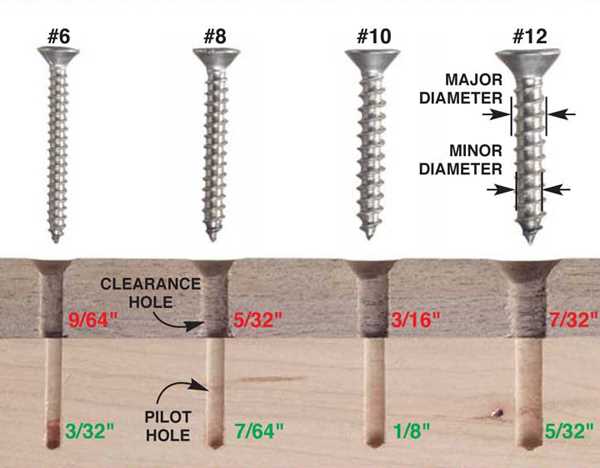
How to Determine the Correct Pilot Hole Size
When it comes to drilling pilot holes, getting the right size is crucial for a successful and precise screw installation. The correct pilot hole size ensures that the screw will go in smoothly and securely without splitting the wood or damaging the screw.
1. Identify the Screw Size
The first step in determining the correct pilot hole size is to identify the size of the screw you will be using. Screw sizes are typically indicated by a number, such as #6, #8, or #10. The larger the number, the thicker the screw.
2. Check the Screw Size Chart
Once you know the size of the screw, refer to a screw size chart. These charts will give you the recommended pilot hole size for the specific screw size you are using. You can find screw size charts online or in hardware stores.
3. Consider the Wood Type
In addition to the screw size, you also need to take into account the type of wood you will be drilling into. Softer woods, like pine or cedar, require smaller pilot holes, while harder woods, like oak or maple, require larger pilot holes to prevent splitting.
4. Test on a Scrap Piece of Wood

If you are unsure about the correct pilot hole size, it is always a good idea to test on a scrap piece of wood before drilling into your actual project. This way, you can determine if the screw goes in smoothly and if the hole is the right size for a secure fit.
5. Adjust as Needed
If the screw is too loose or tight in the pilot hole, you may need to adjust the size. If the screw is loose, try drilling a slightly larger pilot hole. If the screw is too tight or splits the wood, use a smaller pilot hole. It may take some trial and error to find the perfect pilot hole size for your specific project.
By following these steps and using the correct pilot hole size, you can ensure a perfectly straight screw installation and prevent any damage to your wood or screws.
Step-by-Step Guide to Drilling Pilot Holes
1. Select the Right Drill Bit
Start by choosing the appropriate drill bit for your pilot hole. The size of the drill bit should be slightly smaller than the diameter of the screw you will be using. This will ensure a tight fit and provide the necessary support for the screw.
2. Mark the Pilot Hole Location

Using a pencil or marker, mark the exact location where you want to drill the pilot hole. This will serve as a guide and prevent any mistakes or errors during the drilling process.
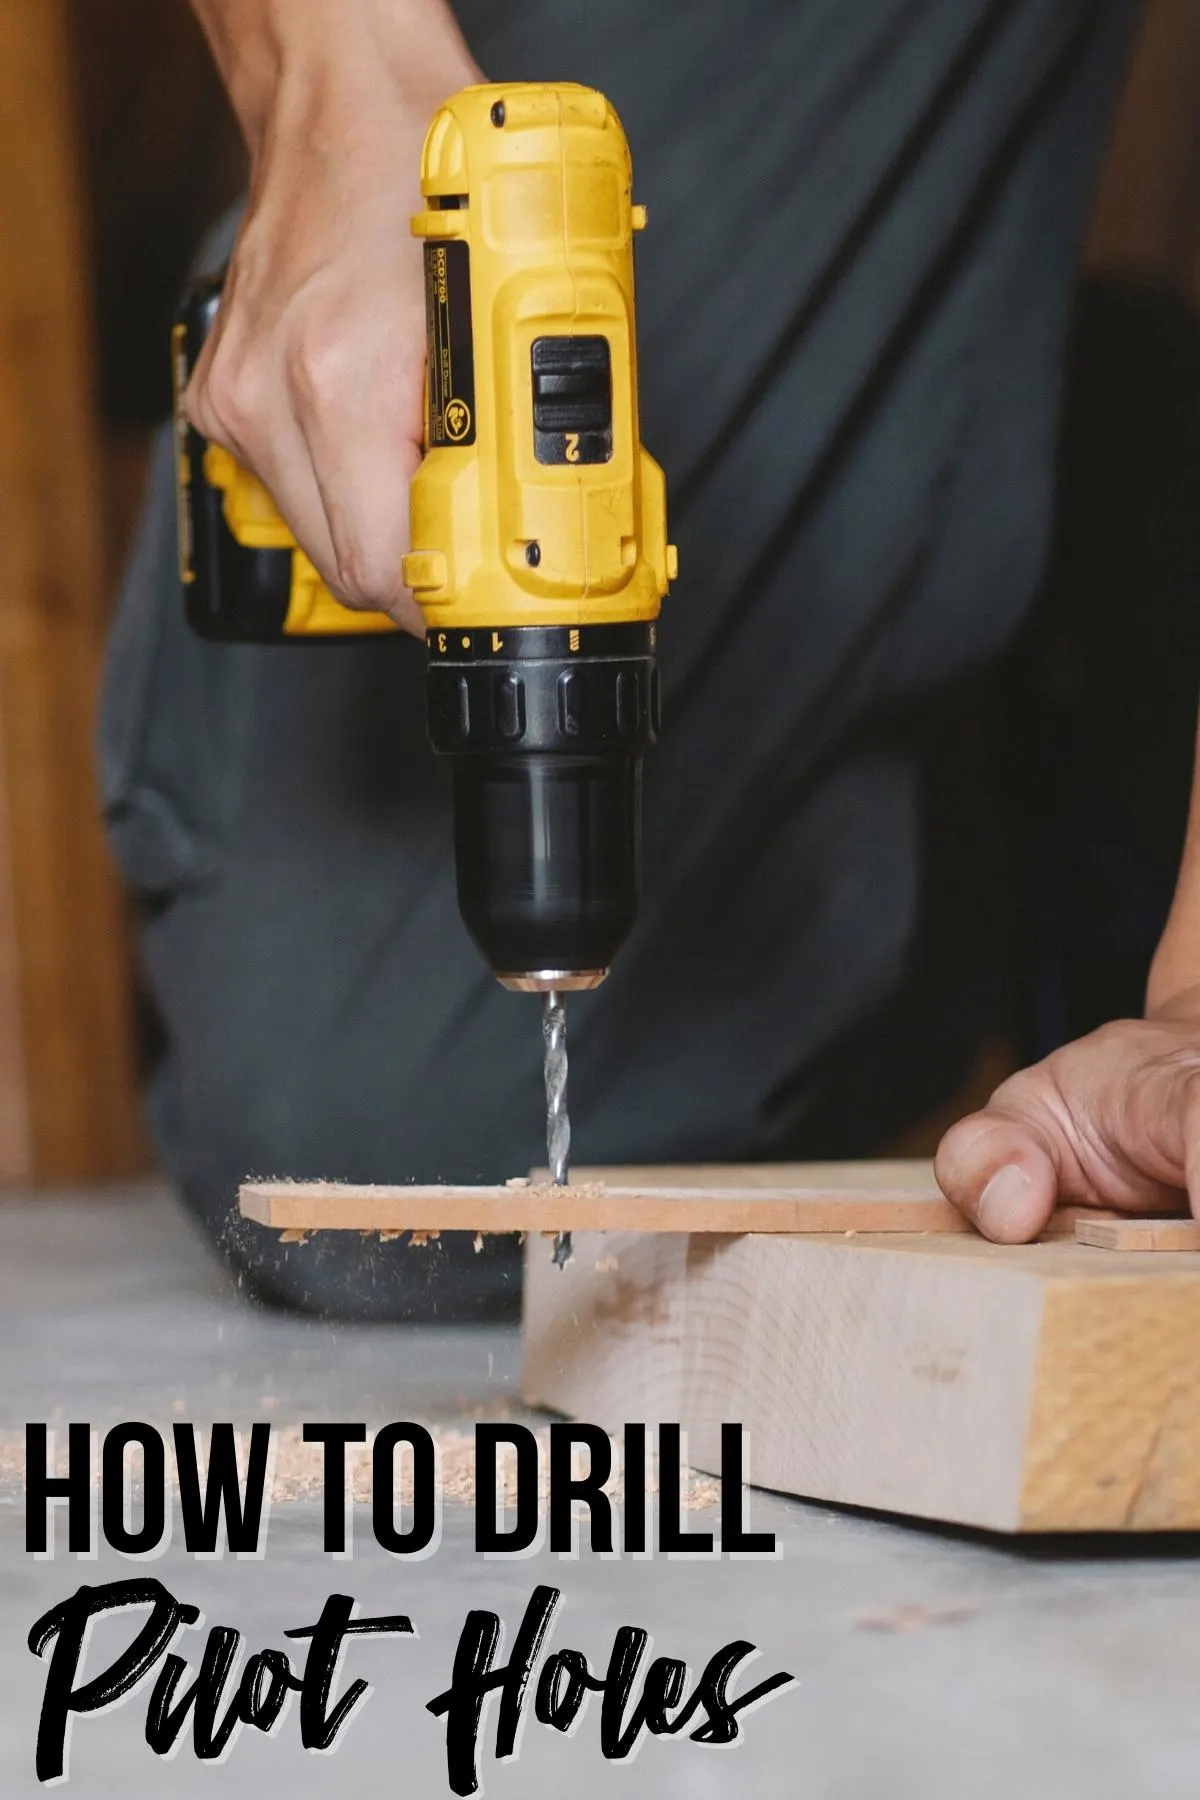
3. Secure the Workpiece
Before drilling, it’s important to secure the workpiece in place. This can be done using clamps or by firmly holding it down with your hand. This will prevent any movement or slipping during the drilling process.
4. Set the Drill to the Correct Speed
Adjust the drill to the appropriate speed setting. For drilling pilot holes, a medium speed is usually sufficient. Be sure to consult the drill’s user manual for specific speed recommendations.
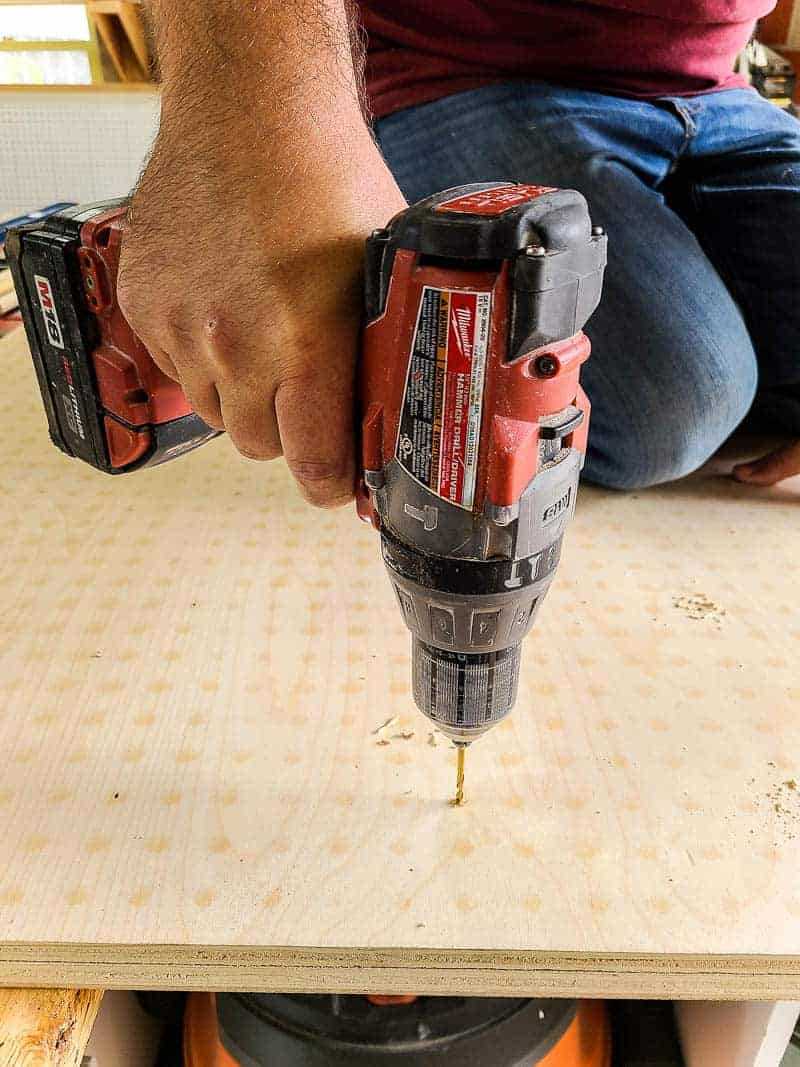
5. Drill the Pilot Hole
Position the drill bit on the marked location and apply gentle pressure. Start drilling slowly and steadily, allowing the drill bit to go through the material smoothly. It’s important to maintain control and avoid any sudden movements.
6. Measure the Depth
Measure the depth of the pilot hole to ensure it’s the correct size. The depth should be slightly shorter than the length of the screw you will be using. This will allow the screw to fully penetrate the material without any interference.
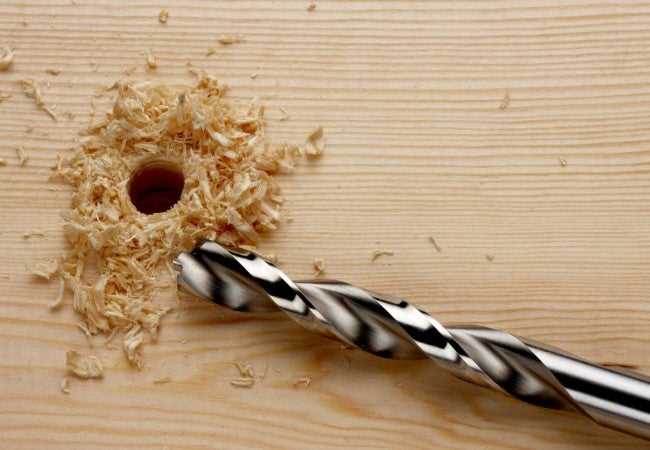
7. Clean the Pilot Hole
Use a brush or compressed air to remove any debris or dust from the pilot hole. This will ensure a clean and smooth surface for the screw to go into. A clean pilot hole will also reduce the risk of the screw getting stuck or breaking.
8. Secure the Screw
Place the screw into the pilot hole and use a screwdriver or drill to tighten it. Be careful not to over-tighten the screw, as this can lead to damage or stripping of the material. The screw should be secure, but not overly tightened.
9. Repeat the Process
If you need to install multiple screws, repeat the above steps for each pilot hole. Take your time and ensure each pilot hole is drilled accurately for the best results.
10. Test the Screws
After all the screws are installed, test each one by applying pressure or gently wiggling them. If any screws feel loose or unstable, remove them and drill a larger pilot hole for a better fit.
By following these step-by-step instructions, you can easily drill pilot holes and achieve perfectly straight screw installation every time.
Common Mistakes to Avoid When Drilling Pilot Holes
When it comes to drilling pilot holes, there are several common mistakes that people often make. These mistakes can lead to crooked or damaged screw installations, so it’s important to be aware of them and learn how to avoid them.
1. Choosing the wrong drill bit size
One of the most common mistakes when drilling pilot holes is using the wrong size drill bit. Using a drill bit that is too small can result in a loose screw that won’t hold properly, while using a drill bit that is too large can cause the wood to split. To avoid this mistake, always choose the appropriate drill bit size for the screw you are using.
2. Skipping the pilot hole altogether
Another common mistake is skipping the pilot hole process altogether. While it may be tempting to try to screw directly into the wood without pre-drilling a hole, this can lead to stripped screws or damaged surfaces. Even if you’re working with soft woods, it’s still best to create a pilot hole to ensure a clean and secure screw installation.
3. Drilling too deep
Drilling too deep is another mistake that many people make when drilling pilot holes. If you drill the hole too deep, the screw may not have enough wood to grip onto, resulting in a weak connection. To avoid this, measure the length of your screw and mark the drill bit accordingly to ensure that you drill to the correct depth.
4. Failing to clean out the pilot hole
After drilling the pilot hole, it’s important to clean out any wood debris or dust that may be left behind. Failing to do so can prevent the screw from being inserted smoothly and securely. To clean out the pilot hole, simply blow or tap out any debris before inserting the screw.
5. Not using a center punch
Using a center punch to create a small dimple in the wood before drilling the pilot hole is a step that many people skip. However, this can help prevent the drill bit from slipping and ensure that the hole is drilled in the desired location. Take the time to use a center punch to mark the spot before drilling the pilot hole.
6. Using too much force

Using too much force when drilling the pilot hole can cause the drill bit to slip and result in an inaccurate hole. It’s important to apply steady, even pressure and let the drill bit do the work. Avoid pushing down too hard or forcing the drill through the wood.
7. Not testing the pilot hole with a screw
Before screwing in the final screw, it’s important to test the pilot hole with a screw of the same size to ensure that it fits properly. This will help you identify any issues and make any necessary adjustments before permanently installing the screw.
Avoiding these common mistakes will help you achieve perfectly straight and secure screw installations. By taking the time to properly drill pilot holes, you can ensure that your projects are built to last.
Tips for Perfectly Straight Screw Installation
1. Choose the Right Drill Bit and Screw Size
Before you start drilling pilot holes, it’s important to choose the right drill bit and screw size. The drill bit should be slightly smaller than the diameter of the screw, allowing it to grip the wood effectively. Using the correct screw size will also ensure that the screw holds securely in place.
2. Mark the Hole Placement
Before drilling pilot holes, mark the exact spot where you want to place the screws. This will help you maintain accuracy and ensure that the screws are perfectly straight. Use a pencil or a small awl to create a small indentation at the marked spot, which will act as a guide for drilling.
3. Use a Center Punch
To further ensure accuracy, you can use a center punch to create a small dimple in the wood before drilling the pilot hole. This will prevent the drill bit from slipping and provide a starting point for drilling. Place the center punch on the marked spot and gently tap it with a hammer to create the dimple.
4. Drill the Pilot Hole
Insert the appropriate drill bit into your drill and set it to the correct speed and torque setting. Place the drill bit on the marked spot and apply steady pressure to start drilling the pilot hole. Keep the drill straight and perpendicular to the surface as you drill to ensure a straight and accurate hole.
5. Measure the Depth of the Pilot Hole
When drilling pilot holes, it’s important to measure the depth of the hole. The pilot hole should be slightly shorter than the length of the screw to prevent it from poking out the other side. Measure the length of the screw and mark the drill bit with a piece of tape to indicate the desired depth.
6. Clear the Pilot Hole
After drilling the pilot hole, it’s important to remove any wood chips or debris that may be left behind. Use a small brush or a blast of compressed air to clear the hole. This will ensure that the screw can be inserted smoothly and securely.
7. Insert the Screw
Once the pilot hole is drilled and cleared, you can insert the screw. Make sure the screw is aligned with the hole and start turning it clockwise using a screwdriver or a drill with a screwdriver bit. Apply steady and even pressure to drive the screw into the wood. Stop when the screw is flush with the surface.
8. Repeat the Process
If you need to install multiple screws, repeat the process for each one. Take care to mark the hole placement accurately, drill the pilot holes straight, and insert the screws evenly. Consistency and attention to detail will ensure that all your screws are perfectly straight and securely installed.
9. Use a Clamp or Guide
If you’re having trouble drilling in a straight line, you can use a clamp or a drilling guide to help you. A clamp will hold the wood in place, preventing it from moving while you drill. A drilling guide, such as a jig or a template, can help you maintain a straight path and ensure that all your pilot holes are aligned correctly.
10. Practice and Patience
Drilling pilot holes for perfectly straight screw installation may take some practice, especially if you’re a beginner. Don’t be discouraged if your first attempts are not perfect. With time and patience, you’ll develop the skills and confidence to install screws straight and with precision.
By following these tips and techniques, you can improve your screw installation and achieve professional-looking results. Remember to always prioritize safety and use the appropriate tools and equipment for the job.
FAQ:
Why do I need to drill pilot holes before installing screws?
Drilling pilot holes before installing screws is necessary for several reasons. Firstly, it helps to prevent the wood from splitting when the screw is inserted. Pilot holes also ensure that the screw goes in smoothly and straight, without causing any damage to the surface. Additionally, pilot holes allow for better control and accuracy when driving the screw into the material.
What size drill bit should I use for pilot holes?
The size of the drill bit for pilot holes depends on the size of the screw you are using. A general rule of thumb is to use a drill bit that is slightly smaller in diameter than the screw. This ensures a tight fit, while still allowing the screw to go in easily. For example, if you are using a #8 screw, a 7/64″ drill bit would be suitable for pilot holes.
Can I skip drilling pilot holes and just screw in the screws directly?
While it is technically possible to skip drilling pilot holes and screw in the screws directly, it is not recommended. Without pilot holes, there is a higher risk of the wood splitting or the screw going in at an angle. This can result in a less secure and less aesthetically pleasing installation. It is best to take the time to drill pilot holes for a professional and durable result.
What type of drill should I use for drilling pilot holes?
For drilling pilot holes, a regular drill or a cordless drill can be used. It is important to adjust the drill to the appropriate speed and torque setting to avoid any damage to the material. It is also recommended to use a drill with a depth stop feature, which allows you to control the depth of the pilot hole and ensure consistent results.
Are pilot holes necessary for all types of screws?
Pilot holes are necessary for most types of screws, especially when working with wood. However, some types of screws, such as self-tapping screws or pocket hole screws, are designed to be used without pilot holes. These screws have special features that allow them to create their own pilot hole as they are driven into the material. Always refer to the manufacturer’s instructions for the specific type of screw you are using.
What are the consequences of not drilling pilot holes?
Not drilling pilot holes before installing screws can lead to several negative consequences. Without pilot holes, there is a higher risk of the wood splitting, especially when working with hardwood or near the edges of the material. The screw may also go in at an angle, resulting in a less secure connection. Additionally, skipping pilot holes can make it more difficult to drive the screw in straight and can cause damage to the surface.
Video:


Meet Harrison Clayton, a distinguished author and home remodeling enthusiast whose expertise in the realm of renovation is second to none. With a passion for transforming houses into inviting homes, Harrison's writing at https://thehuts-eastbourne.co.uk/ brings a breath of fresh inspiration to the world of home improvement. Whether you're looking to revamp a small corner of your abode or embark on a complete home transformation, Harrison's articles provide the essential expertise and creative flair to turn your visions into reality. So, dive into the captivating world of home remodeling with Harrison Clayton and unlock the full potential of your living space with every word he writes.


