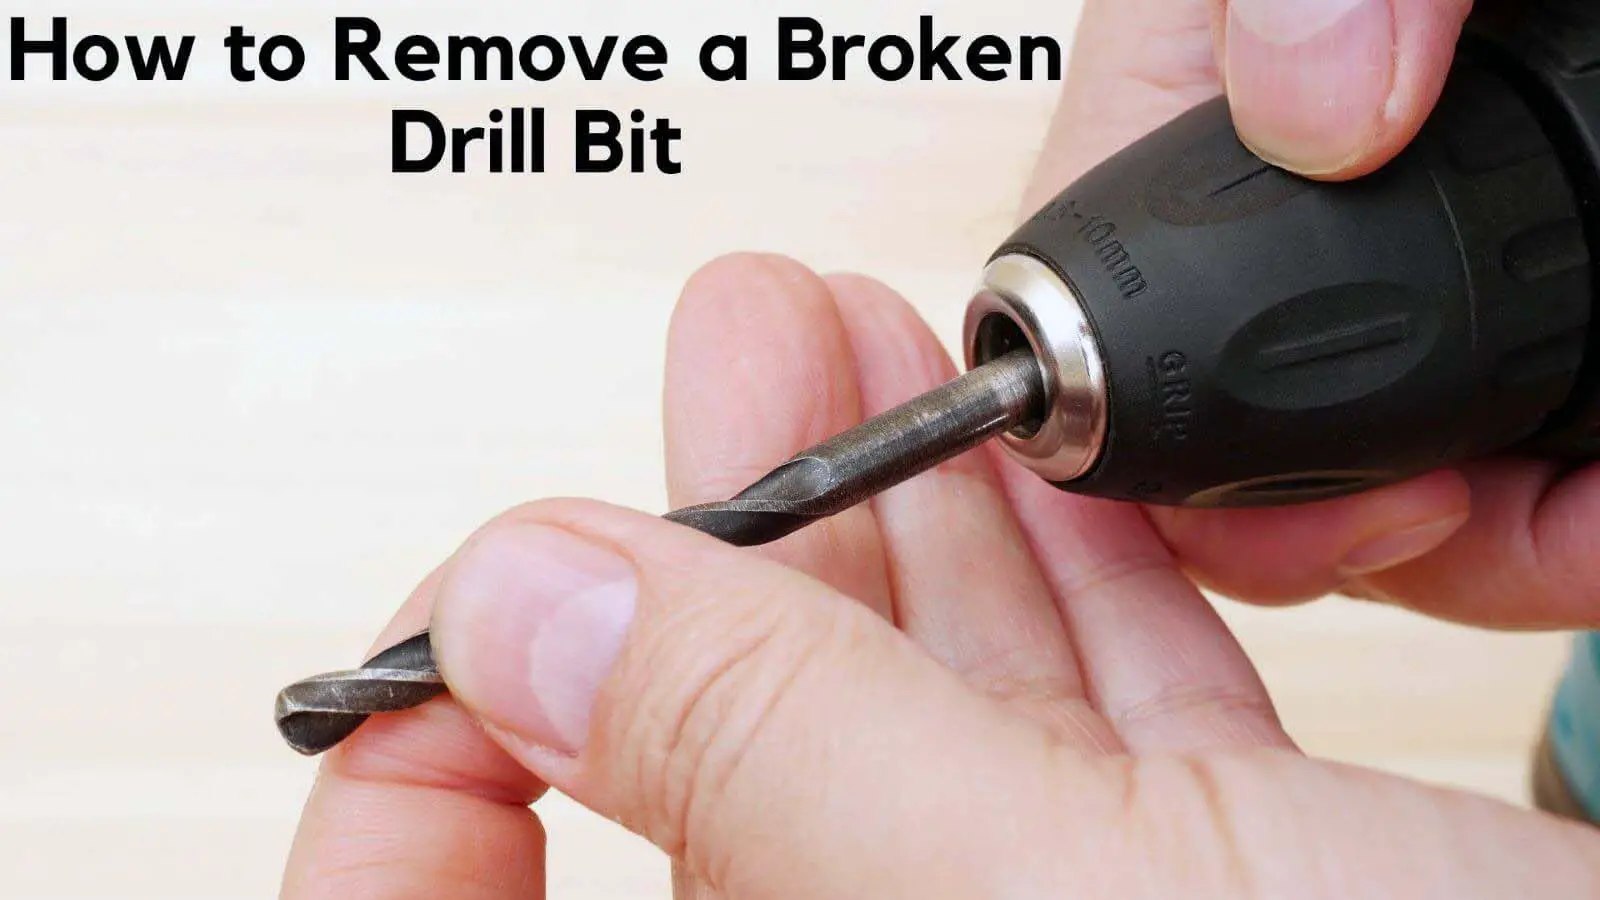
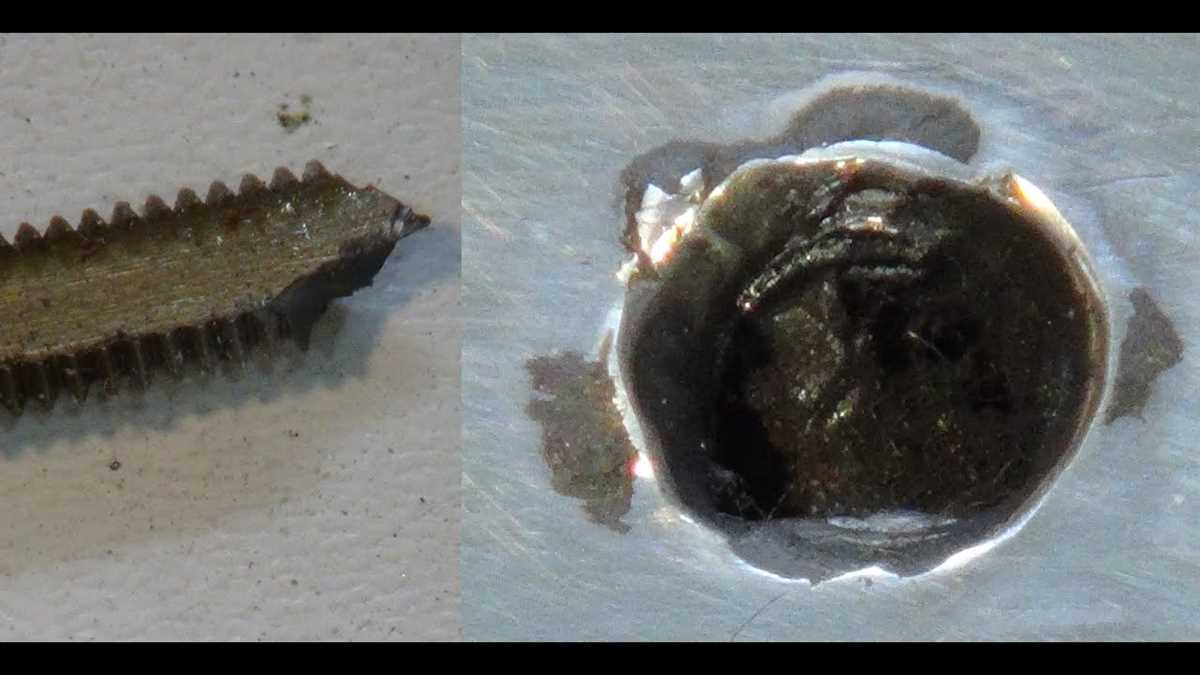
Learn how to safely remove a broken drill bit from metal

Dealing with a broken drill bit is a frustrating situation for any DIY enthusiast or professional. It can happen to anyone, regardless of experience level. However, with the right techniques and tools, you can safely and effectively remove a broken drill bit from metal without causing damage or injury.
The first step in removing a broken drill bit is to assess the situation. Determine how much of the bit is still embedded in the metal and whether there are any visible protrusions. This will help you choose the best method for removal.
One method for removing a broken drill bit is to use pliers or vice grips. Gently grip the exposed section of the bit with the pliers and twist it counterclockwise to loosen it from the metal. However, be careful not to apply too much force, as this can cause the bit to break further or damage the surrounding metal.
If the broken drill bit is too small to grip with pliers, you can try using a screw extractor. A screw extractor is a specialized tool designed to remove broken screws, bolts, or drill bits. It works by drilling into the broken bit and then extracting it using a reverse thread. Make sure to follow the instructions for the specific screw extractor you are using.
Remember to always wear proper protective gear, such as safety goggles and gloves, when removing a broken drill bit. This will help prevent any potential injuries from flying debris or accidental slips. Additionally, take your time and work slowly to avoid further damage to the metal or surrounding materials.

Removing a broken drill bit from metal may seem like a daunting task, but with the right techniques and tools, it can be done safely and effectively. By assessing the situation, using pliers or a screw extractor, and taking the necessary safety precautions, you can successfully remove a broken drill bit and continue with your project.
Steps to Remove a Broken Drill Bit from Metal
1. Assess the Situation
Before attempting to remove the broken drill bit from the metal, you should first assess the situation to determine the best course of action. Consider the size and depth of the broken drill bit, the type of metal it is stuck in, and any other factors that may affect the removal process.
2. Gather the Necessary Tools
Next, gather the tools you will need to remove the broken drill bit. This may include a pair of pliers, a center punch, a hammer, a drill, a drill bit slightly larger than the broken one, lubricant, and safety goggles.
3. Secure the Metal
Before attempting to remove the broken drill bit, it’s important to secure the metal so that it doesn’t move or spin while you’re working. You can do this by using clamps or a vise to hold the metal firmly in place.
4. Apply Lubricant
Apply a generous amount of lubricant, such as penetrating oil or cutting fluid, to the area around the broken drill bit. This will help to loosen any rust or debris that may be interfering with the removal process.

5. Use Pliers to Extract the Bit
With a firm grip on the broken drill bit using a pair of pliers, twist it counterclockwise while applying steady pressure. If the bit is stuck, you may need to use the pliers to wiggle it back and forth to break it free from any corrosion or debris.
6. Tap with a Hammer
If the drill bit is still stuck, you can gently tap on the end of the pliers with a hammer to help loosen it. Be careful not to damage the surrounding metal while doing this.
7. Use a Center Punch and Hammer
If the above methods do not work, you can try using a center punch and hammer to create a small indentation on the broken drill bit. This can give you better leverage when trying to twist and remove it.
8. Drill into the Broken Bit
If all else fails, you may need to drill into the broken drill bit itself. Use a slightly larger drill bit than the broken one and carefully drill into the center of the broken bit. Once the hole is deep enough, you can use the drill bit to extract the broken piece.
9. Clean the Area
After successfully removing the broken drill bit, it’s important to clean the area thoroughly to remove any remaining debris or lubricant. Use a brush or cloth to wipe away any residue.

10. Test the Metal
Finally, test the metal to ensure that it is still in good condition and that there are no lasting effects from the removal process. Check for any damage or distortion, and make any necessary repairs before continuing with your project.
Note: Safety goggles should be worn throughout the entire removal process to protect your eyes from any debris that may be released during the extraction.
Assess the Situation
Before attempting to remove a broken drill bit from metal, it is important to carefully assess the situation. This will help you determine the best course of action and avoid causing further damage to the material.
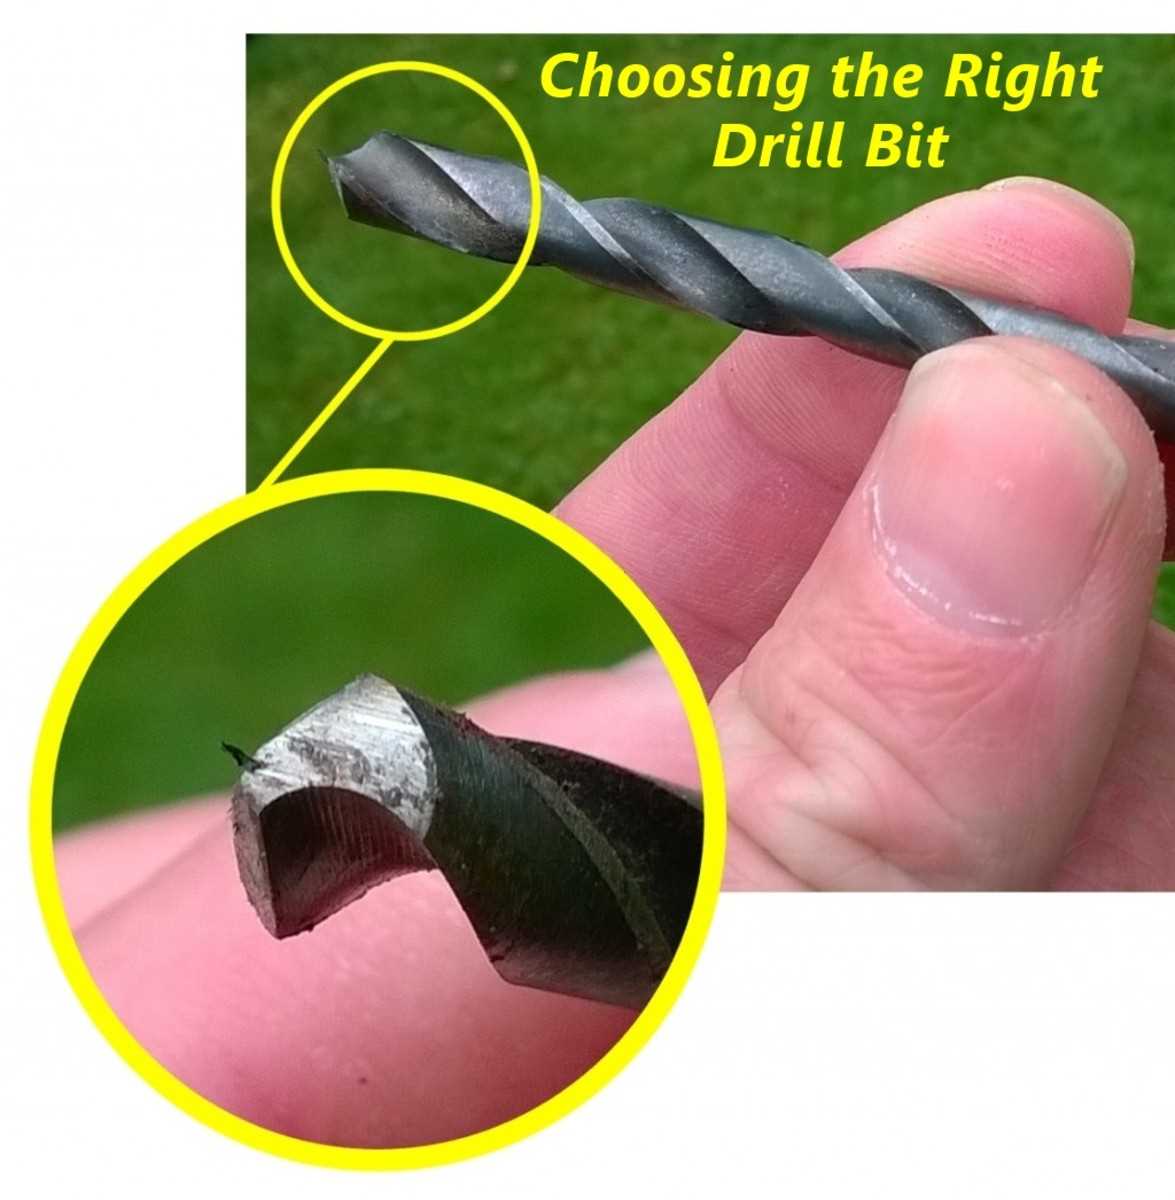
1. Examine the broken drill bit: Take a close look at the broken drill bit to determine how much of it is still stuck in the metal. Sometimes only a small portion of the bit remains, while other times it may be completely lodged inside.
2. Identify the type of metal: Different metals may require different techniques for removing the broken drill bit. Knowing the type of metal can help you choose the most appropriate method.

3. Consider the size of the drill bit: The size of the drill bit can also affect the removal process. Smaller bits may be easier to remove, while larger bits may require more effort.
4. Assess the surrounding area: Take note of any delicate or sensitive components near the broken drill bit. You need to be cautious not to damage surrounding materials or structures while attempting to remove the bit.
5. Determine if professional assistance is needed: If you are unsure about how to safely remove the broken drill bit or if the situation seems complex, it may be best to seek help from a professional with experience in metalworking or drilling.
By carefully assessing the situation, you can make an informed decision about the best approach to safely remove the broken drill bit from the metal.
Gather the Necessary Tools
Before attempting to remove a broken drill bit from metal, it is important to gather all the necessary tools that will be needed for the task. These tools include:

- Pliers or Vise-Grips: These will be used to provide a secure grip on the drill bit.
- Needle-nose pliers: These can be useful for accessing tight spaces.
- Hammer: A hammer may be necessary to tap the broken drill bit if it is lodged firmly in the metal.
- Center punch: A center punch can be used to make an indentation on the broken drill bit, which will help guide the drill bit extraction process.
- Drill and drill bits: Different sizes of drill bits may be needed to drill around the broken drill bit or create a small pilot hole.
- Lubricant or cutting fluid: Applying lubricant or cutting fluid to the broken drill bit can help reduce friction and make the extraction process smoother.
- Protective gear: It is important to wear safety goggles and gloves to protect yourself during the extraction process.
Having these tools ready before beginning the extraction process will ensure that you are well-prepared and can work efficiently to safely remove the broken drill bit from the metal.
Prepare the Work Area
Before you begin removing the broken drill bit, it’s important to ensure that the work area is safe and organized. Taking the time to prepare the work area will help you work more efficiently and reduce the risk of accidents.
- Gather your tools: Make sure you have all the necessary tools for removing the broken drill bit. This may include pliers, a drill bit extractor, a hammer, safety glasses, and gloves.
- Clean the work area: Remove any debris or clutter from the area where you will be working. This will help prevent any tripping hazards and make it easier to see and access the broken drill bit.
- Secure the workpiece: If the workpiece is movable, consider clamping it down to ensure it doesn’t move while you are removing the broken drill bit. This will add stability and make the process safer.
- Protect yourself: Put on safety glasses and gloves to protect your eyes and hands from any flying debris or sharp edges.
- Organize your tools: Lay out your tools in a neat and organized manner so that they are easily accessible while you work. This will save you time and minimize the chances of misplacing a tool.
- Plan your approach: Take a moment to mentally plan the steps you will take to remove the broken drill bit. This will help you work more methodically and reduce the likelihood of making mistakes.
By taking the time to prepare the work area, you will be able to work more safely and effectively in removing the broken drill bit from metal.
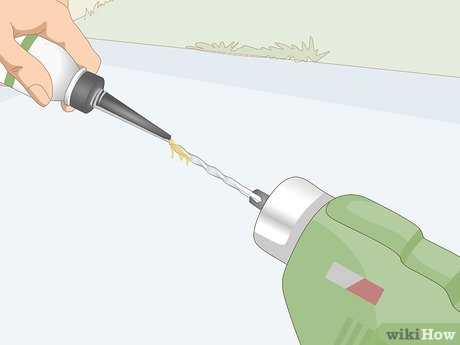
Apply Lubricant
Before attempting to remove a broken drill bit, it is important to apply a lubricant to the surrounding area. This will help to loosen the bit and make it easier to remove.
There are several lubricants that can be used for this purpose, such as penetrating oil or WD-40. Apply the lubricant to the area around the broken drill bit, making sure to cover the entire surface.
Allow the lubricant to sit for a few minutes to penetrate the metal and help loosen the bit. This will make it easier to remove without causing any further damage to the surrounding material.
After allowing the lubricant to sit, you can attempt to remove the broken drill bit using the appropriate method, such as using pliers or a drill bit extractor. The lubricant should help to reduce friction and make the removal process smoother.
Use Pliers to Remove the Broken Bit
When a drill bit breaks off in metal, one of the simplest methods to remove it is by using a pair of pliers. This method works best if a portion of the broken bit is still exposed and accessible.
Instructions:
- Ensure that the power tool is turned off and unplugged before attempting to remove the broken bit.
- Inspect the broken bit and determine if there is a portion sticking out that can be grabbed with pliers. If so, proceed to the next step.
- Select a pair of pliers with jaws that are small enough to grip the broken bit securely. Needle-nose pliers or locking pliers are good options.
- Open the jaws of the pliers and position them around the exposed portion of the broken bit.
- Apply gentle pressure to close the pliers around the broken bit, gripping it firmly.
- Once the pliers have a secure grip on the broken bit, slowly and carefully twist the pliers counterclockwise.
- Continue twisting until the broken bit becomes loose enough to be pulled out of the metal.
- Once the broken bit is removed, inspect the hole to ensure there are no remaining fragments or debris.
Note: If the broken bit is deeply embedded in the metal or cannot be accessed with pliers, it is recommended to seek assistance from a professional or use more advanced techniques like drilling out the broken bit.
Use a Reverse Drill Bit
Step 1: Gather the necessary tools
Before attempting to remove a broken drill bit, make sure you have the following tools:
- Reverse drill bit
- Drill or drill press
- Drill chuck key
- Protective gloves and goggles
Step 2: Choose an appropriate reverse drill bit

Reverse drill bits are specially designed to make it easier to remove broken fasteners, including drill bits. Select a reverse drill bit that is suitable for the size and type of broken drill bit you need to remove.
Step 3: Secure the workpiece
Place the metal workpiece securely in a vise or clamp to prevent it from moving during the drilling process. Ensure that the area where the broken drill bit is located is easily accessible.
Step 4: Insert the reverse drill bit
Insert the reverse drill bit into the chuck of the drill or drill press. Make sure it is securely tightened using the drill chuck key.
Step 5: Position the drill bit over the broken drill bit
Align the reverse drill bit with the broken drill bit, ensuring that the drill bit tip is centered and firmly in contact with the broken piece.
Step 6: Start drilling in reverse
With the drill set to reverse mode, slowly begin drilling into the broken drill bit. Apply steady and even pressure, allowing the reverse drill bit to grab onto the broken piece and start turning it counterclockwise.
Step 7: Continue drilling until the broken drill bit is removed
Keep drilling in reverse until the broken drill bit is completely removed from the metal workpiece. If necessary, you can use a lubricant such as cutting oil to facilitate the drilling process.
Step 8: Inspect and clean the workpiece
Once the broken drill bit is removed, inspect the hole to ensure there are no remaining fragments or debris. Clean the workpiece thoroughly before continuing with your project or drilling new holes.
Step 9: Safety precautions
Always remember to wear protective gloves and goggles when working with power tools. Take caution to prevent the metal shavings and debris from coming into contact with your eyes or skin.
By following these steps and using a reverse drill bit, you can safely and effectively remove a broken drill bit from metal without damaging the workpiece.
Tap and Twist
If the broken drill bit is sticking out of the metal surface, you can try using the tap and twist method to remove it. This technique involves tapping the exposed part of the drill bit gently with a hammer and then twisting it out using pliers.
- First, position the pliers around the exposed part of the broken drill bit, ensuring a secure grip.
- Next, tap the top of the drill bit gently with a hammer, using light force. This will help loosen it from the metal surface.
- After tapping, apply slight pressure with the pliers and start twisting the drill bit counterclockwise. The goal is to unscrew the bit from the metal.
- If the drill bit starts to turn, continue twisting it until it is completely removed. If it doesn’t move, tap it again and try twisting.
- Once the drill bit is successfully removed, inspect the surface to ensure it is free from any remaining fragments or damage.
It’s important to note that this method is only suitable when the drill bit is sticking out of the metal. If the broken part is inside the metal or the above technique doesn’t work, you may have to consider using a more advanced method or seeking professional assistance.
Caution: Make sure to wear safety goggles and gloves when performing any kind of drill bit removal. This will protect your eyes and hands from any potential injury.
Clean and Test
Cleaning the area
Before proceeding with removing the broken drill bit, it is important to clean the area around it.
Use a brush or a cloth to remove any debris or metal shavings that may be present. This will help in having a clear view of the broken drill bit and prevent any interference during the removal process.
Testing the surrounding metal
Prior to attempting to remove the broken drill bit, it is essential to test the hardness of the surrounding metal.
Using a sharp object, gently scrape the metal surrounding the broken drill bit. If the metal feels excessively soft, it may indicate that the bit has penetrated too deeply, making it more difficult to remove.
Preparing the workspace
Make sure you have a stable work surface to operate on and gather all the necessary tools for the drill bit removal.
Have a pair of safety goggles on and protective gloves to avoid any injuries during the process. Organize your workspace so that all the tools are easily accessible.
Testing the drill
Prior to removing the broken drill bit, it is crucial to ensure that the drill is functioning properly.
Insert a different drill bit into the chuck and test the drill by drilling into a scrap piece of metal or wood. If the drill is not functioning correctly, it is recommended to address the issue before proceeding with the removal process.
Inspecting the drill bit
Before attempting to remove the broken drill bit, carefully examine it for any signs of damage.
Look for any bending or wearing out, as it might affect the removal technique to be used. In some cases, a damaged drill bit might require additional measures for safe extraction.
Summary
- Clean the area around the broken drill bit to remove any debris or metal shavings.
- Test the hardness of the surrounding metal by scraping it with a sharp object.
- Prepare a stable and well-organized workspace with the necessary tools.
- Ensure the drill is functioning correctly by testing it with a different drill bit.
- Inspect the broken drill bit for any signs of damage.
FAQ:
What should I do if my drill bit breaks while drilling into metal?
If your drill bit breaks while drilling into metal, it’s important to handle the situation with caution. First, stop applying pressure and turn off the drill. Then, assess the situation and determine the best course of action based on the severity of the break and the type of drill bit. If the broken piece is protruding and easily accessible, you can try to remove it using pliers or a pair of needle-nose pliers. If the broken piece is stuck in the metal, you may need to use a drill bit extractor to remove it safely. Remember to always wear safety goggles and gloves when dealing with broken drill bits to protect yourself from injury.
What can cause a drill bit to break while drilling into metal?
There are several factors that can cause a drill bit to break while drilling into metal. One common cause is excessive pressure or force applied to the drill bit. It’s important to let the drill bit do the work and avoid pushing too hard. Another cause can be using the wrong type of drill bit for the job. Make sure to use a drill bit specifically designed for drilling into metal, as using a wood or general-purpose drill bit can cause it to break. Metal chips or fragments can also get stuck in the flutes of the drill bit, causing it to break. To prevent this, make sure to clear the chips frequently while drilling.
Can I use pliers to remove a broken drill bit from metal?
Yes, you can use pliers to remove a broken drill bit from metal if the broken piece is protruding and easily accessible. Make sure to use a pair of needle-nose pliers for better grip and control. First, carefully grasp the broken piece with the pliers and try to twist it counterclockwise to loosen it. If the broken piece is stuck and won’t budge, you may need to use a drill bit extractor to remove it safely. Remember to be gentle and take your time to avoid causing further damage to the metal or injuring yourself.
What is a drill bit extractor and how does it work?
A drill bit extractor is a specialized tool designed to remove broken drill bits from metal. It consists of a drill bit with reverse-cut flutes and a corresponding extractor tool. To use a drill bit extractor, you first need to drill a small hole into the broken drill bit using the matching drill bit from the extractor set. Then, insert the extractor tool into the hole and turn it counterclockwise using a wrench or pliers. The reverse-cut flutes of the extractor bite into the broken drill bit and help unscrew it from the metal. With slow and steady pressure, the extractor will gradually loosen and remove the broken drill bit.
Is it possible to prevent a drill bit from breaking while drilling into metal?
While it’s not always possible to prevent a drill bit from breaking while drilling into metal, there are some steps you can take to minimize the risk. First, make sure to use the correct type of drill bit for the job. Using a drill bit specifically designed for drilling into metal will reduce the chances of it breaking. Second, apply steady and even pressure when drilling, letting the drill bit do the work instead of forcing it. This will help prevent excessive stress on the drill bit, reducing the risk of breakage. Finally, remember to clear the chips from the flutes of the drill bit frequently to prevent them from getting stuck and causing the bit to break.
Can I reuse a broken drill bit after removing it from metal?
It is not recommended to reuse a broken drill bit after removing it from metal. When a drill bit breaks, it is likely to sustain damage and wear that can affect its performance and integrity. Even if the broken piece is successfully removed, the drill bit may no longer be effective at drilling and could pose a safety risk. It’s best to dispose of broken drill bits properly and replace them with new ones for optimal performance and safety.
Video:

Meet Harrison Clayton, a distinguished author and home remodeling enthusiast whose expertise in the realm of renovation is second to none. With a passion for transforming houses into inviting homes, Harrison's writing at https://thehuts-eastbourne.co.uk/ brings a breath of fresh inspiration to the world of home improvement. Whether you're looking to revamp a small corner of your abode or embark on a complete home transformation, Harrison's articles provide the essential expertise and creative flair to turn your visions into reality. So, dive into the captivating world of home remodeling with Harrison Clayton and unlock the full potential of your living space with every word he writes.


