Learn how to drill a hole in wood for a screw like a pro

Drilling a hole in wood may seem like a simple task, but doing it correctly can make all the difference in the final result of your project. Whether you’re a DIY enthusiast or a professional woodworker, learning how to drill a hole in wood for a screw like a pro is an essential skill that will come in handy in a variety of projects.
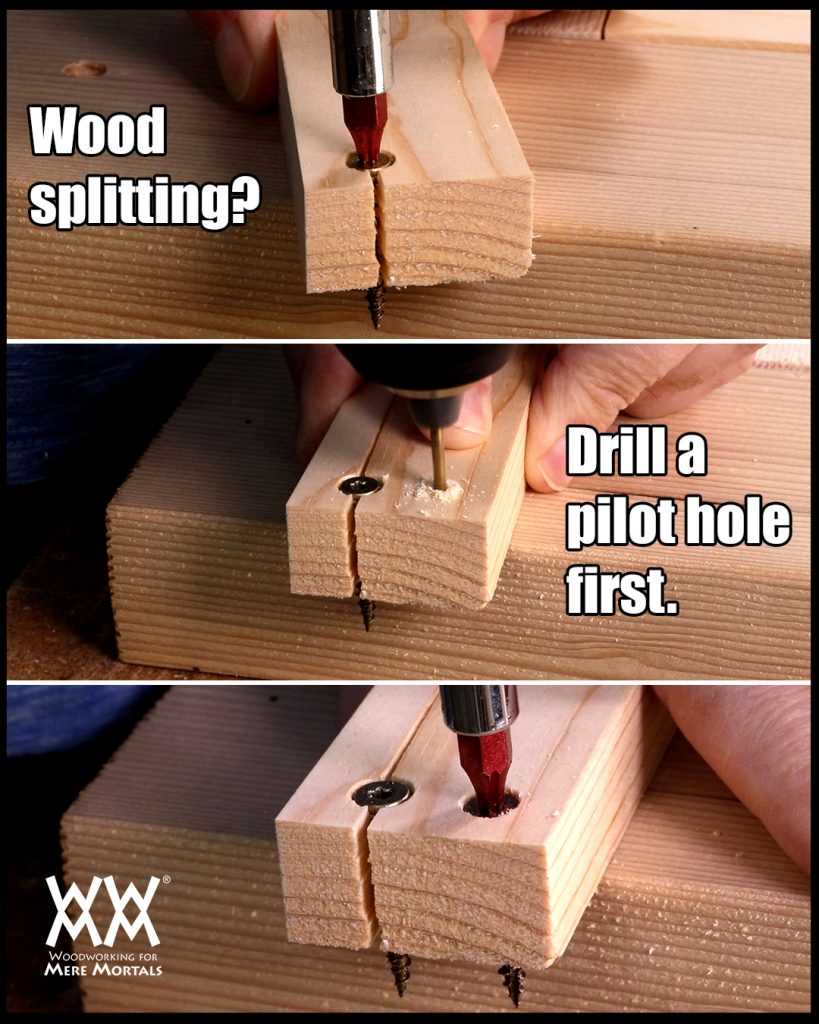
One of the first things to consider when drilling a hole in wood is the size of the hole you’ll need. The size of the hole will depend on the size of the screw you’ll be using. It’s always a good idea to choose a drill bit that is slightly smaller than the diameter of the screw. This will ensure a tight fit and prevent the wood from splitting.
Once you’ve determined the size of the hole, the next step is to mark the spot where you’ll be drilling. Use a pencil or a marker to make a small dot on the wood where you want the hole to be. This will serve as a guide and help you align the drill properly.
Before you start drilling, it’s important to secure the wood in place to prevent it from moving or splintering. If you’re drilling a hole in a flat piece of wood, you can use clamps to hold it securely. If you’re drilling a hole in a vertical surface, like a wall or a post, you can use a vice or a clamp to hold the wood in place.
When drilling the hole, make sure to start slowly and apply gentle pressure. This will help prevent the drill bit from slipping and ensure a clean, precise hole. As you drill, keep the drill bit straight and perpendicular to the wood surface. It’s also a good idea to periodically pull the bit out of the hole to remove any wood chips or debris that may interfere with the drilling process.

Once the hole is drilled, you can insert the screw and tighten it using a screwdriver or a drill driver. Make sure to choose the right type of screw for your project and follow the manufacturer’s instructions for proper installation.
Learning how to drill a hole in wood for a screw like a pro takes practice, but with the right technique and some patience, you’ll be able to achieve professional-looking results every time.
Step-by-Step Guide to Drilling a Hole in Wood for a Screw
Tools and Materials Needed
- Power drill
- Wood drill bit
- Wood screws
- Tape measure or ruler
- Power outlet or charged battery for the drill
- Clamps (optional)
Step 1: Measure and Mark
Using a tape measure or ruler, measure and mark the location on the wood where you want to drill the hole. Double-check your measurements to ensure accuracy.
Step 2: Choose the Correct Drill Bit Size
Choose a drill bit that matches the size of the screw you are using. The drill bit should be slightly smaller than the diameter of the screw shaft to ensure a tight fit.
Step 3: Secure the Wood (Optional)

If necessary, use clamps to secure the wood in place. This will prevent it from moving around while you drill.
Step 4: Set up the Drill
If you are using a corded drill, plug it into a power outlet. If you are using a cordless drill, make sure the battery is fully charged. Insert the correct drill bit into the drill chuck and tighten it securely.
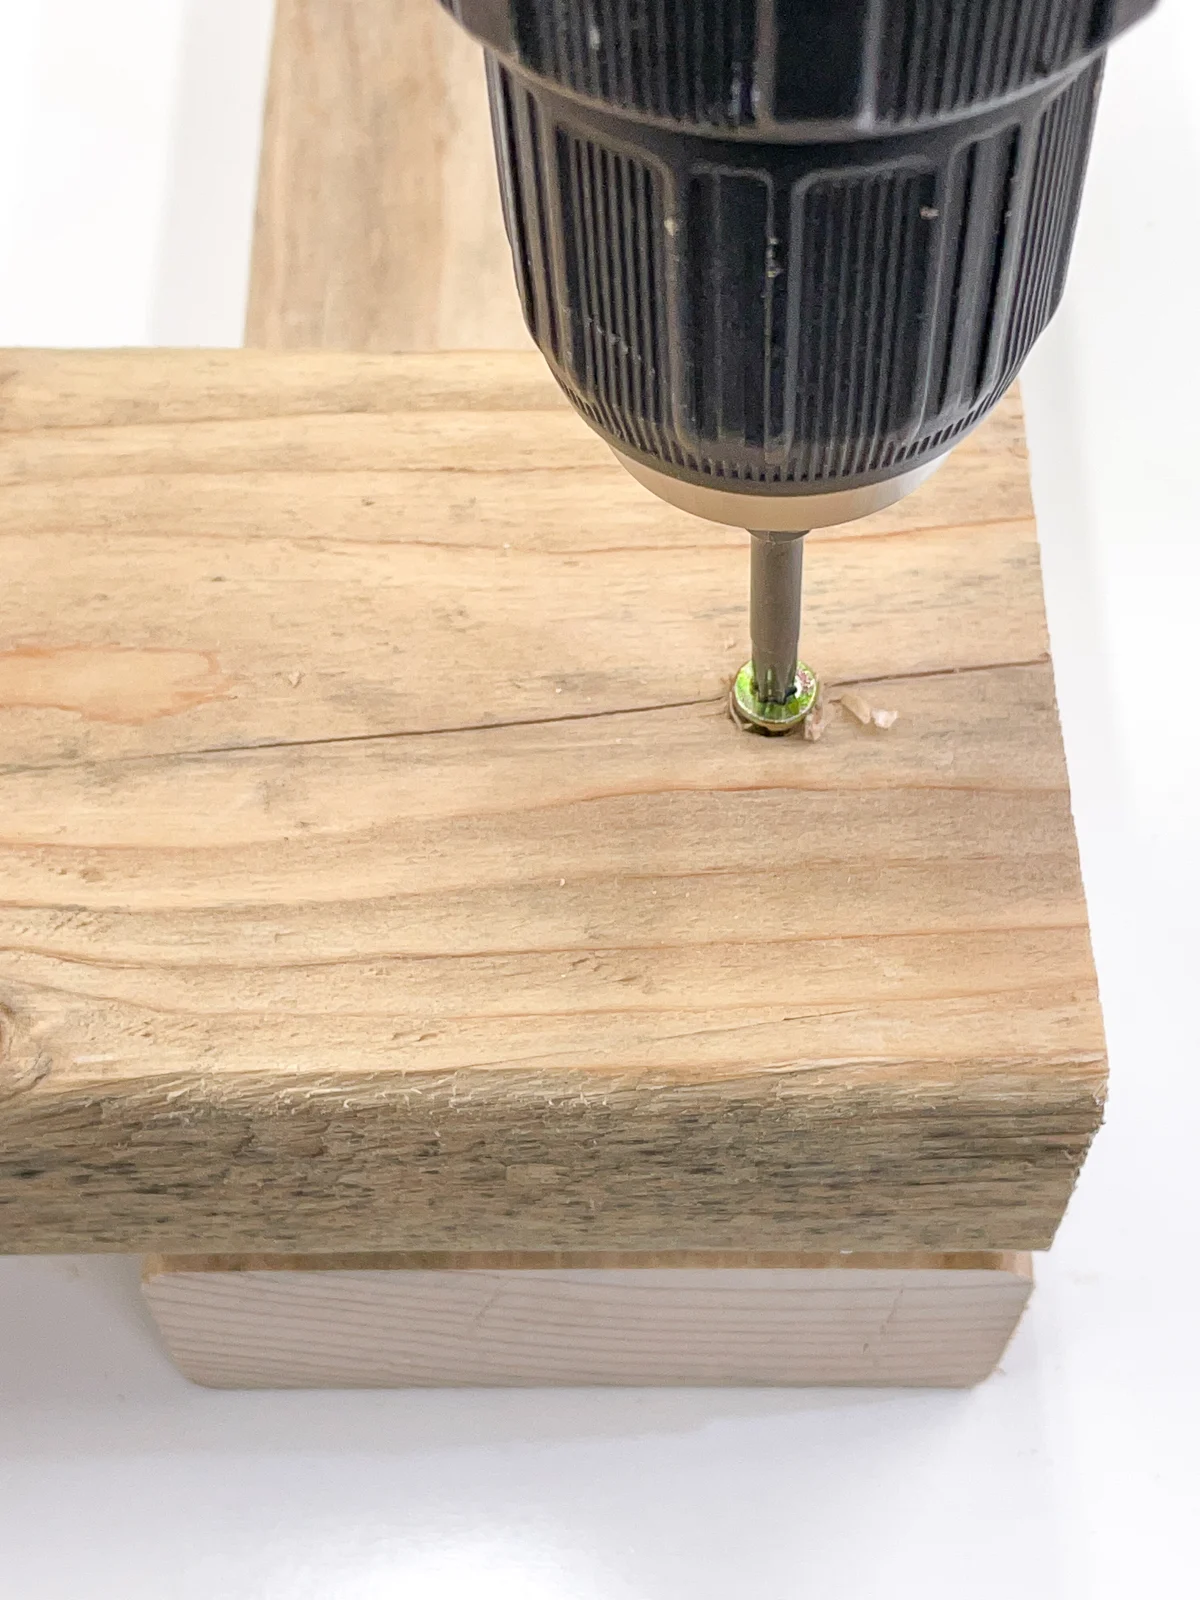
Step 5: Start Drilling
Position the drill bit on the marked spot and hold the drill firmly. Start drilling at a slow speed to create a pilot hole. Apply gentle and steady pressure, letting the drill bit do the work. Gradually increase the speed as the drill bit penetrates the wood.
Step 6: Drill to the Desired Depth
Continue drilling until you reach the desired depth for your screw. This can be determined by placing the screw next to the drill bit and marking the length on the bit with a piece of tape.

Step 7: Remove the Drill
Turn off the drill and carefully remove it from the hole. Clean away any wood shavings or debris from the hole.
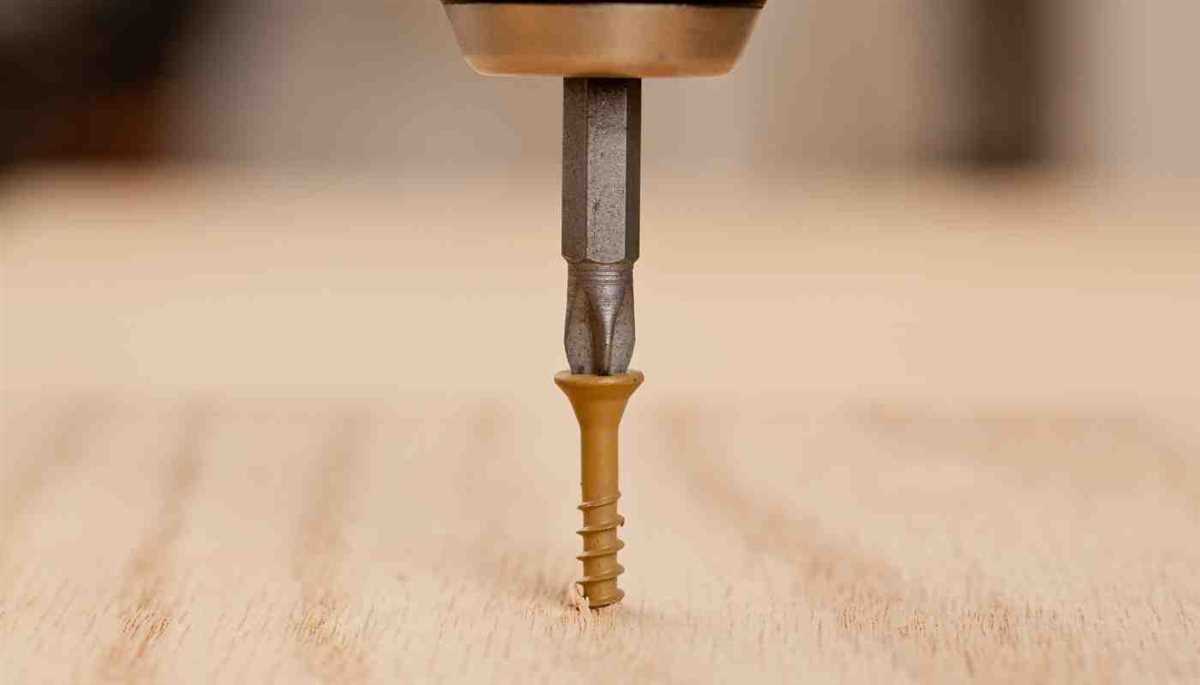
Step 8: Insert the Screw
Place the screw into the hole and use a screwdriver or drill to tighten it into place. Make sure the head of the screw is flush with or slightly below the surface of the wood.
Step 9: Repeat as Necessary
If you need to drill additional holes for more screws, repeat the process starting from step 1. Make sure to measure and mark each hole accurately.
Step 10: Finishing Touches
After all the screws are inserted, inspect the wood surface for any remaining marks or blemishes. If necessary, use sandpaper or a wood filler to smooth out any imperfections.

- Measure and mark the location on the wood
- Choose the correct drill bit size
- Secure the wood (optional)
- Set up the drill
- Start drilling
- Drill to the desired depth
- Remove the drill
- Insert the screw
- Repeat as necessary
- Finishing touches
Gather the Right Tools and Materials
Tools:
- Drill
- Drill bits
- Countersink bit (optional)
- Screwdriver bit
- Screwdriver or screw gun
- Tape measure or ruler
- Pencil or marker
- Clamps (optional)
Materials:
- Wood piece or board
- Screws
When drilling a hole in wood for a screw, it’s important to gather the right tools and materials to ensure a clean and secure result. Here are the tools and materials you will need:
Tools:
1. Drill: A power drill or cordless drill with an adjustable chuck is essential for drilling the hole.
2. Drill bits: Select the appropriate drill bit size based on the diameter of the screw you will be using. It’s recommended to use a drill bit slightly smaller than the screw diameter to ensure a tight fit.

3. Countersink bit (optional): If you want the screw to sit flush with the wood surface, a countersink bit can be used to create a cone-shaped recess for the screw head.
4. Screwdriver bit: Attach the appropriate screwdriver bit to the drill to drive the screw into the wood.
5. Screwdriver or screw gun: If the drill doesn’t have a built-in screwdriver function, a separate screwdriver or screw gun will be needed to tighten the screws.
6. Tape measure or ruler: Use a measuring tool to mark the desired location for the hole.
7. Pencil or marker: Mark the center point for the hole on the wood.

8. Clamps (optional): Clamps can be helpful to secure the wood piece in place while drilling to prevent shifting.
Materials:
1. Wood piece or board: Choose the appropriate type and size of wood for your project.
2. Screws: Select screws with the right length and diameter for the wood thickness and intended use.
Having the right tools and materials at hand will make the process of drilling a hole in wood for a screw much easier and ensure a successful outcome.

Measure and Mark the Drill Hole

Before you start drilling a hole in a piece of wood, it’s important to measure and mark the exact spot where you want the hole to be. This will ensure accuracy and prevent any mistakes.
Here are the steps to measure and mark the drill hole:
- Measure the distance: Use a tape measure or ruler to measure the distance from the edge of the wood to the desired location of the hole. Make sure to double-check your measurement to ensure accuracy.
- Mark the spot: Use a pencil or a marking tool to make a small dot or mark at the exact spot where you want the hole to be drilled. This will serve as a guide for the drill bit.
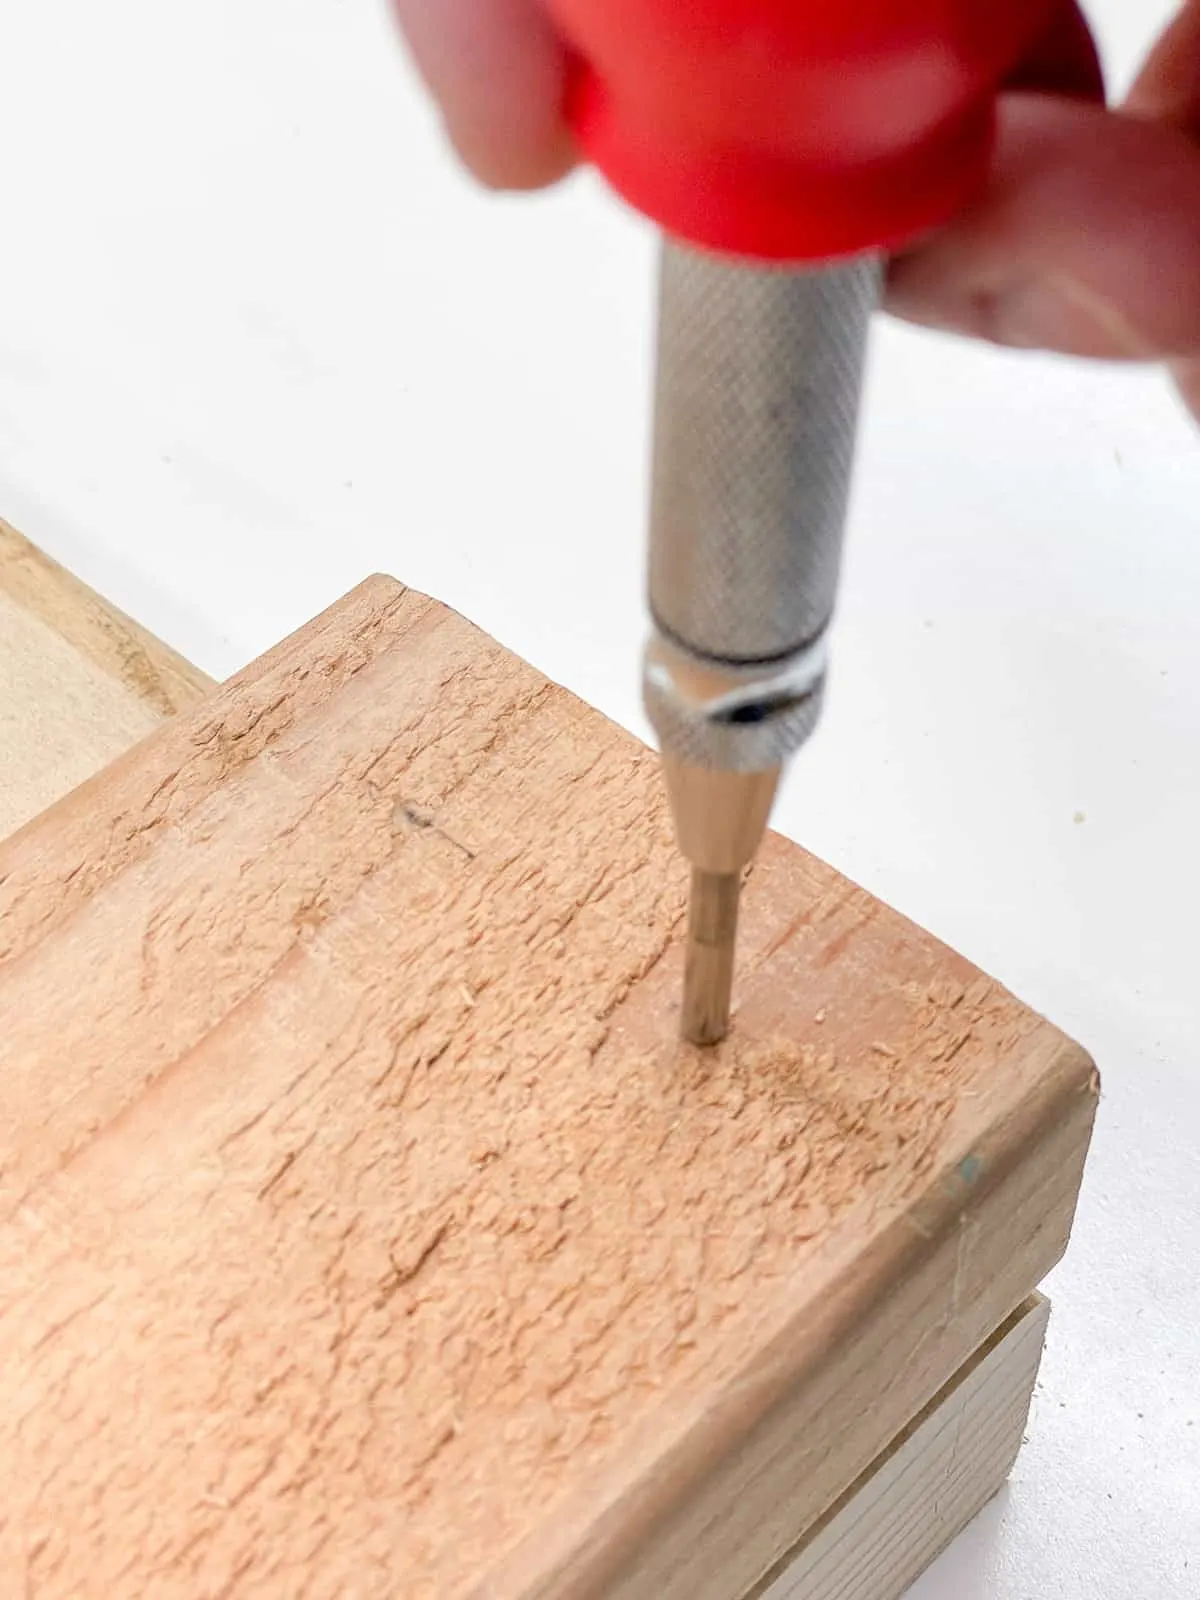
- Use a center punch (optional): If you want to create a small indentation at the marked spot, you can use a center punch. This will help prevent the drill bit from slipping and ensure better accuracy.
It’s important to take your time and be precise when measuring and marking the drill hole. A small mistake in the measurement or marking can lead to misalignment and difficulties when inserting the screw.
Select the Appropriate Drill Bit
When drilling a hole in wood for a screw, it is important to choose the right drill bit for the job. The drill bit you select will depend on the type of screw you are using and the size of the hole you need.
Types of Drill Bits
There are several types of drill bits that are commonly used for drilling holes in wood. The most common types include:
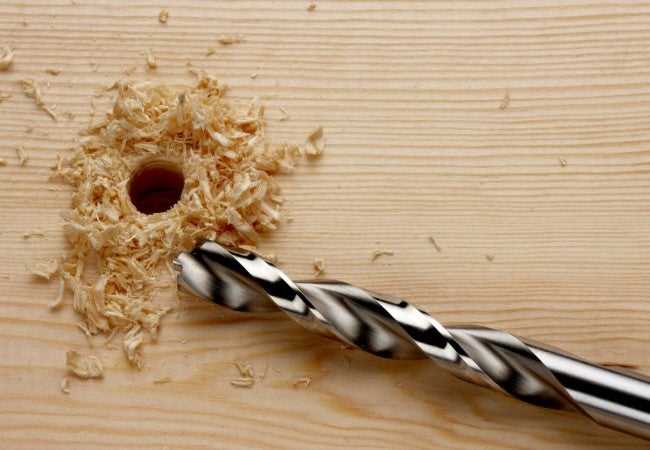
- Twist drill bits: These are the most versatile type of drill bit and are suitable for most drilling applications.
- Spade bits: These are flat, paddle-shaped bits that are used for drilling large holes in wood.
- Forstner bits: These are specialized bits that are used for drilling flat-bottomed holes with smooth sides.
- Auger bits: These are long, spiral-shaped bits that are used for drilling deep holes in wood.
Choosing the Right Size

Once you have selected the type of drill bit you need, it is important to choose the right size. The size of the drill bit you select should be slightly smaller than the diameter of the screw you are using.
Using a drill bit that is too small may cause the wood to split when the screw is inserted, while using a drill bit that is too large may result in a loose-fitting screw.
Consider the Wood Type
It is also important to consider the type of wood you are drilling into when selecting a drill bit. For softer woods, such as pine or cedar, a standard twist drill bit will work well.
However, for harder woods, such as oak or maple, it may be necessary to use a specialized drill bit, such as a brad point bit or a carbide-tipped bit, to ensure clean and accurate holes.
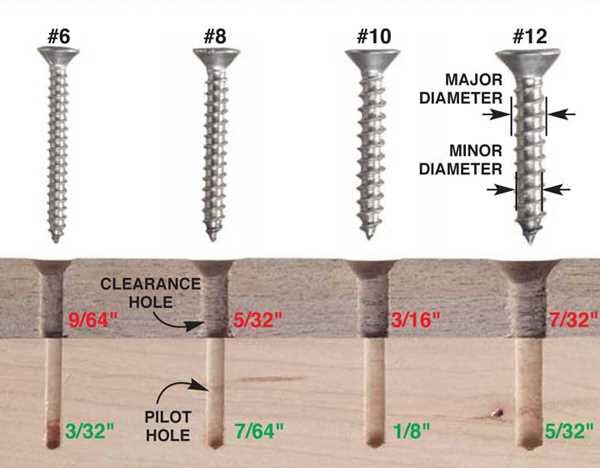
| Screw Size (Gauge) | Drill Bit Size (Inches) |
|---|---|
| 6 | 3/32 |
| 8 | 7/64 |
| 10 | 1/8 |
| 12 | 5/32 |
| 14 | 9/64 |
Remember to always wear safety goggles and take necessary precautions when drilling to ensure your safety.
Secure the Wood Piece
Before drilling a hole in the wood, it is important to secure it properly. This will help prevent any movement or slipping while drilling, ensuring a precise and accurate hole.
Clamp the Wood
One way to secure the wood piece is by using clamps. Place the wood on a sturdy workbench or surface, ensuring it is positioned in the desired location. Then, use clamps to hold the wood firmly in place. Make sure the clamps are tightly secured to prevent any movement during drilling.
Use a Vise
Another method to secure the wood is by using a vise. A vise is a mechanical device that holds objects firmly in place. Place the wood piece between the vise jaws and tighten the vise to grip the wood securely. This method provides stability and minimizes the risk of the wood slipping during drilling.
Secure with Braces
If clamps or a vise are not available, you can use braces or supports to secure the wood. Position the wood piece on a stable surface, such as a workbench or the floor, and use braces to hold it firmly in place. Make sure the braces are properly aligned and tightened to prevent any movement.
Teamwork
For larger wood pieces or when working with awkward angles, having someone assist you can be helpful. One person can hold the wood in place while the other drills the hole. This provides extra stability and ensures the wood does not shift or move during drilling.
Conclusion
Securing the wood piece before drilling is crucial to achieving accurate and clean holes. Whether using clamps, a vise, braces, or teamwork, make sure the wood is firmly held in place to prevent any unwanted movement. Taking the time to properly secure the wood will result in a professional-looking finish and a successful project.
Start Drilling Slowly and Steadily
Once you have marked the spot where you want to drill the hole, it’s time to start drilling. It’s important to approach this step with caution and take your time to ensure accuracy and precision.
- Select the right drill bit: Before you start drilling, make sure you have the appropriate drill bit for the size of the hole you need. Using the wrong size bit can result in an improperly drilled hole.
- Secure the wood: Place the piece of wood firmly on a workbench or any stable surface. Make sure it doesn’t move or shift while you are drilling.
- Set the drill speed: Most drills have adjustable speed settings. For drilling into wood, it’s best to start at a slower speed. This will prevent you from drilling too quickly and causing damage to the wood.
- Hold the drill correctly: Grip the drill firmly with one hand on the handle and the other hand on the body for stability. Keep your fingers away from the moving parts and the drill bit.
Once you are ready, position the drill bit at a 90-degree angle to the wood surface. Apply light pressure and start the drill slowly, allowing the bit to penetrate the wood gradually. Avoid applying too much force, as it can cause the drill bit to slip or the wood to splinter.
As you continue drilling, maintain a steady and controlled pace. Keep the drill straight and perpendicular to the wood surface to ensure a clean and precise hole. If you feel any resistance or hear unusual noises, stop drilling and check if everything is aligned correctly.
Remember, drilling slowly and steadily is key to achieving professional results. Rushing through this step can lead to mistakes and compromised integrity of the hole and the wood.
Control the Depth of the Hole
One important skill to master when drilling a hole in wood for a screw is controlling the depth of the hole. This is crucial because if the hole is too shallow, the screw won’t hold securely. On the other hand, if the hole is too deep, the screw may protrude from the surface of the wood or even break through.
Here are some tips to help you control the depth of the hole:
- Measure the screw length: Before you start drilling, it’s important to measure the length of the screw you’ll be using. This will give you an idea of how deep the hole should be.
- Use a depth stop: Many drills come with a depth stop attachment that allows you to set the drilling depth. This is a useful tool to ensure consistent and controlled drilling depth.
- Mark the drill bit: If you don’t have a depth stop, you can mark the drill bit with masking tape or a marker to indicate the desired depth. This will serve as a guide while drilling.
- Practice on scraps: If you’re unsure about the drilling depth, it’s best to practice on scraps of wood before working on your actual project. This will give you a chance to perfect your technique and avoid mistakes.
Remember, it’s always better to err on the side of caution and drill a slightly shallower hole, as you can always drill deeper if needed. Take your time, be patient, and practice to become a pro at controlling the depth of the hole when drilling in wood for a screw.
Clear the Dust and Debris
After drilling a hole in wood, it’s important to clear away any dust and debris that may have accumulated. This step is crucial for ensuring a clean and secure fit for the screw.
Here is a step-by-step guide on how to effectively clear the dust and debris:
- Use a brush: Start by using a small brush, such as a paintbrush or an old toothbrush, to gently sweep away any loose dust and debris from the drill hole. Be sure to brush in a circular motion to remove as much debris as possible.
- Blow away the dust: If the wood shavings are stubborn and difficult to remove with a brush, you can use a can of compressed air or a simple hand blower to blow away the dust. Aim the nozzle directly into the hole, focusing on removing any remaining debris.
- Vacuum: If you have a vacuum cleaner with a narrow attachment, you can use it to suck up any remaining dust and wood shavings. Gently insert the attachment into the hole and let the vacuum do the work. Make sure to move the attachment around to ensure you collect all the debris.
- Inspect the hole: Once you have cleared the dust and debris, take a close look at the hole to make sure it is clean. Use a flashlight if needed to check for any remaining particles. If necessary, repeat the previous steps until the hole is completely clear.
By following these steps to clear the dust and debris, you can ensure a clean and secure hole for your screw. This will help prevent any issues with the screw fitting properly and ensure a strong and sturdy connection in your woodworking project.
Insert the Screw into the Hole
Once you have drilled a hole in the wood, it’s time to insert the screw. Follow these steps to ensure a secure and tight fit:
- Select the right screw size: Choose a screw that is appropriate for the size of the hole and the thickness of the wood. The screw should be long enough to penetrate the wood and provide a strong hold.
- Position the screw: Hold the screw against the hole, aligning it with the pilot hole. Make sure the screw is perpendicular to the wood surface.
- Apply gentle pressure: Use a screwdriver or a power drill with a screwdriver bit to turn the screw into the hole. Apply steady and even pressure to avoid stripping the screw or damaging the wood.
- Tighten the screw: Continue turning the screw until it is flush with the wood surface or slightly below. Be careful not to overtighten, as it may split the wood.
- Check the alignment: Ensure that the screw is properly aligned and sits securely in the hole. If necessary, adjust the angle or position of the screw.
Important tip: If the screw seems loose or does not hold firmly, you may need to use a larger screw or insert a wooden dowel or wall anchor for added support.
Now that you know how to insert the screw into the hole, you can proceed with your woodworking project with confidence. Remember to take your time and be patient, as precision is key for a successful outcome.
FAQ:
What tools do I need to drill a hole in wood for a screw?
To drill a hole in wood for a screw, you will need a power drill, a drill bit that matches the size of your screw, a marker or pencil, and a measuring tape or ruler.
How do I choose the right size drill bit for my screw?
To choose the right size drill bit for your screw, you can either check the packaging of the screws, or use a drill bit sizing guide. The drill bit should be slightly smaller than the diameter of the screw to ensure a tight fit.
What is the best technique for drilling a hole in wood?
The best technique for drilling a hole in wood is to first mark the spot where you want the hole with a marker or pencil. Then, select the appropriate size drill bit and attach it to your power drill. Hold the drill perpendicular to the wood surface and apply steady pressure as you drill the hole. It is important to maintain control and avoid drilling too quickly or applying too much force.
Can I use a regular screwdriver instead of a power drill?
While it is possible to use a regular screwdriver to manually drill a hole in wood, it is much more efficient and easier to use a power drill. A power drill provides more control and allows you to drill the hole faster and more accurately.
What should I do if the drill bit gets stuck in the wood?
If the drill bit gets stuck in the wood, you should stop drilling immediately. Try reversing the direction of the drill to see if that helps to release the bit. If not, you may need to carefully pry the bit out of the wood using pliers or a screwdriver. Be cautious not to damage the wood or injure yourself in the process.
Can I use a different type of drill bit for drilling into wood?
Yes, there are different types of drill bits that can be used for drilling into wood. For general wood drilling, a twist bit is commonly used. However, there are also spade bits, forstner bits, and auger bits that can be used for specific purposes or when drilling larger holes.
What safety precautions should I take when drilling a hole in wood?
When drilling a hole in wood, it is important to wear safety goggles to protect your eyes from any flying debris. Additionally, it is a good idea to secure the wood piece to prevent it from slipping or moving during drilling. Always keep your hands and fingers away from the drill bit and switch off the power drill when not in use.
Video:


Meet Harrison Clayton, a distinguished author and home remodeling enthusiast whose expertise in the realm of renovation is second to none. With a passion for transforming houses into inviting homes, Harrison's writing at https://thehuts-eastbourne.co.uk/ brings a breath of fresh inspiration to the world of home improvement. Whether you're looking to revamp a small corner of your abode or embark on a complete home transformation, Harrison's articles provide the essential expertise and creative flair to turn your visions into reality. So, dive into the captivating world of home remodeling with Harrison Clayton and unlock the full potential of your living space with every word he writes.


