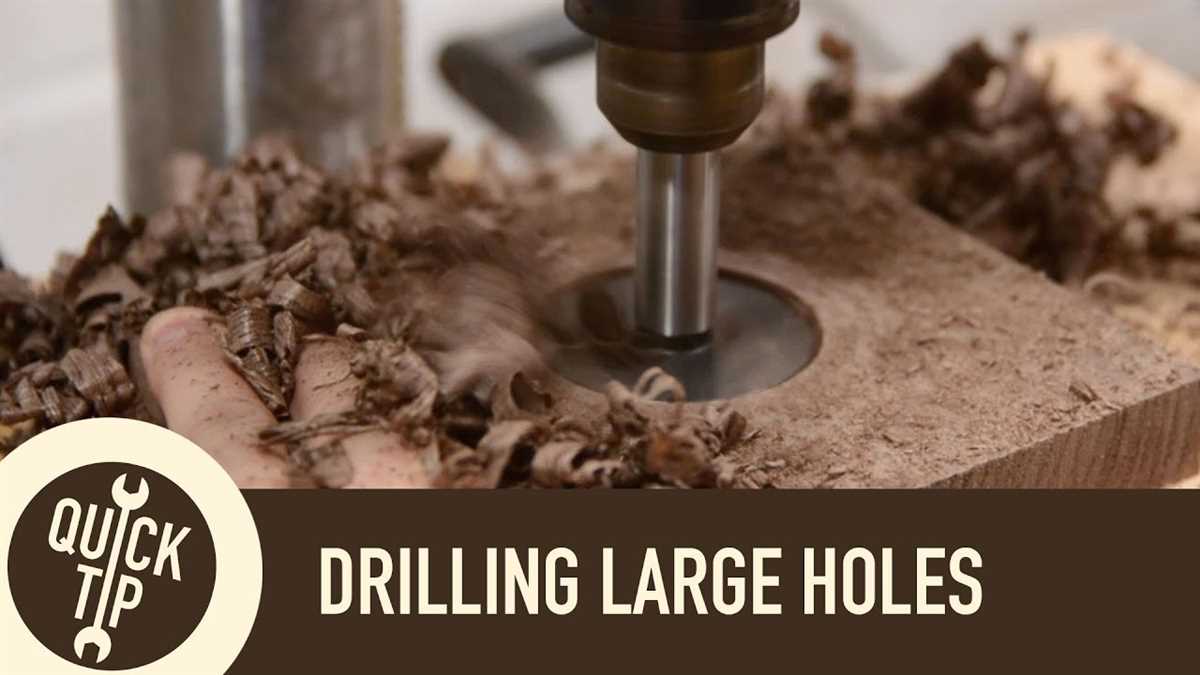
Learn how to drill a big hole in wood with these simple steps

Drilling a big hole in wood may seem like a daunting task, but with the right tools and techniques, it can be a simple and straightforward process. Whether you’re working on a woodworking project or need to install a large dowel or pipe, drilling a big hole can be accomplished with a few easy steps.
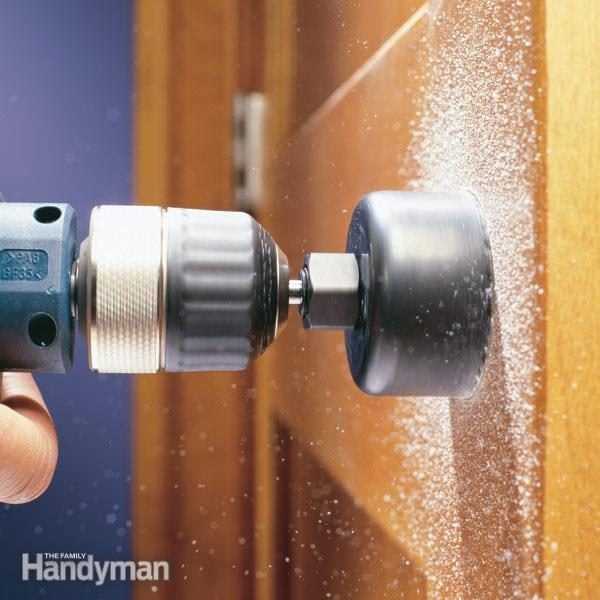
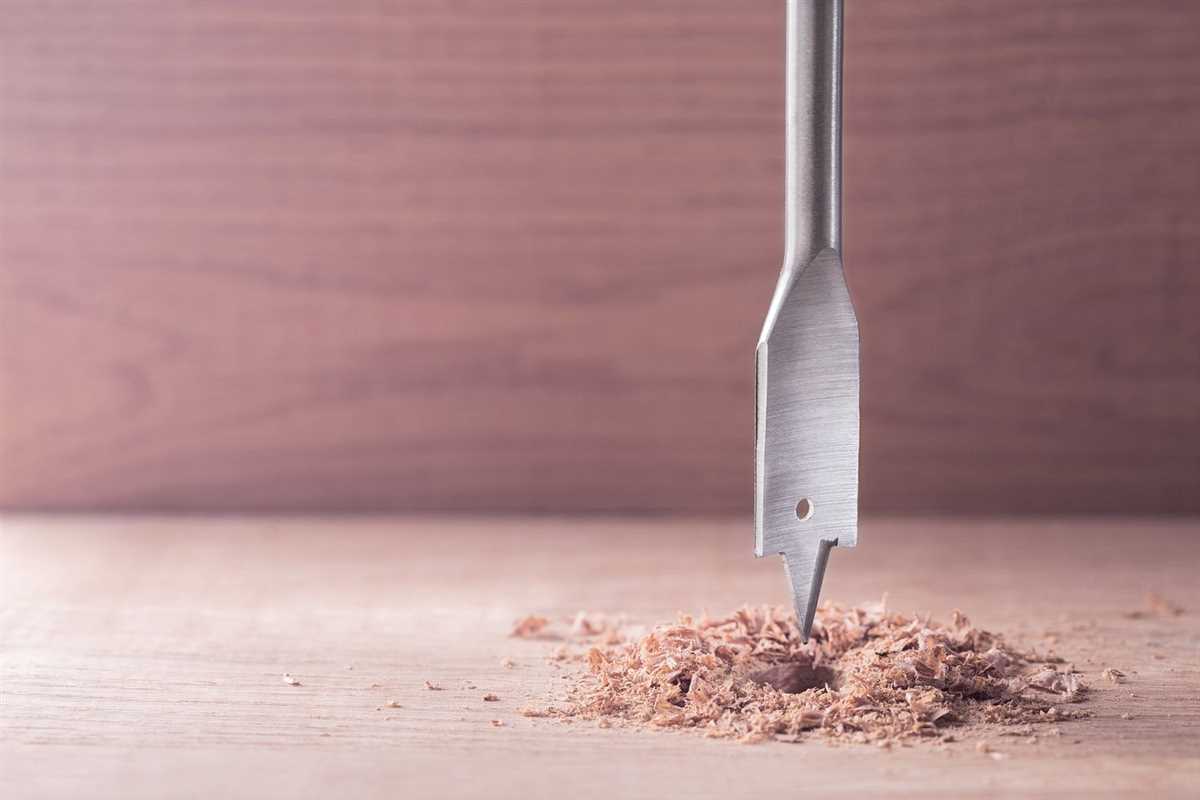
Firstly, it’s important to select the right drill bit for the job. When drilling a big hole, a spade bit or a hole saw is typically the best option. These bits have a larger diameter and are designed specifically for drilling larger holes. Make sure the bit matches the size of the hole you want to create.
Before drilling, it’s crucial to mark the center of the hole on the wood. Measure and mark the exact spot where you want the hole to be, and make sure it aligns with your project’s specifications. Use a ruler or a square to ensure accurate placement.
Next, secure the wood firmly in place using clamps or a vise. This will prevent the wood from moving or splintering during the drilling process. If necessary, create a hole in a scrap piece of wood to use as a guide or to prevent tear-out on the backside of the workpiece.
With your wood properly positioned, start the drilling process. Apply gentle pressure and let the drill do the work. Be patient and avoid forcing the drill too quickly, as this can lead to splintering or overheating. Keep the drill bit perpendicular to the wood and maintain a steady speed to ensure a clean and precise hole.

Once the hole is drilled, remove the drill from the wood and clean away any debris. If the hole has rough edges, use sandpaper or a file to smooth them out. You can also use a chisel or a router to refine the edges, if necessary.
With these simple steps, you can confidently drill a big hole in wood and achieve professional-looking results. Remember to always prioritize safety by wearing appropriate protective gear and following any guidelines provided by the manufacturer of your tools. Happy drilling!
Step 1: Gather the necessary tools
Before you begin drilling a big hole in wood, make sure you have all the tools required. Having the right tools will ensure a successful drilling process. Here are the tools you will need:
- Power drill: Choose a power drill that is suitable for drilling large holes in wood. Make sure it has enough power and the correct drill bit size.
- Large drill bit: For drilling big holes, you will need a larger-sized drill bit. The size of the drill bit will depend on the diameter of the hole you want to drill.
- Clamp: A clamp will help secure the wood in place, preventing it from moving while you drill.
- Measuring tape or ruler: You will need a measuring tape or ruler to accurately measure and mark the area where you want to drill the hole.
- Pencil or marker: Use a pencil or marker to mark the exact spot where you want the center of the hole to be.
- Safety goggles: It’s important to wear safety goggles to protect your eyes from any flying debris or wood chips.
- Dust mask: A dust mask will help protect your lungs from inhaling any wood dust or particles.
Make sure you have all these tools ready before you start drilling a big hole in wood. It’s always better to be prepared and have everything you need in order to ensure a smooth and safe drilling process.
Step 2: Prepare the wood and mark the hole
Before drilling a big hole in the wood, it’s important to prepare the surface and mark the exact spot where the hole will be drilled. This ensures accuracy and prevents any mistakes.

1. Choose the right wood
Make sure to select a suitable piece of wood that is appropriate for your project. The wood should be sturdy enough to withstand the drilling process and the final use.
2. Measure and mark the hole
Using a measuring tape, determine the precise location and dimensions of the hole. Mark the spot with a pencil or a small dot to indicate where the center of the hole will be.
3. Use a center punch

To create a small indentation at the marked spot, use a center punch. This will help to guide the drill bit and prevent it from wandering off the mark.

4. Secure the wood
Before drilling, secure the piece of wood firmly in place. You can use clamps or a vice to hold it securely, ensuring it won’t move during the drilling process.
5. Protect the surface
To avoid any damage to the wood surface, place a scrap piece of wood underneath the area where the hole will be drilled. This will prevent any tear-out or splitting.
6. Wear safety gear

Always wear safety goggles and gloves when working with power tools to protect yourself from any potential hazards.
By following these steps, you will be well-prepared and ready to drill a big hole in the wood accurately and safely.

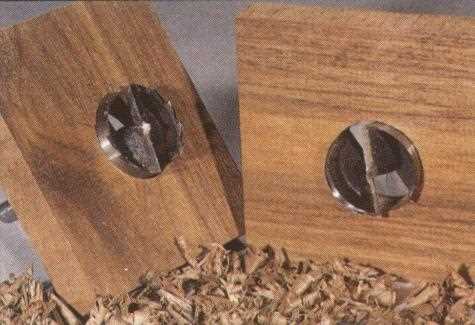
Step 3: Choose the right drill bit

When drilling a big hole in wood, it is important to choose the right drill bit for the job. The type of drill bit you need will depend on the size and type of hole you want to create.
Here are some factors to consider when choosing the right drill bit:
1. Size
The size of the hole you want to drill will determine the size of the drill bit you need. Drill bits come in various sizes, so make sure to select a bit that matches the diameter of the hole you want to create.

2. Material
Consider the material you are drilling into when selecting a drill bit. Different bits are designed to work with specific types of materials. For wood, a standard twist bit or spade bit is usually sufficient. However, if you are drilling into harder materials like metal or concrete, you may need a specialized bit.
3. Shank type
The shank is the part of the drill bit that fits into the chuck of the drill. There are two common types of shank: round and hexagonal. Round shanks are more versatile and can be used with most drills, while hexagonal shanks provide a tighter grip and are less likely to slip.
4. Cutting style
Consider the cutting style of the drill bit. For drilling large holes in wood, a spade bit or an auger bit may be the best choice. These bits have a wide, flat cutting edge that can quickly remove material. For more precise drilling, a Brad point or Forstner bit can be used.

Remember to always use the correct drill bit for the job to ensure safe and effective drilling. Using the wrong bit can result in damage to the wood or injury to yourself.
Step 4: Secure the wood in place
Before you start drilling your big hole in the wood, it’s important to make sure that the wood is firmly secured in place. This will prevent the wood from moving or slipping during the drilling process, which can lead to inaccurate holes or even accidents.
Here are a few methods you can use to secure the wood:
- Clamps: Use clamps to hold the wood firmly in place. Position the clamps on either side of the drilling area and tighten them until the wood is secure.
- Vise: If you have a vise, you can use it to hold the wood in place. Simply position the wood between the vise jaws and tighten the vise until the wood is securely held.
- Workbench: If you don’t have clamps or a vise, you can use a workbench to securely hold the wood. Place the wood on the workbench and use weights or other heavy objects to prevent it from moving.
Once the wood is securely held in place, you can proceed with drilling the big hole using the appropriate drill bit. Remember to always practice safety precautions and wear protective gear while drilling.
Step 5: Set the depth and speed on the drill
Once you have selected the appropriate drill bit for the size of the hole you want to make, it is important to set the depth and speed on the drill before you begin drilling. This will ensure that you achieve the desired results and prevent any damage.

Setting the depth
Many drills have a depth adjustment feature that allows you to control how deep the drill bit will go into the wood. This is especially important when drilling large holes, as you want to make sure you do not drill too deep and risk damaging the material or any underlying structure.
To set the depth on your drill, locate the depth adjustment collar or gauge on the drill. This is usually a round or cylindrical piece that can be moved up or down. Adjust the collar or gauge to the desired depth, making sure it is securely locked in place.
Setting the speed
The speed at which your drill operates can also affect the quality of the hole you drill. Different drill bits and materials require different speeds. For drilling large holes in wood, it is generally best to use a slower speed to ensure better control and prevent the drill from overheating.
To set the speed on your drill, locate the speed control dial or switch. This may be located on the side or top of the drill. Adjust the speed to the recommended setting for drilling into wood. If you are unsure, start with a slower speed and gradually increase it until you find the optimal speed for the job.
Keep in mind that setting the depth and speed on the drill may vary depending on the specific model and manufacturer. Always refer to the user manual or instructions provided with your drill for the most accurate and specific guidance.
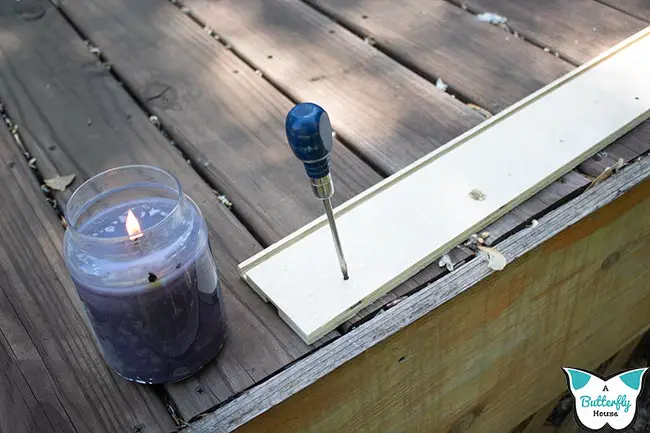
Step 6: Start drilling the hole
Once you have properly marked the center of the hole and secured the wood, it’s time to start drilling. Follow these steps to ensure a successful drilling process:
- Position the drill: Hold the drill with a firm grip and position it over the marked center of the hole. Make sure the drill bit is aligned vertically with the surface of the wood.
- Apply gentle pressure: Start the drilling process by applying gentle and steady pressure on the drill. Avoid using excessive force as it may lead to splintering or damage to the wood. Let the drill do the work for you.
- Start drilling: Switch on the drill and slowly begin drilling into the wood. Keep the drill straight and perpendicular to the surface. Allow the drill bit to penetrate the wood gradually.
- Control the speed: Maintain a consistent speed while drilling. Avoid drilling too fast or too slow, as it can affect the quality of the hole. Adjust the speed of the drill according to the type and size of the hole you are drilling.
- Clear the chips: As you drill, wood chips and debris may accumulate around the hole. Periodically stop drilling and clear the chips to prevent clogging and ensure a cleaner hole.
Note: Depending on the size of the hole, you may need to change drill bits or use a hole saw attachment. Follow the manufacturer’s instructions for attaching or changing drill bits.
Continue drilling until you have reached the desired depth for the hole. Take your time and be patient, especially when drilling larger holes. Remember to wear safety goggles and protective gear to prevent any injuries.
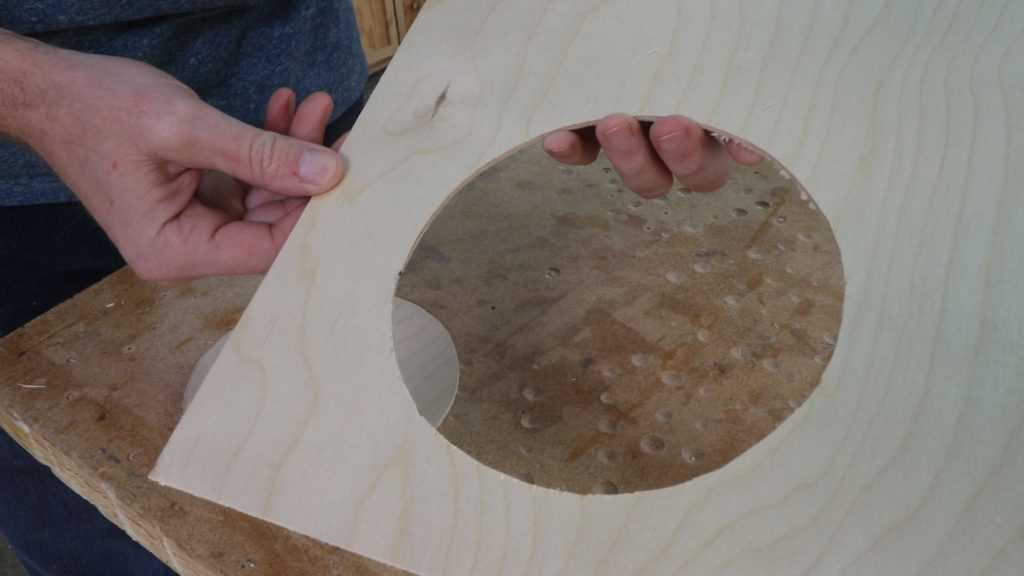
Step 7: Remove excess wood chips
After drilling a big hole in wood, it’s important to remove any excess wood chips or debris that may have accumulated. This will help ensure that the hole is clean and free from any obstructions that could affect its functionality or the fit of any parts that will be inserted into it.
To remove the excess wood chips, follow these steps:
- Use a brush or a vacuum cleaner attachment to gently sweep away the loose wood chips from the hole.
- If there are any stubborn wood chips that are stuck in the hole, use a small chisel or a flathead screwdriver to carefully pry them out.
- Inspect the hole to make sure it is clean and free from any remaining debris. If necessary, repeat steps 1 and 2 until the hole is completely clear.
Removing excess wood chips ensures that the hole is ready for any further steps in your woodworking project. It also helps to prevent any potential issues that could arise from debris interfering with the functionality or aesthetics of the finished product.
Remember to work carefully when removing wood chips, as using excessive force or applying too much pressure can damage the wood or the hole itself. Take your time and be gentle, ensuring that the hole is clean and ready for use.
Step 8: Clean up and finish the hole
Once you have drilled the big hole in the wood, it’s important to clean up any debris or sawdust that may have accumulated during the drilling process. This will ensure that the hole is clean and ready for further use or finishing touches.
To clean up the hole, you can use a brush or a vacuum to remove any loose particles. Make sure to thoroughly clean both the inside and the edges of the hole to ensure a smooth surface.
After cleaning, you may choose to finish the hole to give it a polished look. This can be done by sanding the edges of the hole with a fine-grit sandpaper to smooth out any roughness. Be sure to sand in a circular motion to achieve an even finish.
If desired, you can also apply a wood filler or putty to any imperfections or gaps around the edges of the hole. This will help create a seamless look and provide additional support.
Once the hole is clean and finished, you can proceed with your intended use, whether it be inserting a dowel, attaching a piece of hardware, or any other woodworking project.
FAQ:
What tools do I need to drill a big hole in wood?
To drill a big hole in wood, you will need a few tools. First, you will need a drill with a large drill bit. You may also need a jigsaw or a hole saw, depending on the size and shape of the hole you want to make.
What safety precautions should I take when drilling a big hole in wood?
When drilling a big hole in wood, it is important to take several safety precautions. First, make sure to wear safety glasses to protect your eyes from any flying debris. Additionally, it’s a good idea to wear work gloves to protect your hands. Finally, be sure to secure the wood to a stable surface before drilling to prevent it from moving or slipping.
How do I choose the right drill bit for a large hole in wood?
Choosing the right drill bit for a large hole in wood is essential for achieving the desired result. You will want to select a drill bit with a diameter slightly larger than the size of the hole you want to make. Additionally, consider the type of wood you are drilling into and choose a drill bit that is suitable for that type of wood.
What is the best technique for drilling a big hole in wood?
The technique for drilling a big hole in wood will depend on the tools you are using. If you are using a drill with a large drill bit, start by marking the center of the hole on the wood. Then, slowly and steadily drill into the wood while applying slight pressure. If you are using a jigsaw or a hole saw, start by drilling a small pilot hole to guide the blade. Then, carefully follow the marked outline of the hole with the jigsaw or hole saw.
Can I drill a big hole in wood without any power tools?
Yes, you can drill a big hole in wood without any power tools, although it may require more effort and time. You can use a hand drill or a brace and bit to manually drill the hole. However, it’s important to note that drilling a big hole in wood without power tools may not give you as clean or precise results as using a power drill or other power tools.
What are some creative uses for large holes in wood?
There are many creative uses for large holes in wood. Some common examples include creating holes for plumbing or electrical wiring, creating decorative cutouts or designs in furniture or wooden crafts, or creating holes for dowels or other joinery methods. The possibilities are endless, and the only limit is your imagination!
Video:

How to cut porcelain slabs

Meet Harrison Clayton, a distinguished author and home remodeling enthusiast whose expertise in the realm of renovation is second to none. With a passion for transforming houses into inviting homes, Harrison's writing at https://thehuts-eastbourne.co.uk/ brings a breath of fresh inspiration to the world of home improvement. Whether you're looking to revamp a small corner of your abode or embark on a complete home transformation, Harrison's articles provide the essential expertise and creative flair to turn your visions into reality. So, dive into the captivating world of home remodeling with Harrison Clayton and unlock the full potential of your living space with every word he writes.


