How to Uninstall Disk Drill: A Step-by-Step Guide

Disk Drill is a popular data recovery software that allows users to recover lost or deleted files from their computer or external storage devices. However, there may come a time when you no longer need the application or want to free up some disk space. In this step-by-step guide, we will walk you through the process of uninstalling Disk Drill from your computer.
Step 1: Close Disk Drill and any associated processes
Before you begin the uninstallation process, make sure to close Disk Drill and any associated processes running in the background. This will ensure a smooth and successful uninstallation.
Step 2: Open the Control Panel
Next, you will need to open the Control Panel on your computer. You can do this by clicking on the Start button, then selecting Control Panel from the menu. Alternatively, you can search for Control Panel in the search bar.

Step 3: Uninstall Disk Drill
Once you have opened the Control Panel, navigate to the “Programs” or “Programs and Features” section. Here, you will find a list of all the installed programs on your computer. Look for Disk Drill in the list and click on it to select it.
Step 4: Click on “Uninstall”
After selecting Disk Drill, click on the “Uninstall” button located at the top of the list. This will initiate the uninstallation process.
Step 5: Follow the prompts

Follow the prompts that appear on the screen to complete the uninstallation process. This may include confirming your decision to uninstall Disk Drill, selecting additional options, or entering your administrator password.
Step 6: Restart your computer
Once the uninstallation process is complete, it is recommended to restart your computer. This will ensure that any remaining files or processes associated with Disk Drill are fully removed.
By following these step-by-step instructions, you can easily uninstall Disk Drill from your computer. Remember to only uninstall software that you no longer need or use to keep your system running smoothly and free up valuable disk space.
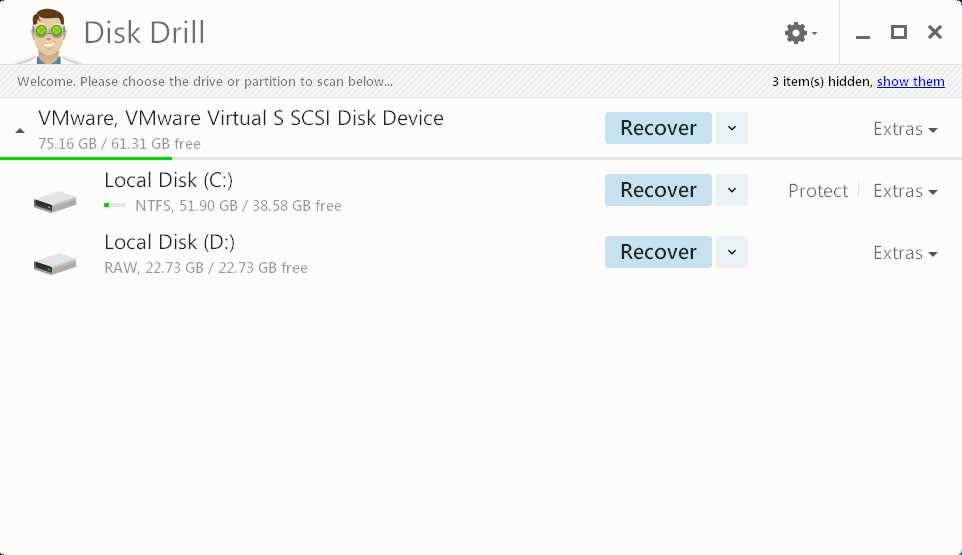
Overview of Disk Drill

Disk Drill is a powerful data recovery software that allows you to recover lost or deleted files from your computer’s hard drive, external drives, memory cards, and other storage devices. It uses advanced algorithms to scan and analyze your device for recoverable data, helping you retrieve important files that were accidentally deleted, formatted, or lost due to system crashes.
Some key features of Disk Drill include:
- Quick Scan: This feature allows you to perform a fast scan of your device to quickly find and recover recently deleted files.
- Deep Scan: With deep scan, you can thoroughly search your device for lost or inaccessible files, even if they were deleted a long time ago.
- Partition Recovery: Disk Drill also supports partition recovery, which means you can restore lost or deleted partitions on your hard drive.
- Preview and Filter: Before recovering the files, Disk Drill lets you preview them to ensure you are recovering the right ones. You can also use filters to only recover specific file types.
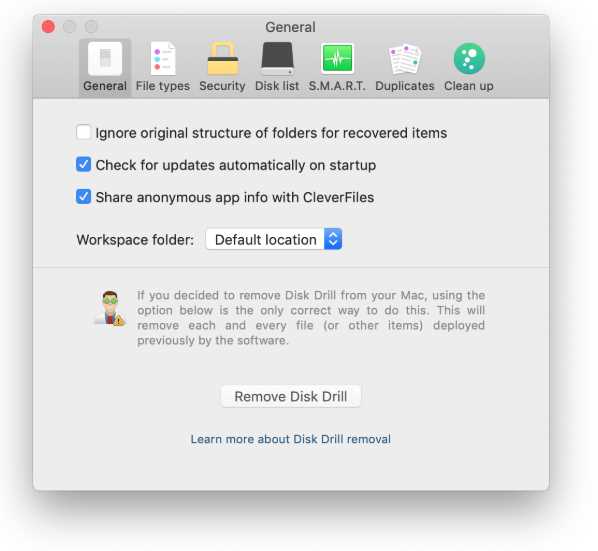
- Protection and Backup: Apart from recovery, Disk Drill offers features like Recovery Vault and Guaranteed Recovery, which can help prevent data loss and automatically create backups of important files.
Whether you accidentally deleted a file, formatted a drive, or encountered a system crash, Disk Drill provides a user-friendly interface and a wide range of recovery options to help you retrieve your valuable data. It supports both Windows and Mac operating systems, making it a versatile tool for data recovery on various platforms.
In the following sections, we will guide you through the process of uninstalling Disk Drill from your computer.
Why Uninstall Disk Drill?
1. Performance Issues

Disk Drill is a data recovery tool that runs in the background and may consume a considerable amount of system resources. It can slow down your computer, especially if you have a less powerful device or if you’re running multiple applications simultaneously. Uninstalling Disk Drill can help enhance your computer’s performance and speed.
2. Privacy Concerns
Disk Drill requires access to your files and storage devices to perform data recovery tasks. While it claims to handle your data with care and security, you may still have concerns about privacy. If you no longer need Disk Drill’s services or want to ensure that your data remains private, uninstalling the software is a valid option.
3. Frequent Updates and Notifications
Like any software, Disk Drill requires regular updates to fix bugs, improve functionality, and address security vulnerabilities. These updates may interrupt your workflow and appear as frequent notifications, which can be bothersome or distracting. If you don’t use Disk Drill often or find the updates and notifications disruptive, uninstalling the software can alleviate these annoyances.
4. Alternative Solutions

If you’ve found a better data recovery tool that suits your needs or have already recovered the data you needed with Disk Drill, you may no longer have a use for the software. Uninstalling Disk Drill can free up storage space on your computer and make room for other programs or files that you need.
5. Compatibility Issues
Disk Drill may not be compatible with all operating systems or storage devices. If you’ve encountered compatibility issues or have switched to a different operating system, you may want to uninstall Disk Drill to ensure smooth and uninterrupted usage of your computer.
6. License Limitations
If you’re using a free version of Disk Drill and have reached its limitations, such as the number of recoverable files or restricted features, you may consider uninstalling the software. Upgrading to a paid version or exploring alternative data recovery solutions could be more cost-effective and efficient in the long run.
Overall, the decision to uninstall Disk Drill depends on your specific needs, concerns, and preferences. Evaluating the reasons mentioned above can help you determine whether keeping or uninstalling Disk Drill is the right choice for you.
Step 1: Close Disk Drill and Other Processes
In order to uninstall Disk Drill from your computer, you first need to make sure that all Disk Drill processes are closed. Here are the steps to close Disk Drill and other related processes:
- Locate the Disk Drill icon in your system tray.
- Right-click on the Disk Drill icon.
- Select “Quit” or “Exit” from the context menu.
This will close the Disk Drill application and prevent any further processes from running in the background.
It is also important to ensure that there are no other background processes associated with Disk Drill running on your computer. Here’s how to check for and close any such processes:
- Open the Task Manager by pressing Ctrl + Shift + Esc on your keyboard.
- In the Task Manager window, click on the “Processes” tab.
- Look for any processes related to Disk Drill, such as “DiskDrill.exe” or “SmartMonitoring.exe”.
- If you find any such processes, right-click on them and select “End Task” or “End Process”.
By closing Disk Drill and any associated processes, you ensure that the uninstallation process proceeds smoothly without any interruptions.
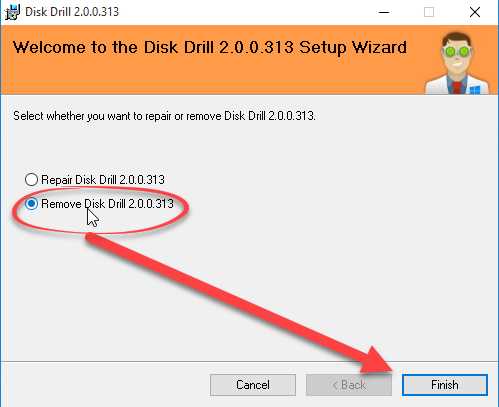
Step 2: Uninstall Disk Drill from Control Panel
After you have closed all running programs and saved any important documents, you can proceed with uninstalling Disk Drill from your computer’s Control Panel. Follow the steps below:
- Open the Control Panel by clicking on the Start menu and searching for “Control Panel”.
- Once the Control Panel window opens, navigate to the “Programs” or “Programs and Features” section.
- In the list of installed programs, locate and select “Disk Drill”.
- Click on the “Uninstall” or “Remove” button, which may be located at the top of the window or in the right-click menu.
- Follow the prompts and confirmation messages to complete the uninstallation process.
Note: The exact steps and wording may vary slightly depending on your version of Windows.
Once the uninstallation process is complete, Disk Drill should no longer be present on your computer. However, it’s always a good idea to double-check by searching for any remaining files or folders related to Disk Drill and deleting them manually.
Step 3: Remove Disk Drill Files and Folders
After successfully uninstalling Disk Drill from your computer, you need to make sure that all of its associated files and folders are also removed. Follow the steps below to fully remove Disk Drill from your system:
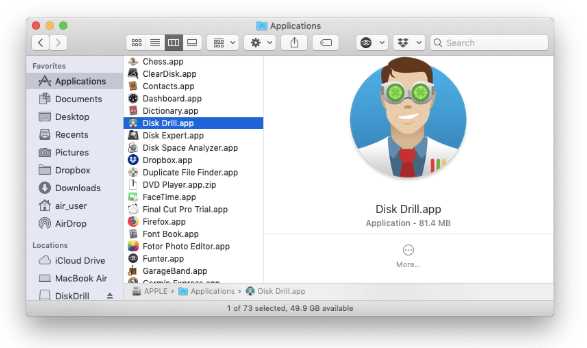
- Open the File Explorer on your computer.
- Navigate to the installation directory where Disk Drill was initially installed. This is usually located in the “Program Files” or “Program Files (x86)” folder.
- Once you’ve located the Disk Drill folder, right-click on it and select “Delete” to remove it from your system.
- Confirm the deletion by clicking on “Yes” in the confirmation prompt.
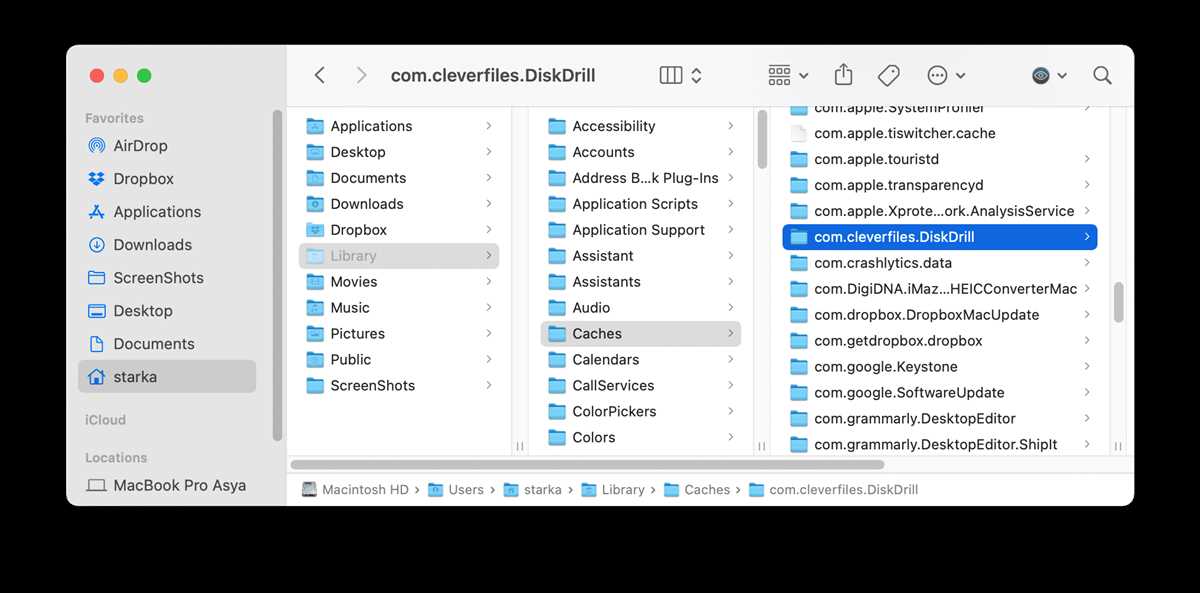
- Next, navigate to the “AppData” folder on your computer. This is usually a hidden folder, so you may need to enable the option to show hidden files and folders.
- In the “AppData” folder, locate the “Local” and “Roaming” folders. Open each of these folders and delete any Disk Drill-related files or folders.
It’s important to thoroughly search and remove any remaining Disk Drill files or folders, as they may still contain information or preferences that could potentially interfere with future installations or cause conflicts with other software on your system.
Once you have completed these steps, you can be confident that Disk Drill has been completely removed from your computer.
Step 4: Clear Disk Drill Registry Entries
When you uninstall Disk Drill, it’s important to remove any registry entries associated with the software. These entries are stored in the Windows Registry and can cause issues if left behind.
To clear Disk Drill registry entries, follow these steps:
- Press the Windows key + R to open the Run dialog box.
- Type “regedit” and press Enter. This will open the Registry Editor.
- In the Registry Editor, navigate to the following location: HKEY_CURRENT_USERSoftwareCleverFilesDisk Drill.
- Right-click on the “Disk Drill” folder and select “Delete” to remove it from the registry.
- Confirm the deletion when prompted.
- Navigate to the following location: HKEY_LOCAL_MACHINESOFTWAREWOW6432NodeCleverFilesDisk Drill (for 64-bit systems) or HKEY_LOCAL_MACHINESOFTWARECleverFilesDisk Drill (for 32-bit systems).
- Repeat steps 4 and 5 to delete the “Disk Drill” folder from the registry.
Once you have deleted the Disk Drill registry entries, you can close the Registry Editor. The software has now been completely uninstalled from your system, including any associated registry entries.
It’s important to note that modifying the Windows Registry can be risky. If you are not comfortable with this process, it’s recommended to use a registry cleaner tool or seek assistance from a knowledgeable technician.
Step 5: Remove Disk Drill From Startup Programs
After uninstalling Disk Drill from your computer, it’s important to make sure that it is no longer set to run automatically when you start your computer. This step will guide you through removing Disk Drill from the list of startup programs.
Windows:
- Press Ctrl + Shift + Esc to open the Task Manager.
- Click on the Startup tab.
- In the list of startup programs, locate Disk Drill.
- Right-click on Disk Drill and select Disable.
- Close the Task Manager.
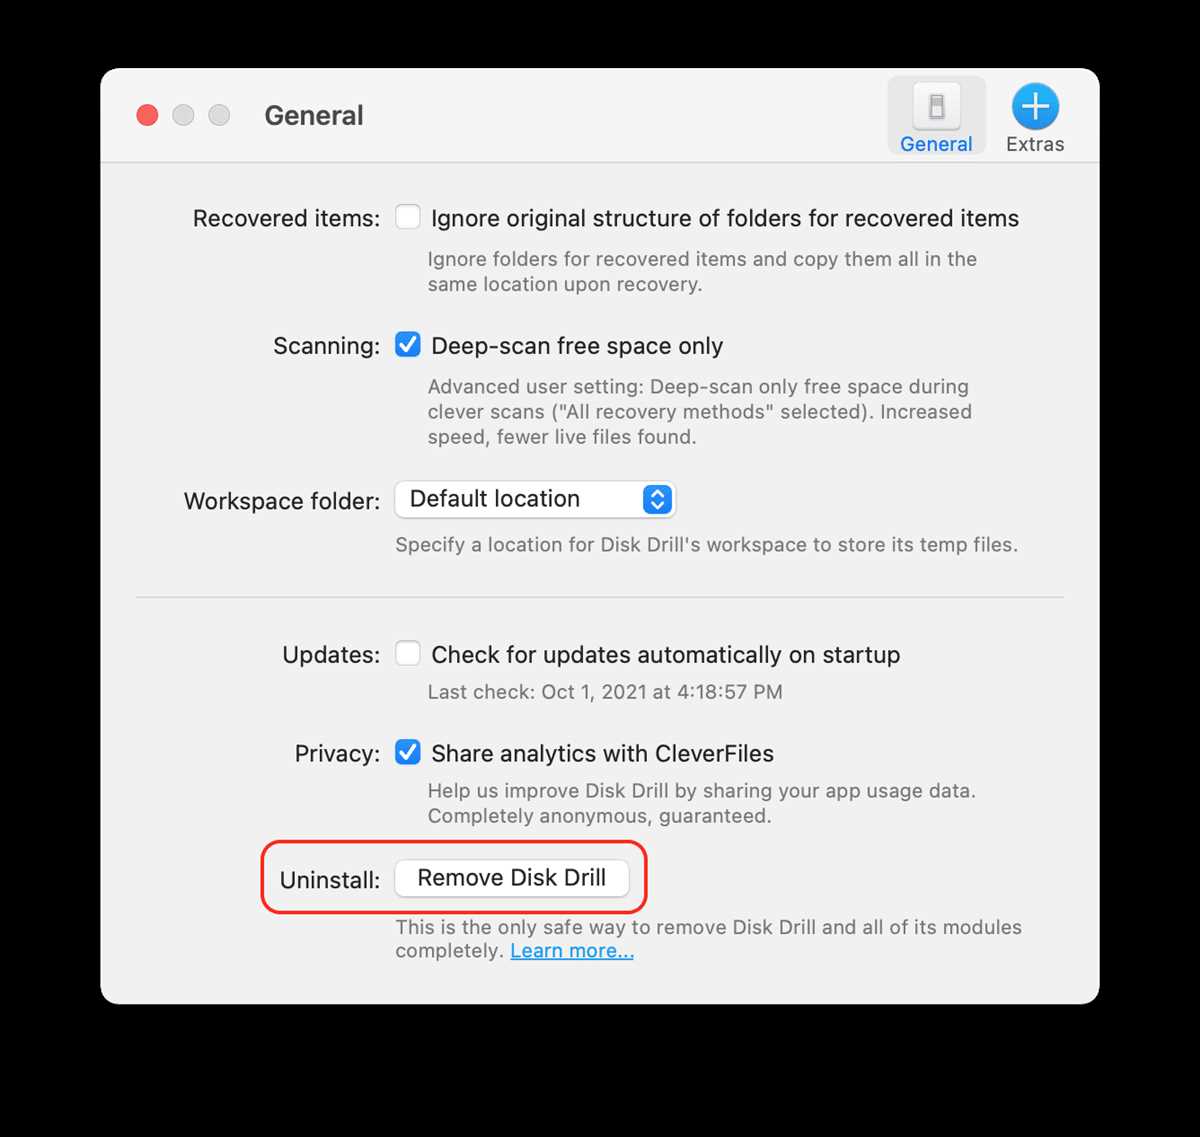
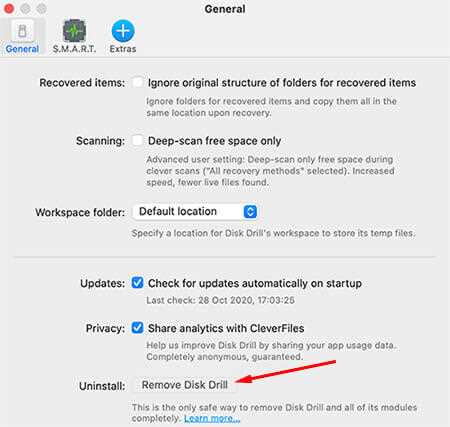
Mac:
- Click on the Apple menu and select System Preferences.
- Click on Users & Groups.
- Click on your username and then select the Login Items tab.
- In the list of login items, locate Disk Drill.
- Select Disk Drill and click on the – button to remove it from the list.
By following these steps, you have successfully removed Disk Drill from the list of startup programs on your computer. This ensures that Disk Drill will no longer run automatically when you start your computer.
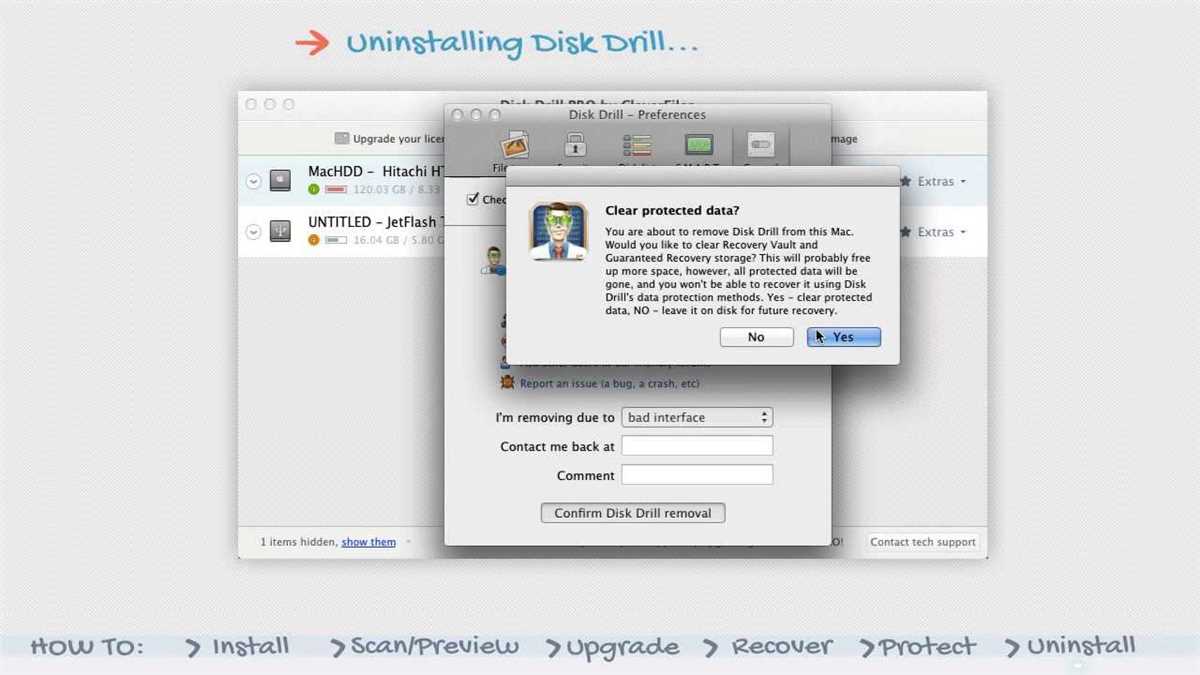
Step 6: Clear Disk Drill Leftovers
Even after you have successfully uninstalled Disk Drill from your computer, there may still be some leftover files and folders that were not removed during the uninstallation process. These leftovers can take up valuable disk space and may potentially cause conflicts with other software programs.
To ensure a complete removal of Disk Drill and its associated files, you should perform a manual cleanup of any remaining leftovers. Here are the steps to clear Disk Drill leftovers:
- Open the File Explorer on your Windows computer by pressing the Windows key and E simultaneously.
- Navigate to the following locations and delete any related files and folders:
- Program Files: Look for a folder named “CleverFiles” and delete it.
- AppData: Go to the “AppData” folder, then navigate to “Local” and “Roaming.” Look for any folders related to Disk Drill or CleverFiles and delete them.
- Registry Editor: Press the Windows key and R simultaneously to open the Run command. Type “regedit” and press Enter. In the Registry Editor, navigate to HKEY_CURRENT_USERSoftware and HKEY_LOCAL_MACHINESOFTWARE. Look for any entries related to Disk Drill or CleverFiles and delete them. Note: Modifying the Windows Registry can be dangerous, so proceed with caution and make a backup before making any changes.
- Once you have deleted all the relevant files and folders, empty your Recycle Bin to permanently remove them from your computer.
By following these steps, you can ensure that all remnants of Disk Drill have been removed from your computer, freeing up disk space and preventing any potential conflicts with other programs. If you encounter any issues during the cleanup process, it is recommended to consult with a professional or the Disk Drill support team for further assistance.
Step 7: Restart Your Computer
Once you have successfully uninstalled Disk Drill from your computer, it is recommended to restart your computer to ensure that all changes take effect and to fully remove any remaining traces of the software.
To restart your computer, follow these steps:
- Save any open documents or files.
- Click on the Start menu in the bottom-left corner of your screen.
- Select the “Power” option.
- From the menu that appears, choose “Restart”.
- Your computer will now begin the restart process.
During the restart process, your computer will close all running programs and services, flush temporary files, and reload the operating system. This helps to ensure that any lingering components or settings associated with Disk Drill are completely removed from your system.
Once your computer has finished restarting, you can proceed to use your computer as normal. You have now successfully uninstalled Disk Drill from your computer.
FAQ:
Can I uninstall Disk Drill without losing my data?
Yes, you can uninstall Disk Drill without losing your data. The uninstallation process only removes the application itself and does not delete any of your files.
Will uninstalling Disk Drill affect my other applications?
No, uninstalling Disk Drill will not affect your other applications. The uninstallation process only removes the Disk Drill application and does not interfere with other programs on your computer.
Can I reinstall Disk Drill after uninstalling it?
Yes, you can reinstall Disk Drill after uninstalling it. Simply download the Disk Drill installer from the CleverFiles website and follow the installation instructions.
Do I need to restart my computer after uninstalling Disk Drill?
No, you do not need to restart your computer after uninstalling Disk Drill. The uninstallation process does not require a system restart.
How long does it take to uninstall Disk Drill?
The uninstallation process for Disk Drill is usually quick and can be completed within a minute or two.
Video:


Meet Harrison Clayton, a distinguished author and home remodeling enthusiast whose expertise in the realm of renovation is second to none. With a passion for transforming houses into inviting homes, Harrison's writing at https://thehuts-eastbourne.co.uk/ brings a breath of fresh inspiration to the world of home improvement. Whether you're looking to revamp a small corner of your abode or embark on a complete home transformation, Harrison's articles provide the essential expertise and creative flair to turn your visions into reality. So, dive into the captivating world of home remodeling with Harrison Clayton and unlock the full potential of your living space with every word he writes.


