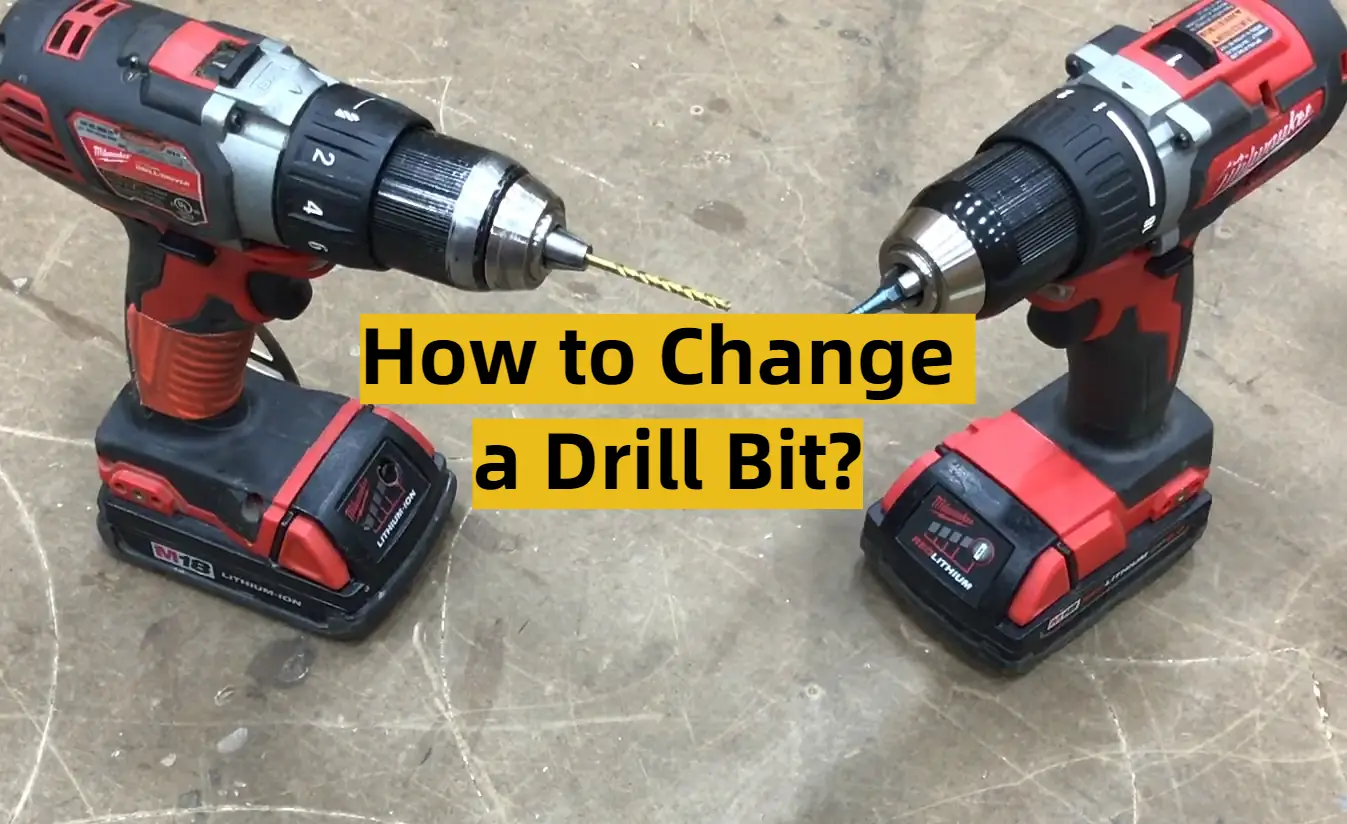
How to Switch Drill Bits: A Step-by-Step Guide

Changing drill bits may seem like a simple task, but if you’ve never done it before, it can be a bit intimidating. However, with the right tools and a step-by-step guide, you’ll be able to switch drill bits with ease.
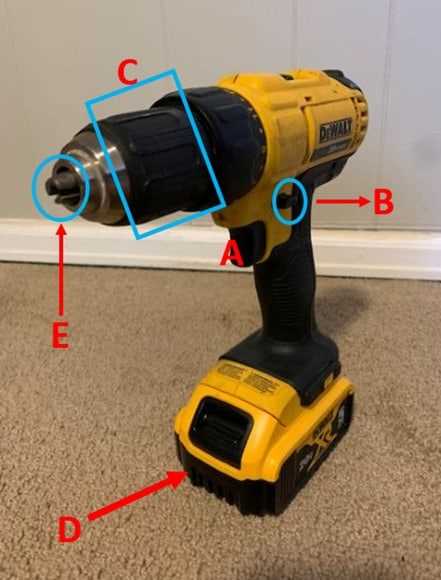
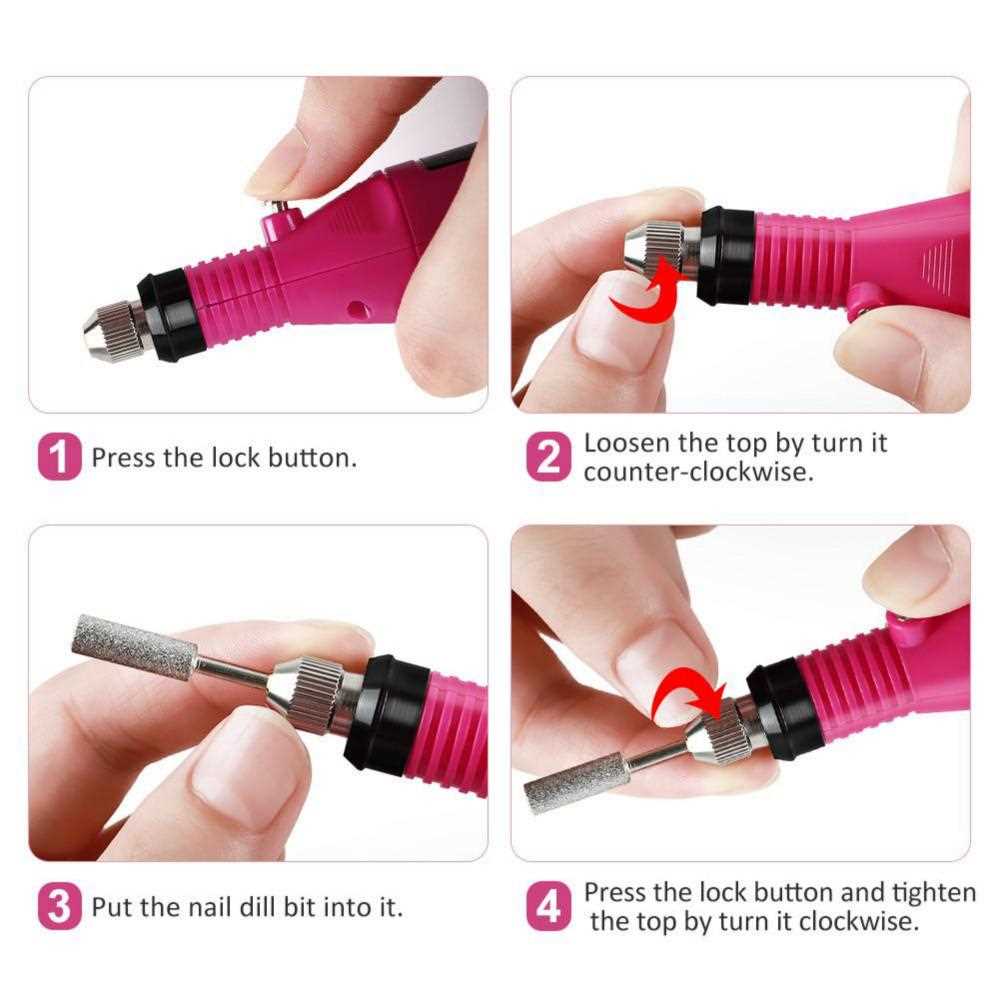
The first step in switching drill bits is to ensure that your drill is turned off and unplugged. This will prevent any accidents or injuries. Once the drill is switched off, locate the chuck, which is the part of the drill that holds the bit.
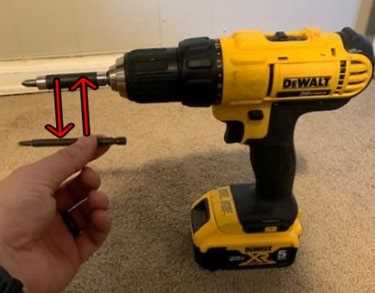
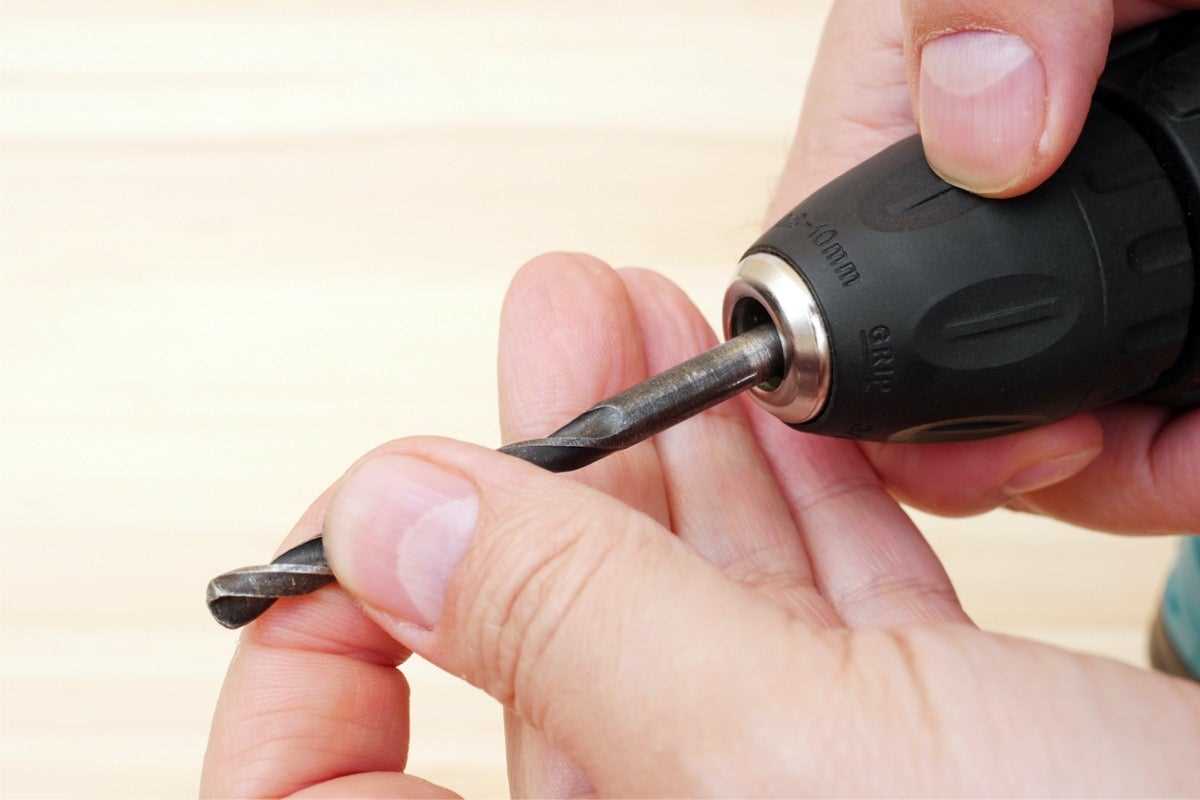
To release the current drill bit, hold onto the drill chuck with one hand and rotate the chuck counterclockwise with your other hand. This will loosen the chuck and allow you to remove the bit. Once the bit is removed, set it aside in a safe place.
Next, select the new drill bit that you want to use and hold it by the shank, which is the non-cutting end of the bit. Align the shank with the jaws of the chuck and insert it into the chuck. Make sure that the bit is fully inserted and then hold onto the chuck and rotate it clockwise to tighten it. Ensure that the bit is securely fastened in the chuck.
Finally, give the chuck a gentle tug to make sure that the bit is properly secured. Once you’ve confirmed that the bit is securely fastened, you can plug in the drill and turn it on. You’re now ready to start drilling with your new bit!

Gather the Necessary Tools
Before you begin the process of switching drill bits, make sure you have all the necessary tools. Having the proper tools on hand will make the process easier and more efficient. Here are the tools you will need:
- A drill
- A chuck key or drill bit tool
- The new drill bit you plan to use
- Safety goggles or glasses
- Gloves (optional, but recommended)
Having a drill with a keyless chuck can make the process even simpler, as it eliminates the need for a chuck key. However, if your drill has a chuck that requires a key, make sure you have the appropriate key on hand.
It is also important to wear safety goggles or glasses to protect your eyes from any flying debris. Additionally, wearing gloves can provide an added layer of protection and improve grip.
Turn Off and Unplug the Drill
Before attempting to switch drill bits, it’s important to turn off the drill and unplug it from the power source. This step is crucial for your safety and helps to prevent any accidental injuries while working on the drill.

Here’s how to turn off and unplug the drill:
- Locate the switch or trigger on the drill and release it to the “off” position.
- If the drill has a power cord, unplug it from the wall socket or extension cord.
- If the drill is cordless, remove the battery pack from the drill.
By turning off and unplugging the drill, you ensure that there is no power running through it, reducing the risk of accidental starts or electrocution. Always make it a habit to perform this step before working on any power tool, including changing drill bits.
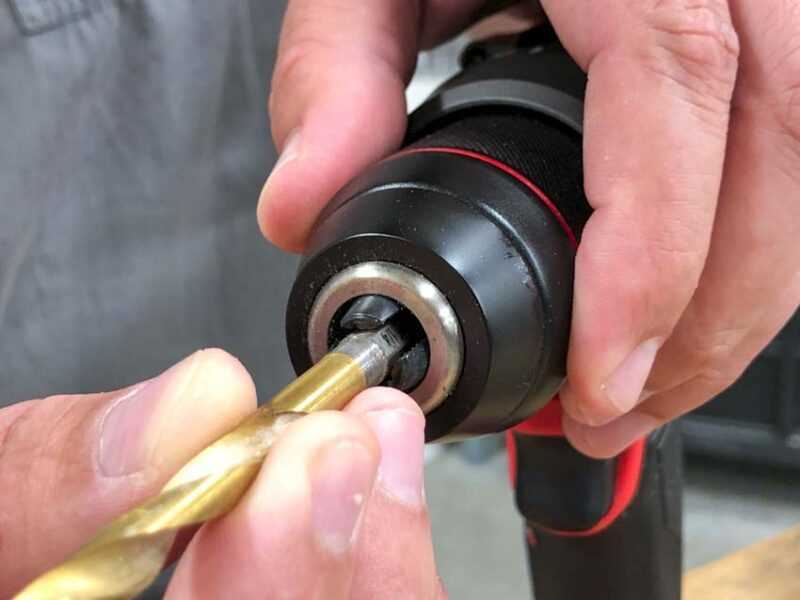
Release the Current Drill Bit
Before you can switch drill bits, you need to safely release the current drill bit from the drill. Follow these steps to release the current drill bit:
Step 1: Power off the drill
Make sure the drill is turned off and unplugged from the power source. This will prevent any accidental start-ups while you are removing the drill bit.
Step 2: Locate the chuck
The chuck is the part of the drill that holds the drill bit in place. It is usually located at the front of the drill. Look for a cylindrical or hexagonal-shaped component with ridges or jaws.
Step 3: Tighten the chuck
If the chuck is already tightened, you will need to loosen it before you can remove the drill bit. Turn the chuck counterclockwise to loosen it. You may need to use a chuck key or a
Gather the New Drill Bits
Before you can switch drill bits, you need to have the new bit or bits ready to go. Determine what type and size of bit you need for your next task. If you have a set of drill bits, locate the one that matches your requirements.

Check the Compatibility
Not all drill bits are compatible with all drills. Some drills require specific types of bits, while others can accommodate a wider range of options. Check the user manual or instructions for your drill to see what types of drill bits are recommended or compatible.
Consider the Material
When selecting a new drill bit, consider the material you will be drilling into. Different materials require different types of bits to achieve the best results. For example, wood bits are designed for drilling into wood, while masonry bits are used for drilling into concrete or brick.
Determine the Size
Take note of the required size of the new drill bit. This may be indicated in millimeters or inches, depending on your location and the drill bit manufacturer’s specifications. Make sure the new bit matches the size needed for your specific drilling task.
Optional: Select Multiple Bits
If you anticipate needing to switch between different sizes or types of drill bits during your project, consider selecting multiple bits in one go. This will save you time later on and ensure you have the right bits for different tasks.
Inspect the New Drill Bit
Before inserting the new drill bit, inspect it for any visible defects or damage. Check for any sharp edges, cracks, or bends that could affect its performance or safety. If you notice any issues, discard the bit and select a different one.

Prepare the New Drill Bit
Remove any protective covers or packaging from the new drill bit. Ensure that it is clean and free from any debris or residue. This will help the bit function properly and improve drilling accuracy.
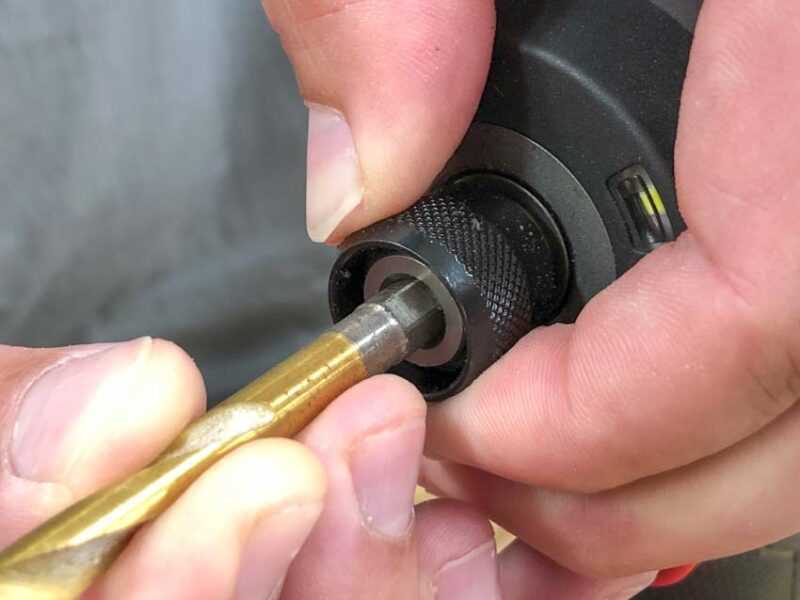
Insert the New Drill Bit
Once you have removed the old drill bit, it’s time to insert the new one. Follow these steps to properly insert the new drill bit into your drill:
- Double-check that the drill is powered off and unplugged from the power source.
- Inspect the new drill bit to ensure it is the correct size and type for your intended task.
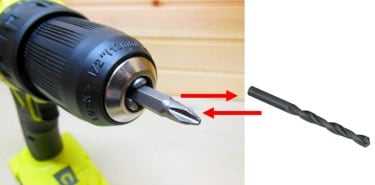
- Hold the new drill bit by its shank, which is the non-cutting end.
- Aline the chuck jaws with the grooves or notches on the shank, ensuring they are properly lined up.
- Insert the shank into the chuck, making sure it goes in straight and fully.
- Tighten the chuck by turning it clockwise. Use a chuck key if necessary, or the drill’s built-in chuck mechanism.
- Give the chuck a final twist to make sure the drill bit is securely in place.
It’s important to note that some drills have keyless chucks, which means you can tighten the chuck by hand without the need for a chuck key. However, if your drill has a keyed chuck, you will need to use a chuck key to tighten the chuck.
By following these steps, you should be able to safely and effectively insert a new drill bit into your drill. Remember to always wear appropriate safety gear, such as safety glasses, when working with power tools.
Tighten the Chuck
Once you have inserted the drill bit into the chuck, you will need to tighten it securely. This ensures that the bit stays in place while you are drilling.
- Hold the drill with one hand and grip the chuck firmly with your other hand.
- Turn the chuck clockwise to tighten it. Make sure to turn it as far as it will go to ensure a tight fit.
- If your drill has a keyless chuck, you can simply hand-tighten it by gripping the chuck and twisting it to the right.
- If your drill has a keyed chuck, insert the chuck key into one of the holes on the side of the chuck. Use the key to turn the chuck clockwise until it is tight.
After tightening the chuck, give it a gentle tug to make sure the bit is secure. If the bit wiggles or feels loose, you may need to tighten the chuck further.
Test the New Drill Bit
Before you start using the new drill bit, it’s important to test it out to ensure it’s working properly and to familiarize yourself with its capabilities. Here are the steps to test the new drill bit:
- Ensure the drill is in the off position and unplugged from the power source.
- Insert the new drill bit into the chuck, making sure it is securely tightened.
- Choose a scrap piece of material to test the drill bit on. This can be a piece of wood, metal, or any other material you plan on drilling.
- Place the scrap material onto a steady surface, such as a workbench or sawhorse, and secure it in place if necessary.
- Turn on the drill and position the tip of the new drill bit on the surface of the scrap material.
- Apply gentle pressure and begin drilling a hole, making sure to keep the drill steady and straight.
- Observe the drilling process and check for any issues or abnormalities. The drill bit should smoothly cut into the material without any excessive vibrations or wobbling.
- Continue drilling until you have completed the hole or until you are satisfied with the test results.
- Inspect the quality of the hole and the condition of the drill bit. Look for any signs of damage or wear on the drill bit.
If the test is successful and the drill bit performs as expected, you can proceed with using it for your intended projects. If any issues arise during the test, such as the drill bit not cutting properly or excessive vibrations, you may need to troubleshoot the problem or consider using a different drill bit.
Remember to always follow safety precautions when using power tools and to wear appropriate protective gear, such as safety glasses and gloves.
Clean Up and Store the Previous Drill Bit
Before moving on to insert the new drill bit, it is important to clean up and properly store the previous one. This will help maintain the longevity and effectiveness of the drill bits.
Steps to clean up the previous drill bit:
- Unplug the power cord or remove the battery from the drill to ensure safety.
- Using a piece of cloth or a brush, remove any debris or dust that may have accumulated on the drill bit. It is important to clean it thoroughly to prevent any damage while storing.
- Inspect the drill bit for any signs of wear or damage. If you notice any chips or dullness, it may be time to replace the drill bit.
- If the drill bit is in good condition, you can clean it further by dipping it in a cleaning solution or rubbing alcohol. This will help remove any stubborn dirt or residue.
- After cleaning, make sure to dry the drill bit completely to prevent any rust or corrosion.
Steps to store the previous drill bit:
- Once the drill bit is cleaned and dried, it is essential to store it properly to maintain its quality.
- You can use a drill bit organizer or a designated container to store the drill bit separately from other tools.
- Ensure that the storage container is clean and dry before placing the drill bit inside.
- If the drill bit came with its original packaging, it is recommended to store it back in the original case for added protection.
- Label the container or case with the size or type of the drill bit to easily identify it in the future.
- Store the container or case in a cool, dry place away from direct sunlight or extreme temperatures.
By properly cleaning and storing the previous drill bit, you can ensure its longevity and convenience when it comes time to use it again. It is essential to take care of your drill bits to maintain their efficiency and performance.
FAQ:
What is the purpose of this guide?
The purpose of this guide is to provide a step-by-step process on how to switch drill bits.
Why is it important to know how to switch drill bits?
Knowing how to switch drill bits is important because it allows you to use different sizes and types of drill bits for different tasks, making your drilling more efficient and effective.
Can I use the same method to switch drill bits on all types of drills?
The method described in this guide is generally applicable to most types of drills. However, it is always recommended to consult the drill’s manual for specific instructions.
Are there any safety precautions I should take when switching drill bits?
Yes, safety precautions should always be taken when working with power tools. Make sure to turn off the drill and unplug it from the power source before attempting to switch drill bits. Additionally, wear safety goggles to protect your eyes from any flying debris.
Video:

Meet Harrison Clayton, a distinguished author and home remodeling enthusiast whose expertise in the realm of renovation is second to none. With a passion for transforming houses into inviting homes, Harrison's writing at https://thehuts-eastbourne.co.uk/ brings a breath of fresh inspiration to the world of home improvement. Whether you're looking to revamp a small corner of your abode or embark on a complete home transformation, Harrison's articles provide the essential expertise and creative flair to turn your visions into reality. So, dive into the captivating world of home remodeling with Harrison Clayton and unlock the full potential of your living space with every word he writes.


