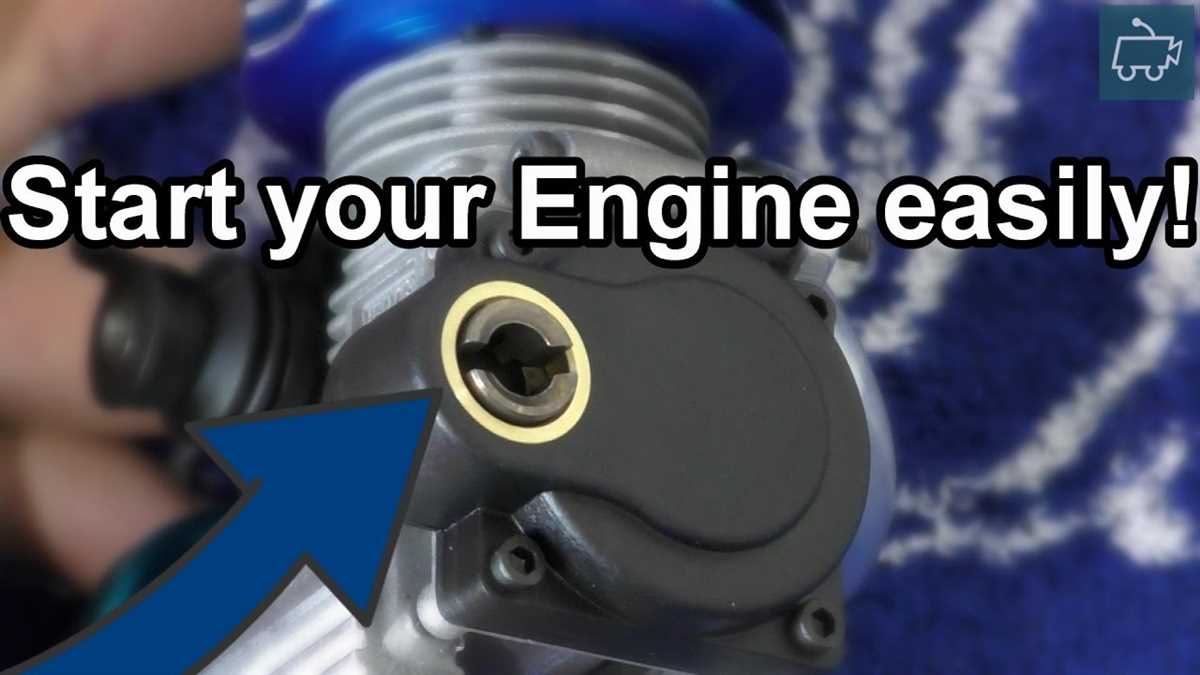
How to Start a Nitro RC Car with a Drill

Starting a nitro RC car can sometimes be a chore, especially if you don’t have the right tools or know the proper technique. One way to make the process easier is by using a drill to start the engine. This method can save you time and frustration, allowing you to get on the road or track faster.
To start a nitro RC car with a drill, you will need a few things. First, make sure you have a fully charged battery for your drill. Next, locate the small hole on top of the engine called the “glow plug hole.” This is where you will insert the drill to start the car. It’s important to note that not all RC cars can be started with a drill, so check your car’s manual or consult with a professional if you’re unsure.
Once you have everything ready, insert the drill into the glow plug hole and gently turn it clockwise. This will cause the engine to rotate and create compression, which is necessary for starting. After a few rotations, you should hear the engine start to sputter. At this point, release the drill and give the engine a little extra throttle by pulling the throttle trigger on your transmitter. This will help the engine catch and start running smoothly.
Keep in mind that starting a nitro RC car with a drill can be tricky at first, so it’s important to practice and be patient. It may take a few tries to get the hang of it, but once you do, you’ll be able to start your car quickly and easily every time.
Understanding the Basics
- Nitro RC Car: A nitro RC car is a type of remote-controlled car that is powered by a small internal combustion engine fueled by nitromethane. These cars are typically faster and more powerful than electric RC cars.
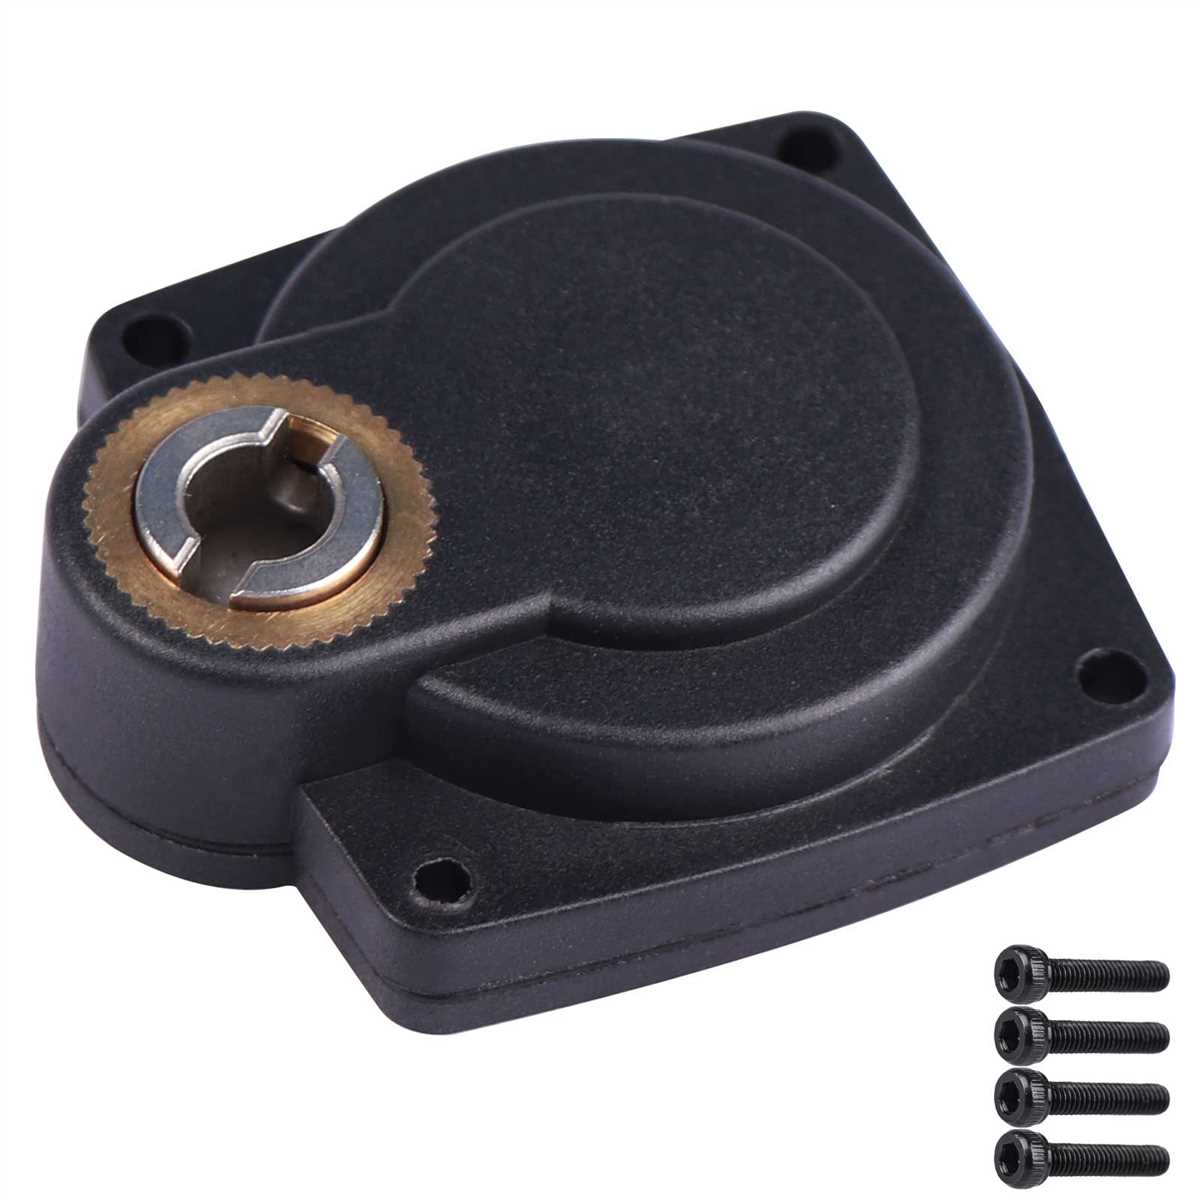
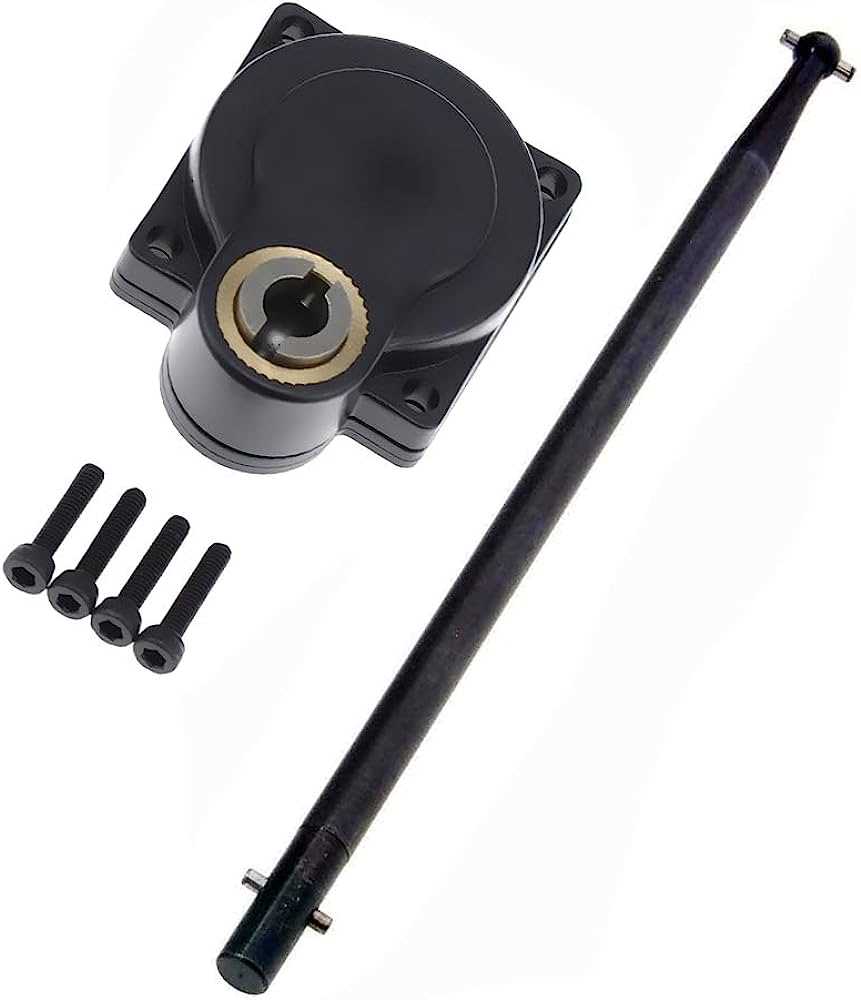
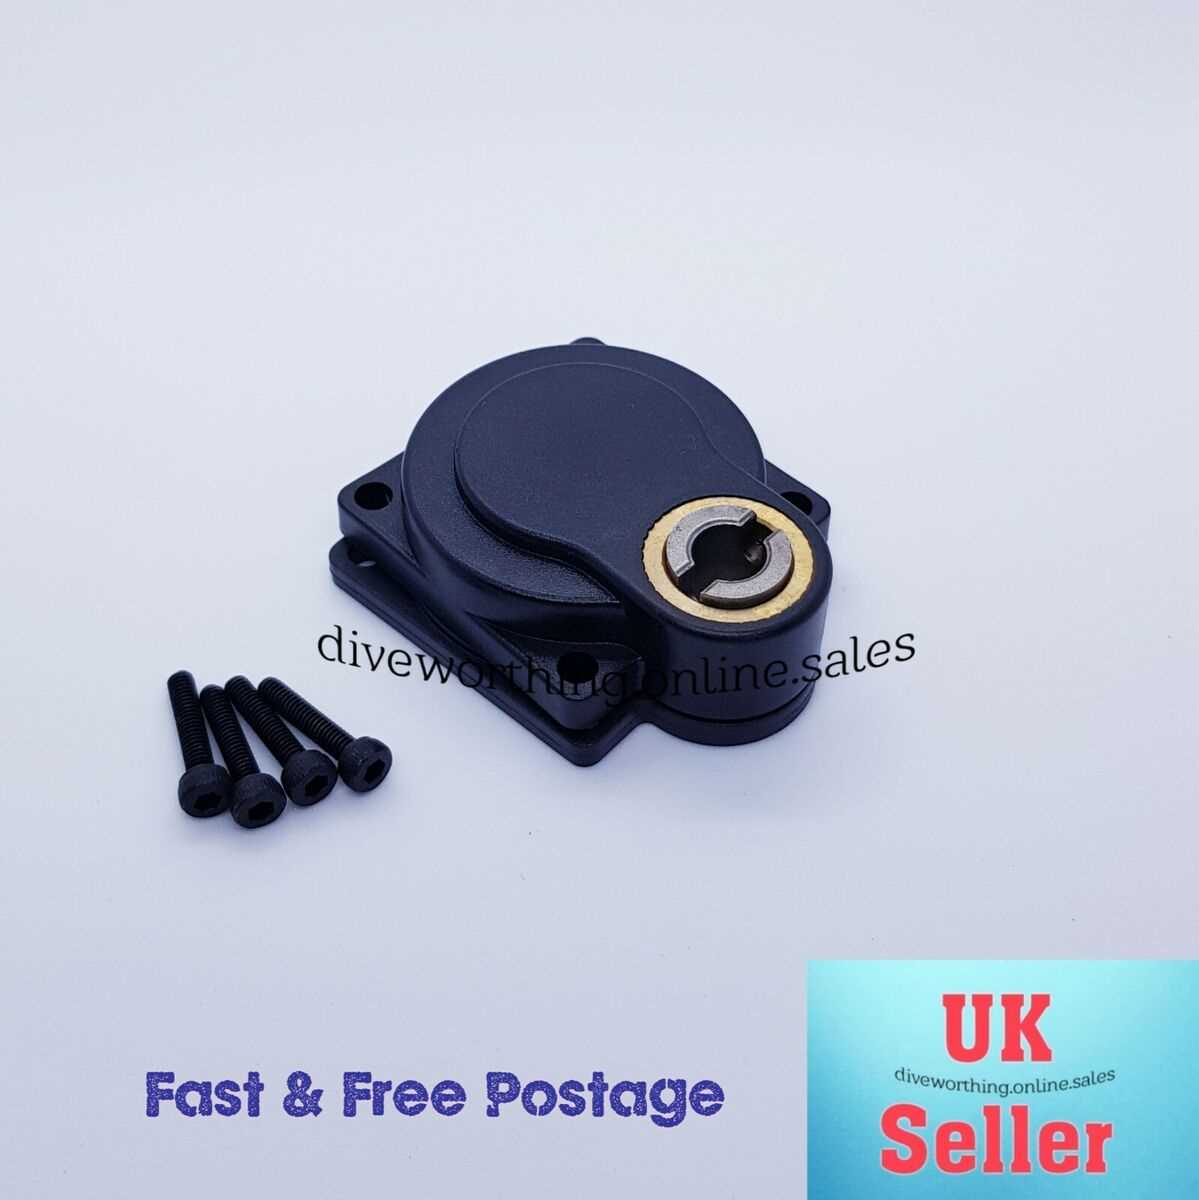
- Drill Starter: A drill starter is a tool used to start the engine of a nitro RC car. It consists of a handheld drill with a special attachment that connects to the car’s engine. When the drill is turned on, it rotates the engine’s flywheel, which starts the combustion process.
- Combustion Engine: The engine in a nitro RC car is a two-stroke internal combustion engine. It uses a mixture of nitromethane, methanol, and oil as fuel. When the fuel is ignited, it creates a series of controlled explosions that generate power to propel the car.
- Fuel: The fuel used in nitro RC cars is a combination of nitromethane, methanol, and oil. The nitromethane provides the majority of the power, while the methanol acts as a solvent and coolant. The oil lubricates the moving parts of the engine and helps to prevent overheating.
- Glow Plug: The glow plug is a small device in the combustion chamber of the engine that is heated by an electric current. When the drill is used to start the engine, the glow plug ignites the fuel mixture, starting the combustion process.
Before starting a nitro RC car with a drill, it is important to understand the basics of how the car and engine work. A nitro RC car is powered by an internal combustion engine fueled by a mixture of nitromethane, methanol, and oil. The engine is started using a drill starter, which rotates the engine’s flywheel and ignites the fuel mixture with the glow plug.

It is important to handle the fuel and drill starter with care, as they can be flammable and dangerous if used improperly. Always follow the manufacturer’s instructions and safety guidelines when operating a nitro RC car.
Preparing Your RC Car
Before you can start your nitro RC car using a drill, there are a few steps you need to take to ensure everything is in order. Here’s how to prepare your RC car:
1. Check the Fuel Level
Make sure your nitro RC car has enough fuel to run. Check the fuel tank and fill it up if necessary. It’s essential to have enough fuel to start the engine and run the car smoothly.
2. Inspect the Glow Plug
The glow plug is crucial for the engine’s ignition. Check the condition of the glow plug and make sure it’s properly seated in the engine. If the glow plug is damaged or worn out, replace it before attempting to start the car.
3. Prime the Engine
Before starting the nitro RC car, you need to prime the engine. To do this, apply a small amount of fuel to the carburetor using a priming bulb or a fuel bottle. This helps create the necessary fuel-air mixture for the engine to ignite.

4. Charge the Battery
If your nitro RC car comes with a starter box or an electric starter, make sure the battery is fully charged. A dead battery will prevent the starter from functioning correctly and delay the car’s start.
5. Check the Electronics
Inspect the electronic components of your RC car, such as the receiver and servos. Ensure all connections are secure and there are no loose wires. Faulty electronics can affect the car’s performance and prevent it from starting.
6. Prepare the Drill
If you haven’t done so already, attach the drill adapter to your power drill. Ensure it’s securely attached and ready to provide the necessary power to start the nitro engine. Double-check the drill’s battery level to avoid unexpected power loss during the starting process.
7. Secure the Car
Place your RC car on a stable surface or use a car stand to prevent it from moving while starting the engine. This stability ensures safe operation and prevents accidental damage to the car or surrounding objects.
8. Wear Protective Gear
It’s essential to wear protective gear while operating a nitro RC car, especially when starting it with a power drill. Wear safety goggles to protect your eyes from fuel splashes, gloves to shield your hands, and long sleeves to avoid any accidental burns or cuts.

9. Follow Manufacturer Instructions
Always follow the manufacturer’s instructions for starting your specific nitro RC car model. Different cars may have specific requirements or steps for a successful start. Refer to the user manual or any accompanying guides for proper guidance.
By following these steps, you can ensure your nitro RC car is prepared for starting with a drill. This preparation will help you have a smooth and successful start, getting you ready for an exhilarating RC driving experience.
Preparing the Drill
To start a nitro RC car with a drill, you will need to prepare the drill beforehand. Follow these steps to ensure your drill is ready for use:
1. Choose the Right Drill
Not all drills are suitable for starting a nitro RC car. You will need a drill with enough torque and power to effectively crank the engine. It is recommended to use a cordless drill with at least 18 volts of power for best results.

2. Attach the Proper Attachment
Most nitro RC cars come with a drill starter attachment, also known as a drill backplate. This attachment is specifically designed to fit onto the engine’s backplate and transfer the drill’s power to the engine. Find the appropriate attachment for your specific RC car model and attach it securely to the drill.
3. Ensure Proper Battery Level
Before starting the nitro RC car, make sure your drill’s battery is fully charged. A low battery could result in inadequate power to start the engine. It is always a good idea to have a spare battery on hand, as starting the engine may drain the drill’s battery quickly.
4. Check the Drill’s Chuck
Inspect the drill’s chuck to ensure it is firmly tightened and secure. A loose chuck could result in the attachment coming off during operation, causing damage to the engine or potential injury. Use the appropriate chuck key or tool to tighten it if necessary.
5. Familiarize Yourself with the Drill Controls
Take a moment to familiarize yourself with the drill’s controls, including the on/off switch and variable speed settings. Knowing how to quickly operate the drill will help you start the engine smoothly and efficiently.

By following these steps and preparing the drill properly, you will be ready to start your nitro RC car with a drill. Remember to always prioritize safety and exercise caution when handling power tools.
Connecting the Drill to the Nitro RC Car
In order to start a nitro RC car with a drill, you will need to connect the drill to the car’s engine. This process involves a few steps to ensure a proper connection and safe operation of the car.
Step 1: Prepare the Drill
- Make sure the drill is fully charged or has enough power to start the car.
- Choose a suitable drill bit that fits into the car’s engine shaft.
- Ensure that the drill’s chuck is tightened securely to hold the drill bit in place.
Step 2: Locate the Engine Shaft
Locate the engine shaft of the nitro RC car. This is usually located at the front or back of the car, depending on the model.
Step 3: Attach the Drill to the Engine Shaft
- Position the drill bit at the end of the engine shaft.
- Press the drill bit against the engine shaft, ensuring a secure connection.
- Turn on the drill and let it rotate the engine shaft. The rotation should mimic the motion produced when starting the car manually.
Step 4: Monitor the Car’s Engine
While the drill is connected and rotating the engine shaft, closely monitor the car’s engine. Look for signs of ignition, such as vibrations or sputtering sounds. If the car does not start within a few attempts, it may require further troubleshooting or maintenance.
Always exercise caution while operating the nitro RC car with a drill. Follow the manufacturer’s guidelines and safety instructions to prevent any accidents or damage to the car or drill.
Priming the Fuel System
Before starting the nitro RC car with a drill, it is important to prime the fuel system to ensure proper fuel flow. Priming the fuel system will help the engine start smoothly and efficiently.
1. Prepare the Fuel Mixture
First, you need to prepare the fuel mixture by mixing the appropriate amount of nitro fuel and oil. Follow the manufacturer’s instructions for the correct fuel-to-oil ratio, as this may vary depending on the engine and fuel type.
2. Fill the Fuel Tank
Next, fill the fuel tank with the prepared fuel mixture. Take care not to overfill the tank to avoid any spillage or leakage during priming.
3. Check the Fuel Lines
Inspect the fuel lines for any cracks, leaks, or blockages. Ensure that the fuel lines are properly connected and in good condition. If any issues are found, replace or repair the fuel lines as necessary.
4. Remove the Glow Plug
Remove the glow plug from the engine using an appropriate glow plug wrench. This will allow you to manually prime the engine.
5. Prime the Engine
To prime the engine, place your finger over the glow plug hole while slowly turning the flywheel. This creates suction and draws fuel into the engine’s carburetor. Repeat this process several times until you see fuel dripping from the carburetor.
6. Reinstall the Glow Plug
Once you have primed the engine, reinstall the glow plug and tighten it securely using the glow plug wrench.
7. Connect the Drill
Now you are ready to connect the drill to the engine’s starter shaft. Make sure the drill is set to rotate clockwise, as this is the direction the engine needs to turn to start.
8. Start the Engine
With the drill connected, firmly hold the car and switch on the drill. The rotation from the drill will spin the engine’s flywheel and ignite the fuel mixture. If all goes well, the engine should start running smoothly.
Following these steps will ensure that your nitro RC car’s fuel system is properly primed, allowing for an easy and efficient start using a drill. Remember to always follow safety precautions and manufacturer’s instructions when working with nitro RC cars.
Starting the Engine
Starting the engine of a nitro RC car with a drill can be a bit tricky, but with the right technique, it can be done smoothly. Here are the steps you need to follow:
- Prepare the car: Before starting the engine, make sure the car is in a stable position and the wheels are not touching the ground. This will prevent the car from moving once the engine starts.
- Check the fuel: Ensure that the fuel tank is filled with the appropriate amount of nitro fuel. This fuel is specially formulated for nitro RC cars and can be purchased at hobby stores or online.
- Prime the engine: Prime the engine by covering the exhaust pipe with your finger and pulling the pull-start mechanism a few times. This will draw fuel into the engine and make it easier to start.
- Attach the drill: Attach the drill to the hexagonal nut on the front of the engine’s flywheel. Make sure it is securely attached and can rotate freely.
- Start the drill: Start the drill at a slow speed to avoid damaging the engine. As the drill spins, it will rotate the flywheel and build up compression in the engine.
- Engage the glow plug: While the drill is running, use a glow plug igniter to heat up the glow plug. This will provide the spark needed to ignite the fuel in the engine.
- Release the exhaust pressure: After the glow plug has been heated for a few seconds, release the exhaust pressure by moving the exhaust pipe away from your finger. This will allow the engine to start firing.
- Remove the drill: Once the engine starts firing, remove the drill from the flywheel and let the engine run on its own.
Following these steps will help you start the engine of your nitro RC car smoothly using a drill. Remember to always wear protective gear and operate the drill and car in a safe environment.
Operating Your Nitro RC Car
1. Fueling the Car
Before starting your nitro RC car, it is important to fuel it up properly. Here are the steps to follow:
- Make sure you have the right fuel for your nitro RC car. Most nitro cars require a special nitro fuel that can be purchased at hobby stores.
- Find the fuel tank on your RC car. It is usually located on the top of the car or near the engine.
- Open the fuel cap and fill the tank with fuel. Be careful not to spill any fuel on the car or yourself.
- Close the fuel cap tightly to prevent any leaks.
2. Preparing the Engines
After fueling the car, you need to prepare the engines for starting:
- Make sure the car is on a flat and open surface, away from any obstacles.
- Remove the glow plug from the engine by using a glow plug wrench.
- Apply a small amount of nitro fuel onto the glow plug, then reconnect it to the engine.
- Find the air filter on the car and make sure it is clean. If it is dirty, remove it and clean it before reattaching it to the car.
3. Starting the Car
Once the car is fueled and the engines are prepared, you can start the nitro RC car:
- Hold down the throttle on the car’s remote control to engage the acceleration.
- Using an electric drill, spin the flywheel on the engine while holding the throttle. This will generate enough power to start the car’s engine.
- Continue spinning the flywheel until the engine starts firing and the car begins to run.
- Release the throttle on the remote control to allow the car to idle. Adjust the idle speed if necessary.
4. Controlling the Car
Once the car is running, you can start driving and controlling it:
- Use the steering wheel on the remote control to control the direction of the car.
- Use the throttle to control the speed of the car. Move it forward to accelerate and backward to brake and reverse.
- Practice driving in a safe and open area until you get comfortable with the controls and the car’s speed.
Remember to always drive your nitro RC car responsibly and follow any local regulations or guidelines for RC vehicle usage.
Maintenance and Troubleshooting
Maintaining your nitro RC car is important to ensure it runs smoothly and lasts for a long time. Here are some tips for maintenance and troubleshooting:
1. Cleaning and Lubrication
Regular cleaning is essential to remove dirt, debris, and fuel residue from your nitro RC car. Use a damp cloth or compressed air to clean the exterior and a small brush to gently clean the engine and other parts. Lubricate the moving parts with appropriate lubricants to reduce friction and prolong their lifespan.
2. Fuel System
Check the fuel system regularly to ensure there are no leaks and all connections are secure. Inspect the fuel lines for any cracks or damage and replace them if necessary. Keep the fuel tank clean and free from debris. It is also important to properly mix the nitro fuel according to the manufacturer’s instructions to avoid any engine issues.
3. Air Filter
The air filter prevents dirt and particles from entering the engine. Clean or replace the air filter regularly to ensure proper air flow and engine performance. A clogged or dirty air filter can cause the engine to run poorly or even damage it.
4. Clutch and Gears
Check the clutch and gears for wear and tear. The clutch bell and spur gear should be inspected for any signs of damage or excessive wear. Replace any worn or damaged parts to maintain optimal performance.
5. Suspension and Steering
Regularly inspect the suspension and steering components for any signs of damage or wear. Check for any loose screws or bolts and tighten them as necessary. Proper suspension and steering are crucial for stability and control, so any issues should be immediately addressed.
6. Battery and Electronics
If your RC car has a battery or electronic components, such as a receiver or servo, make sure they are functioning properly. Check the battery voltage regularly and replace it if necessary. Inspect the wiring and connectors for any damage or loose connections.
7. Troubleshooting
If you encounter any issues with your nitro RC car, here are some troubleshooting steps you can take:
- Check the fuel tank to ensure it is properly filled and not empty.
- Inspect the glow plug to see if it needs to be replaced.
- Check the air filter for any clogs or dirt.
- Make sure the engine is properly tuned and adjusted.
- Inspect the clutch and gears for any damage or wear.
- Check the fuel lines for any leaks or blockages.
- Inspect the battery and electronics for any issues.
If the problem persists, it may be best to consult the user manual or seek professional help to diagnose and fix the issue.
FAQ:
What tools do I need to start a nitro RC car with a drill?
To start a nitro RC car with a drill, you will need a few tools. Firstly, you will need a power drill with a chuck adapter that fits your car’s flywheel. Secondly, you will need a hex driver or a socket driver bit to loosen the glow plug. Finally, you will need a glow starter or a 12-volt battery pack to power the glow plug.
Can I start a nitro RC car with a regular electric screwdriver?
No, a regular electric screwdriver will not be suitable for starting a nitro RC car. The flywheel on a nitro RC car requires torque to start spinning, and a power drill is designed to provide that torque. An electric screwdriver does not have enough power to start the engine.
How do I attach the power drill to the flywheel?
To attach the power drill to the flywheel, you will first need to remove the glow plug on the engine. Then, you will need to attach a chuck adapter to the power drill. The chuck adapter is a metal piece with a hexagonal end that fits into the flywheel. Once the adapter is securely in place, you can tighten the chuck on the power drill to hold it in place.
What should I do after attaching the power drill to the flywheel?
After attaching the power drill to the flywheel, you should make sure that the car is in a neutral position and that the glow plug is connected to a glow starter or a 12-volt battery pack. Then, with the power drill in the forward position, gently squeeze the trigger to start the engine. Be careful not to apply too much pressure, as this can damage the engine.
Are there any risks involved in starting a nitro RC car with a drill?
Yes, there are a few risks involved in starting a nitro RC car with a drill. Firstly, if the drill is not securely attached to the flywheel, it can come loose and cause damage to the car or injury to the operator. Secondly, starting the engine with too much pressure can cause the engine to flood or flame out. Finally, it is important to handle the nitro fuel with care, as it is highly flammable.
Video:


Meet Harrison Clayton, a distinguished author and home remodeling enthusiast whose expertise in the realm of renovation is second to none. With a passion for transforming houses into inviting homes, Harrison's writing at https://thehuts-eastbourne.co.uk/ brings a breath of fresh inspiration to the world of home improvement. Whether you're looking to revamp a small corner of your abode or embark on a complete home transformation, Harrison's articles provide the essential expertise and creative flair to turn your visions into reality. So, dive into the captivating world of home remodeling with Harrison Clayton and unlock the full potential of your living space with every word he writes.


