How to Sharpen a Step Drill Bit: Tips and Techniques

If you regularly work with a step drill bit, you know how important it is to keep it sharp. A dull step drill bit can lead to inaccurate holes, damaged material, and increased effort. However, sharpening a step drill bit can be a daunting task if you are not familiar with the proper techniques. In this article, we will provide you with some tips and techniques on how to sharpen a step drill bit effectively.
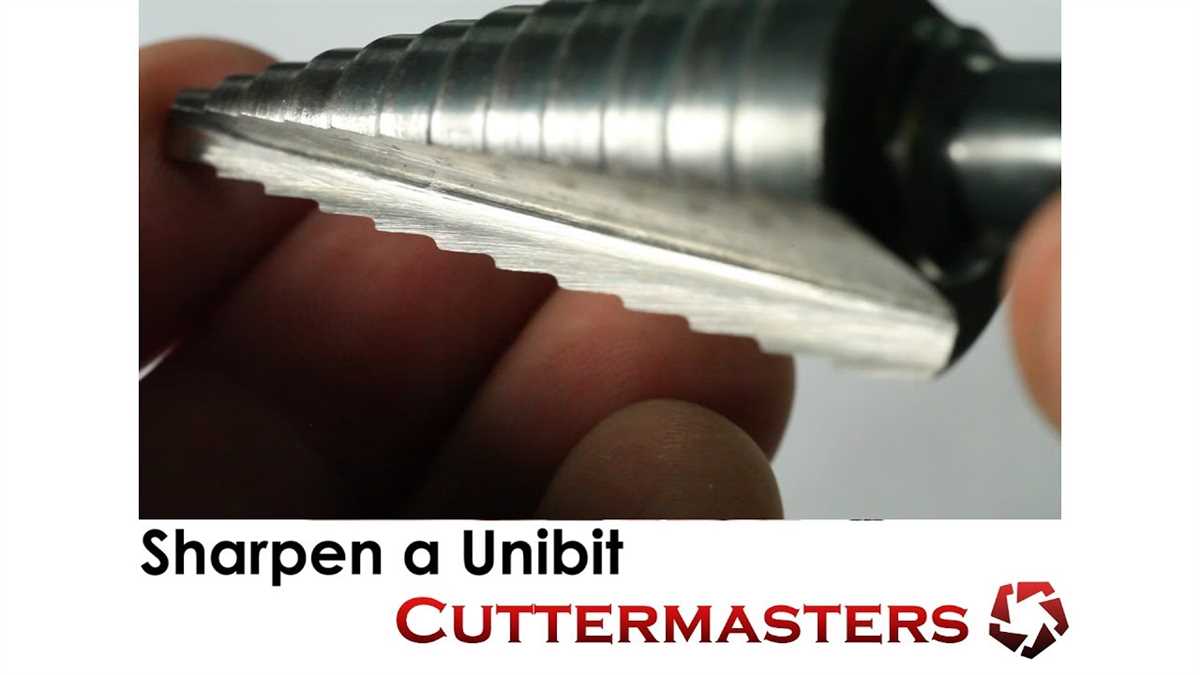
Firstly, it is important to understand the anatomy of a step drill bit. A step drill bit consists of multiple steps or levels, each with a different diameter. To sharpen a step drill bit, you need to focus on the cutting edges of each step. These cutting edges are typically made of high-speed steel (HSS) or cobalt, and they should be sharpened at a specific angle to ensure optimal performance.
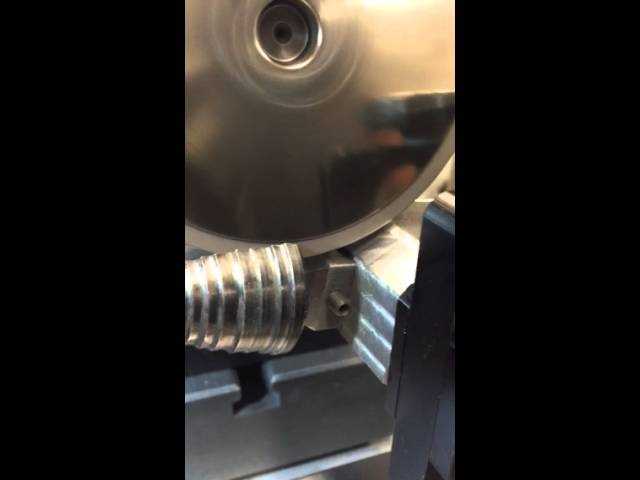
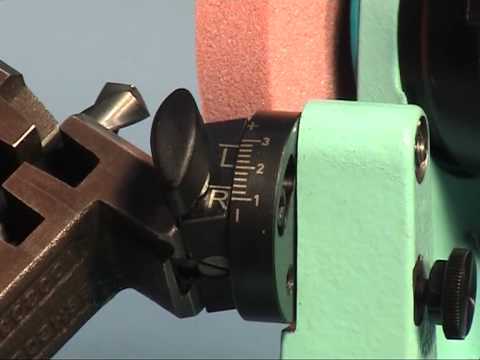
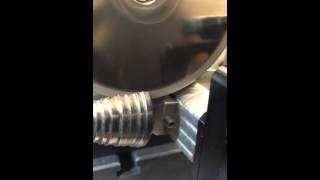
One of the most common methods to sharpen a step drill bit is by using a bench grinder. Start by securing the step drill bit firmly in a bench vise to ensure stability. Then, use the bench grinder to carefully grind the cutting edges of each step. Make sure to maintain a consistent angle throughout the sharpening process, usually around 118 degrees for HSS bits. It is also important to avoid overheating the bit, as excessive heat can cause the cutting edge to lose hardness.
Alternatively, if you do not have access to a bench grinder, you can also use a diamond sharpening wheel or a sharpening stone. With these tools, you can manually sharpen the cutting edges of the step drill bit by gently applying pressure and moving the bit in a circular motion. This method requires a bit more time and patience, but it can yield excellent results if done correctly.
Pro tip: After sharpening the step drill bit, it is essential to test its sharpness before using it. You can do this by drilling a test hole in a scrap piece of material. If the bit cuts smoothly and effortlessly, then it is properly sharpened. If not, it may require further sharpening.
By following these tips and techniques, you can effectively sharpen your step drill bit and maintain its optimal performance. Remember to take your time and be patient, as sharpening is a process that requires precision. With a sharp step drill bit, you can achieve accurate and clean holes, making your work more efficient and professional.

Tips for Sharpening a Step Drill Bit
1. Use a Bench Grinder
One of the best tools to use when sharpening a step drill bit is a bench grinder. This powerful tool allows you to easily grind away any dull or damaged edges and restore the sharpness of the bit. Make sure to wear safety goggles and gloves when using a bench grinder.
2. Maintain Proper Angles
When sharpening a step drill bit, it is important to maintain the proper angles to ensure a sharp cutting edge. The angles may vary depending on the manufacturer and design of the bit, so refer to the manufacturer’s instructions or guidelines for the correct angles.
3. Start with a Coarse Grinding Wheel
When sharpening a step drill bit, start with a coarse grinding wheel to remove any major damage or nicks on the cutting edges. Use a steady hand and apply even pressure to ensure an even grind. Move the bit back and forth across the wheel to maintain a consistent grind.
4. Switch to a Fine Grinding Wheel
After using the coarse grinding wheel, switch to a fine grinding wheel to refine and smooth out the edges of the step drill bit. This will help to create a sharper cutting surface and improve the overall performance of the bit.
5. Use Cooling Lubricants
When sharpening a step drill bit, it is important to use cooling lubricants to prevent overheating and damaging the temper of the steel. Apply a small amount of cutting oil or coolant to the bit while sharpening to ensure a smooth and efficient grind.

6. Check for Uniformity
After sharpening a step drill bit, it is important to check for uniformity to ensure that all cutting edges are sharp and even. Inspect the bit under a light and look for any unevenness or dull spots. If necessary, make small adjustments with the grinder to achieve a uniform cutting edge.
7. Clean and Store Properly
After sharpening a step drill bit, make sure to clean off any debris or residue from the grinding process. This will help to prevent contamination and maintain the sharpness of the bit. Store the sharpened bit in a dry and secure location to prevent damage.
Following these tips will help you sharpen your step drill bit effectively and ensure optimal performance for your drilling tasks. Remember to always prioritize safety and take the necessary precautions when using a bench grinder or any other power tools.
Know the Basics
Before you start sharpening your step drill bit, it is important to understand some basics about the tool and the sharpening process.
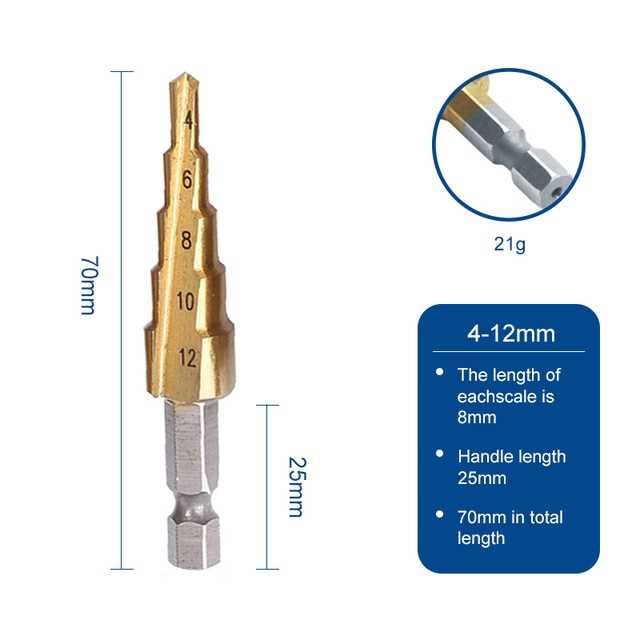
Step drill bit: A step drill bit, also known as a step bit or a unibit, is a specialized drill bit that can create holes of different sizes using a single tool. It is often used for drilling holes in thin materials, such as sheet metal or plastic.

Sharpening: Sharpening a step drill bit involves restoring its cutting edges to their original shape and sharpness. Over time, the cutting edges can become dull and inefficient, leading to slower drilling speeds and poor hole quality.
Why sharpen: Sharpening a step drill bit can help prolong its lifespan, improve drilling performance, and reduce the need for frequent replacements. It can also save you money in the long run by avoiding the purchase of new drill bits.
Tools required: To sharpen a step drill bit, you will need the following tools:
- Bench grinder: A bench grinder is a power tool that consists of a rotating abrasive wheel. It is commonly used for sharpening tools, including drill bits.
- Protective gear: It is important to wear safety goggles and gloves to protect yourself from flying metal shavings and the heat generated during the sharpening process.
- Drill bit gauge: A drill bit gauge is a measuring tool that allows you to check the diameter and angle of the drill bit’s cutting edges. It helps ensure that the edges are sharpened correctly.
Sharpening techniques: There are different techniques for sharpening a step drill bit, depending on its design and the type of grinder being used. Some common techniques include using a bench grinder to grind the cutting edges, using a diamond file to hone the edges, or using a rotary tool with a grinding attachment.
Gather the Tools and Materials
Before you begin sharpening your step drill bit, you will need to gather the necessary tools and materials. Having everything ready will make the process much smoother and more efficient.

Tools:
- Bench grinder with a fine grinding wheel
- Protective eyewear
- Gloves
- Sharpening jig or vise
Materials:
- Step drill bit
- Marker or paint pen
- Sharpening stone or diamond file (optional)
- Light oil or lubricant (optional)
Having a bench grinder with a fine grinding wheel is crucial for sharpening your drill bit effectively. Make sure to wear protective eyewear and gloves to ensure your safety throughout the process. A sharpening jig or vise will also come in handy to hold the drill bit securely while you work on it.
In addition to the tools, you will need the step drill bit that you want to sharpen. It is also helpful to have a marker or paint pen to mark the cutting edges for easier visualization. If you have a sharpening stone or diamond file, they can be used to touch up any rough edges after using the bench grinder. Finally, having a light oil or lubricant can help keep the drill bit cool during the sharpening process.
Inspect the Drill Bit
Before you start sharpening a step drill bit, it’s important to inspect it for any damage or wear. This step is essential because if the bit is already damaged beyond repair or if it has excessive wear, it may not be worth sharpening and should be replaced instead.
1. Examine the Flutes
Take a close look at the flutes of the drill bit, which are the spiraled grooves that help to remove the material as you drill. Look for any signs of damage, such as chips or cracks. If you notice any significant damage, it’s best to replace the drill bit rather than attempting to sharpen it.
2. Check the Cutting Edges
The cutting edges are the sharp points on the drill bit that actually cut through the material. Carefully inspect each cutting edge for signs of wear or dullness. If the cutting edges are worn or dull, it may be necessary to sharpen the bit to restore its cutting ability.

3. Measure the Step Sizes
If you’re using a step drill bit with multiple steps, measure the diameter of each step. Compare the measurements to the original specifications to ensure that the steps are not worn down or uneven. If the steps are uneven or have excessive wear, the drill bit may need to be replaced.
4. Clean the Drill Bit
Before you begin sharpening the step drill bit, it’s important to clean off any debris or buildup that may be present. Use a wire brush or a cleaning solution to remove any dirt, grease, or other contaminants from the bit. This will ensure a clean surface for sharpening and prevent any interference with the sharpening process.
Clean the Drill Bit
Once you have finished sharpening the step drill bit, it is important to clean it thoroughly. This will help to remove any metal shavings or debris that may have accumulated during the sharpening process. You can use a soft brush or a cloth to wipe away any particles from the drill bit’s surface. Make sure to pay special attention to the flutes and the tip of the bit.
After cleaning, it is a good idea to inspect the drill bit for any damage or signs of wear. Look for any cracks, chips, or dull edges that may need to be addressed before using the bit again. If you notice any significant damage, it may be necessary to replace the bit.
Additionally, you can consider applying a thin layer of oil or lubricant to the drill bit. This can help to prevent rusting and ensure smooth operation when using the bit in the future. Simply apply a small amount of oil to a cloth or paper towel and wipe it onto the surface of the bit. Be sure to wipe off any excess oil to avoid any potential mess or buildup.
Sharpen the Drill Bit
Sharpening a step drill bit is essential to ensure optimal performance and longevity. Here are the steps on how to sharpen the drill bit:
1. Gather the Necessary Tools
Before starting the sharpening process, make sure you have the following tools and materials:
- A bench grinder
- A protective face shield
- A pair of heavy-duty gloves
- A drill bit sharpening jig (optional)
- A coolant or lubricant
2. Inspect the Drill Bit
Examine the step drill bit for any signs of damage or wear. Look for dull edges, chips, or any other irregularities that may affect cutting performance. If the drill bit is severely damaged, it may be more cost-effective to replace it than to sharpen it.
3. Secure the Drill Bit
Secure the drill bit in the drill bit sharpening jig or a vise to hold it steady during the sharpening process. Make sure it is firmly secured to prevent accidents and ensure accurate sharpening.
4. Start the Grinder
Put on the protective face shield and heavy-duty gloves for safety. Turn on the bench grinder and let it reach its full speed before proceeding.
5. Sharpen the Drill Bit
Hold the drill bit at a 60-degree angle against the grinding wheel. Gently move the drill bit back and forth along the wheel, maintaining the angle. Be careful not to apply too much pressure, as it may overheat and damage the drill bit.
Rotate the drill bit regularly to ensure even sharpening on all sides. Keep the cutting edges parallel to the grinding wheel for a consistent result.
6. Cool and Inspect
Dip the drill bit into a coolant or lubricant periodically to prevent overheating. This will help maintain the drill bit’s temper and prolong its life.
Periodically inspect the drill bit for sharpness. Check for a clean and defined cutting edge. If necessary, continue the sharpening process until the desired sharpness is achieved.
7. Clean and Store
After sharpening, clean the drill bit to remove any metal shavings and coolant. Use a wire brush or compressed air to remove debris from the flutes and cutting edges. Store the sharpened drill bit in a protective case or container to keep it safe and prevent any further damage.
By following these steps, you can effectively sharpen a step drill bit and ensure its optimal performance for future use.
Test the Drill Bit
Once you have sharpened the step drill bit, it is important to test it before using it on your project. Testing the drill bit will ensure that it is in proper working order and will drill clean and precise holes.
Steps to test the drill bit:
- Inspect the sharpness: Examine the cutting edges of the drill bit to ensure that they are sharp and free from any burrs or imperfections. If any dull spots or rough edges are found, further sharpening may be needed.
- Choose a test material: Select a scrap piece of the same material that you will be drilling into for your project. This will allow you to accurately assess the performance of the drill bit.
- Mark the test material: Use a pencil or marker to mark the exact spot where you will be drilling the test hole. This will help you gauge the accuracy of the drill bit.
- Secure the test material: Clamp or secure the test material in a vise or any other suitable holding mechanism. This will prevent the material from moving during drilling and affecting the test results.
- Drill the test hole: Carefully align the sharp tip of the drill bit with the marked spot on the test material. Apply moderate pressure and drill the hole, maintaining a consistent speed and keeping the drill steady.
- Inspect the test hole: After drilling the hole, carefully examine it for any signs of inconsistencies or imperfections. Look for clean and precise edges and a properly centered hole.
- Assess the performance: Based on your observations of the test hole, evaluate the performance of the drill bit. If the hole is clean, accurate, and meets your expectations, the drill bit is ready for use. However, if there are any issues or concerns, further sharpening or adjustments may be necessary.
Testing the drill bit before using it on your project will ensure that you have a properly sharpened and functional tool. It will also help you identify any potential issues or problems that need to be addressed. Remember to always prioritize safety and follow proper drilling procedures to achieve the best results.
Maintain and Store the Drill Bit
Proper maintenance and storage are important for extending the lifespan and ensuring optimal performance of your step drill bit. Here are some tips on how to maintain and store your drill bit:
Clean the Drill Bit After Use
After each use, it is important to clean the drill bit to remove any debris or buildup. Use a brush or compressed air to remove any dust or shavings from the flutes and cutting edges. This will help prevent the bit from becoming dull and clogged, which can affect drilling performance.
Inspect the Drill Bit Regularly
Regularly inspect your drill bit for any signs of damage or wear. Check for any chips, cracks, or dullness on the cutting edges. If you notice any issues, it is best to replace the drill bit to maintain optimal performance.
Sharpen the Drill Bit as Needed
If you notice the drill bit becoming dull, it may be necessary to sharpen it. Follow the instructions provided by the manufacturer or use a drill bit sharpening tool. Be sure to use proper safety precautions when sharpening the bit and ensure it is properly balanced and sharpened to the correct angle.
Store the Drill Bit Properly
When not in use, store your step drill bit in a clean and dry place. Avoid storing it in a damp or humid environment as this can cause rust and corrosion. Consider using a protective case or organizer to keep the drill bit secure and protected from damage.
Label and Organize
If you have multiple drill bits, it can be helpful to label and organize them for easy identification. Use a marker or label maker to mark the size or purpose of each drill bit. Consider using a storage system with compartments or a pegboard to keep your drill bits organized and readily accessible.
Follow Manufacturer Guidelines
Lastly, always follow the manufacturer’s guidelines for maintenance and storage of your specific step drill bit. Different materials and coatings may require specific care instructions, so it is important to read and follow the recommendations provided by the manufacturer.
By properly maintaining and storing your step drill bit, you can ensure its longevity and performance, allowing you to complete your drilling tasks with ease and precision.
Final Thoughts
Sharpening a step drill bit is a relatively simple process that can greatly extend the lifespan of the tool. By following the steps outlined in this guide, you can ensure that your step drill bit cuts smoothly and effectively every time.
Remember to always wear safety goggles and gloves when working with sharp tools. Additionally, be sure to check your bit for any signs of damage or wear before sharpening it. If the bit is severely damaged or worn, it may be best to replace it rather than attempting to sharpen it.
Regularly maintaining and sharpening your step drill bit will not only save you money on replacements, but it will also result in cleaner and more precise holes. A sharp bit requires less force to cut through material, reducing the risk of accidents or fatigue.
Whether you are a professional or a DIY enthusiast, knowing how to sharpen a step drill bit is an essential skill that can improve the quality of your work. The techniques outlined in this guide should help you keep your step drill bit in excellent condition and ready for any project that comes your way.
FAQ:
Why is it important to sharpen a step drill bit?
Sharpening a step drill bit is important to maintain its cutting performance and prolong its lifespan. A sharp bit will cut through materials more efficiently and with less effort, reducing the chances of the bit getting stuck or breaking.
What tools do I need to sharpen a step drill bit?
To sharpen a step drill bit, you will need a bench grinder or a drill bit sharpener. Additionally, you may need a vice or clamp to hold the bit securely during sharpening.
Can a step drill bit be sharpened by hand?
While it is possible to sharpen a step drill bit by hand using a file or a sharpening stone, it is not recommended. Hand sharpening may not result in an evenly sharpened bit, and it can be time-consuming and difficult to achieve the desired sharpness.
How do I know if my step drill bit needs sharpening?
You can inspect the cutting edges of your step drill bit to determine if it needs sharpening. If the edges appear dull, rounded, or chipped, it is a sign that the bit needs sharpening. Additionally, if the bit is not cutting through materials as smoothly or as quickly as before, it may be time to sharpen it.
Can I sharpen a step drill bit without a bench grinder?
Yes, you can sharpen a step drill bit without a bench grinder. There are other methods available, such as using a drill bit sharpener attachment for a power drill or using a sharpening stone or file. However, using a bench grinder generally provides quicker and more consistent results.
How often should I sharpen my step drill bit?
The frequency of sharpening your step drill bit depends on how often you use it and the materials you work with. As a general guideline, you should sharpen the bit whenever you notice a decrease in cutting performance or see visible signs of dulled or damaged cutting edges.
Video:


Meet Harrison Clayton, a distinguished author and home remodeling enthusiast whose expertise in the realm of renovation is second to none. With a passion for transforming houses into inviting homes, Harrison's writing at https://thehuts-eastbourne.co.uk/ brings a breath of fresh inspiration to the world of home improvement. Whether you're looking to revamp a small corner of your abode or embark on a complete home transformation, Harrison's articles provide the essential expertise and creative flair to turn your visions into reality. So, dive into the captivating world of home remodeling with Harrison Clayton and unlock the full potential of your living space with every word he writes.


