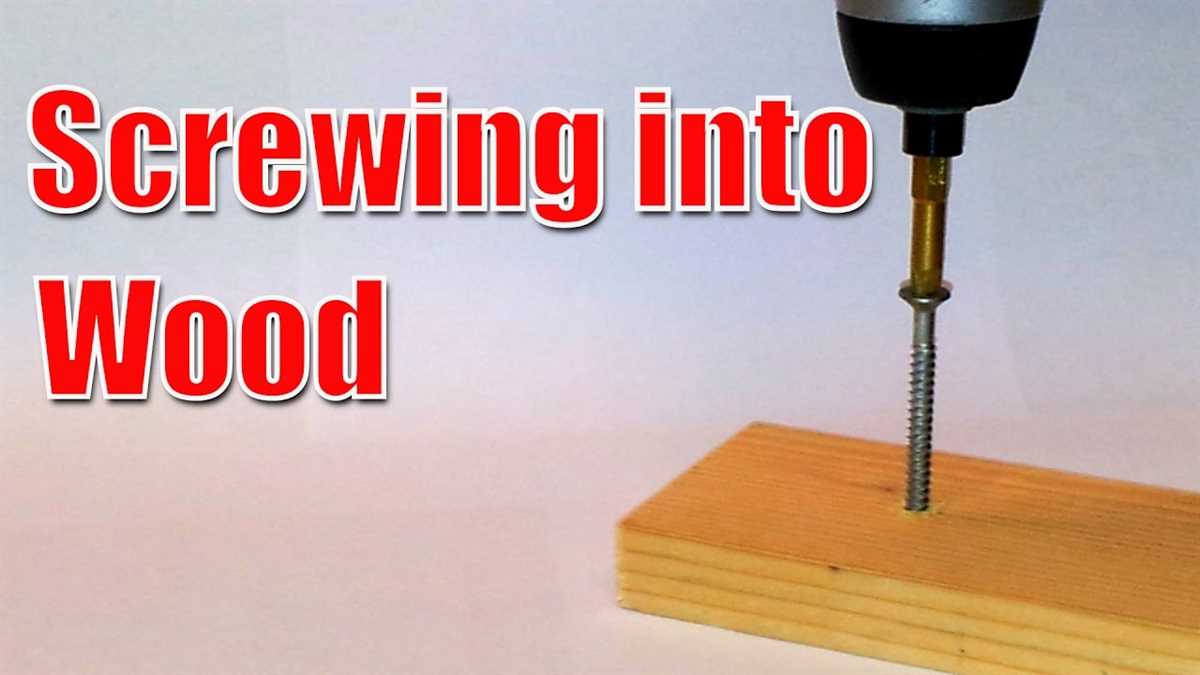
How to Screw into Wood with a Drill: A Step-by-Step Guide

When it comes to woodworking projects, knowing how to screw into wood with a drill is an essential skill. Whether you’re building furniture, constructing a deck, or tackling a home improvement project, being able to securely fasten wood together is crucial.
In this step-by-step guide, we’ll walk you through the process of screwing into wood with a drill. We’ll cover everything from selecting the right type and size of screws, to drilling pilot holes, and driving the screws into the wood.
Before you begin, it’s important to gather all the necessary tools and materials. You’ll need a power drill, drill bits, screws, a screwdriver bit, and the piece of wood you’re working with. It’s also a good idea to wear protective eyewear and gloves for safety.
Ready to get started? Let’s dive in and learn how to screw into wood with a drill!
Choose the Right Drill Bit for Wood Screws
When it comes to screwing into wood with a drill, choosing the right drill bit is crucial. Using the wrong drill bit can result in damaged wood, stripped screws, or a lack of holding power. Here are some factors to consider when selecting a drill bit for wood screws:

1. Screw Size
The size of the screw you plan to use will determine the size of the drill bit you need. Most wood screws come with a recommended drill bit size on the packaging. If not, you can refer to a drill bit size chart to find the appropriate size. Using a drill bit that matches the screw size will ensure a tight fit and prevent the wood from splitting.
2. Shank Size
The shank size of the drill bit should match the chuck size of your drill. Most drills have a 3/8-inch chuck, but some may have a 1/2-inch chuck. Make sure you choose a drill bit with a shank size that fits your drill to ensure compatibility and prevent slippage during drilling.
3. Type of Wood
The type of wood you are working with can also affect the choice of drill bit. Hardwoods, such as oak or maple, require a sharp and durable drill bit to penetrate smoothly without dulling. Softer woods, like pine or cedar, are more forgiving and can be drilled with a standard twist bit. However, if you are working with highly dense or engineered wood, such as MDF or particle board, consider using a specialized drill bit designed for that material.
4. Pilot Hole
If you are using long or large wood screws, it is recommended to pre-drill a pilot hole before driving the screws. A pilot hole helps prevent the wood from splitting and makes it easier to drive the screw in. The size of the pilot hole should be slightly smaller than the screw’s diameter. Use a drill bit that matches the size of the pilot hole.
By considering these factors, you can choose the right drill bit for wood screws and ensure a successful and secure project. Remember to always wear safety goggles when drilling and follow the manufacturer’s guidelines for your specific drill and wood screws.

Types of Drill Bits for Wood
There are various types of drill bits that are specifically designed for drilling into wood. Each type of drill bit has its own unique features and applications. Here are some of the most common types of drill bits for wood:
- Twist Drill Bits: These are the most common type of drill bits used for drilling into wood. They have a spiral design that helps to remove the wood chips as you drill.
- Brad Point Drill Bits: These drill bits have a sharp, pointed tip that helps to create precise and clean holes in wood. They are often used for drilling holes for dowels or when working with delicate or softwoods.
- Forstner Drill Bits: Forstner drill bits are used for drilling flat-bottomed holes in wood. They are often used when a clean and precise hole is required, such as when installing hinges or making furniture.
- Spade Drill Bits: Spade drill bits, also known as paddle bits, have a flat, wide blade that helps to create large diameter holes in wood. They are commonly used for drilling holes for pipes or cables.
- Auger Drill Bits: Auger drill bits are designed to remove a large amount of wood chips as you drill. They have a spiral design with a wide flute that allows for faster drilling in wood.
- Countersink Drill Bits: Countersink drill bits are used to create a recessed hole in wood for the head of a screw or bolt. The cone-shaped tip helps to create a clean and flush finish.
When choosing a drill bit for wood, consider the type of hole you need to drill and the type of wood you are working with. Each type of drill bit has its own advantages and limitations, so choose the one that best suits your specific needs.
Prepare the Wood Surface
Before you start screwing into wood with a drill, it’s important to prepare the surface to ensure a secure and long-lasting connection. Here are the steps to follow:
1. Choose the Right Screws
First, select the appropriate screws for your project. Consider the thickness and type of wood you are working with, as well as the weight and stress that will be placed on the joint. Choosing the right screws will help to prevent them from stripping or breaking.

2. Measure and Mark
Using a measuring tape and a pencil, measure and mark the locations where you want to screw into the wood. Take into account the size and placement of the object or material you will be attaching to the wood.
3. Drill Pilot Holes
Next, use a drill bit that is slightly smaller than the diameter of your screws to drill pilot holes at the marked locations. Pilot holes help to prevent the wood from splitting and make it easier to drive the screws into the wood.
4. Countersink the Holes (If Needed)
If you want the screw heads to be flush with the surface of the wood, use a countersink bit and drill a shallow hole that will allow the screw head to sit below the surface. Countersinking helps to create a clean and professional finish.
5. Sand the Wood (If Necessary)
If the wood surface is rough or has imperfections, use sandpaper or a sanding block to smooth it out. This will not only improve the appearance of the finished project but also help the screws to grip the wood better.
6. Remove Dust and Debris
After sanding or if there is any dust or debris on the wood surface, use a clean cloth or a tack cloth to remove it. Dust and debris can affect the adhesion of the screw and weaken the connection.

7. Apply Wood Glue (Optional)
If you want to reinforce the joint, you can apply a small amount of wood glue to the surface before screwing into the wood. The glue will help to strengthen the connection and minimize movement between the two pieces of wood.
By following these steps and properly preparing the wood surface, you can ensure that your screws will hold securely and provide a reliable connection.
Remove any Obstacles and Debris
Before you begin screwing into wood with a drill, it’s important to remove any obstacles and debris from the area. This will help ensure a clean and efficient process.
Step 1: Clear the Work Area
Start by clearing the work area of any clutter or objects that may hinder your ability to drill into the wood. This includes removing tools, loose materials, or any other items that could potentially get in the way.

Step 2: Sweep or Vacuum the Area
Next, sweep or vacuum the area to remove any loose dirt, dust, or debris. This will help prevent any particles from interfering with the drilling process or getting into the drill’s mechanism.
Step 3: Check for Nails, Screws, or Staples
Inspect the wood surface for any nails, screws, or staples that may be embedded in it. Use a metal detector or visually inspect the surface to ensure that there are no hidden metal objects that could damage your drill bit or cause injury.
Step 4: Fill Any Holes or Cracks
If you come across any holes or cracks in the wood, it’s a good idea to fill them before proceeding with screwing. Use wood filler or putty to fill in any imperfections, and allow it to dry completely before moving on to the drilling process.
By taking the time to remove any obstacles and debris, you’ll create a safer and more efficient environment for screwing into wood with a drill.
Mark the Drill Hole
Before you start drilling into wood, it’s important to mark the spot where you want to place the screw. This will ensure that you drill in the right location and help prevent any mistakes.
Here are the steps to mark the drill hole:
- Measure and select the location: Determine the exact spot where you want to place the screw. Use a measuring tape or ruler to ensure accuracy.
- Mark the spot: Using a pencil or marker, make a small dot or X on the surface of the wood to indicate the center of the drill hole. Make sure the mark is clearly visible.
- Use a center punch (optional): To create a small indentation that will guide the drill bit, you can use a center punch. Place the tip of the center punch on the mark you made and lightly tap it with a hammer. This will create a small dent in the wood.
By marking the drill hole before you start drilling, you’ll have a clear guide to follow and ensure that the screw is placed exactly where you want it.
Use a Pencil or Marking Tool
Before you start drilling into wood, it’s important to have a clear plan and know exactly where you want to place your screw. Using a pencil or marking tool can help you ensure accuracy and avoid any mistakes.
Step 1: Choose the Right Pencil or Marking Tool
When selecting a marking tool, choose something that will make a visible mark on the wood but can also be easily erased or removed if needed. Some popular options include regular graphite pencils, carpenter’s pencils, or even a fine-tipped permanent marker.
Step 2: Determine the Screw Placement
Measure and mark the exact spot where you want to place the screw on the wood surface. Use a ruler or tape measure to ensure accuracy. Keep in mind the thickness of the wood and the length of the screw you will be using.
Step 3: Make Your Mark
Take the selected pencil or marking tool and make a small dot or line on the wood surface at the marked spot. Press firmly enough to create a visible mark but avoid pressing too hard that you indent the wood.
Step 4: Double Check Your Markings
Before you start drilling, take a moment to double-check your markings and ensure they are accurate. It’s better to spend an extra minute verifying rather than rushing into drilling and making a mistake.
Step 5: Erase or Remove the Markings (optional)
If you’re using a marking tool that can be easily erased or removed, you can choose to do so after drilling is complete. This will help ensure a clean and professional-looking finish to your project.
Using a pencil or marking tool is a simple but crucial step in screwing into wood with a drill. It helps you accurately position your screws and avoid any mishaps or damage to your wood surfaces.
Select the Proper Drill Speed
When using a drill to screw into wood, it’s important to select the proper drill speed. The speed at which the drill rotates can have a significant impact on the success of the screwing process.
Here are some guidelines for selecting the appropriate drill speed:
- Low Speed: When screwing into softer woods or when using smaller screws, it’s best to use a low drill speed. This allows for better control and reduces the risk of stripping the screw or damaging the wood.
- Medium Speed: For most standard wood screwing tasks, a medium drill speed is recommended. This speed provides a good balance between control and speed, allowing you to quickly and efficiently drive the screw into the wood.
- High Speed: High drill speeds are typically used for drilling through metal or other hard materials. It is generally not recommended to use a high speed when screwing into wood, as it can easily lead to stripped screws or damaged wood.
It’s important to note that the specific speed settings and terminology may vary depending on the type of drill you are using. Refer to the drill’s user manual for more information on the speed settings and how to adjust them.
Additionally, it’s a good idea to practice on scrap wood or inconspicuous areas before starting a project to get a feel for the appropriate drill speed and the amount of pressure needed.
By selecting the proper drill speed, you can ensure successful screwing into wood without damaging the material or compromising the integrity of the screws.
Consider the Wood Type
-
Softwood: Softwood is a type of wood that comes from evergreen trees such as pine, spruce, or fir. It is generally less dense and more affordable than hardwood. Softwood is easier to screw into because it is less likely to split. It is commonly used in construction, woodworking, and DIY projects.
-
Hardwood: Hardwood comes from deciduous trees such as oak, maple, or cherry. It is denser and more durable than softwood, but it can also be more difficult to work with. Hardwood requires more power and care when drilling to avoid splitting or damaging the wood. Hardwood is often used in furniture making, flooring, and high-end woodworking projects.
-
Plywood: Plywood is not a type of wood but rather a construction material made from thin layers of wood veneer glued together. It can be made from both hardwood and softwood. Plywood has a layered structure that provides strength and stability. When screwing into plywood, it is important to consider the thickness of the top veneer layer and use appropriate screws and drilling techniques to avoid splintering or delamination.
-
MDF: MDF stands for Medium Density Fiberboard, which is a type of engineered wood made from wood fibers and resin. It is denser and more stable than natural wood, making it less likely to split when screwing into it. However, caution should still be taken to use appropriate screws and drilling techniques to avoid damaging the MDF’s surface.
When choosing the right drill bit and screw for your wood, consider the type of wood you are working with. Softwood is generally easier to screw into, but hardwood, plywood, and MDF have their own characteristics that require different drilling techniques and screw choices. This will help ensure a secure and long-lasting connection when screwing into wood.
Drill the Pilot Hole
Before screwing into wood, it is important to drill a pilot hole. This small hole helps in several ways:
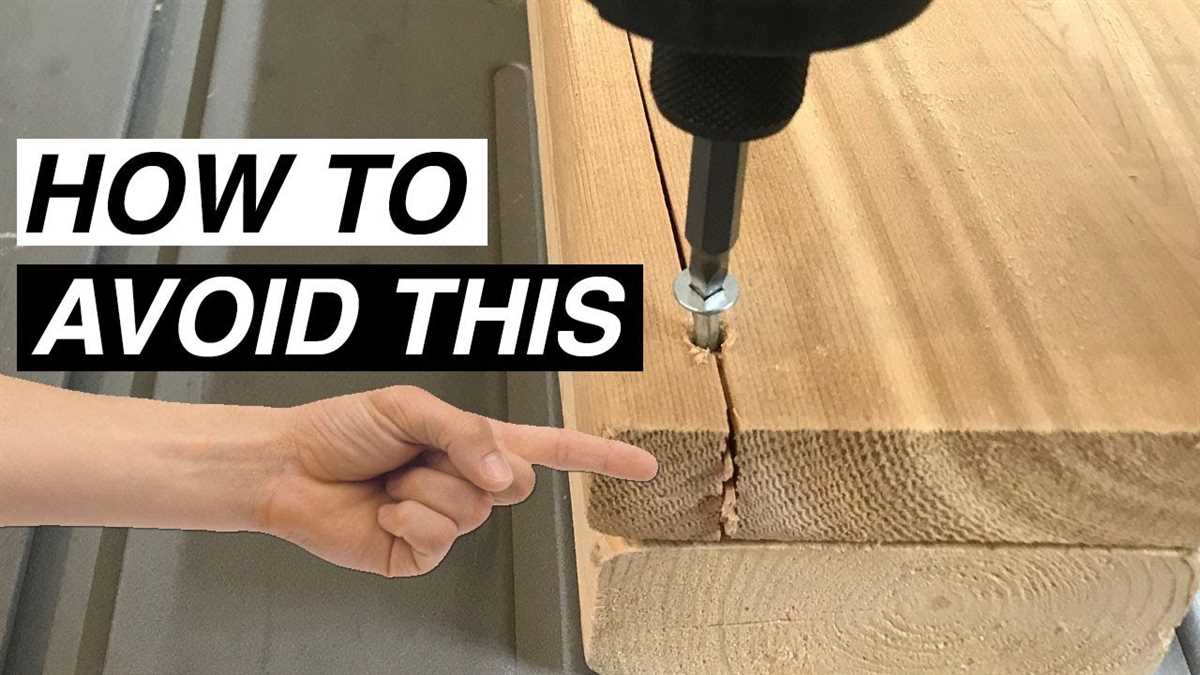
- It prevents the wood from splitting: When you drive a screw directly into wood without a pilot hole, the screw can cause the wood to split. This can weaken the holding capacity of the screw and can even damage the wood.
- It guides the screw: A pilot hole provides a path for the screw to follow, making it easier to drive the screw in straight and without any issues.
- It reduces the chances of the wood cracking: By drilling a pilot hole, you can reduce the chances of the wood cracking, especially if you are using hardwood or brittle wood.
To drill a pilot hole, follow these steps:
- Choose the right drill bit size: The size of the pilot hole should be slightly smaller than the diameter of the screw. This will ensure a tight fit and proper engagement of the screw.
- Mark the spot: Use a pencil or a marker to mark the spot where you want to drill the pilot hole.
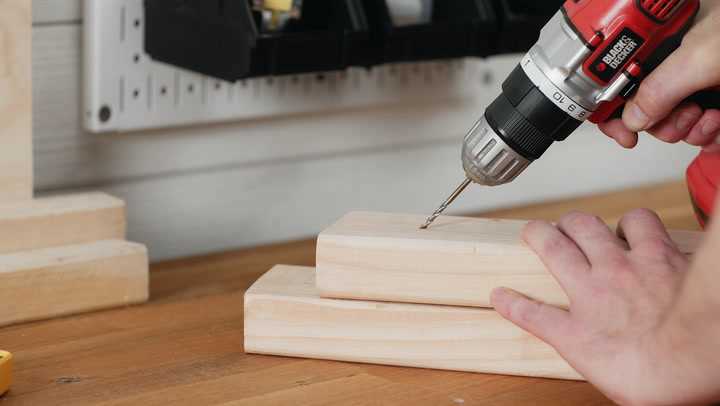
- Secure the wood: Place the wood on a stable surface and make sure it is secured properly to prevent it from moving while drilling.
- Set the depth: Adjust the drill bit depth to match the length of the screw. This will help you avoid drilling through the entire piece of wood.
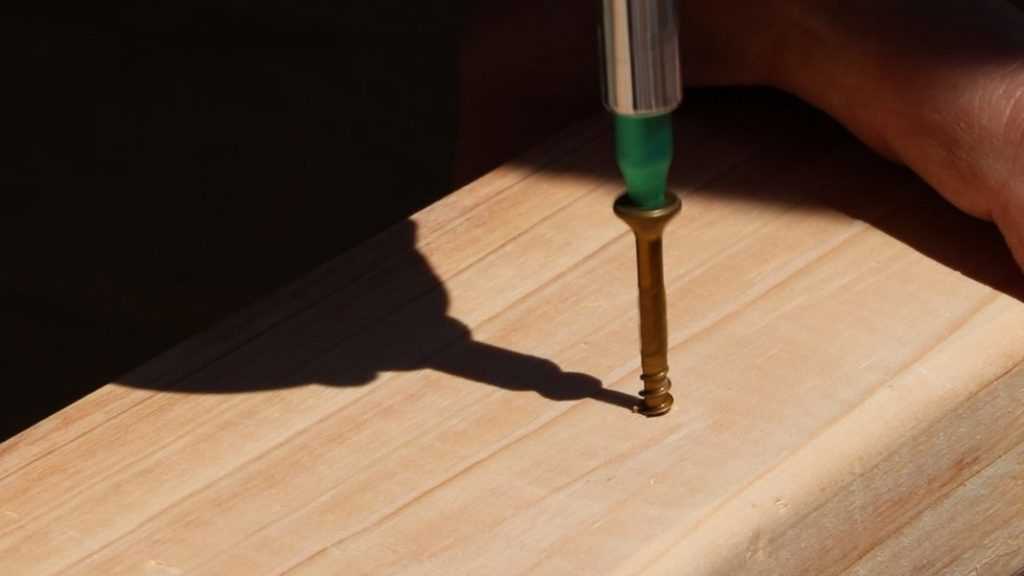
- Start drilling: Hold the drill perpendicular to the wood surface and apply firm, steady pressure. Start drilling at a slow speed to create a groove and then gradually increase the speed.
- Drill to the desired depth: Drill the pilot hole to the desired depth, making sure not to go too deep. You can use a piece of tape on the drill bit as a depth guide.
- Clean the hole: Use a brush or compressed air to remove any wood chips or debris from the pilot hole.
Once the pilot hole is drilled, you are ready to screw into the wood. The pilot hole will make it easier to drive the screw and will ensure a stronger and more secure connection.
Start with a Small Drill Bit
When screwing into wood with a drill, it is important to start with a small drill bit. This will create a pilot hole that guides the screw into the wood and helps prevent splitting. The size of the drill bit will depend on the size of the screw you are using, but generally, a bit that is slightly smaller than the diameter of the screw is a good starting point.
Before starting, make sure you have the appropriate drill and drill bit for the job. You can choose between a cordless drill or a corded drill, depending on your preference and availability. Attach the small drill bit securely to the drill, making sure it is tightened properly.
Next, determine where you want to insert the screw and mark the spot with a pencil or a piece of tape. This will help ensure that you drill the hole in the right location. Take a moment to visualize the process and consider any potential obstacles or challenges that may come up.
Place the drill bit on the marked spot and hold the drill firmly, with your other hand on the handle for support. Begin drilling slowly, applying gentle but consistent pressure to the drill. Keep the drill perpendicular to the surface of the wood to ensure a straight hole.
As the drill bit begins to penetrate the wood, you will feel some resistance. This is normal, and you can continue drilling until the entire length of the drill bit has entered the wood. If necessary, you can remove the drill and clear away any wood chips or debris that may have accumulated in the hole.
Once the pilot hole is complete, you can proceed to screwing in the screw. Starting with a small pilot hole will make it easier to drive the screw into the wood, reducing the risk of the wood splitting or the screw getting stuck.
Remember to adjust the drill to the appropriate setting for driving screws, if your drill has this feature. This will provide the necessary power and control for screwing into the wood effectively. Take your time and work carefully to ensure the best results.
FAQ:
What tools do I need to screw into wood with a drill?
To screw into wood with a drill, you will need a drill, drill bits, screws, a screwdriver bit, and safety goggles.
Is it necessary to wear safety goggles while screwing into wood with a drill?
Yes, it is highly recommended to wear safety goggles while screwing into wood with a drill as it protects your eyes from any flying debris.
What size drill bit should I use to make a pilot hole?
The size of the drill bit depends on the size of the screw you are using. As a general rule, the drill bit should be slightly smaller than the diameter of the screw.
How deep should the pilot hole be?
The depth of the pilot hole should be slightly shorter than the length of the screw you are using. It is important to make sure the hole is deep enough to allow the screw to go in smoothly without splitting the wood.
What is the best technique for screwing into wood with a drill?
The best technique for screwing into wood with a drill is to start by drilling a pilot hole, then switching to a screwdriver bit on the drill, aligning the screw with the pilot hole, and slowly driving the screw into the wood using the drill in a clockwise motion.
What should I do if the screw gets stuck while screwing into wood with a drill?
If the screw gets stuck while screwing into wood with a drill, you can try reversing the drill to back it out. If that doesn’t work, you can use a pair of pliers or a screw extractor tool to remove the stuck screw.
Video:


Meet Harrison Clayton, a distinguished author and home remodeling enthusiast whose expertise in the realm of renovation is second to none. With a passion for transforming houses into inviting homes, Harrison's writing at https://thehuts-eastbourne.co.uk/ brings a breath of fresh inspiration to the world of home improvement. Whether you're looking to revamp a small corner of your abode or embark on a complete home transformation, Harrison's articles provide the essential expertise and creative flair to turn your visions into reality. So, dive into the captivating world of home remodeling with Harrison Clayton and unlock the full potential of your living space with every word he writes.


