How to Screw into Metal Using Tools You Already Have

When it comes to working with metal, many people assume that they need specialized tools to get the job done. However, you might be surprised to learn that you can actually screw into metal using tools that you already have lying around in your toolbox. Whether you need to hang a heavy picture frame or install shelves in your garage, this guide will show you how to accomplish the task with just a few simple tools.
The first tool you’ll need is a high-quality drill bit specifically designed for metal. The key to successfully screwing into metal is being able to create a hole that is the right size for your screw. Using a drill bit with the correct diameter will ensure a snug fit and prevent the screw from slipping or stripping the metal.
Before you start drilling, it’s important to mark the spot where you want to insert the screw. Use a pencil to make a small dot on the metal surface, and double-check your measurements to ensure accuracy. Additionally, you may want to use a center punch to create a small indentation in the metal. This will help prevent the drill bit from slipping as you start drilling.
Next, attach the appropriate drill bit to your power drill and position it at a 90-degree angle to the metal surface. Apply gentle pressure as you start the drill and gradually increase the speed until the drill bit begins to bite into the metal. Remember to wear safety goggles and gloves to protect yourself from any metal shavings or debris.
Why Screw into Metal?
Screwing into metal can be necessary for a variety of DIY projects or repairs. Whether you are building furniture, hanging shelves, or fixing appliances, knowing how to screw into metal can be a useful skill to have. There are several advantages to screwing into metal:
Durability:
When you screw into metal, you can expect a strong and durable hold. Metal is a sturdy material that can withstand heavy loads and provide a secure attachment for your projects. This durability is especially important for tasks that require stability and long-lasting results.

Versatility:
Metal can be found in many different forms, including sheets, pipes, and rods. This means that you can screw into various types of metal and adapt to different project requirements. Whether you are working with steel, aluminum, or other metals, the same screwing techniques can typically be used.
Professional Finish:
Screwing into metal can give your projects a professional and polished appearance. The clean lines and precise fastening offered by screws can enhance the overall look of your finished product. Additionally, screws can be easily removed and replaced without damaging the metal, making them a versatile option for future modifications or repairs.
Security:
When you screw into metal, you can trust that your fasteners will stay in place. This is especially important for items that need to be secured for safety reasons, such as handrails or equipment attachments. Metal screws provide a secure and reliable hold, giving you peace of mind that your project is well-secured.
Accessibility:
Most hardware stores carry a wide range of screws specifically designed for metal. This means that you can easily find the right size, length, and type of screw for your project. Additionally, many of the tools and techniques used for screwing into wood can also be applied to screwing into metal, making it accessible even if you already have basic tools on hand.

Understanding the benefits of screwing into metal can help you decide when it is the best option for your DIY projects. With the right tools and techniques, you can confidently tackle metal-based projects and achieve professional and secure results.
What Tools Do You Already Have?
Before you start screwing into metal, it’s important to assess the tools you already have in order to determine the best approach. While there are specific tools designed for metalworking, you may be surprised to find that you already have some tools that can be used to screw into metal. Here are some common tools you may already have:
1. Power Drill
A power drill is a versatile tool that can be used for various tasks, including drilling holes and driving screws. If you already have a power drill, it can be a great tool for screwing into metal. Just make sure you have the appropriate drill bits and screwdriver bits for metal.
2. Screwdriver
A simple screwdriver can also be used to screw into metal, although it may require more effort and time compared to a power drill. If you don’t have a power drill, a screwdriver can still get the job done, especially for lighter tasks or small screws.
3. Adjustable Wrench
An adjustable wrench is a useful tool for tightening or loosening nuts and bolts. While it may not be the most efficient tool for screwing into metal, it can still be used in some situations, especially for larger screws or bolts.

4. Pliers
Pliers, such as needle-nose pliers or locking pliers, can be handy for holding small screws or bolts in place while you screw them into metal. They can provide a better grip and make it easier to screw in or remove screws.
5. Hammer
A hammer may not be the first tool that comes to mind when you think about screwing into metal, but it can be useful in certain situations. For example, if you need to create a pilot hole before driving a screw, you can use a hammer and a nail to make a small indentation.
6. Clamps
Clamps can be helpful when you need to hold metal pieces together while you screw them in. They can provide stability and prevent the pieces from moving or shifting during the screwing process.
7. Files or Sandpaper
If you need to smooth out rough edges or remove burrs from metal surfaces before screwing in, you can use files or sandpaper. These tools can help prepare the metal and make it easier to insert screws.
8. Safety Equipment
Lastly, don’t forget about safety equipment. It’s important to protect yourself when working with metal, especially when using tools like drills or hammers. Safety glasses, gloves, and ear protection can help prevent injuries and ensure a safe working environment.

Remember, while these tools may be useful for screwing into metal, it’s always a good idea to have the right tools for the job. If you frequently work with metal, consider investing in specialized tools designed for metalworking, such as metal drill bits, impact drivers, or tap-and-die sets.
Preparing the Surface
Before you begin screwing into metal, it is important to properly prepare the surface. This involves ensuring that the metal is clean and free from any debris or contaminants that could affect the screw’s ability to securely fasten. Here are some steps to follow when preparing the surface:
1. Clean the Metal
Start by cleaning the surface of the metal using a mild detergent and water solution. This will help remove any dirt, dust, or grease that may be present. Use a soft cloth or sponge to scrub the metal gently, avoiding any abrasive materials that could scratch the surface.
2. Remove Rust or Corrosion
If you notice any rust or corrosion on the metal surface, it is important to remove it before screwing into it. You can use a wire brush or sandpaper to scrub away the rust, making sure to reach all the affected areas. Once the rust is removed, wipe the surface clean with a dry cloth to remove any loose particles.

3. Apply Lubricant
In some cases, screwing into metal can be challenging due to its hardness. To make the process easier, you can apply a lubricant to the surface. This will reduce friction and make it easier to drive the screw in. You can use a lubricating spray or a specific metal lubricant for this purpose. Apply a small amount to the area where you plan to insert the screw and spread it evenly across the surface.
4. Mark the Hole Locations
Before you start drilling or screwing into the metal, it is important to accurately mark the locations where the screws will be inserted. This will ensure that the screws are properly aligned and result in a secure fastening. Use a pencil or a marker to make small dots or lines on the metal surface, indicating where the holes should be drilled or the screws should be placed.
5. Consider Pilot Holes
Depending on the thickness and type of metal, you may need to create pilot holes before screwing in the screws. Pilot holes are small guide holes that help prevent the metal from splitting or cracking when the screws are inserted. Using a drill bit slightly smaller than the diameter of the screws, carefully drill the pilot holes at the marked locations. Make sure to drill straight and to the appropriate depth according to the length of the screws.
By following these preparation steps, you will ensure that the surface is ready for screwing into metal. This will result in a secure and durable connection between the screw and the metal, allowing you to complete your projects with confidence.
Removing Rust and Debris
If you are working with metal that has rust or debris on its surface, it is important to remove these impurities before screwing into it. Rust and debris can weaken the metal and make it more difficult to screw into. Here are a few methods for removing rust and debris:
1. Wire Brush
A wire brush is a simple tool that can be used to remove rust and debris from metal surfaces. Hold the metal securely and use the wire brush to scrub away the rust and debris. Be sure to brush in all directions to thoroughly clean the surface. You can also use a wire brush attachment on a power drill for larger areas or tougher rust.
2. Sandpaper
Sandpaper is another effective tool for removing rust and debris from metal. Start with a rough grit sandpaper and gradually work your way to a finer grit. Rub the sandpaper against the metal surface in a back-and-forth motion until the rust and debris are removed. This method may require more effort and time, especially for larger areas.
3. Chemical Rust Removers
There are a variety of chemical rust removers available on the market. These products are designed to dissolve rust and make it easier to remove. Follow the instructions on the product carefully, as some may require rinsing or neutralizing after use. Be sure to wear gloves and work in a well-ventilated area when using chemical rust removers.
4. Power Tools
If the rust or debris is particularly stubborn, you may need to use a power tool to remove it. An angle grinder or rotary tool with a wire brush or sanding attachment can be effective in these situations. Be cautious when using power tools, as they can be aggressive and may damage the surface if not used properly.
Remember to clean the metal surface thoroughly after removing rust and debris. Use a damp cloth to wipe away any remaining residue, and allow the metal to dry completely before screwing into it. Taking the time to properly clean the metal will ensure a secure and long-lasting screw connection.
Cleaning the Surface
Before you begin screwing into metal, it’s important to ensure that the surface is clean and free from any dirt, debris, or rust. Cleaning the surface properly will help improve the effectiveness and durability of your screws. Here are a few methods you can use to clean the surface:
1. Use a wire brush
One of the simplest ways to clean metal surfaces is by using a wire brush. Begin by scrubbing the surface vigorously with the wire brush to remove any loose rust, paint, or dirt. Make sure to cover the entire surface area that you intend to screw into.
2. Apply a rust remover
If the metal surface has stubborn rust or oxidation, you may need to apply a rust remover. Follow the instructions mentioned on the product and apply it to the affected areas. Allow the rust remover to sit for the specified duration and then scrub the surface with a wire brush to remove the rust.
3. Use sandpaper
For smaller surfaces or intricate designs, sandpaper can be an effective tool for cleaning. Choose sandpaper with a grit suitable for the metal surface and start rubbing it gently in circular motion. This will help remove any rust or paint and provide a smooth surface for screwing.
4. Utilize a solvent or degreaser
If the metal surface is greasy or covered in oil, you can use a solvent or degreaser to remove the oil film. Apply the solvent or degreaser onto a clean cloth or sponge and wipe the surface thoroughly. This will help remove any dirt, grease, or oil that could hinder the screw’s grip.
5. Clean with vinegar and baking soda
For a natural cleaning solution, mix vinegar and baking soda into a paste. Apply this paste to the metal surface and scrub it with a soft-bristled brush or sponge. The vinegar’s acidic properties will help dissolve any rust or dirt, while the baking soda acts as a gentle abrasive.
Remember, regardless of the cleaning method you choose, always wear protective gloves and safety glasses to prevent any injuries. Additionally, make sure the surface is completely dry before screwing into it to avoid any potential slipping or damage to the screws.
Choosing the Right Screw
Choosing the correct screw for your metal project is essential for a successful installation. Here are some factors to consider when selecting a screw:
1. Material
First, consider the material of the metal. Different metals have different properties, such as hardness and strength. For softer metals like aluminum, brass, or copper, it’s best to use screws made from a softer material, like brass or stainless steel, to avoid damaging the metal. For harder metals like steel or iron, you can use screws made from hardened steel.
2. Size
The size of the screw is also important. It should be long enough to securely hold the materials together. Too short of a screw may not provide sufficient grip, while a screw that is too long can damage the metal or protrude on the other side. It’s a good idea to measure the thickness of the metal and choose a screw that is slightly longer than that measurement.
3. Head Type
The head type of the screw depends on your specific application. Common head types for metal screws include flat head, pan head, and oval head. Each head type has its own advantages and may be more suitable for certain projects. Flat head screws are often countersunk for a flush finish, pan head screws have a rounded top and are ideal for applications where a low-profile head is desired, and oval head screws have a slightly rounded top and are commonly used in decorative applications.
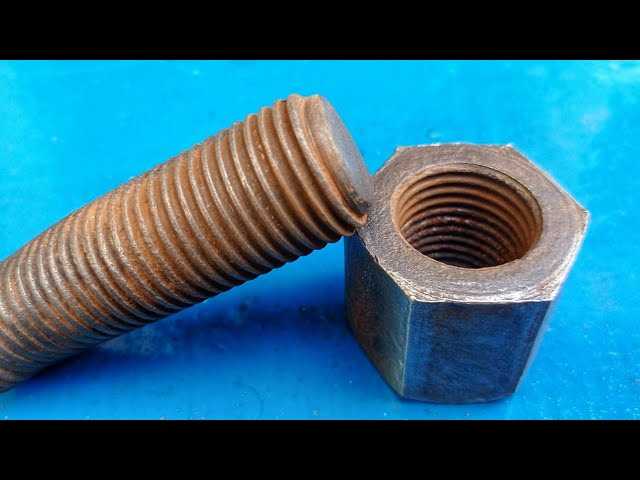
4. Thread Type
The thread type of the screw is important for creating a secure hold in the metal. There are two main types of thread: machine threads and self-tapping threads. Machine threads are used with nuts or tapped holes and require pre-drilling. Self-tapping threads are designed to create their own threads as they are screwed into the metal, eliminating the need for pre-drilling.
5. Corrosion Resistance
If your metal project will be exposed to moisture or other corrosive elements, it’s important to choose a screw that has a high level of corrosion resistance. Stainless steel screws are a popular choice for their excellent corrosion resistance, making them suitable for outdoor applications or projects in humid environments. Coated screws, such as zinc or galvanized screws, are also available and provide some level of corrosion resistance.
By considering these factors, you can choose the right screw for your metal project, ensuring a secure and long-lasting installation.
Understanding Screw Types
When it comes to screwing into metal, it’s important to understand the different types of screws that are available. Each type of screw has its own unique characteristics and uses.
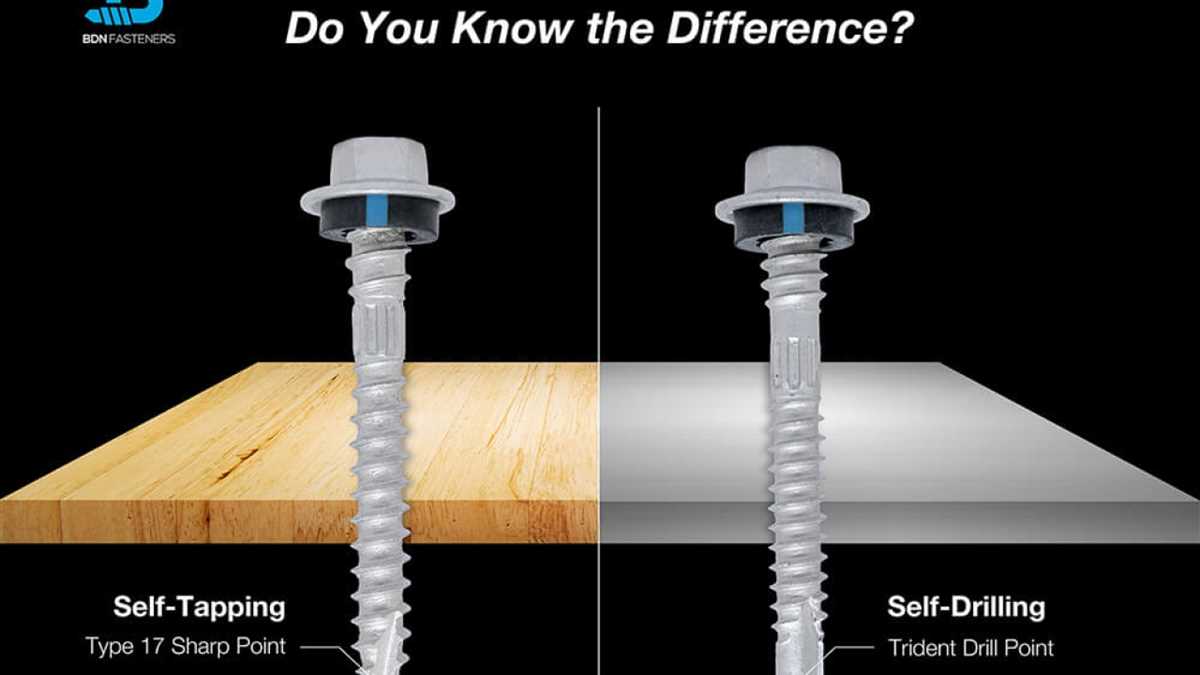
1. Self-Drilling Screws
Self-drilling screws, also known as Tek screws, are designed to drill their own pilot hole as they are screwed into the metal. These screws have a pointed tip and sharp threads, allowing them to penetrate the metal without the need for pre-drilling. Self-drilling screws are commonly used in metal-to-metal applications where a secure and permanent connection is required.
2. Machine Screws
Machine screws are typically used in applications where a precise and tight fit is needed. These screws have a uniform diameter and thread pitch, which allows them to be threaded into tapped holes or used with nuts. Machine screws come in a variety of sizes and lengths and are often used in machinery, appliances, and electrical devices.
3. Sheet Metal Screws
Sheet metal screws, also known as sheet metal screws, are designed specifically for use in thin metal materials. These screws have sharp threads and a flat or rounded head. They are commonly used to attach sheet metal to wood or other materials. Sheet metal screws come in different sizes and lengths and are available in both Phillips and slotted drive types.
4. Wood Screws
Wood screws are not specifically designed for use in metal, but they can still be used in certain metal applications. These screws have a tapered shaft, sharp threads, and a flat or rounded head. When using wood screws in metal, it’s important to pre-drill a pilot hole to prevent the metal from splitting or cracking.
5. Concrete Screws
Concrete screws, also known as masonry screws or Tapcons, are designed for use in concrete, brick, or block. These screws have a specially designed thread that allows them to cut into masonry materials. Concrete screws are often used to attach metal brackets, plates, or other fixtures to masonry surfaces.
6. Lag Screws
Lag screws, also known as lag bolts, are heavy-duty screws used for securing heavy objects to wood or metal. These screws have a thick shaft, coarse threads, and a hexagonal or square head. Lag screws are often used in construction, carpentry, and other applications where a strong and durable connection is required.
Understanding the different types of screws available will help you choose the right screw for your specific metal application. Whether you need to drill into metal or attach metal to another material, there’s a screw type that’s perfect for the job.
Choosing the Appropriate Length
When it comes to screwing into metal, choosing the appropriate screw length is crucial. Using the wrong length can result in a loose connection or a damaged surface. Here are some guidelines to help you select the right length for your project:
1. Determine the Thickness of the Metal
The first step is to determine the thickness of the metal you will be screwing into. This can be done by using a caliper or a ruler. Measure the metal’s thickness at the location where you plan to insert the screw.
2. Calculate the Screw Length
To calculate the appropriate screw length, add the thickness of the metal to the desired depth of penetration. The depth depends on the specific application and the strength required for the connection. It is important to ensure that the screw will penetrate the metal enough to provide a secure grip, but not too much that it punctures the other side.
3. Consider the Type of Screw
Different types of screws may have different recommendations for optimal lengths. For example, self-drilling screws typically require a shorter length compared to regular screws since they can penetrate the metal without the need for pre-drilling. Be sure to check the manufacturer’s recommendations for the specific screw type you are using.
4. Test with a Pilot Hole
Before screwing directly into the metal, it is always a good idea to test with a pilot hole. This will allow you to ensure that the screw goes in smoothly without damaging the metal. The pilot hole should be slightly smaller than the screw’s diameter.
5. Choose the Right Screw Size
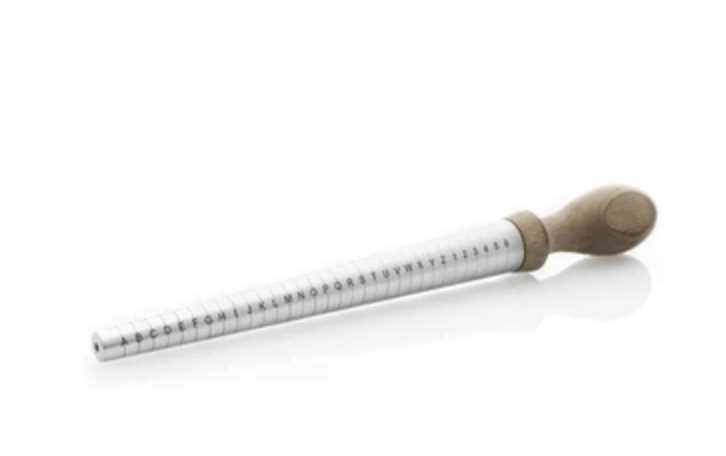
In addition to length, you also need to consider the appropriate screw size for your project. The size refers to the diameter and thread count of the screw. The larger the diameter and thread count, the stronger the connection will be. Refer to a screw size chart to choose the right size based on your project’s requirements.
By following these guidelines, you can ensure that you choose the appropriate screw length for screwing into metal. Remember to always use the right tools and techniques to achieve a secure and durable connection.
Marking the Spot
Before you can start screwing into metal, you need to mark the spot where you want the screw to go. This step is crucial to ensure accuracy and prevent any mistakes. Here are some tips to help you mark the spot:
1. Measure and mark the desired location
Using a measuring tape, measure the exact location where you want to screw into the metal. Use a pencil or a marker to make a clear and visible mark on the surface. Make sure your measurements are precise to ensure the screw goes in the right place.
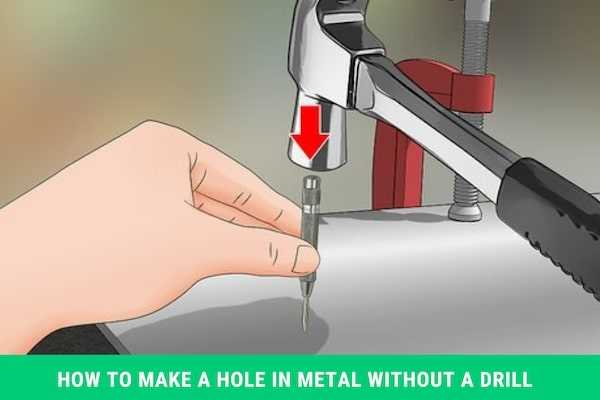
2. Use a center punch
If you’re working with a hard metal surface, it can be helpful to use a center punch. Place the tip of the center punch on the marked spot and use a hammer to strike the center punch. This will create a small indentation that will serve as a guide for the drill bit.
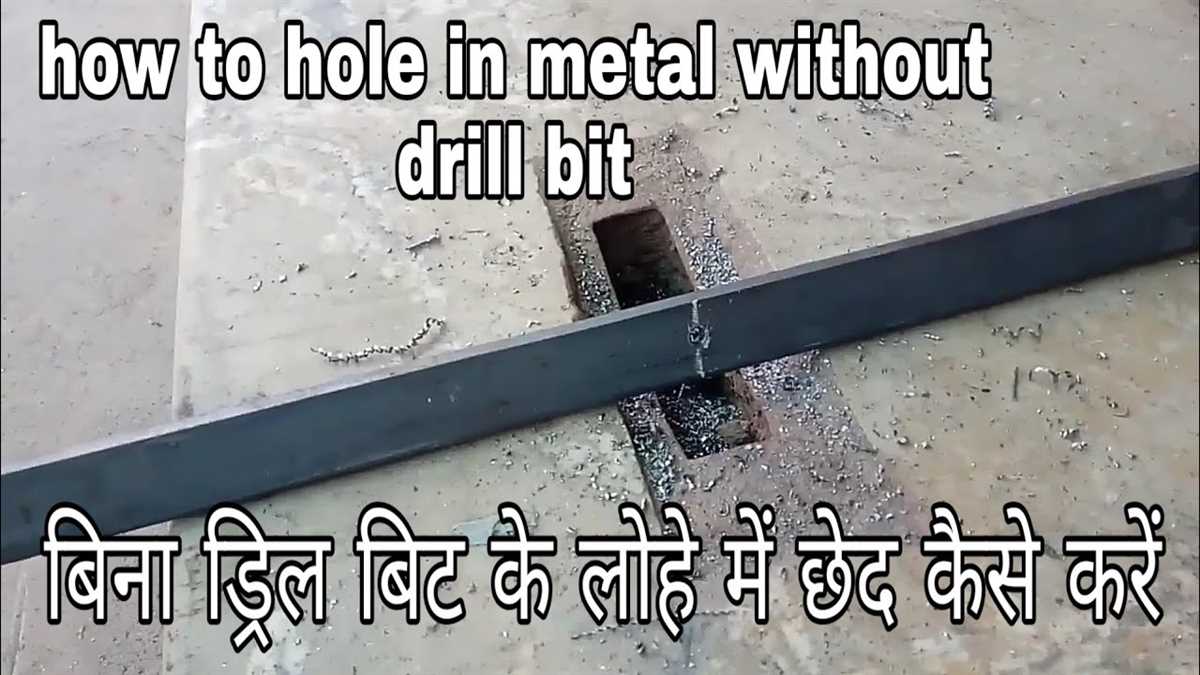
3. Use a center drill bit
If the metal surface is thick or very hard, it’s recommended to use a center drill bit. This type of drill bit has a pointed tip that helps to create a small pilot hole. Place the tip of the center drill bit on the marked spot and apply a moderate amount of pressure while drilling. This will create a small hole that will help guide the screw into the metal.
4. Consider using a pilot hole
For thicker metal or when working with large screws, it’s a good idea to create a pilot hole before screwing. A pilot hole is a smaller hole that is drilled before the main hole to make it easier for the screw to go in. Use a drill bit slightly smaller than the diameter of the screw and drill a hole on the marked spot. Remember to drill the hole at a slower speed to prevent overheating or damaging the drill bit.
5. Secure the metal
When screwing into metal, it’s important to secure the metal piece properly. Use clamps or a vice to hold the metal piece in place to prevent any movement while drilling or screwing.
By following these steps and taking the time to mark the spot accurately, you’ll have a much easier time screwing into metal using the tools you already have.
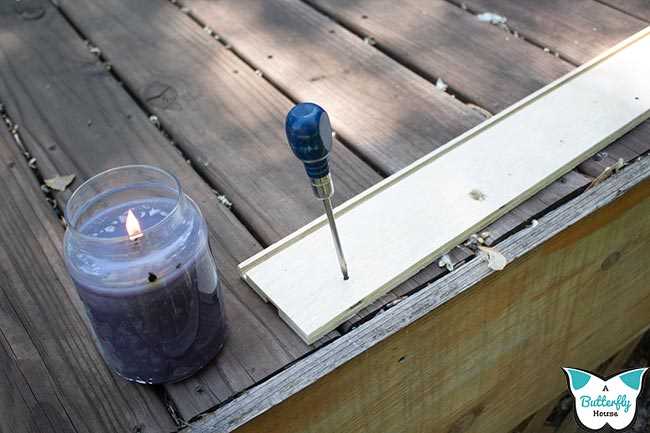
Using a Pencil
If you don’t have access to power tools, one simple tool you can use to screw into metal is a pencil. Here’s how:
- Mark the spot: Use a pencil to mark the spot where you want to screw into the metal. Make sure it is a visible and easily accessible spot.
- Make a pilot hole: Hold the pencil perpendicular to the metal surface and apply pressure to create a small indentation. This will serve as a pilot hole for the screw.
- Insert the screw: Align the screw with the pilot hole and start turning it clockwise using a manual screwdriver or a wrench. Apply steady pressure and keep turning until the screw is fully inserted into the metal.
Using a pencil to create a pilot hole may not be as efficient as using power tools, but it can still be a useful technique when you don’t have access to other tools. Just make sure to use a strong and sharp pencil to make the process easier.
FAQ:
What materials can I screw into using the tools I already have?
You can screw into various materials such as wood, drywall, concrete, and metal using the tools you already have.
What tools do I need to screw into metal?
You can use a power drill or a screwdriver to screw into metal.
Do I need any special drill bits for screwing into metal?
Yes, you will need a drill bit specifically designed for metal, such as a cobalt or titanium drill bit.
Can I use regular screws for screwing into metal?
No, regular screws may not be strong enough to hold in metal. It is recommended to use self-tapping screws or metal screws specifically designed for metal applications.
What precautions should I take when screwing into metal?
When screwing into metal, make sure to wear safety goggles to protect your eyes from any flying metal shavings. Also, be cautious of any sharp edges on the metal.
Do I need to pre-drill holes in metal before screwing?
It is generally recommended to pre-drill pilot holes in metal before screwing. This helps to prevent the metal from cracking or splitting.
Can I use a regular screwdriver to screw into metal?
Yes, you can use a regular screwdriver to screw into metal, but it may require more effort and force compared to using a power drill.
Video:

How to open a lollipop

Meet Harrison Clayton, a distinguished author and home remodeling enthusiast whose expertise in the realm of renovation is second to none. With a passion for transforming houses into inviting homes, Harrison's writing at https://thehuts-eastbourne.co.uk/ brings a breath of fresh inspiration to the world of home improvement. Whether you're looking to revamp a small corner of your abode or embark on a complete home transformation, Harrison's articles provide the essential expertise and creative flair to turn your visions into reality. So, dive into the captivating world of home remodeling with Harrison Clayton and unlock the full potential of your living space with every word he writes.


