How to Screw into Concrete without a Hammer Drill: Tips and Techniques

Screwing into concrete can be a challenging task, especially if you don’t have a hammer drill. Whether you’re hanging up shelves, mounting a TV, or installing a light fixture, it’s important to know the right techniques to successfully screw into concrete without the need for a special tool.
One of the first things to consider when screwing into concrete without a hammer drill is the type of screw you’ll be using. It’s recommended to use masonry screws, also known as concrete screws, as they are specifically designed to secure objects to concrete surfaces. These screws have a special thread pattern and a hardened tip that allows them to penetrate the concrete without the need for pre-drilling.
Before you start screwing, it’s important to prepare the surface of the concrete. Clean the area where you’ll be attaching the object and remove any debris or dust. This will ensure a better grip and prevent the screw from slipping or breaking. Additionally, you can use a masonry anchor to provide extra stability and strength to your screw.
When inserting the screw, it’s essential to use a screwdriver or an impact driver instead of a regular drill. Apply firm pressure while turning the screwdriver clockwise to create the necessary torque and drive the screw into the concrete. You may need to use both hands or apply more force than usual, but be careful not to overtighten and strip the screw.
In conclusion, screwing into concrete without a hammer drill is possible with the right techniques and tools. By using masonry screws, preparing the surface properly, and using a screwdriver or an impact driver, you can securely attach objects to concrete surfaces without the need for a specialized tool. Remember to always take proper safety precautions and consult a professional if you’re unsure about the process.

Preparing Your Tools
Before you start screwing into concrete without a hammer drill, it’s important to make sure you have the right tools and equipment. Here are some tips for preparing your tools:
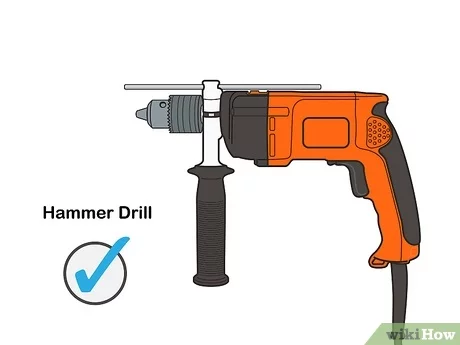
- Power screwdriver or drill: While a hammer drill is not necessary, a power screwdriver or drill with a high torque setting will make the process easier.
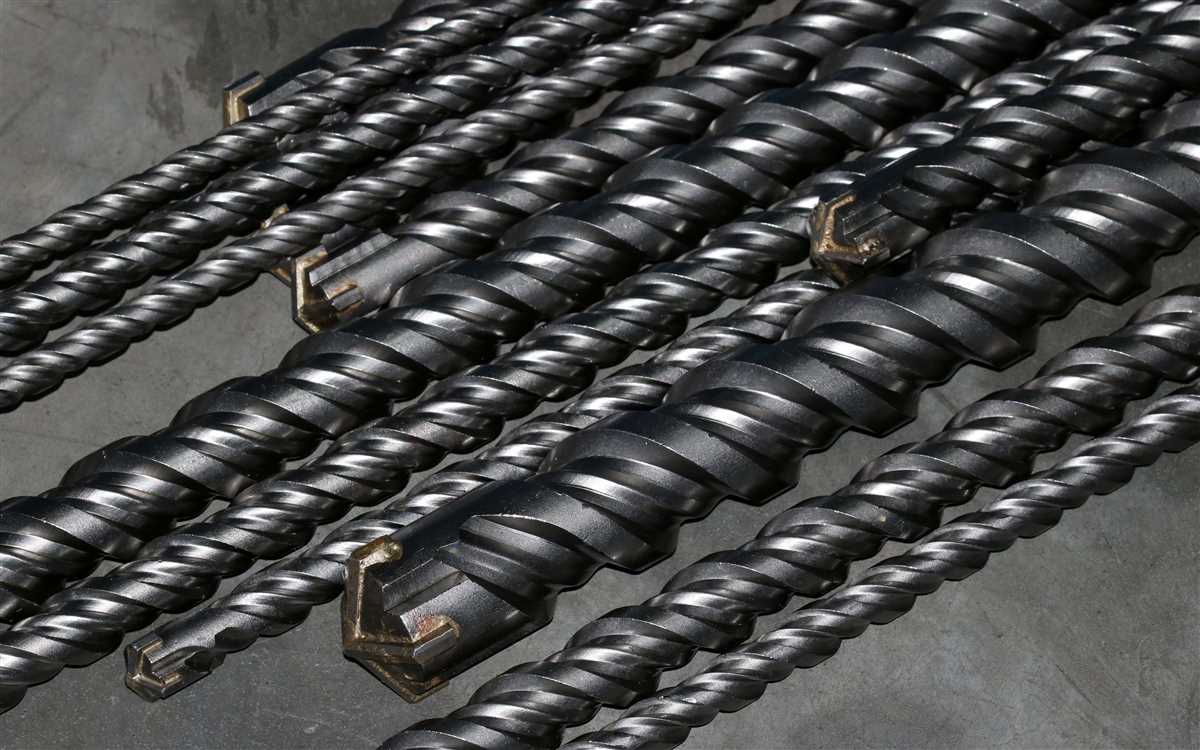
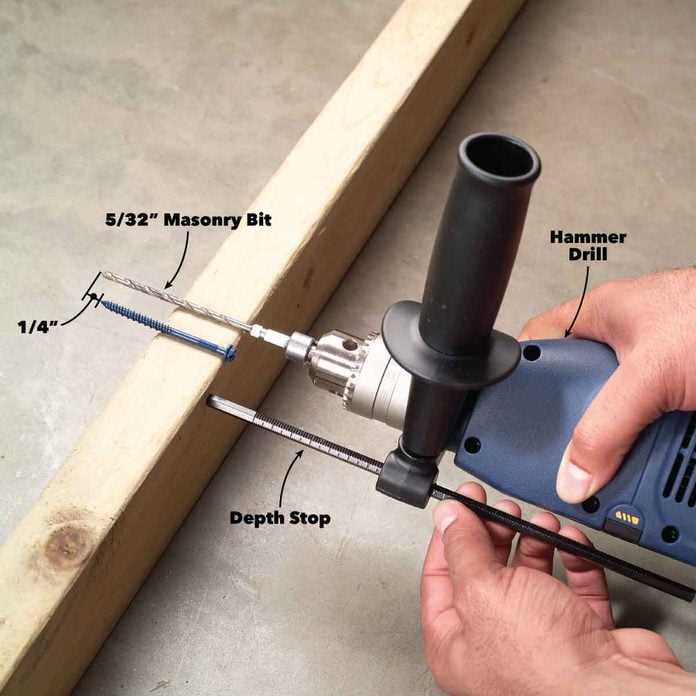
- Masonry drill bit: To drill into concrete, you’ll need a special masonry drill bit. The size of the bit will depend on the size of the screws you’ll be using.
- Masonry screws: Choose screws specifically designed for masonry applications. These screws will have sharp, self-tapping points and extra-hard threads that can bite into the concrete.
- Tape measure and pencil: Measure and mark the locations where you want to screw into the concrete. This will help ensure accurate placement.
- Safety gear: Concrete drilling can create dust and debris, so be sure to wear safety goggles, a dust mask, and ear protection.
Once you have all the necessary tools and equipment, you’ll be ready to proceed with screwing into concrete without a hammer drill. The next step is to prepare the concrete surface for drilling and screwing.
Choosing the Right Screw
When it comes to screwing into concrete without a hammer drill, it’s important to choose the right screw for the job. Here are some factors to consider:
- Screw Type: There are several screw types available for concrete applications, such as masonry screws, concrete screws, and anchor screws. Each type is designed for different levels of strength and durability. It’s essential to choose a screw type that is suitable for your project.
- Screw Size: The size of the screw is also crucial. It should be long enough to penetrate the concrete adequately but not too long that it extends out. The diameter of the screw should fit the size of the hole you plan to drill. Consult the manufacturer’s specifications for the recommended screw size.
- Thread Type: The thread type of the screw can impact its holding power in concrete. Coarse threads usually provide better grip and stability, making them a good choice for applications with heavier loads. Fine threads are suited for lighter-duty applications.
- Corrosion Resistance: If your project is exposed to moisture or outdoor elements, consider using screws that are corrosion-resistant. Stainless steel screws or screws with coatings like zinc or galvanized finish can help prevent rusting and increase the longevity of the screw.
- Head Type: The head type of the screw can affect its installation and appearance. Flat heads are commonly used for flush installations, while hex heads and Phillips heads offer more torque and better grip during installation. Choose the head type based on your preference and the required functionality.
Before purchasing screws, make sure to read the product descriptions and specifications to ensure they are suitable for concrete applications. Taking the time to select the right screw can save you from potential issues and ensure a successful and secure installation.

Gathering the Necessary Tools
Before you start screwing into concrete without a hammer drill, it’s important to gather the necessary tools for the job. While you won’t need a hammer drill, you will still need some basic tools to ensure a successful installation.
Here are the tools you will need:
- Power drill – While you won’t need a hammer drill, a regular power drill with a high torque setting can still be effective.
- Masonry drill bit – Choose a masonry drill bit that is specifically designed for drilling into concrete. Look for a bit with a carbide tip for better durability.
- Screwdriver bit – Depending on the type of screws you are using, you may need a specific screwdriver bit. Make sure you have the right bit for your screws.
- Measuring tape – To ensure accurate placement of the screws, it’s important to measure and mark the desired locations.
- Pencil or marker – Use a pencil or marker to mark the spots where you will be drilling.
- Dust mask and safety goggles – Drilling into concrete can create a lot of dust and debris. Wear a dust mask and safety goggles for protection.
- Vacuum cleaner or brush – After drilling, you will need to clean up the dust and debris. A vacuum cleaner or brush can be helpful for this task.
- Screws and anchors – Select the appropriate screws and anchors for the weight and type of object you are installing.
By gathering these tools before you start, you can ensure that you have everything you need for a successful installation. This will save you time and frustration during the process.
Marking and Measuring
Before you start screwing into concrete without a hammer drill, it’s important to mark and measure the area where you want to drill. This will help ensure accurate placement of screws and prevent any unwanted damage.
Step 1: Determine the Location

- Identify the specific spot on the concrete where you want to place the screw.
- Use a tape measure to determine the exact measurements and make note of them.
Step 2: Mark the Spot
- Hold the tip of a pencil against the concrete surface and align it with the desired location.
- Apply slight pressure while moving the pencil in a circular motion to create a small indentation.
- This mark will serve as your guide when drilling into the concrete.
Step 3: Repeat the Process
- If you need to place multiple screws, repeat the marking process for each location.
- Ensure that the marks are evenly spaced and align with your desired measurements.
Step 4: Double-Check the Measurements
- Before drilling, double-check the measurements to ensure accuracy.
- Use a level to ensure that the marked spots are aligned horizontally or vertically, depending on your project’s requirements.
By marking and measuring the location before drilling, you can ensure that the screws are placed precisely where you want them. This will result in a more secure and professional-looking installation.
Locating and Marking the Screw Placement
Before you start screwing into concrete, it’s important to properly locate and mark the positions where you want to place the screws. This will ensure accurate and secure screw installation.
1. Determine the Placement
First, you need to decide where you want to place the screws in the concrete. Consider the purpose of the screws and the weight-bearing capacity they need to provide. If you are hanging something heavy, it’s essential to find the strongest areas of the concrete, such as solid concrete walls or columns.
2. Use a Stud Finder
A stud finder is a handy tool that can help you locate the steel reinforcing bars (rebars) in the concrete. These rebars are great for anchoring screws as they provide extra strength. Move the stud finder along the surface of the concrete until it detects a rebar. Mark the spot with a pencil or chalk.
3. Measure and Mark the Screw Positions
Once you have determined the placement and located the rebars, use a tape measure to measure and mark the exact positions for the screws. Make sure to space them evenly and account for any obstructions or factors that may affect the screw installation.

4. Double Check the Markings
Before you start drilling, double check your markings to ensure accuracy. Make sure they are aligned and at the correct distance from each other. It’s better to spend a few extra moments verifying the markings than to end up with misplaced or crooked screws.
5. Consider a Pilot Hole
Depending on the type of screws you are using and the hardness of the concrete, you may want to consider drilling pilot holes. Pilot holes can help guide the screws into the concrete and prevent them from slipping or breaking. Use a drill bit slightly smaller than the diameter of the screws to create the pilot holes.
By properly locating and marking the screw placement, you can ensure a successful screw installation in concrete. Taking the time to plan and measure will result in a secure and sturdy attachment that will withstand the test of time.
Measuring the Depth
Before you start screwing into concrete, it’s important to measure the depth of the hole you need to drill. This will ensure that your screws are anchored properly and securely. Here are a few tips on how to measure the depth:
- Use a depth gauge: A depth gauge is a tool that allows you to measure the depth of a hole accurately. Simply insert the gauge into the hole until it reaches the bottom, and then read the measurement.
- Mark the drill bit: If you don’t have a depth gauge, you can mark your drill bit to indicate the desired depth. Measure the length of the screw you plan to use and wrap a small piece of tape around the drill bit at that length. This will serve as a visual guide when drilling.
- Measure with a ruler or tape measure: If you don’t have a depth gauge or tape, you can measure the depth manually using a ruler or tape measure. Insert the measuring tool into the hole until it reaches the bottom, and then read the measurement.
Remember to add a little extra depth to accommodate any debris that may be in the hole. This will ensure that the screw goes in smoothly and securely.
By measuring the depth accurately, you can ensure that your screws are properly anchored into the concrete, giving you strong and long-lasting results.
Pilot Holes and Anchors
When screwing into concrete without a hammer drill, it is important to use pilot holes and anchors to ensure a secure and long-lasting installation. Pilot holes are small, pre-drilled holes that provide a guide for the screw and make it easier to insert it into the concrete. Anchors, on the other hand, are devices that provide added support and stability to the screw.
Here are some tips and techniques for using pilot holes and anchors when screwing into concrete:
1. Mark the spot

Before drilling the pilot hole, mark the spot where you want to insert the screw. It’s important to accurately measure and mark the spot to avoid any mistakes or miscalculations.
2. Choose the right size pilot hole
The size of the pilot hole should be slightly smaller than the diameter of the screw you are using. This will ensure a snug fit and prevent the concrete from cracking or splitting.
3. Drill the pilot hole
Using a masonry drill bit, slowly and carefully drill the pilot hole into the concrete. Make sure to apply steady and even pressure, and periodically remove any dust or debris that may accumulate in the hole.
4. Insert the anchor
After drilling the pilot hole, you will need to insert an anchor into the hole. There are various types of anchors available, such as plastic anchors, metal anchors, and adhesive anchors. Choose the appropriate anchor based on the weight and type of object you are attaching to the concrete.
5. Screw in the screw
Once the anchor is in place, you can screw in the screw using a screwdriver or a drill with a screwdriver bit. Make sure to apply even pressure and avoid overtightening, as this can cause the anchor to loosen or the concrete to crack.
6. Test the stability
After the screw is fully inserted, test the stability by gently tugging or shaking the attached object. If it feels secure, then the installation is successful. If it feels loose or unstable, you may need to remove the screw, adjust the anchor, and try again.
By using pilot holes and anchors, you can successfully screw into concrete without a hammer drill. This technique provides stability and ensures that your installation will withstand the test of time.
Drilling Pilot Holes
When screwing into concrete without a hammer drill, it is important to drill pilot holes to make the process easier and ensure that the screws can be inserted smoothly. Pilot holes are small holes drilled into the concrete that act as guides for the screws, allowing them to be inserted accurately and securely.
Here are some tips and techniques for drilling pilot holes in concrete without a hammer drill:
- Choose the right drill bit: Use a carbide-tipped masonry bit specifically designed for drilling into concrete. These bits are durable and can withstand the tough material.
- Mark the drilling points: Use a pencil or marker to mark the spots where you want to insert the screws. Measure and mark accurately to ensure proper alignment.
- Prepare the drill: Insert the carbide-tipped masonry bit into the drill chuck, ensuring that it is secured tightly. Check the drill’s settings and set it to the appropriate speed for drilling into concrete.
- Start drilling: Place the tip of the drill bit on the marked spot and apply gentle pressure. Start drilling at a slow speed to prevent the bit from slipping or wandering. Gradually increase the speed as the hole becomes deeper.
- Control the drilling depth: Drill the pilot hole to a depth slightly shorter than the length of the screw you are using. This will provide enough space for the screw to grab onto the concrete without bottoming out.
- Clear the dust: While drilling, periodically remove the drill bit from the hole to clear out the accumulated dust. This will help prevent the bit from getting clogged and ensure smooth drilling.
- Use a vacuum or blower: After drilling the pilot holes, use a vacuum or blower to remove any remaining dust from the holes. This will ensure a clean and secure fit for the screws.
- Insert the screws: Once the pilot holes are drilled and cleaned, you can now insert the screws into the concrete. Use a screwdriver or power drill with a screwdriver attachment to drive the screws in.
By following these tips and techniques, you can successfully drill pilot holes in concrete without a hammer drill, making the process of screwing into concrete easier and more efficient.
Using Concrete Anchors
- Step 1: Before using concrete anchors, it is important to determine the correct type of anchor for your specific application. There are various types of concrete anchors available, such as sleeve anchors, wedge anchors, and drop-in anchors. Each type of anchor is designed for different load capacities and installation methods.
- Step 2: Once you have chosen the appropriate anchor, mark the location on the concrete where you want to install the anchor. Use a tape measure and a pencil to make accurate markings.
- Step 3: Wear safety goggles and gloves before starting the installation process. Drill a hole into the concrete at the marked location using a masonry drill bit of the appropriate size for the anchor you are using. It is essential to use the appropriate size masonry drill bit to ensure a secure fit for the anchor.
- Step 4: After drilling the hole, clean it by removing any dust or debris using a vacuum or a blowout pump. This will help ensure a proper fit for the anchor.
- Step 5: Insert the concrete anchor into the drilled hole. Make sure it is properly aligned and flush with the surface of the concrete.
- Step 6: Use a wrench or a hammer to tighten the anchor, depending on the type of anchor you are using. Follow the manufacturer’s instructions for the specific anchor you have chosen.
- Step 7: Test the anchor by applying pressure or pulling on it to make sure it is secure and properly installed. If it feels loose or unstable, remove the anchor and start the installation process again.
- Step 8: Repeat the process for each anchor you need to install, making sure to use the appropriate size anchor for each hole.
Using concrete anchors can provide a secure and reliable solution for attaching objects to concrete surfaces. By following these steps, you can ensure that your anchors are properly installed and provide the necessary support for your project.
Driving the Screw
Once you have prepared the hole and inserted the anchor or plug, it’s time to drive the screw into the concrete. Follow these tips and techniques to ensure a successful and secure attachment:
- Select the right screw: Choose a screw that is specifically designed for concrete applications. Concrete screws typically have a hardened steel core and threads that are designed to grip the concrete surface securely.
- Use a screwdriver or impact driver: A regular screwdriver may be sufficient for lightweight applications, but for larger screws or tougher concrete, an impact driver will provide more torque and make the driving process easier.
- Apply pressure: Start by applying firm pressure while turning the screw clockwise. Use both hands to ensure a steady and controlled motion. As the screw enters the concrete, you may need to increase the force applied.
- Monitor the screw depth: Keep an eye on the depth of the screw as you drive it in. It’s important to stop when the head of the screw is flush with the surface of the material you are attaching. This will prevent overdriving and ensure a secure hold.
- Adjust the speed and pressure: If you encounter any resistance or the screw is difficult to drive, try adjusting the speed and pressure. Slowing down the driver or applying more force can help overcome tougher spots in the concrete.
- Clean up and inspect: Once the screw is fully driven, remove any excess debris or dust from the hole or surrounding area. Inspect the screw to ensure it is secure and properly seated in the concrete.
Following these tips and techniques will help you successfully drive screws into concrete without the need for a hammer drill. Remember to always wear safety goggles and work with caution when working with power tools and concrete to avoid accidents or injuries.
FAQ:
Do I need a hammer drill to screw into concrete?
No, you don’t always need a hammer drill to screw into concrete. There are alternative techniques that can be used.
What are some alternative techniques to screw into concrete without a hammer drill?
Some alternative techniques include using a masonry nail and a hammer, pre-drilling a hole using a regular drill bit, or using an adhesive anchor.
Is it difficult to screw into concrete without a hammer drill?
Screwing into concrete without a hammer drill can be more challenging than using a hammer drill, but with the right techniques and tools, it can be done effectively.
What type of screws should I use when screwing into concrete?
When screwing into concrete, it is recommended to use screws that are specifically designed for concrete, such as masonry screws or concrete screws. These screws have special features that help them hold securely in concrete.
Can I use a regular drill bit to pre-drill a hole in concrete?
No, it is not recommended to use a regular drill bit to pre-drill a hole in concrete. Concrete is a hard material, and a regular drill bit may not be able to drill through it effectively. It is better to use a masonry drill bit or a carbide-tipped drill bit.
Do I need to use an anchor when screwing into concrete without a hammer drill?
Using an anchor can provide additional support and stability when screwing into concrete without a hammer drill. It is recommended to use an anchor, especially for heavier loads or when a secure attachment is required.
Video:

Meet Harrison Clayton, a distinguished author and home remodeling enthusiast whose expertise in the realm of renovation is second to none. With a passion for transforming houses into inviting homes, Harrison's writing at https://thehuts-eastbourne.co.uk/ brings a breath of fresh inspiration to the world of home improvement. Whether you're looking to revamp a small corner of your abode or embark on a complete home transformation, Harrison's articles provide the essential expertise and creative flair to turn your visions into reality. So, dive into the captivating world of home remodeling with Harrison Clayton and unlock the full potential of your living space with every word he writes.


