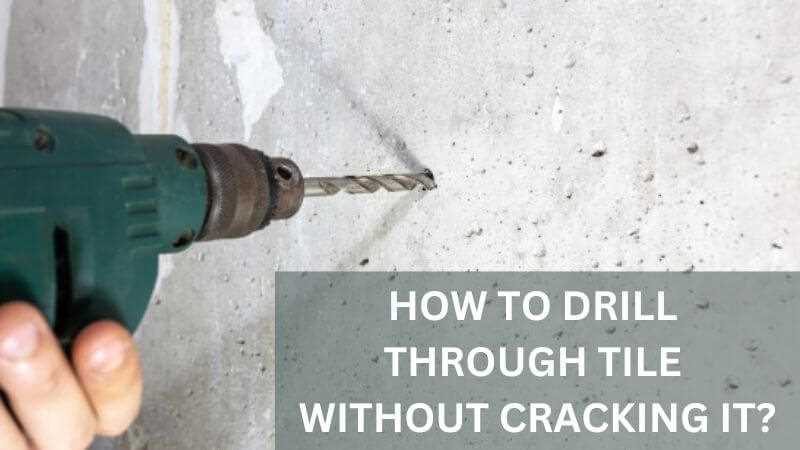
How to Safely Drill Through Porcelain Tile Without Cracking

Drilling through porcelain tile can be a tricky task, as this hard and brittle material is prone to cracking or chipping if not handled correctly. Whether you’re installing bathroom fixtures or hanging wall decor, it’s important to follow some key steps to ensure a successful and crack-free drilling experience.
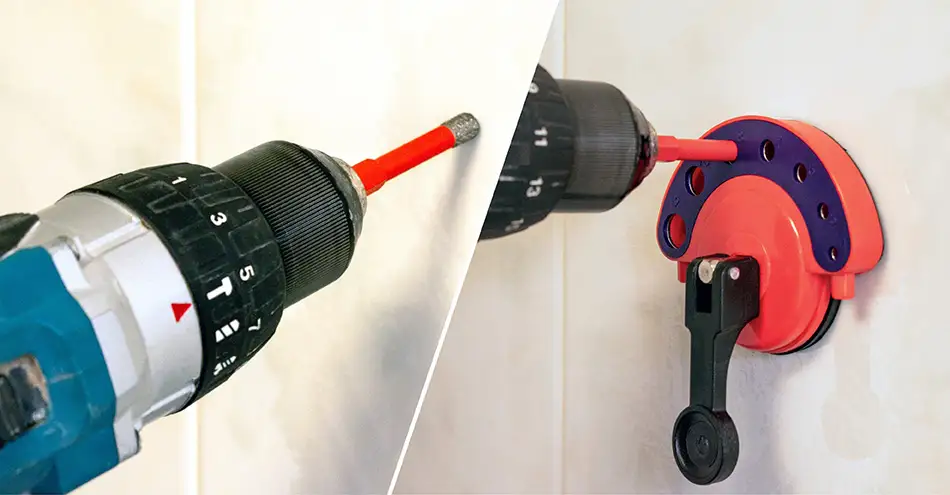
The first step is to gather the necessary tools and materials. You’ll need a high-quality diamond-tipped drill bit specifically designed for drilling through porcelain tile. These drill bits have a diamond coating that allows for precise and clean cuts without damaging the tile. Additionally, you’ll need a variable speed drill and some masking tape to mark your drilling spot and provide extra support to prevent cracking.
Before drilling, it’s crucial to wear safety goggles and gloves to protect yourself from any potential flying debris or sharp edges. Next, place a piece of masking tape over the area where you intend to drill and mark the spot with a pen or marker. This will not only help guide your drill bit, but also provide additional support and reduce the risk of cracking. Additionally, placing a small piece of wood underneath the tile can help absorb some of the pressure and prevent cracking.
When drilling, start at a slow speed and gradually increase the speed as you penetrate the tile. Apply gentle, steady pressure and let the drill do the work. Avoid using excessive force or applying sideways pressure, as this can easily cause the tile to crack. It’s also important to periodically pause and clean away any dust or debris that may accumulate, as this can hinder the drilling process and increase the risk of cracking.
By following these steps and taking the necessary precautions, you can successfully drill through porcelain tile without cracking or damaging it. Remember to always work carefully and patiently, as rushing or being careless can result in costly and time-consuming repairs. With the right tools and technique, you can achieve a professional and clean finish for your drilling projects.

Tips for Drilling Porcelain Tile
If you need to drill through porcelain tile, it’s important to follow these tips to avoid cracking or damaging the tile:
- Choose the right drill bit: Use a carbide-tipped masonry drill bit for porcelain tile, as it is specifically designed to handle the hardness of the material.
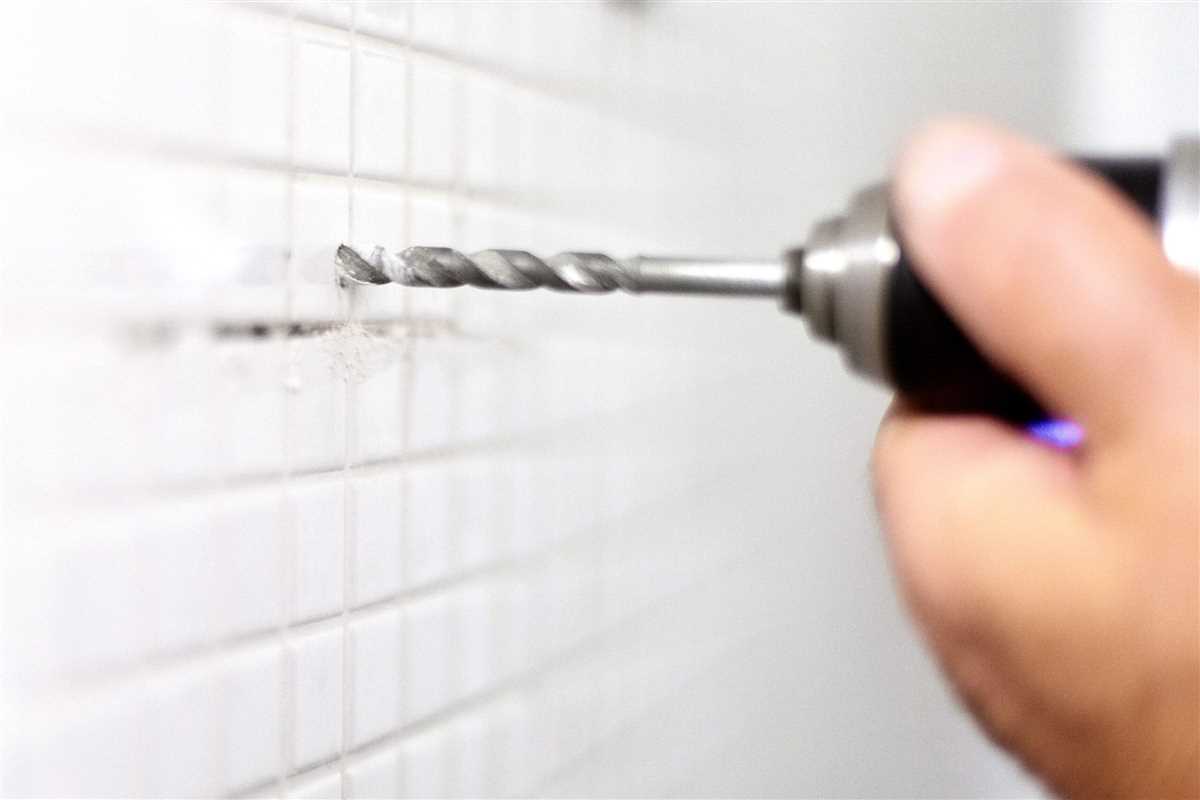
- Mark the drilling spot: Use a marker or adhesive tape to mark the exact spot where you want to drill the hole. This will help you maintain accuracy and prevent the drill bit from slipping.
- Start with a small pilot hole: Begin by drilling a small pilot hole to guide the larger drill bit. This will prevent the bit from wandering and ensure a neater, cleaner hole.
- Use a slow drill speed: Set your drill to a low speed setting to prevent overheating and reduce the risk of cracking. Slow and steady is the key.
- Apply light pressure: Apply gentle pressure when drilling to avoid exerting too much force, which can lead to cracking. Let the drill bit do the work by allowing its cutting edges to grind through the tile at a gradual pace.
- Keep the drill cool: To prevent overheating, periodically dip the drill bit in water or use a coolant to keep it cool. This will prolong its lifespan and help prevent damage to the tile.
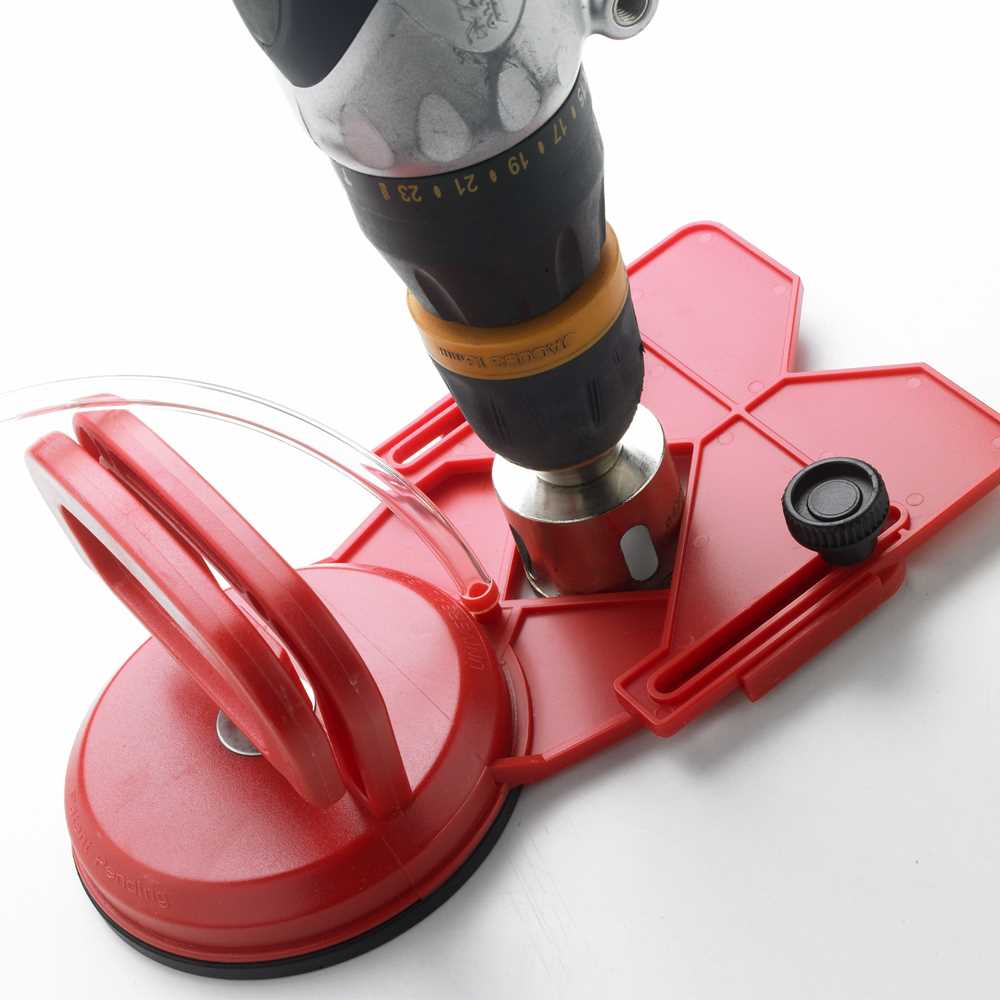
- Secure the tile: Use clamps or a non-slip mat to securely hold the tile in place. This will prevent it from moving or shifting during drilling, reducing the risk of cracking.
- Use a backing board: If possible, place a piece of scrap wood or backer board behind the tile to provide support and prevent the tile from cracking as the drill bit exits the tile.
- Work slowly and patiently: Take your time when drilling through porcelain tile. Rushing can lead to mistakes and increase the chances of cracking or damaging the tile.
By following these tips and using the proper tools, you can safely drill through porcelain tile without causing any cracking or damage. Remember to always wear appropriate safety equipment, such as goggles and gloves, when working with power tools.
Choosing the Right Drill Bit
When it comes to drilling through porcelain tile without cracking it, one of the most important factors to consider is the type of drill bit you use. There are several different drill bit options available, but not all of them are suitable for drilling through porcelain tile.
Diamond-Tipped Drill Bits
Diamond-tipped drill bits are a popular choice for drilling through porcelain tile. These drill bits are specifically designed to handle the hardness of porcelain, as they are coated in diamond particles that offer superior durability and strength. Diamond-tipped drill bits are ideal for drilling small holes in porcelain tiles, but they can be expensive compared to other options.

Carbide-Tipped Drill Bits
Carbide-tipped drill bits are another good option for drilling through porcelain tile. These drill bits feature a carbide tip that can handle the hardness of porcelain. While not as durable as diamond-tipped drill bits, carbide-tipped drill bits are generally more affordable and readily available.
Glass and Tile Drill Bits
Glass and tile drill bits are designed to drill through hard materials like porcelain tile. These drill bits typically have a spear-shaped, carbide or diamond-coated tip that helps to reduce the risk of cracking or chipping the tile. While they may not be as durable as diamond or carbide-tipped drill bits, glass and tile drill bits are a good option for occasional use or DIY projects.
Masonry Drill Bits
If you already have masonry drill bits, they can be used to drill through porcelain tile. However, it’s important to note that masonry drill bits are not specifically designed for porcelain tile and may not offer the same level of precision and durability as dedicated porcelain drill bits. They can be a good temporary option if you don’t have access to other drill bit types.

- Choose a drill bit that is specifically designed for drilling through porcelain tile.
- Consider the durability and strength of the drill bit material.
- Evaluate the cost and availability of different drill bit options.
- If using masonry drill bits, be aware that they may not offer the same precision and durability as dedicated porcelain drill bits.
Remember, regardless of the type of drill bit you choose, it’s important to use proper drilling techniques and take precautions to minimize the risk of cracking or damaging the porcelain tile. This includes using steady pressure, drilling at a slower speed, and using water or a cooling agent to keep the drill bit and tile cool during the drilling process.
Preparing the Tile Surface
Before you begin drilling through porcelain tile, it’s important to properly prepare the surface to minimize the risk of cracking or chipping. Follow these steps to ensure a safe drilling process:
- Mark the drilling location: Use a marker or pencil to mark the exact spot where you want to drill the hole. Measure carefully and double-check your measurements to ensure accuracy.
- Clear the area: Remove any obstacles or debris from the surface of the tile. This will provide a clean and flat surface for drilling.
- Secure the tile: If possible, secure the tile to prevent it from sliding or moving during the drilling process. You can use clamps or a vice to hold the tile in place.
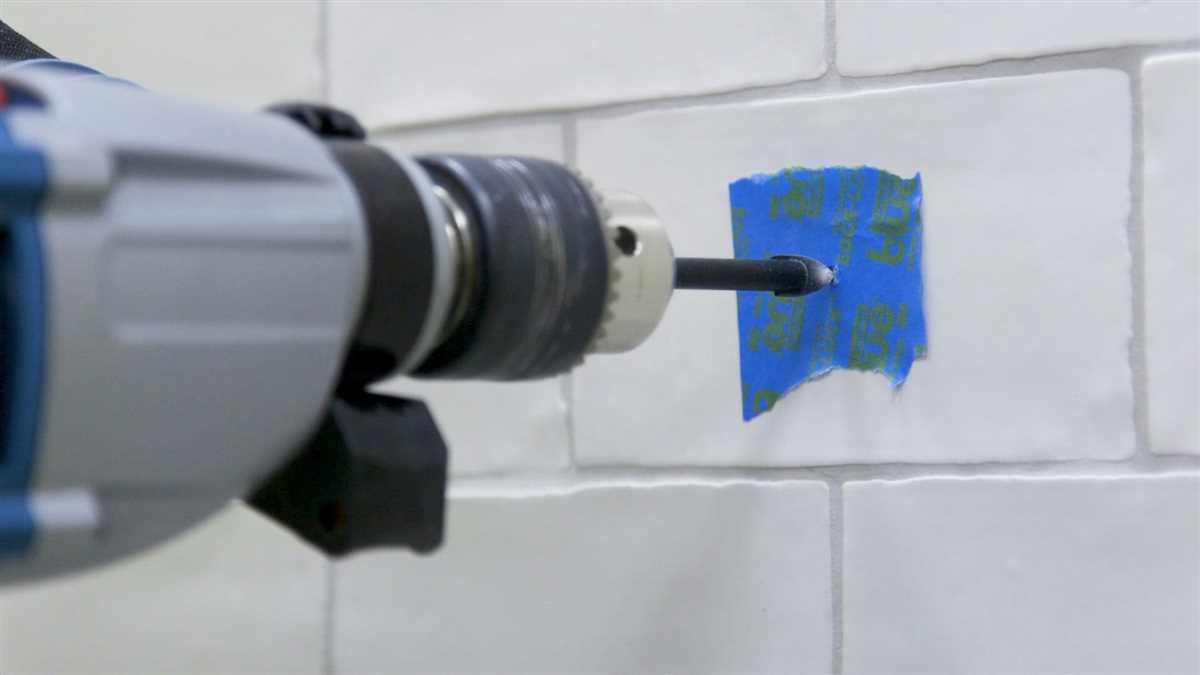
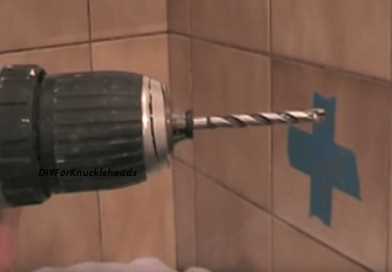
- Apply masking tape: Place a strip of masking tape over the drilling point. This will help prevent the drill bit from slipping and provide a protective barrier for the tile.
- Use a diamond drill bit: When drilling through porcelain tile, it’s essential to use a diamond drill bit specifically designed for this material. Diamond drill bits are more durable and can withstand the hardness of porcelain.
- Start with a smaller pilot hole: To minimize the risk of cracking, it’s recommended to start with a small pilot hole before drilling the final hole. This will create a guide for the drill bit and reduce the chances of the tile cracking.
- Apply water as a lubricant: To keep the drill bit cool and avoid overheating, it’s crucial to regularly apply water as a lubricant during the drilling process. This will also help to flush away any debris and prevent the bit from getting clogged.
- Drill at a slow speed: Porcelain tile is a delicate material, so it’s important to drill at a slow speed and apply consistent, gentle pressure. Rushing or using excessive force can cause unnecessary stress and potentially crack the tile.
- Take breaks: If you’re drilling multiple holes or working on a large project, it’s necessary to take breaks to let the drill bit and tile cool down. This will help prevent overheating and reduce the risk of damage.
By following these preparation steps, you can increase the chances of safely drilling through porcelain tile without cracking or damaging the surface. Remember to always take your time, use the right tools, and apply necessary safety precautions.
Marking the Drill Spot
Before you start drilling through porcelain tile, it is important to mark the exact spot where you want the hole to be. This will help ensure accuracy and prevent any unnecessary damage to the tile.

Here are the steps to mark the drill spot:
- Clean the surface of the tile to remove any dirt or debris that may interfere with the marking.
- Measure the desired location for the hole using a tape measure or ruler, and make a small mark with a pencil or marker.
- Place a piece of masking tape over the mark to provide a protective layer and prevent the drill bit from slipping.
- Using a permanent marker, make a visible mark on top of the masking tape.
By marking the drill spot, you will have a clear target for your drill bit and reduce the chances of cracking or chipping the porcelain tile. Taking the time to properly mark the spot will save you from potential frustration and costly mistakes.
Drilling Technique
It is important to use the correct drilling technique when drilling through porcelain tile in order to avoid cracking or damaging the tile. Here are some steps to follow:
- Mark the spot where you want to drill the hole on the tile using a pencil or marker.
- Place a piece of masking tape over the marked spot. This will help prevent the drill bit from slipping and provide better grip.
- Select a carbide-tipped drill bit specifically designed for drilling through porcelain tile. The carbide tip provides added strength and durability.
- Insert the drill bit into the drill chuck and tighten it securely.
- Set the drill to a low speed and apply steady pressure on the tile to start drilling.
- Use a gentle up and down motion while drilling to help break through the tile’s hard surface.
- Continue drilling with a slow and steady pace until you reach the desired depth.
- Periodically remove the drill and clean away any debris or dust from the hole to ensure smooth drilling.
Remember to always wear safety goggles and gloves when drilling to protect your eyes and hands from any flying debris. Additionally, it is advisable to practice drilling on a scrap piece of porcelain tile before attempting to drill on the actual tile.
Using Water to Cool the Tile

When drilling through porcelain tile, maintaining the temperature of the tile is crucial to prevent cracking. One effective way to keep the tile cool is by using water during the drilling process. Here’s how you can use water to cool the tile:
- Prepare the drilling area: Clear the space around the tile and make sure there are no obstacles or debris that could interfere with the drilling process.
- Mark the drilling spot: Use a marker or masking tape to indicate the exact spot where you want to drill the hole.
- Attach a water source: Connect a water supply to your drilling tool. Most power drills have a built-in attachment for a water source. Alternatively, you can use a spray bottle or a damp sponge to keep the tile wet.
- Start drilling: Position the drill bit over the marked spot, holding it perpendicular to the tile. Apply gentle pressure and start drilling at a slow speed.
- Keep the tile wet: As you drill, use the water source to continuously wet the drilling area. This will help to dissipate the heat generated by the friction between the drill bit and the tile, keeping the tile cool and reducing the risk of cracking.
- Monitor the progress: Periodically check the hole you’re drilling to ensure that it’s not getting too hot. If you notice excessive heat or see steam coming from the drilling site, stop drilling and let the tile cool down before continuing.
- Clean and dry: Once you’ve completed drilling the hole, clean off any debris and thoroughly dry the tile surface.
Using water to cool the tile is a simple and effective method for preventing cracking. By following these steps, you can safely drill through porcelain tile without compromising its integrity.
Minimizing Vibrations
When drilling through porcelain tile, it is important to minimize vibrations as they can increase the risk of cracking. Here are some tips to help reduce vibrations during the drilling process:
1. Choose the Right Drill Bit
A diamond-tipped drill bit is the best option for drilling through porcelain tile. It is designed to cut through hard materials and will help minimize vibrations. Make sure to use a drill bit that is specifically designed for drilling through tile.
2. Use a Drill with a Variable Speed Setting
Drilling at a high speed can cause excessive vibrations, increasing the risk of cracking the tile. A drill with a variable speed setting allows you to choose a lower speed, reducing vibrations while still maintaining the drilling power needed to penetrate the tile.
3. Start with a Pilot Hole
Before drilling the full-size hole, start with a small pilot hole. This helps to guide the drill bit and reduce the chances of slipping or causing vibrations. Once the pilot hole is made, gradually increase the size of the hole using larger drill bits.
4. Use Water as a Lubricant
Using water as a lubricant while drilling can help to reduce friction and heat, which in turn minimizes vibrations. It also helps to keep the drill bit cool and prolong its lifespan. Simply wet the tile surface before drilling and periodically wet the drill bit during the drilling process.
5. Apply Slow and Steady Pressure
Applying too much pressure or drilling too quickly can increase vibrations. Instead, apply slow and steady pressure while drilling. Let the drill bit do the work and avoid forcing it through the tile. This will help to maintain a consistent drilling speed and reduce the risk of cracks.
By following these tips, you can minimize vibrations while drilling through porcelain tile and reduce the likelihood of cracking. Remember to always wear appropriate safety gear and use caution when working with power tools.
Finishing Touches and Clean-Up
Once you have successfully drilled through the porcelain tile without cracking it, there are a few finishing touches you can make to ensure that your project is completed properly. Additionally, it is important to properly clean up after yourself to maintain a tidy and safe work environment.
Finishing Touches
After the hole has been drilled, you may need to add some final touches to complete the project:
- Remove any debris: Use a vacuum or a brush to remove any loose debris or particles that may have accumulated during the drilling process.
- Smooth rough edges: If the drilled hole has rough or sharp edges, you can smooth them out with sandpaper or a tile file to prevent any potential injuries.
- Apply sealer: Depending on the purpose of the hole and the type of project you are working on, you may want to apply a sealer or caulk around the edges of the hole to provide extra protection against moisture or to enhance the overall appearance.
Clean-Up
Proper clean-up is necessary to maintain a safe and organized work environment:
- Collect and dispose of debris: Gather all the debris, including dust and any broken tile fragments, and dispose of them appropriately. Make sure to follow any local regulations regarding the disposal of construction waste.
- Clean the work area: Use a damp cloth or mop to wipe down the surface of the tile and surrounding area. This will remove any dust or dirt that may have accumulated during the drilling process.
- Check for any damage: Inspect the surrounding tiles and the area where you drilled the hole for any potential damage. If you notice any cracks or chips, you may need to repair or replace the affected tiles.
By paying attention to these finishing touches and cleaning up properly, you can ensure that your project is completed safely and that your porcelain tiles remain in excellent condition.
FAQ:
What tools do I need to drill through porcelain tile?
To drill through porcelain tile, you will need a carbide or diamond-tipped drill bit, a drill with adjustable speed, masking tape, a spray bottle filled with water, and safety goggles.
Can I use a regular drill bit to drill through porcelain tile?
No, a regular drill bit will not work on porcelain tile. It is too hard and will likely crack the tile. You need to use a carbide or diamond-tipped drill bit specifically designed for drilling through hard materials like porcelain.
How do I prevent the porcelain tile from cracking while drilling?
To prevent the porcelain tile from cracking while drilling, you should first cover the area you want to drill with masking tape. This will help to reduce the chance of the tile cracking. Additionally, make sure to use a low drilling speed and apply constant, gentle pressure while drilling. It is also important to keep the drill bit lubricated with water to prevent overheating.
What are some common mistakes to avoid when drilling through porcelain tile?
Some common mistakes to avoid when drilling through porcelain tile include using too much pressure, drilling at a high speed, not using masking tape to protect the tile, and not using water as a lubricant. These mistakes can increase the likelihood of the tile cracking or breaking during the drilling process.
Video:

Harrison Clayton
Meet Harrison Clayton, a distinguished author and home remodeling enthusiast whose expertise in the realm of renovation is second to none. With a passion for transforming houses into inviting homes, Harrison's writing at https://thehuts-eastbourne.co.uk/ brings a breath of fresh inspiration to the world of home improvement. Whether you're looking to revamp a small corner of your abode or embark on a complete home transformation, Harrison's articles provide the essential expertise and creative flair to turn your visions into reality. So, dive into the captivating world of home remodeling with Harrison Clayton and unlock the full potential of your living space with every word he writes.


