How to Safely Drill Out a Padlock: Step-by-Step Guide

Lock picking is a skill that many individuals are interested in learning, especially when it comes to padlocks. However, in certain situations, drilling out a padlock may be the only option to gain access. Whether you have lost the key, forgotten the combination, or simply need to remove a faulty lock, drilling can be an effective method. In this step-by-step guide, we will walk you through the process of drilling out a padlock safely and efficiently.
Step 1: Prep Work
Before you begin drilling, it is important to gather the necessary tools and materials. You will need a drill with a fresh set of drill bits, safety goggles, work gloves, and a clamp or vice to secure the padlock. Ensure that you are working in a well-ventilated area and have a fire extinguisher nearby in case of any accidents.
Step 2: Positioning
Once you have gathered your materials, secure the padlock in a clamp or vice. This will prevent the padlock from moving and ensure a clean and steady drilling process. Make sure that the padlock is positioned in a way that allows you easy access to the keyhole or locking mechanism.

Step 3: Start Drilling
Put on your safety goggles and work gloves before starting the drilling process. Begin by selecting the appropriate drill bit size. Start with a smaller bit, and gradually increase the size if necessary. Place the drill bit into the keyhole or desired position on the padlock and apply firm but controlled pressure. Start drilling at a slow speed to prevent the drill bit from slipping or causing damage to the padlock.
Step 4: Break the Core
Continue drilling until you reach the core of the padlock. Once you feel increased resistance, you know you are getting closer to breaking the core. You may need to switch to a larger drill bit at this point to break through the internal mechanisms. Drill in a circular motion, making sure to maintain control and avoid exerting excessive force that could damage the drill bit or padlock.
Step 5: Remove the Core

Once the core of the padlock is completely drilled out, you can remove it using pliers or similar tools. Be cautious, as the core may be hot to the touch. Dispose of the core properly, and assess the situation to determine if you need to replace the padlock or if it can be reassembled. Remember to safely store your drilling equipment for future use.
Disclaimer: Drilling out a padlock should only be done in legal and appropriate situations. Always seek permission from the lock owner or consult with a locksmith if you are unsure of the legal ramifications or if there are other viable options available.
By following this step-by-step guide, you can safely and effectively drill out a padlock when needed. However, it is important to note that drilling should only be done in situations where it is legal and necessary. Always exercise caution and consult with professionals if you are unsure of the best course of action.
Gather the Necessary Tools
Before you begin the process of drilling out a padlock, it’s important to gather all the necessary tools to ensure a safe and successful operation. Here are the tools you will need:
- A drill with a large drill bit
- Safety glasses or goggles
- Heavy-duty gloves
- A vice or clamps
- A marker or pen
- A lubricant, such as WD-40
- A drill guide
- A metal file or sandpaper
- A screwdriver or pry bar
Make sure that all the tools are in good working condition and that you are familiar with how to use them safely. It’s also important to wear proper safety gear, such as safety glasses and gloves, to protect yourself from any potential hazards during the drilling process.
Additionally, having a vice or clamps to secure the padlock in place will provide stability and prevent it from moving while you drill. The marker or pen will come in handy for marking the spot where you will drill, ensuring accuracy and precision. The lubricant will help to reduce friction and make the drilling process smoother.

Lastly, a drill guide is a useful tool that can help you maintain a straight and steady drilling motion, preventing the drill bit from slipping or veering off course. The metal file or sandpaper can be used to clean up any rough edges or burrs that may be left behind after drilling, ensuring a smooth finish.
By gathering all the necessary tools before you start drilling out a padlock, you will be well-prepared and equipped to handle the task safely and effectively.
Choose the Right Drill Bit
When drilling out a padlock, it is important to choose the right drill bit for the job. The drill bit you select will depend on the material of the padlock and the level of security you encounter.
Types of Drill Bits
There are several types of drill bits to choose from, including:
![Screw Extractor, [6 Pieces] Diyife Stripped Screw Remover, Damaged Screw Remover and Extractor Set, Speed Out Drill Bits Guide Set for Broken or Damaged Screw Made from H.S.S. 4341# Hardness 62-63hrc](https://m.media-amazon.com/images/I/5118W1-37EL._SS520_.jpg)
- Titanium-Coated Bits: These bits are durable and can withstand high heat. They are best for drilling into metal locks.
- Cobalt Bits: Cobalt bits are extremely hard and can drill through hardened steel locks.
- Carbide-Tipped Bits: Carbide-tipped bits are perfect for drilling into masonry locks.
- Twist Bits: Twist bits are versatile and can be used for drilling into a variety of materials, including wood and soft metals.
Choosing the Right Size
The size of the drill bit is also important. It should be slightly larger than the diameter of the lock’s pins. This will allow you to drill through the pins without damaging the surrounding lock mechanism.
However, if you are drilling into a lock with security pins, you may need to use a smaller bit to avoid triggering the security features. In this case, it is recommended to start with a smaller bit and gradually increase the size if necessary. It may also be helpful to refer to the lock’s specifications or consult a locksmith for guidance.
Secure the Padlock
Before you begin the process of drilling out a padlock, it is important to take certain precautions to ensure your safety. Here’s how you can securely set up the padlock:
- Choose a well-ventilated area: Ensure that you are working in an open space or a well-ventilated area. This will help prevent the buildup of potentially harmful fumes.
- Gather necessary safety equipment: Equip yourself with safety goggles to protect your eyes from any flying debris while drilling. Additionally, wear work gloves to protect your hands.
- Secure the padlock: Find a stable surface, such as a workbench or vise, to secure the padlock in place. This will prevent any movement that could impair the drilling process or cause accidents.
- Position the padlock: Ensure that the padlock is positioned in a way that allows easy access to the area where you will be drilling. This way, you can drill without any obstructions.
- Use a padlock holder: Consider using a padlock holder, which is a specialized tool designed to securely hold the padlock during the drilling process. This can provide added stability and control as you drill.
By following these steps to secure the padlock, you can minimize the risk of accidents and work more efficiently while drilling it out.
Mark the Drilling Point
- Before you start drilling the padlock, it is important to carefully mark the drilling point. This will help ensure that the drill bit is centered and aiming directly at the core of the lock.
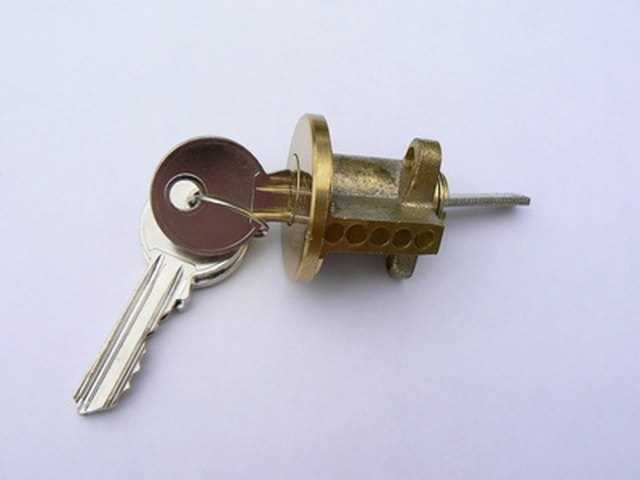
- First, examine the padlock and locate the center of the lock’s core. This is typically where the keyway is located.
- Use a marker or a punch tool to mark the center point on the padlock. Make sure it is clearly visible and easy to guide the drill bit towards.
- It is important to be precise when marking the drilling point. The accuracy of your marking will affect the success of drilling out the lock without damaging adjacent parts.
- Take your time to ensure the mark is accurate before proceeding with the drilling process. Double-check the mark and adjust if necessary.
- Remember to wear protective goggles and gloves before starting the drilling process to protect yourself from any potential injuries.
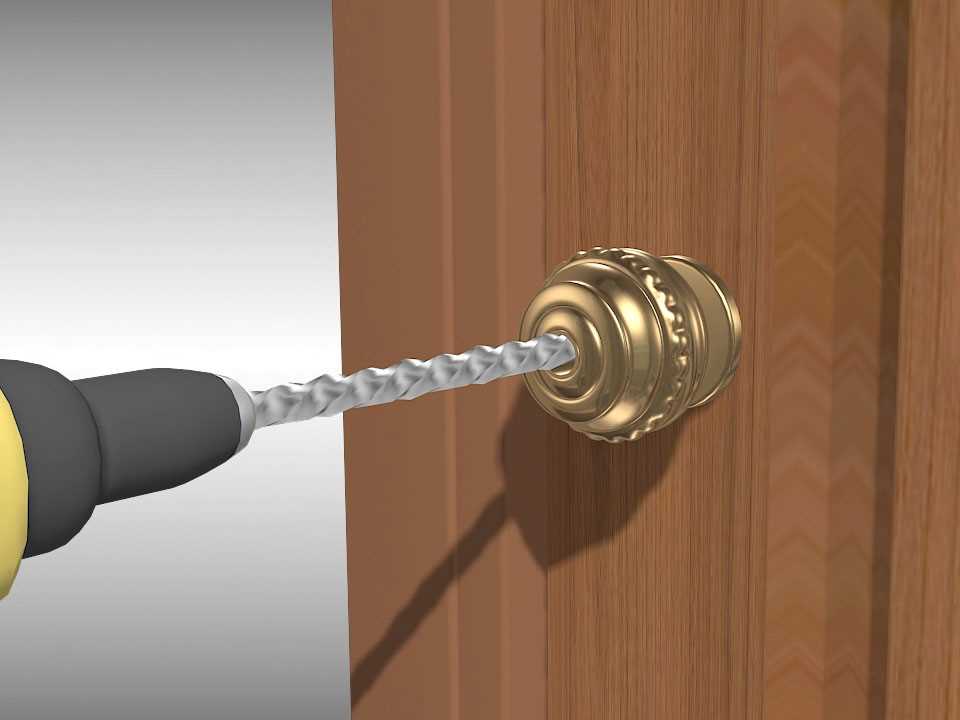
Start Drilling
Once you have gathered all the necessary tools and safety equipment, it is time to start drilling out the padlock. Follow these steps to safely drill out the padlock:
- Put on your safety goggles and gloves to protect yourself from any flying debris or sharp edges.
- Insert a drill bit into your power drill. The size of the drill bit will depend on the size of the padlock, but it is usually best to start with a small bit and gradually work your way up if needed.
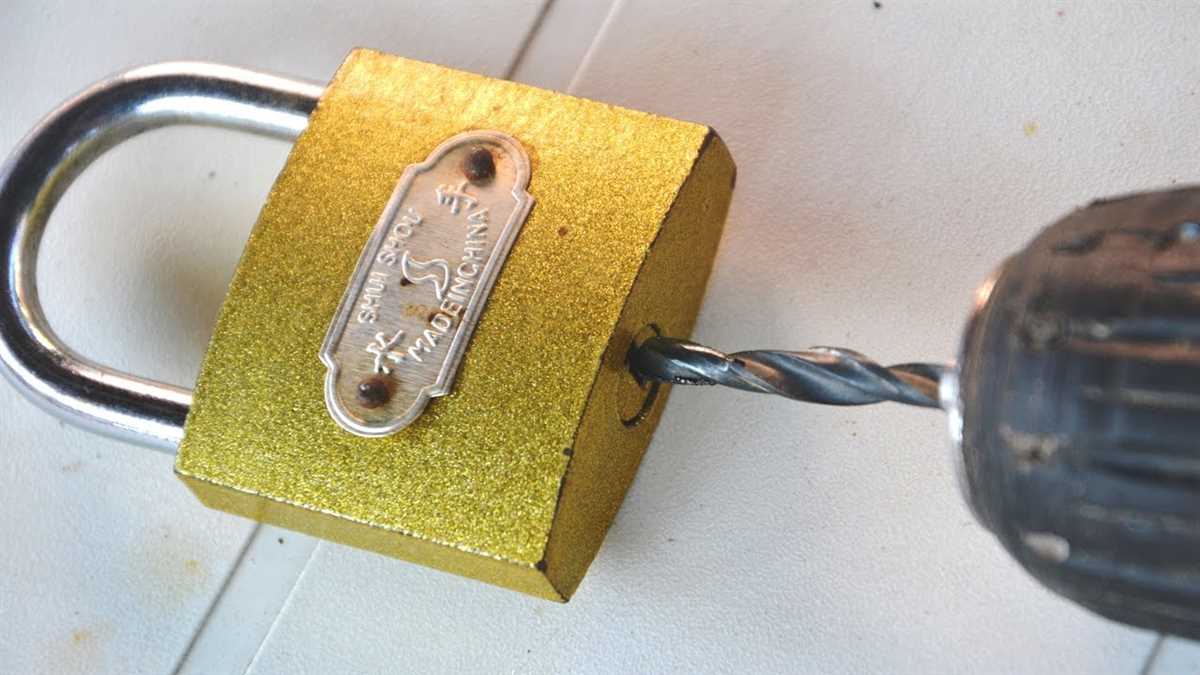
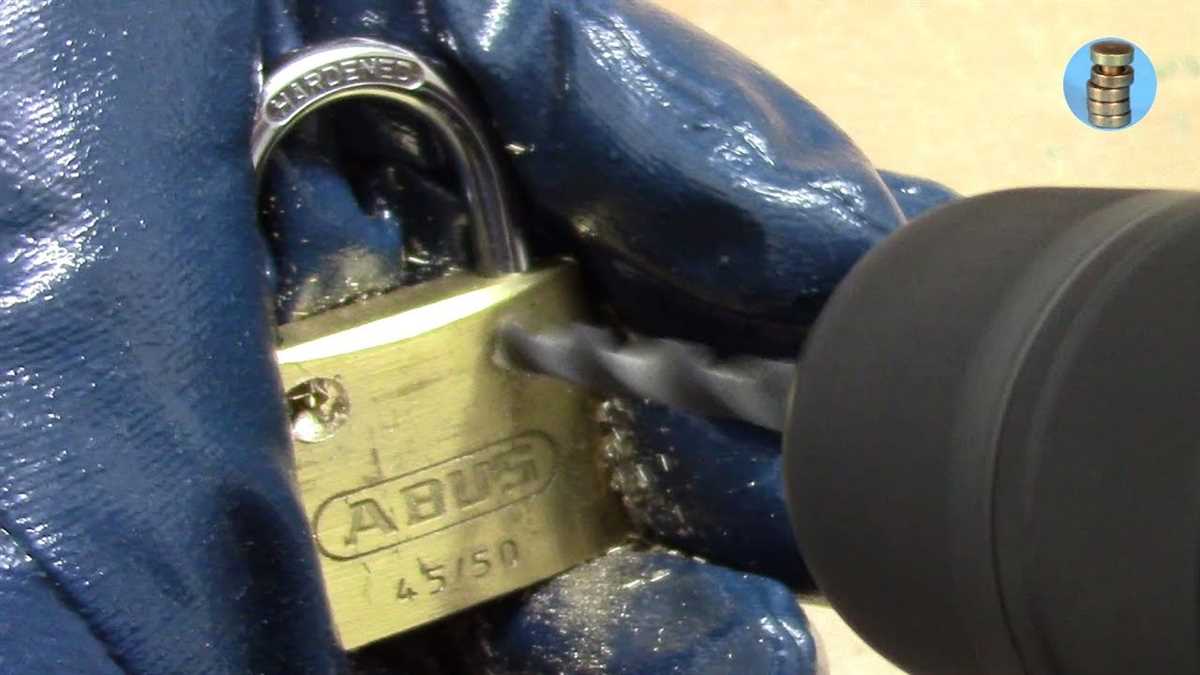
- Position the drill bit on the center of the keyhole in the padlock. Apply firm and steady pressure to the drill as you begin drilling.
- Drill slowly and steadily, allowing the drill bit to do the work. Avoid exerting too much force, as this can lead to the drill bit slipping, causing damage to the lock or injuring yourself.
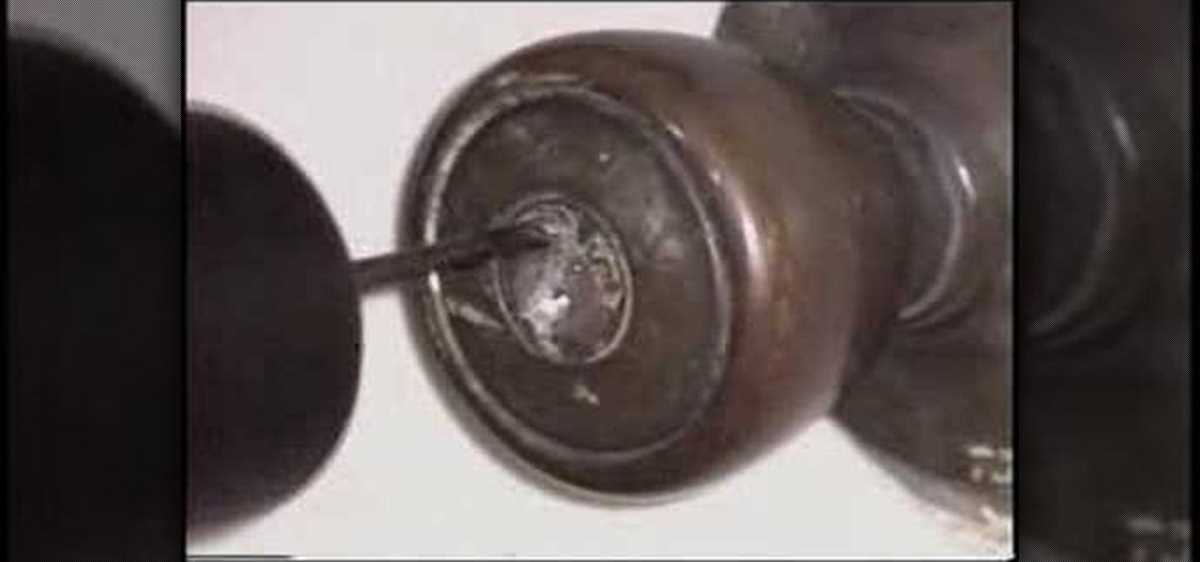
- Continue drilling until you have completely drilled through the lock cylinder. It is important to go all the way through to ensure the lock is fully disabled.
- Remove the drill bit from the padlock and set it aside in a safe place.
- Inspect the padlock to ensure the cylinder has been drilled out completely. If there are any remaining pieces of the lock cylinder, use pliers or a screwdriver to remove them.
- Dispose of the broken padlock and any remaining pieces in a safe and secure manner.
- Clean up your work area and store your tools properly.
Remember to always prioritize safety when drilling out a padlock. Follow these steps carefully and take precautions to protect yourself and others.
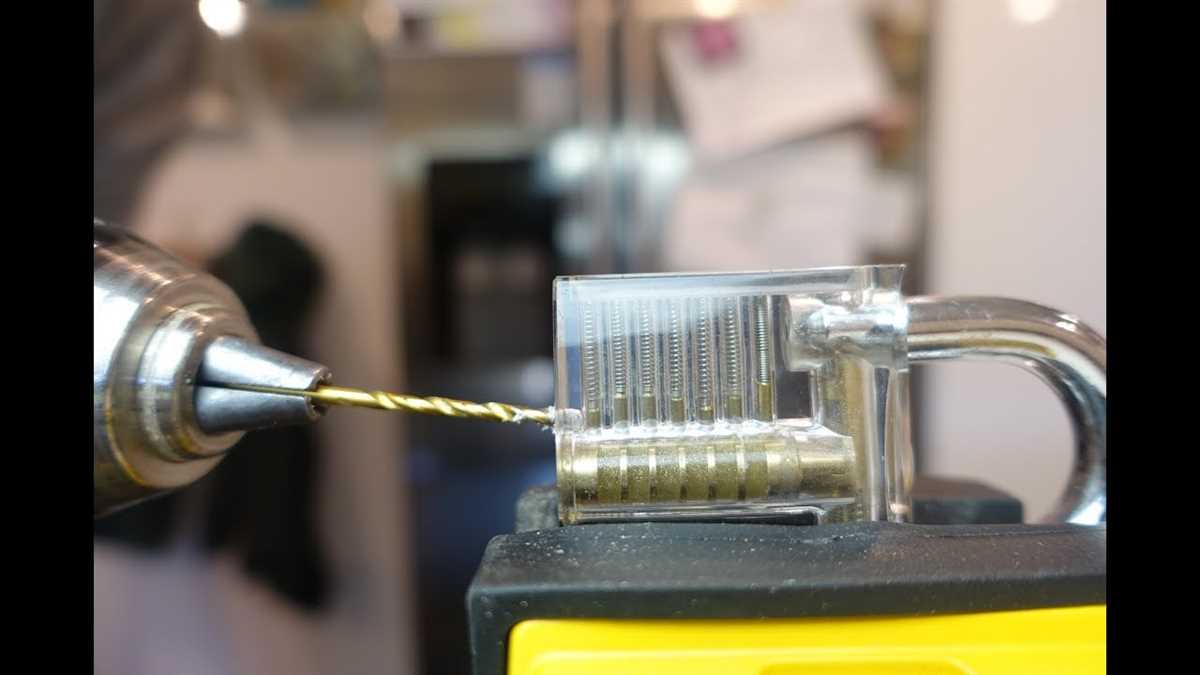
Drill Slowly and Steadily
When drilling out a padlock, it is important to maintain control over the drill and go at a slow and steady pace. This will help prevent any accidents or damage to the lock itself.
Step 1: Before starting the drilling process, make sure you have the necessary safety gear on hand, including safety glasses and gloves.
Step 2: Attach a small drill bit, preferably around 1/8 inch in diameter, to your drill. This will allow you to start a pilot hole in the center of the lock.
Step 3: Position the drill bit on the center of the lock and apply moderate pressure. Begin drilling slowly, making sure the drill bit is straight and perpendicular to the surface of the lock.
Step 4: As you drill, periodically stop and remove any debris that may accumulate in the hole. This will help prevent the drill bit from getting stuck or overheating.
Step 5: Once you have created a pilot hole, gradually increase the size of the drill bit to widen the hole. Continue drilling slowly and steadily, paying close attention to the pressure you apply.
Step 6: Be patient and avoid rushing the drilling process. Applying too much pressure or drilling too quickly can result in the drill bit breaking or damaging the lock.
Step 7: As you continue drilling, periodically check the progress and assess how close you are to fully drilling out the lock. Adjust your speed and pressure accordingly to ensure a controlled and accurate drilling process.
Step 8: Once you have drilled out the lock, carefully remove the padlock from its position. Clean up any debris or metal shavings that may have accumulated during the drilling process.
Note: Always exercise caution when drilling out a padlock, as it can be a dangerous task. If you are unsure or uncomfortable with this process, it is recommended to seek professional assistance.
Remove the Drill Bit Frequently
When drilling out a padlock, it is important to remove the drill bit frequently to prevent it from getting too hot. Drilling generates a lot of heat and if the drill bit gets too hot, it can become damaged and less effective. Additionally, the heat can also transfer to the padlock, potentially damaging it or even causing it to melt.
By removing the drill bit frequently, you allow it to cool down and prevent any heat-related issues. This also gives you a chance to clear out any metal shavings that may have accumulated in the hole, which could impede the drilling process.
After removing the drill bit, take a moment to inspect it for any signs of damage. Look for any signs of wear or dullness, as this can affect its drilling efficiency. If necessary, replace the drill bit with a new one before continuing.
Remember to wear protective gloves when removing the drill bit, as it can be hot to the touch. This will help prevent any accidental burns or injuries.
- Remove the drill bit frequently to prevent overheating
- Inspect the drill bit for damage before continuing
- Clear out any metal shavings from the hole
- Wear protective gloves to prevent burns or injuries
Test the Padlock

Before drilling out a padlock, it’s important to test it to make sure it is sturdy and cannot be opened by other means. This will help ensure that drilling is the only option for opening the padlock.
To test the padlock, follow these steps:
- Insert the key into the padlock and turn it to unlock the shackle.
- Once the shackle is unlocked, try to pull it open. If it opens easily without any resistance, the padlock may be faulty or weak. In this case, it may not be necessary to drill it out as it could easily be bypassed using other methods.
- If the padlock resists opening, try applying pressure to the shackle and wiggle it back and forth. A high-quality padlock should resist these attempts to force it open.
- If the padlock successfully withstands these tests and remains securely locked, it is suitable for drilling out.
Note: Testing the padlock is crucial as it helps determine whether drilling is necessary and can save time and effort if the padlock can be opened by other means. Always ensure you have the legal right to open the padlock or seek professional assistance if needed.
FAQ:
What do I need to safely drill out a padlock?
To safely drill out a padlock, you will need a power drill, a set of drill bits, safety goggles, a pair of gloves, a can of lubricant, and a vice or clamp to hold the padlock securely.
Is it possible to pick a padlock without drilling it?
Yes, it is possible to pick a padlock without drilling it. However, picking a lock requires specific skills and tools, and it might take a long time to succeed. Drilling a padlock is a faster and more straightforward method that can be used if picking the lock is not an option.
What precautions should I take before drilling out a padlock?
Before drilling out a padlock, make sure to wear safety goggles and gloves to protect your eyes and hands from any flying debris. It is also important to secure the padlock in a vice or clamp to prevent it from moving during the drilling process. Additionally, ensure that you are drilling in a well-ventilated area, as the drilling process can produce smoke and fumes.
How do I select the right size drill bit for drilling a padlock?
To select the right size drill bit for drilling a padlock, you can use a drill bit gauge or measuring device to determine the diameter of the lock cylinder. Once you know the diameter, choose a drill bit size that is slightly larger than the cylinder to ensure that you can drill through it without damaging the surrounding lock body.
What should I do if the drill bit gets stuck in the padlock?
If the drill bit gets stuck in the padlock while drilling, do not try to force it out. Instead, stop drilling and try to use lubricant to loosen the bit. You can also try drilling in the opposite direction to remove the bit. If these methods do not work, you may need to consult a professional locksmith for assistance.
Video:

Meet Harrison Clayton, a distinguished author and home remodeling enthusiast whose expertise in the realm of renovation is second to none. With a passion for transforming houses into inviting homes, Harrison's writing at https://thehuts-eastbourne.co.uk/ brings a breath of fresh inspiration to the world of home improvement. Whether you're looking to revamp a small corner of your abode or embark on a complete home transformation, Harrison's articles provide the essential expertise and creative flair to turn your visions into reality. So, dive into the captivating world of home remodeling with Harrison Clayton and unlock the full potential of your living space with every word he writes.


