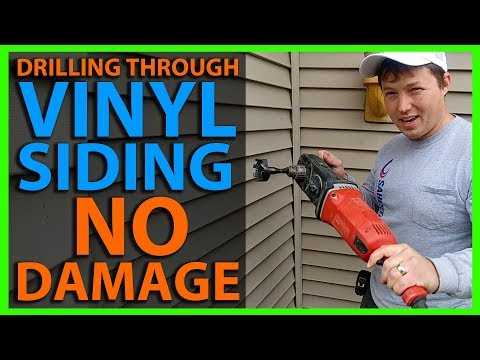
How to Safely Drill into Vinyl Siding: A Step-by-Step Guide
Drilling into vinyl siding may seem like a daunting task, but with the right tools and techniques, it can be done safely and easily. Whether you are installing a new light fixture, hanging up decorations, or mounting a camera, this step-by-step guide will walk you through the process, ensuring you don’t damage your siding in the process.
Step 1: Gather your tools and safety gear.
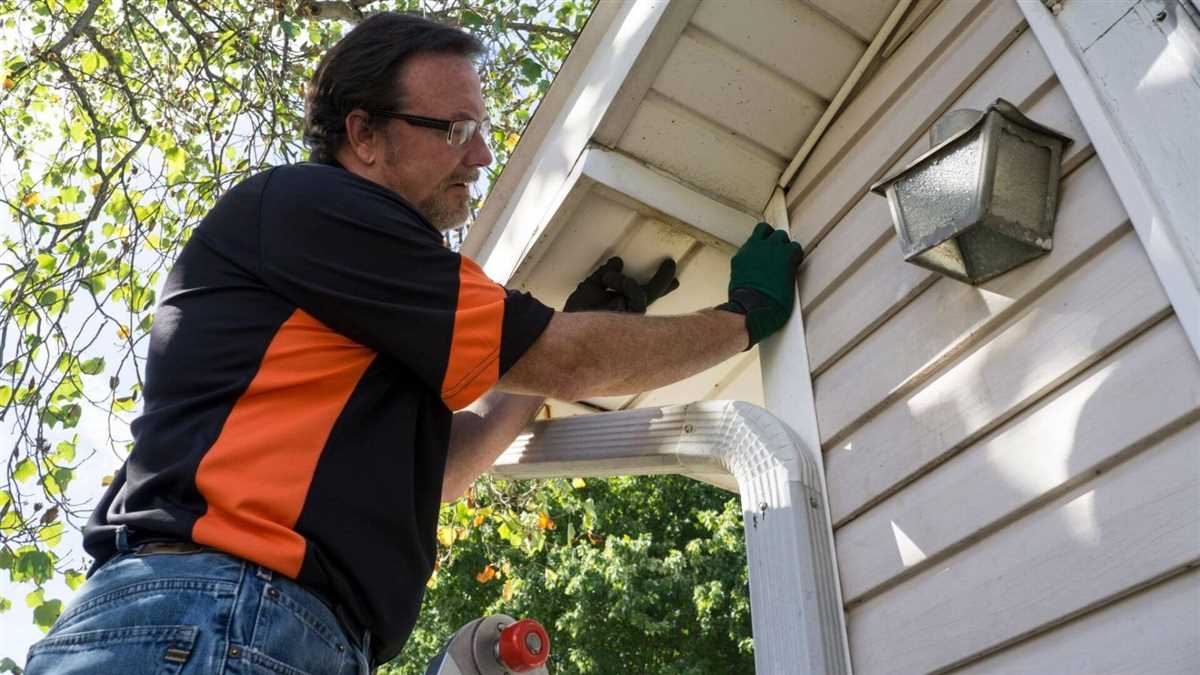
Before you begin drilling into vinyl siding, make sure you have all the necessary tools and safety gear. You will need a drill with a sharp, high-quality drill bit suitable for drilling into vinyl, a ladder or step stool for reaching the desired area, safety goggles to protect your eyes from any debris, and gloves to protect your hands.
Step 2: Locate the studs.
It’s essential to know the location of the studs behind the vinyl siding before you start drilling. Use a stud finder to locate the studs, which will provide a secure anchor point for your screws or fasteners. Mark the stud locations with a pencil or tape to ensure accuracy when drilling.

Step 3: Choose the right drill bit and drill a pilot hole.
Select a drill bit that is specifically designed for drilling into vinyl siding. These bits typically have a sharp point and a wide fluted body to prevent excessive heat and maintain good control. Start by drilling a small pilot hole on the marked spot where you want to install your fixture or fastener. Apply light pressure as you drill to avoid damaging the siding.
Step 4: Drill the final hole.
Once you have a pilot hole, switch to a larger drill bit suitable for the size of the screws or fasteners you will be using. Using the pilot hole as your guide, carefully enlarge the hole to the required size. Again, apply gentle pressure to prevent any unnecessary damage to the siding.
Step 5: Secure your fixture or fastener.

Now that you have a properly drilled hole, it’s time to secure your fixture or fastener. Use screws or fasteners specifically designed for vinyl siding and follow the manufacturer’s instructions. Ensure the fixture is securely fastened but be careful not to overtighten, as this can cause the siding to crack or warp.
Step 6: Test and inspect.
Once your fixture or fastener is in place, give it a gentle tug to ensure it is secure. Take a step back and inspect the area for any signs of damage or stress on the vinyl siding. If necessary, touch up any paint or caulk around the hole to maintain the integrity of your siding.
By following these steps and taking the necessary precautions, you can safely drill into vinyl siding without causing any damage. Remember to always prioritize safety, take your time, and be mindful of the materials and tools you are using. With a little patience, you can successfully complete your desired project while keeping your vinyl siding intact.
What is Vinyl Siding?

Vinyl siding is a popular choice for exterior cladding on residential and commercial buildings. It is made from polyvinyl chloride (PVC) resin, which is a type of plastic. Vinyl siding is known for its durability, versatility, and low maintenance requirements. It is available in a wide range of colors and styles, allowing homeowners to choose a look that complements their home’s architecture and personal taste.
Vinyl siding is designed to withstand the elements, including harsh weather conditions such as high winds and heavy rain. It is resistant to fading, cracking, and warping, making it a long-lasting option for homeowners.
One of the main advantages of vinyl siding is its ease of installation. It can be installed directly over existing materials, such as wood, without the need for extensive preparation or removal. This can help save time and money during the installation process.
Additionally, vinyl siding is relatively low maintenance compared to other types of cladding. It does not require painting or staining, and it can be easily cleaned with a hose and mild detergent. This makes it an attractive option for homeowners who want a durable and low-maintenance siding solution.
In conclusion, vinyl siding is a versatile and durable cladding material that offers homeowners a wide range of benefits. Its ease of installation, low maintenance requirements, and ability to withstand the elements make it a popular choice for residential and commercial buildings.

Why Drill into Vinyl Siding?
There are several reasons why you might need to drill into vinyl siding. Here are a few common scenarios where drilling into vinyl siding may be necessary:
- Installation of outdoor fixtures: When installing outdoor light fixtures, house numbers, or mailboxes, you may need to drill into vinyl siding to secure them in place.
- Hanging decorations: Drilling into vinyl siding allows you to attach hooks or hangers for hanging decorations such as wind chimes or hanging baskets.
- Making repairs: In case of damage or wear, you may need to replace a section of vinyl siding. This requires drilling into the siding to remove and replace damaged panels.
- Adding ventilation: If you need to add or upgrade ventilation in your home, drilling into vinyl siding may be necessary to install vents for your attic or bathroom exhaust fans.
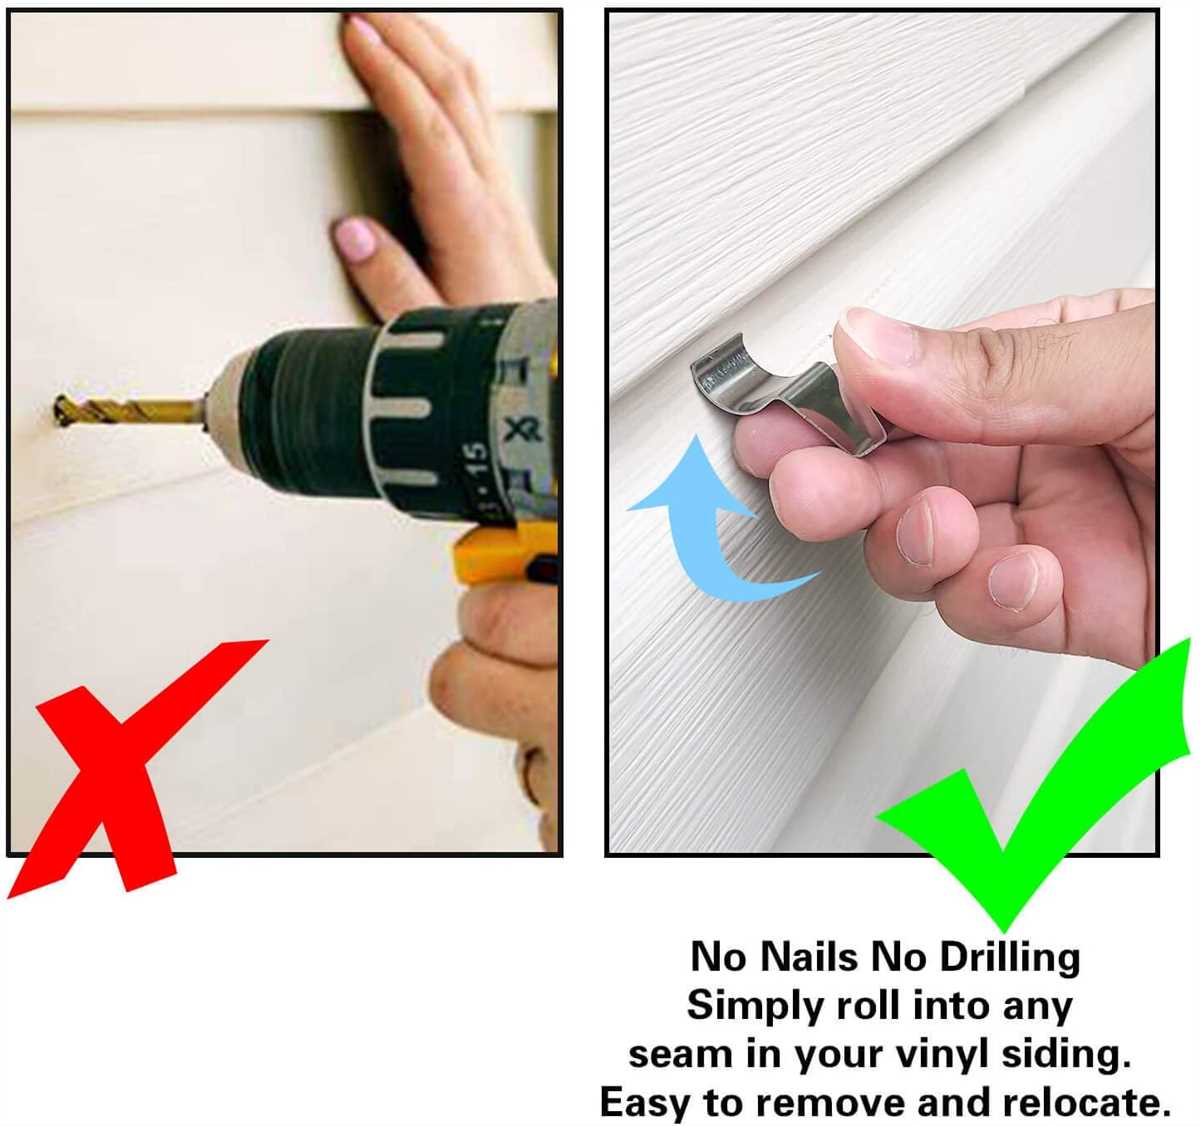
It is important to note that drilling into vinyl siding should be done carefully to avoid damaging the siding and to maintain its weatherproofing properties. By following the proper steps and using the right tools, you can safely and effectively drill into vinyl siding for a variety of purposes.
Step 1: Gather the Required Tools
Before you begin drilling into vinyl siding, it’s important to gather all the necessary tools. Having the right tools on hand will make the process easier and ensure that you can safely and effectively complete the job. Here is a list of tools you will need:
- Power drill: You will need a power drill with a drill bit appropriate for the size of the hole you want to make in the vinyl siding.
- Tape measure: Use a tape measure to accurately measure the spot where you want to drill into the siding.
- Marker or pencil: Use a marker or pencil to mark the exact spot where you want to drill the hole.
- Level: Use a level to ensure that the hole you are drilling is straight.
- Safety glasses: It’s important to protect your eyes from any debris that may be produced when drilling into the vinyl siding.
- Work gloves: Work gloves will protect your hands while handling the tools.
- Ladder: Depending on the height of the area you want to drill, you may need a ladder to reach it.
Having all these tools readily available will help you complete the task efficiently and minimize any potential damage to the vinyl siding. Once you have gathered all the necessary tools, you can move on to the next step of the process.

Step 2: Prepare the Work Area
Before you begin drilling into the vinyl siding, it’s important to prepare the work area to ensure a smooth and safe drilling process. Follow these steps to properly prepare:
-
Gather the necessary tools: Before starting, make sure you have all the tools you need for the job. This typically includes a drill with the appropriate drill bit, a level, a measuring tape, and safety goggles.
-
Choose a suitable location: Identify the spot on the vinyl siding where you want to drill the hole. It’s best to select a location where you won’t compromise the structural integrity of the siding or any underlying surfaces. Avoid drilling near electrical wires, pipes, or windows.
-
Mark the location: Use a marker or pencil to mark the exact center of the spot where you plan to drill. This will help you maintain accuracy during the drilling process.
-
Protect surrounding areas: To prevent any damage to the surrounding siding, use painter’s tape or masking tape to cover the immediate area around the marked spot. This will help protect the siding from scratches or dents caused by the drill or other tools.
-
Ensure proper ventilation: If you’re drilling indoors or in an enclosed area, ensure proper ventilation to avoid any accumulation of dust or debris. Open windows or use a fan to keep the air circulating during the drilling process.
By taking these steps to prepare the work area, you’ll create a safe and organized environment for drilling into the vinyl siding. This will help minimize the risk of accidents or damage during the project.
Step 3: Mark the Drilling Points
Before you start drilling into your vinyl siding, it’s important to mark the drilling points accurately. This will ensure that your holes are in the right position and that your project turns out as planned. Here’s how you can do it:
- Measure and decide on the placement of your drill holes. Consider the item you are hanging and make sure the holes are positioned to provide support and stability.
- Hold the item up against the siding, making sure it’s level and in the desired position.
- Using a pencil or marker, mark the center of each hole on the siding. This will serve as your guide when drilling.
- If you are drilling multiple holes, use a measuring tape or ruler to ensure equal spacing between the marks.
Note: It’s important to be precise when marking the drilling points to avoid any mistakes or damage to your siding. Double-check your measurements and markings before moving on to the next step.
Step 4: Choose the Right Drill and Bit

Choosing the right drill and bit is essential for successfully drilling into vinyl siding without causing damage. Here are some tips to help you make the right choice:
1. Drill Selection
When it comes to drilling into vinyl siding, it’s important to use a drill with enough power to penetrate the siding without applying too much force. A cordless drill with a variable speed setting is a good choice. Make sure the drill is fully charged before you begin.
2. Bit Selection
The type of bit you use will depend on the type of hole you need to make. For most applications, a pilot hole is sufficient. A drill bit with a diameter of 1/8 inch is recommended for creating pilot holes. If you need to create a larger hole, make sure to choose a spade bit or a hole saw that is designed for drilling into vinyl siding.
3. Safety Considerations
Before you start drilling, always wear safety glasses to protect your eyes from any flying debris. It’s also important to keep the work area clear of any obstacles and to secure the siding with a clamp or your hand to prevent it from cracking or breaking.
4. Test First
Before you drill into the actual siding, it’s a good idea to test the drill and bit on a scrap piece of siding. This will allow you to assess the speed and pressure needed to drill into the siding without causing damage.
By choosing the right drill and bit, you can ensure a smooth and successful drilling process without any damage to your vinyl siding.
Step 5: Drill into Vinyl Siding
Once you have marked the spot where you want to drill, it’s time to start drilling into the vinyl siding. Follow these steps to ensure a safe and successful drilling process:
- Attach the appropriate drill bit to your drill. For drilling into vinyl siding, it is recommended to use a high-speed steel (HSS) or a carbide-tipped masonry drill bit.
- Hold the drill steady and position it perpendicular to the surface of the siding where you want to drill. Make sure to align the drill bit with your marked spot.
- Slowly apply pressure and begin drilling into the vinyl siding. Start at a low speed and gradually increase the speed as the drill bit penetrates the surface.
- Continue drilling until you have reached the desired depth. Vinyl siding is typically around 0.04 inches thick, so you shouldn’t need to drill too deeply.
- Once you have finished drilling, carefully remove the drill bit from the hole. Be cautious not to scratch or damage the surrounding vinyl siding.
If you are drilling multiple holes, make sure to clean the drill bit after each hole to remove any vinyl debris. This will prevent the buildup of debris and ensure that your drill bit remains sharp and effective throughout the drilling process.
Remember to always prioritize safety when drilling into vinyl siding. Wear safety goggles to protect your eyes from any flying debris, and work slowly and carefully to minimize the risk of accidents.
Step 6: Secure the Drilled Holes

After drilling the holes into your vinyl siding, it is important to secure them properly to ensure a secure and long-lasting installation. Here are a few steps to follow:
- Clean the drilled holes: Once the holes have been drilled, use a soft cloth or brush to remove any debris or dust that may have accumulated in the holes. This will ensure a clean and smooth surface for securing the screws or anchors.
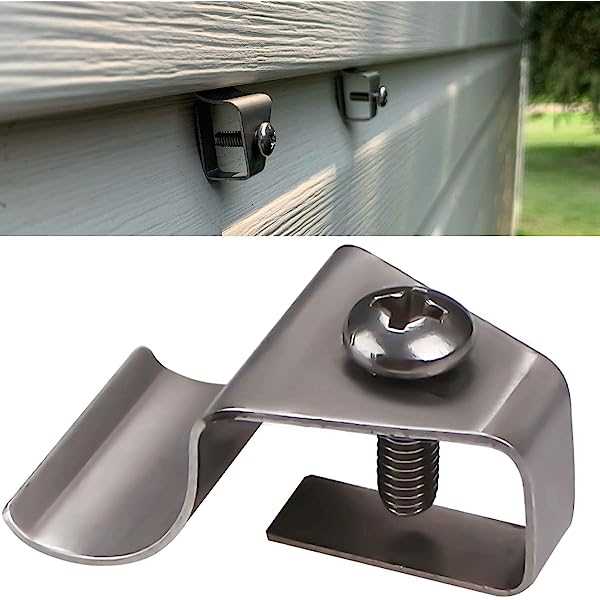
- Choose the appropriate fasteners: Depending on the weight and size of the item you are installing, choose the appropriate fasteners to secure the drilled holes. For lighter items, such as small hooks or signs, screws may be sufficient. For heavier items, such as large fixtures or brackets, consider using wall anchors or toggle bolts for added stability.
- Insert the fasteners: Insert the chosen fasteners into the drilled holes. For screws, use a screwdriver to secure them in place, making sure they are tight but not overtightened. If using wall anchors or toggle bolts, follow the specific instructions provided with the fasteners to properly insert them into the holes.
- Test the stability: Once the fasteners are in place, gently test the stability of the installed item. Apply some pressure to ensure that it is securely attached to the vinyl siding and does not move or wobble. If there is any instability, adjust the fasteners as needed.
- Finish the installation: Finally, complete the installation by attaching the item onto the secured fasteners. Use the appropriate hardware or brackets to attach the item securely, following the manufacturer’s instructions if available.
By following these steps to secure the drilled holes, you can ensure a safe and effective installation of items onto your vinyl siding. Remember to always prioritize safety and use appropriate tools and materials for the job.
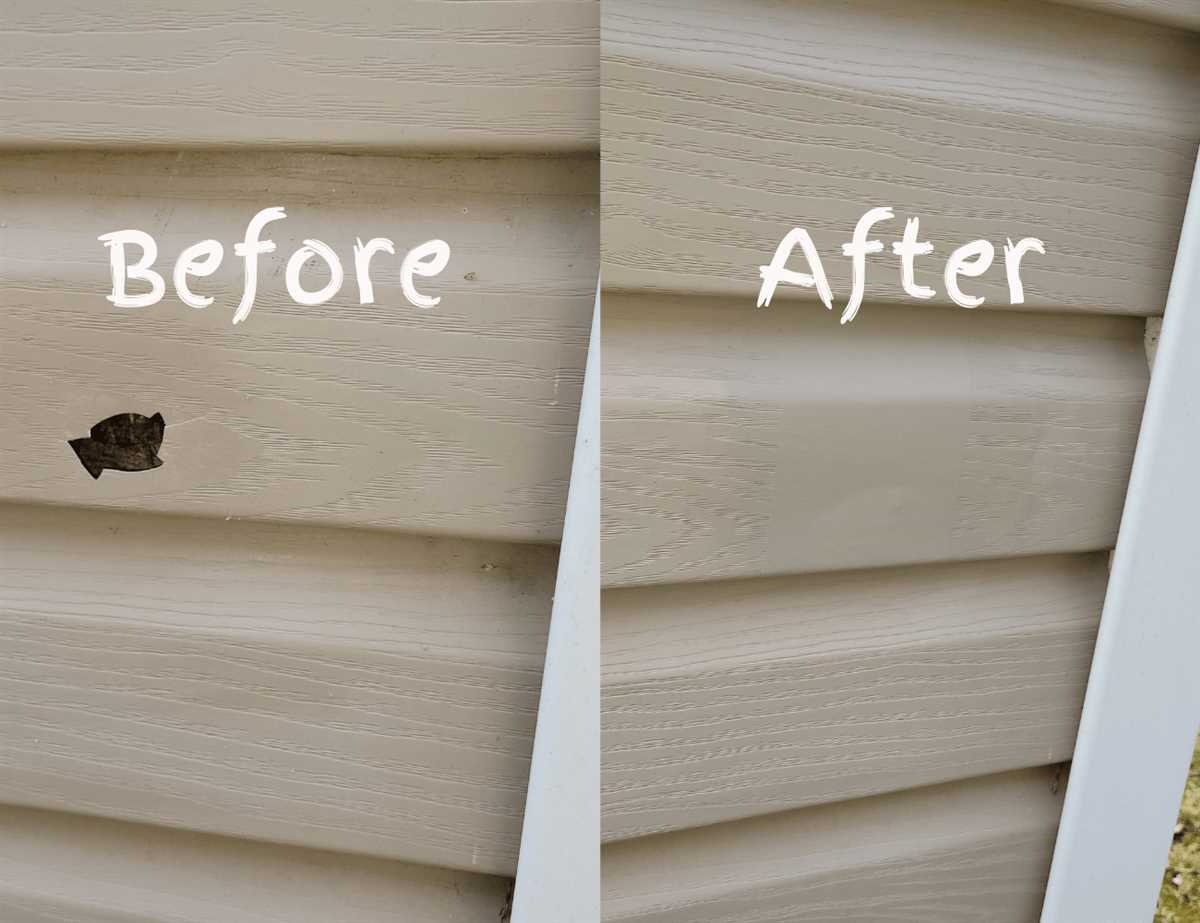
Step 7: Clean Up and Maintenance
After you have successfully installed your desired fixture or accessory on your vinyl siding, it is important to clean up any mess that may have been made during the drilling process. This will help maintain the appearance and integrity of your siding.
Cleaning Up
- Start by sweeping or vacuuming up any loose debris, dust, or vinyl shavings that may have accumulated on the ground or nearby surfaces.
- If there are any noticeable marks or stains on the siding, use a mild detergent or soap with warm water and a soft cloth to gently clean the area. Avoid using harsh cleaners or abrasive materials that could damage the vinyl.
- Rinse the cleaned area with clean water and pat it dry using a clean cloth or towel.
Maintenance Tips
- Inspect your drilled holes and the surrounding vinyl siding regularly to ensure there are no signs of damage or moisture penetration. If you notice any issues, it is important to address them promptly.
- Seal any gaps or cracks that may have formed around the drilled holes using a high-quality exterior caulk or silicone sealant. This will help prevent water from seeping behind the siding and causing damage.
- Consider applying a protective wax or polish specifically designed for vinyl siding to help maintain its color and finish over time.
- Avoid using excessive force or pressure when cleaning the siding, as this could cause it to crack or become distorted. Stick to gentle cleaning methods and tools.
Conclusion
By following these cleaning and maintenance steps, you can help ensure that your vinyl siding remains in good condition even after drilling into it. Regular upkeep and attention will prolong the lifespan of your siding and keep it looking its best for years to come.
FAQ:
Can I drill into vinyl siding without damaging it?
Yes, you can drill into vinyl siding without damaging it if you follow the correct steps and use the right tools.
What tools do I need to safely drill into vinyl siding?
To safely drill into vinyl siding, you will need a power drill, a drill bit specifically designed for use on vinyl siding, a tape measure, a level, and a pencil.
Is it necessary to remove the vinyl siding before drilling into it?
No, it is not necessary to remove the vinyl siding before drilling into it. You can drill directly into the siding using the proper tools and techniques.
How do I patch the holes in the vinyl siding after drilling?
To patch the holes in the vinyl siding after drilling, you can use a vinyl siding repair kit or fill the holes with exterior caulk. Make sure to match the color of the repair material to the color of your siding for a seamless finish.
Video:


Meet Harrison Clayton, a distinguished author and home remodeling enthusiast whose expertise in the realm of renovation is second to none. With a passion for transforming houses into inviting homes, Harrison's writing at https://thehuts-eastbourne.co.uk/ brings a breath of fresh inspiration to the world of home improvement. Whether you're looking to revamp a small corner of your abode or embark on a complete home transformation, Harrison's articles provide the essential expertise and creative flair to turn your visions into reality. So, dive into the captivating world of home remodeling with Harrison Clayton and unlock the full potential of your living space with every word he writes.


