How to Safely Drill Into Porcelain Tile Without Cracking It

Porcelain tile is a popular choice for bathroom and kitchen floors, as well as for walls and backsplashes. However, drilling into porcelain tile can be tricky, as it is a hard, brittle material that is prone to cracking. Fortunately, by following a few simple steps and using the right tools, you can safely drill into porcelain tile without damaging it.
Step 1: Choose the Right Drill Bit
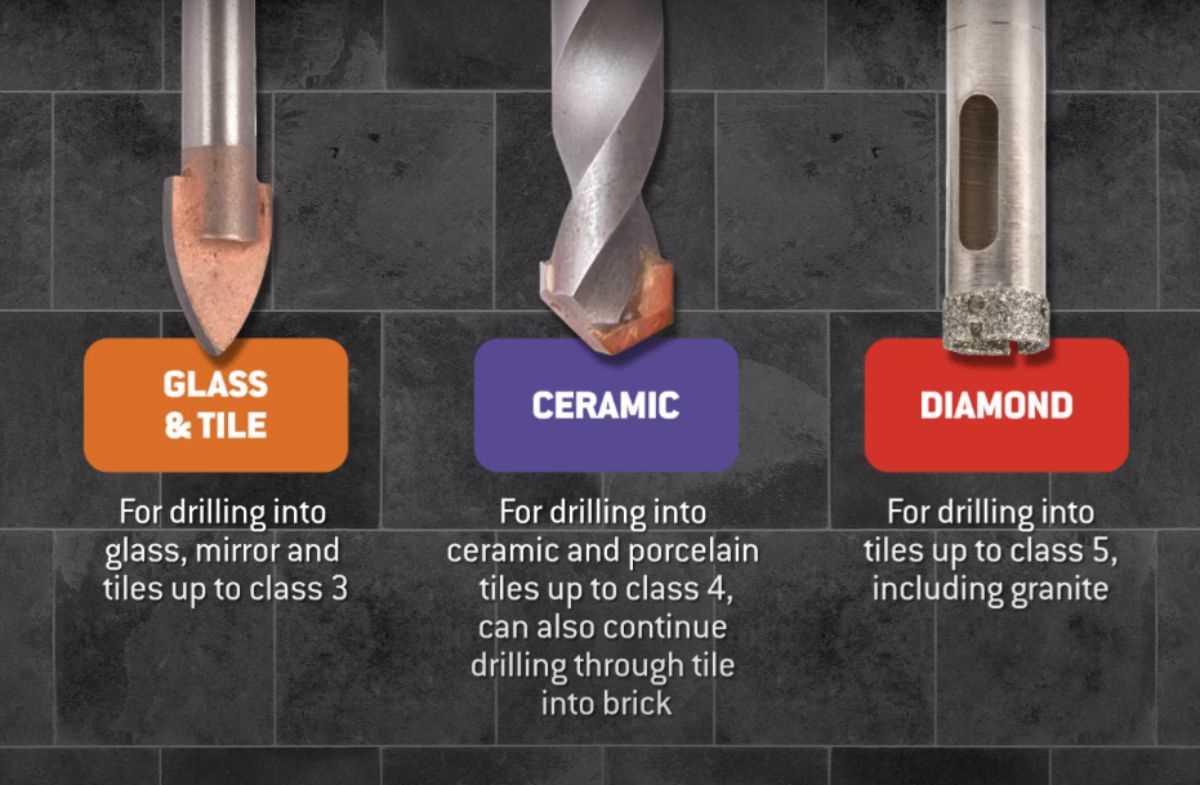
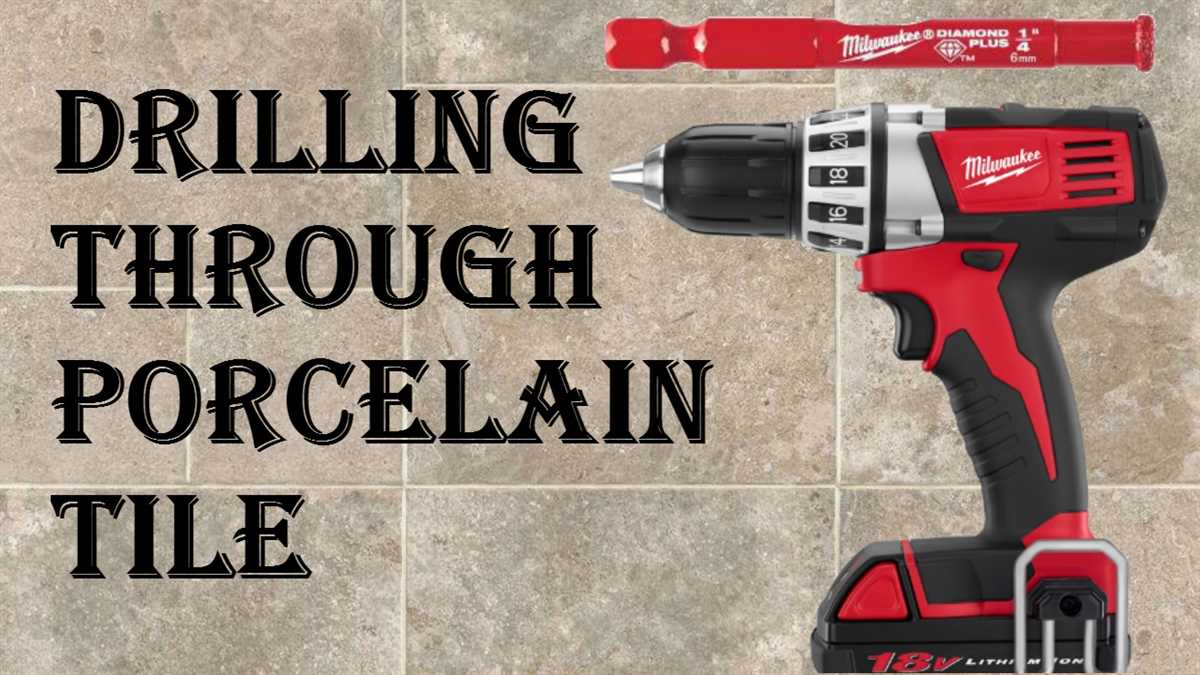
Before you start drilling, it’s important to select the right drill bit. A carbide-tipped masonry bit or a diamond-tipped drill bit is recommended for drilling into porcelain tile. These types of bits are specifically designed to cut through hard materials like porcelain. Make sure to choose a drill bit that is slightly larger than the size of the hole you need to drill.
Step 2: Prepare the Surface
Next, you’ll need to prepare the surface of the tile for drilling. Use a masking tape to mark the spot where you want to drill the hole. This will help prevent the drill bit from slipping and scratching the tile. Additionally, you can place a piece of scrap wood or a tile spacer directly behind the spot you want to drill. This will provide support and help to distribute the pressure evenly during drilling.

Step 3: Start Drilling
Once the surface is prepared, it’s time to start drilling. Begin by drilling at a slow speed with low pressure, using a cordless drill or a drill equipped with a variable speed control. This will prevent the drill bit from overheating and reduce the risk of cracking the tile. Apply steady, gentle pressure and let the drill do the work. You may need to stop periodically to clear away debris and cool down the drill bit. Take your time and be patient, as drilling into porcelain tile requires precision.
Step 4: Finish and Clean
After drilling the hole, carefully remove the masking tape and clean the area. Use a damp cloth to wipe away any debris or dust. If desired, you can apply a clear sealant to the edges of the hole to help prevent moisture from seeping into the tile. This will help maintain the integrity of the tile and prevent cracking or damage.
Remember, drilling into porcelain tile requires patience and precision. Take your time, use the right tools and technique, and you’ll be able to safely drill into porcelain tile without cracking it. If you’re unsure or uncomfortable with drilling, it’s always best to consult a professional.
Tips for Drilling Into Porcelain Tile Without Cracking It

- Choose the right drill bit: Using the correct drill bit is crucial when drilling into porcelain tile. A diamond-tipped or carbide-tipped drill bit specifically designed for drilling into hard materials like porcelain is recommended.
- Use a slow drilling speed: Porcelain tile is delicate and prone to cracking, so it’s important to drill at a slow speed to avoid putting too much pressure on the tile. Using a variable speed drill allows you to control the drilling speed more effectively.
- Apply gentle pressure: When drilling into porcelain tile, it’s important to apply gentle and consistent pressure. Avoid pushing too hard as it can cause the tile to crack. Let the drill bit do the work and allow it to gradually penetrate the tile.
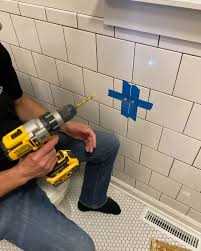
- Mark the drilling point: Before drilling, mark the spot where you want to drill on the tile using a pencil or masking tape. This helps to ensure accurate placement and prevents any accidental slips during the drilling process.
- Start with a small pilot hole: To mitigate the risk of cracking, start by drilling a small pilot hole before enlarging it to the desired size. This allows for better control, reduces the stress on the tile, and minimizes the chances of cracking.
- Use water as a lubricant: Drilling into porcelain tile generates heat, which can increase the likelihood of cracking. To minimize heat buildup, it’s recommended to use water as a lubricant while drilling. Simply spray water on the drilling area periodically to keep it cool.
- Work from the backside of the tile: If possible, consider drilling from the backside of the tile. This helps to reduce the chances of chipping or cracking the visible front surface. However, this may not be feasible in all situations.
- Take breaks: While drilling into porcelain tile, it’s important to take periodic breaks to avoid overheating the tile and the drill bit. This allows both the tile and the bit to cool down, reducing the risk of cracking or damage.
- Use a backing board: Placing a backing board, such as a scrap piece of wood or plastic, behind the tile can provide additional support and help prevent cracking. The backing board absorbs some of the pressure and reduces the stress on the tile.
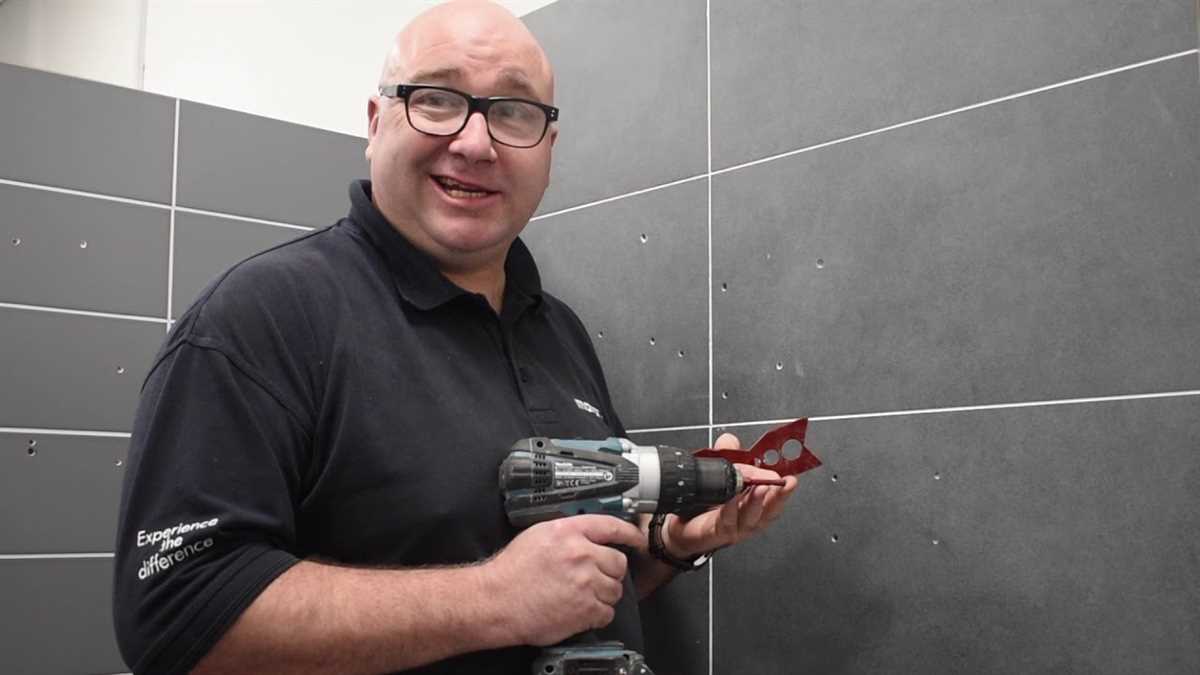
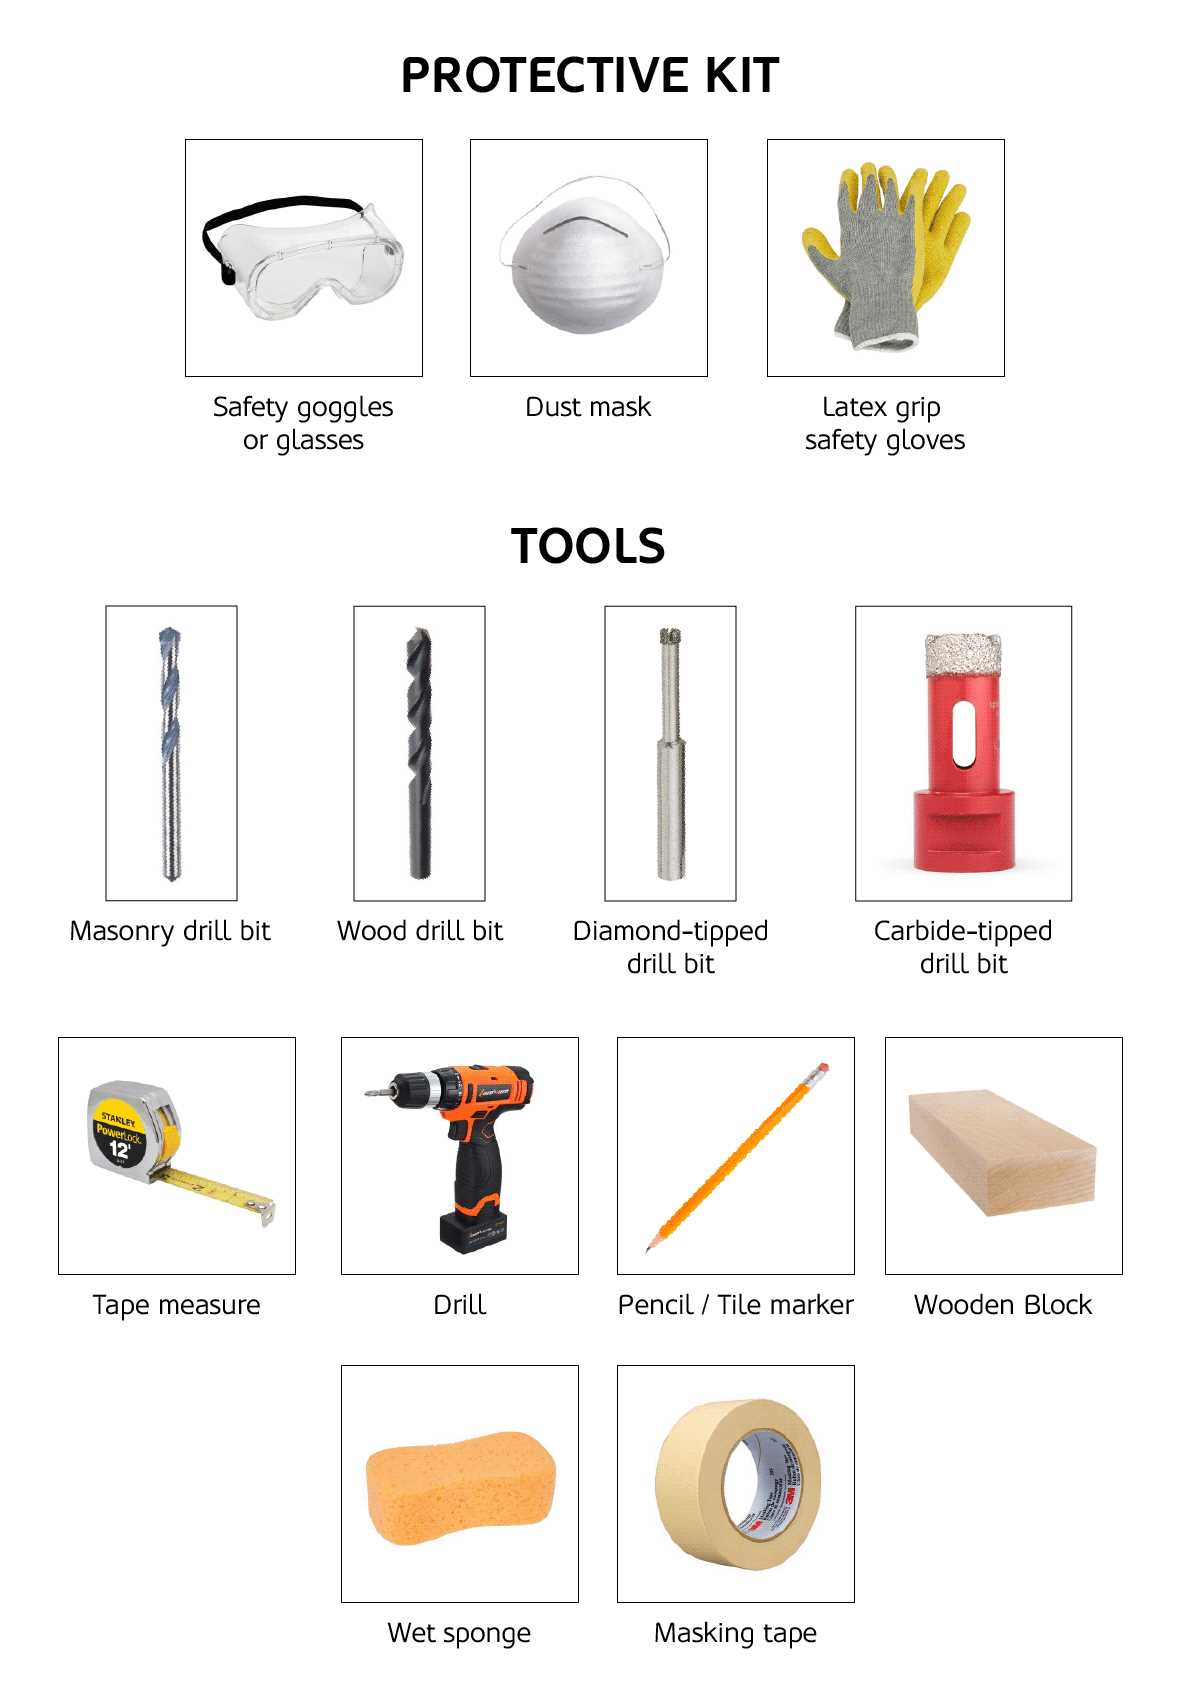
- Wear safety gear: Always wear appropriate safety gear, including safety glasses and gloves, when drilling into porcelain tile. This protects your eyes and hands from potential debris and prevents injury.
By following these tips, you can safely drill into porcelain tile without cracking it. Remember to use the right drill bit, go slow, apply gentle pressure, and use water as a lubricant to minimize the risk of damage. Good luck with your drilling project!
Choosing the Right Drill Bit
When it comes to drilling into porcelain tile without cracking it, choosing the right drill bit is crucial. Using the wrong type of drill bit can result in chipped or cracked tiles, making all your hard work go to waste. Here are some factors to consider when selecting the right drill bit for porcelain tile:
- Diamond-Tipped Drill Bits: Diamond-tipped drill bits are specifically designed for drilling into hard materials like porcelain tile. The diamond coating on the drill bit creates a sharper cutting edge, allowing it to penetrate the tile without causing damage.
- Size: The size of the drill bit you choose will depend on the size of the hole you need to drill. Make sure to measure the diameter of the hole accurately and select a drill bit that matches that size.
- Carbide-Tipped Drill Bits: While diamond-tipped drill bits are the best option for porcelain tile, they can be quite expensive. If you’re on a budget, you can consider using carbide-tipped drill bits. They are not as effective as diamond-tipped drill bits but can still get the job done.
- Screw Tip: Some drill bits come with a screw tip, also known as a self-centering tip. This type of drill bit helps to keep the bit centered and prevents it from wandering off while drilling. Using a screw tip drill bit can provide more control and reduce the chance of cracking the tile.
- Quality: It’s important to choose high-quality drill bits that are specifically designed for drilling into porcelain tile. Poor-quality drill bits can wear out quickly or lose their sharpness, causing more complications during the drilling process.
- Coating: Some drill bits come with specialized coatings such as titanium or cobalt. These coatings can increase the durability and lifespan of the drill bit, allowing it to handle the hard surface of porcelain tile more effectively.
By considering these factors and choosing the right drill bit, you can ensure a successful drilling experience without cracking or damaging your porcelain tile.
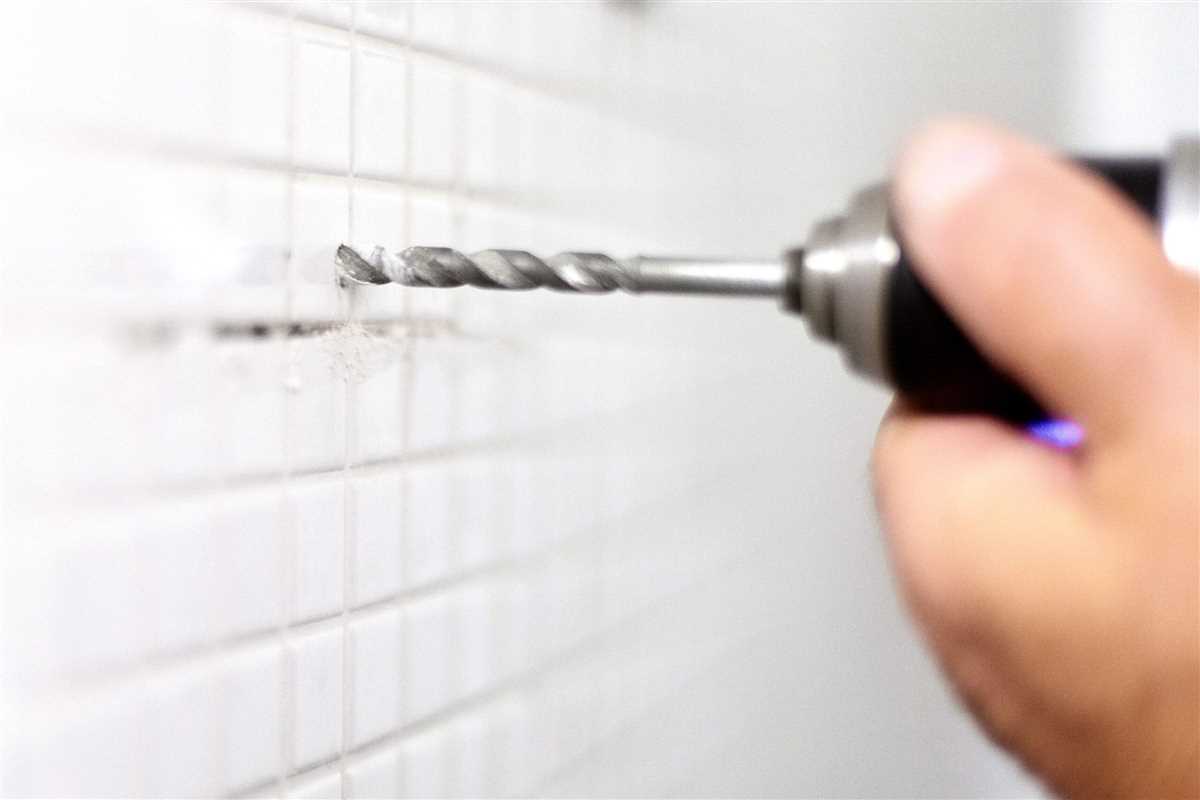
Marking the Drill Hole

Before you start drilling into the porcelain tile, it is important to mark the location of the drill hole. This will ensure that the hole is drilled in the right spot and will help you avoid any mistakes or damage to the tile. Here are the steps to mark the drill hole:
- Measure and determine the placement: Use a measuring tape or ruler to measure and determine the exact location where you want to drill the hole. Double-check your measurements to ensure accuracy.
- Apply painter’s tape: Once you have determined the placement, apply a small piece of painter’s tape over the spot. This will help prevent the drill bit from slipping and provide some protection to the tile surface.
- Mark the center point: Use a pencil or marker to make a small X or dot at the center of the painter’s tape. This will serve as a guide for drilling the hole.
By following these steps, you can effectively mark the drill hole in the porcelain tile and proceed to the drilling process with confidence.
Using a Pilot Hole
When drilling into porcelain tile, it is important to use a pilot hole to prevent cracking. A pilot hole is a small hole that is drilled before the main hole to guide the drill bit and reduce the risk of the tile cracking. Here are the steps to use a pilot hole:
- Choose the desired location for the hole and mark it with a pencil.
- Select a drill bit that is suitable for drilling into porcelain tile. Diamond-tipped drill bits or carbide-tipped masonry bits are recommended for this job.
- Put on safety goggles and gloves to protect yourself while drilling.
- Attach the drill bit to a power drill and set it to a low speed. Drilling at a high speed can generate too much heat and cause the tile to crack.
- Position the drill bit perpendicular to the tile surface at the marked location.
- Apply gentle pressure to the drill and slowly start drilling into the tile. It is important to start drilling at a slow and steady pace to create a precise pilot hole.
- If the tile is glazed, periodically dip the drill bit in water to keep it cool and lubricated.
- Continue drilling until the pilot hole is complete. Take your time and avoid applying excessive force, as this can increase the risk of cracking the tile.
Once the pilot hole is complete, you can proceed to drill the main hole using the same technique. Remember to use caution and take your time to ensure a successful and crack-free drilling process.
Applying the Right Amount of Pressure
When drilling into porcelain tile, it is important to apply the right amount of pressure to prevent cracking or damaging the tile. Here are some tips to follow:

- Start with a pilot hole: Before drilling the actual hole, it is recommended to start with a smaller pilot hole. This will help guide the drill bit and prevent it from slipping on the smooth tile surface.
- Use a steady hand: Maintaining a steady hand while drilling is crucial. Apply gentle but firm pressure to the drill, keeping it steady and perpendicular to the tile surface.
- Let the drill do the work: Let the drill bit do the work instead of forcing it. Applying too much pressure can cause the bit to overheat and potentially crack the tile.
- Use low speed: Using a low-speed setting on your drill can help reduce the risk of cracking the porcelain tile. Lower speeds provide better control and minimize the chances of damaging the tile.
- Be patient: Take your time and be patient while drilling into porcelain tile. Rushing the process can lead to mistakes and increase the chances of cracking or damaging the tile.
Remember, drilling into porcelain tile requires caution and precision. By applying the right amount of pressure and following these tips, you can safely drill into porcelain tile without cracking it.
Drilling at a Low Speed
One of the most important factors to consider when drilling into porcelain tile is the speed at which you drill. Drilling at a high speed can cause the tile to crack or shatter, so it’s crucial to exercise caution and drill at a low speed.
Here are some key tips for drilling at a low speed:
- Choose the right drill bit: Select a high-quality diamond-tipped drill bit specifically designed for drilling into porcelain tile. These bits are more durable and will minimize the risk of cracking the tile.
- Set your drill to a low speed: Adjust your drill’s speed setting to the lowest possible speed. This slower speed will reduce the chances of the tile cracking due to excessive force or friction.
- Apply steady, gentle pressure: When drilling, apply even and steady pressure to the drill. Avoid exerting too much force, as this can increase the chances of the tile cracking. Let the drill bit do the work and take your time to ensure a clean and precise hole.
- Use a lubricant: Applying a lubricant, such as water or drilling oil, while drilling can help to keep the drill bit cool and reduce friction. This will further minimize the risk of cracking the tile.
By following these tips and drilling at a low speed, you can significantly reduce the risk of cracking the porcelain tile and achieve a clean and successful drilling process.

Cooling the Drill Bit
One of the key factors in successful drilling into porcelain tile without cracking it is keeping the drill bit cool. This can help prevent excessive heat buildup, which can lead to the tile cracking or shattering.
Here are a few ways you can cool the drill bit while drilling into porcelain tile:
1. Use Water as a Coolant
Running water over the drill bit can help dissipate heat and keep the bit cool. You can do this by attaching a spray bottle or a hose with a gentle flow of water near the drilling area. Make sure to continuously apply water while drilling to prevent the bit from overheating.
2. Dip the Bit in Water
If running water is not feasible, you can also dip the drill bit in water periodically. This will help cool it down between drilling sessions and reduce the chances of the tile cracking due to heat buildup.
3. Use a Cooling Gel
Another option is to apply a cooling gel or paste specifically designed for drilling into hard materials like porcelain tile. These gels provide a lubricating and cooling effect to the drill bit, helping to reduce friction and heat.
4. Take Short Breaks
Drilling into porcelain tile can generate a significant amount of heat, especially if you’re using a high-speed drill. To prevent overheating, take short breaks during the drilling process to allow the drill bit to cool down. This can help extend the life of the drill bit and minimize the risk of the tile cracking.
5. Use a Slow Speed

Using a slow drilling speed can also help prevent excessive heat buildup. High-speed drilling can generate more heat, increasing the chances of the tile cracking. By using a slow speed, you can control the heat generation and reduce the risk of damaging the tile.
Remember, cooling the drill bit is crucial when drilling into porcelain tile. By implementing these cooling methods, you can reduce the risk of cracking or shattering the tile, ensuring a successful drilling experience.
Using a Drilling Template
One of the safest ways to drill into porcelain tile without cracking it is by using a drilling template. A drilling template is a guide that helps you properly position and secure the drill bit onto the tile surface. This helps to prevent the drill bit from slipping and avoids any potential damage to the tile.
Materials You Will Need:
- Drilling template
- Painter’s tape or masking tape
- Marker or pencil
- Drill with a diamond-tipped drill bit designed for porcelain tile
- Water or lubricant for cooling
- Safety glasses
- Work gloves
Step-by-Step Guide:
- Clean the tile surface: Wipe the area where you want to drill with a clean cloth to remove any dirt, dust, or debris. This will ensure that the drill bit makes proper contact with the tile.
- Position the drilling template: Place the drilling template on the desired spot where you want to drill. Ensure that it is aligned properly and centered. Use painter’s tape or masking tape to secure the template in place.
- Mark the drilling point: Using a marker or pencil, mark the spot on the template where you want to drill. This will serve as a guide for placing the drill bit.
- Prepare the drill: Attach a diamond-tipped drill bit designed for porcelain tile to your drill. Make sure it is securely fastened.
- Apply lubricant: To prevent heat and friction, apply water or a lubricant specifically designed for drilling into porcelain tile on the marked spot.
- Drill slowly and steadily: Position the drill bit on the marked spot on the template. Hold the drill firmly and drill slowly and steadily. Applying too much pressure or drilling too quickly can cause the tile to crack.
- Cool the drill bit and tile: Occasionally, dip the drill bit into water or apply more lubricant to keep it cool. This will prevent overheating and damage to the drill bit and tile.
- Remove the template: Once you have finished drilling the hole, carefully remove the drilling template and any tape used to secure it.
- Clean up: Clean the surface of the porcelain tile and remove any debris or residue left from drilling.
By using a drilling template, you can increase the accuracy and safety of drilling into porcelain tile without the risk of cracking or damaging the tile. Remember to always wear safety glasses and work gloves when drilling to protect yourself from any potential hazards.
Cleaning the Drill Hole
After drilling into porcelain tile, it’s important to properly clean the drill hole before proceeding with any further installation or repairs. Cleaning the drill hole will help ensure a secure and proper bond with any anchors or fasteners that are used.
Here are the steps to clean the drill hole:
- Remove any debris: Use a small vacuum or brush to remove any dust or debris from the drill hole. This will help create a clean surface for adhesion.
- Wipe the hole: Take a clean cloth or paper towel and dampen it slightly with water. Gently wipe the inside of the drill hole to remove any remaining particles and ensure a smooth surface.
- Dry the hole: Allow the drill hole to air dry completely before proceeding. This will ensure that no moisture or residue is left behind, which could affect the adhesion of anchors or fasteners.
- Inspect the hole: Once the hole is dry, visually inspect it to ensure there are no remaining debris or imperfections. If necessary, repeat the cleaning process until the drill hole is free from any obstructions.
A clean and properly prepared drill hole will provide a solid base for any anchors or fasteners, minimizing the risk of cracking or damaging the porcelain tile. Take your time to clean the drill hole thoroughly before proceeding with any further installation or repairs.
FAQ:
What precautions should I take before drilling into porcelain tile?
Before drilling into porcelain tile, it is important to take a few precautions. First, make sure you have the right tools for the job, including a diamond-tipped drill bit specifically designed for drilling into tile. Also, wear safety goggles to protect your eyes from any debris that may be generated during the drilling process. Finally, mark the spot where you want to drill with a pencil or masking tape to ensure accuracy.
What is the best type of drill bit for drilling into porcelain tile?
The best type of drill bit for drilling into porcelain tile is a diamond-tipped drill bit. These drill bits are specifically designed to cut through hard materials like porcelain without cracking or chipping the tile. The diamond coating on the tip of the drill bit allows for precise and clean cuts, making it the ideal choice for drilling into fragile materials like tile.
How do I prevent the porcelain tile from cracking while drilling?
To prevent porcelain tile from cracking while drilling, there are a few key steps you can follow. First, start by applying a piece of masking tape over the area where you plan to drill. This will help reduce the likelihood of the tile cracking. Additionally, make sure to use a diamond-tipped drill bit and apply gentle pressure while drilling. Avoid using a hammer function on your drill, as this can cause too much force and potentially crack the tile. Finally, consider using a lubricant, such as water or cutting oil, to help reduce friction and keep the drill bit cool.
What is the correct drilling technique for porcelain tile?
The correct drilling technique for porcelain tile involves a few key steps. First, mark the spot where you want to drill with a pencil or masking tape. Then, gently apply steady pressure to the drill while keeping it perpendicular to the tile surface. Start drilling at a slow speed to create a small pilot hole, and gradually increase the speed as you continue drilling. It is important to be patient and let the drill bit do the work, without applying excessive force. Finally, once the hole is complete, be sure to clean up any debris and remove the masking tape.
Are there any alternatives to drilling into porcelain tile?
Yes, there are alternatives to drilling into porcelain tile if you want to avoid the risk of cracking or damaging the tile. One option is to use adhesive or mounting tape to attach items to the tile surface instead of drilling. Another option is to use a tile-specific adhesive or epoxy to secure items in place. These alternatives may be more suitable for temporary or non-permanent installations, as they may not provide the same level of stability as drilling and using anchors.
Video:


Meet Harrison Clayton, a distinguished author and home remodeling enthusiast whose expertise in the realm of renovation is second to none. With a passion for transforming houses into inviting homes, Harrison's writing at https://thehuts-eastbourne.co.uk/ brings a breath of fresh inspiration to the world of home improvement. Whether you're looking to revamp a small corner of your abode or embark on a complete home transformation, Harrison's articles provide the essential expertise and creative flair to turn your visions into reality. So, dive into the captivating world of home remodeling with Harrison Clayton and unlock the full potential of your living space with every word he writes.


