How to Safely Drill into a Steel Stud: Step-by-Step Guide

If you’re looking to hang heavy objects or install shelves on your wall, you may need to drill into a steel stud. While steel studs provide a strong and durable support, drilling into them can be a bit more challenging than drilling into wood or drywall. However, with the right tools and techniques, you can safely drill into a steel stud without damaging it or compromising its structural integrity. In this step-by-step guide, we’ll walk you through the process of drilling into a steel stud.
Step 1: Prepare your tools
Before you start drilling, it’s important to gather all the necessary tools and materials. You’ll need a high-quality drill with a sharp metal drill bit, a stud finder, a level, a pencil, and safety goggles. Make sure your drill is fully charged or that you have a spare battery on hand.
Step 2: Locate the stud
Use a stud finder to locate the position of the steel stud in your wall. Move the stud finder along the wall until it indicates the presence of a stud. Mark the edges of the stud with a pencil to clearly outline its width.

Step 3: Measure and mark the drilling point
Using a level, measure and mark the desired drilling point on the steel stud. Make sure your mark is accurate and aligned with any other studs in the vicinity. Double-check your measurements before moving on to the next step.
Step 4: Put on your safety goggles
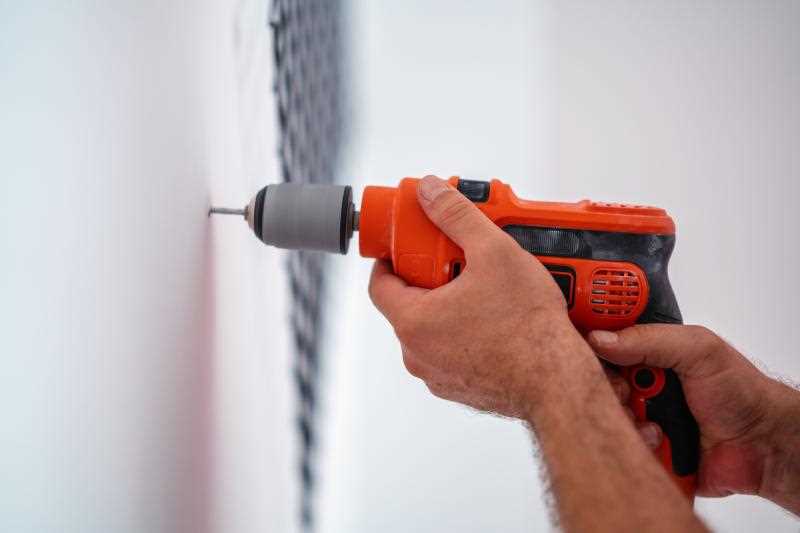
Safety should always be your top priority when drilling into any material, especially steel. Put on your safety goggles to protect your eyes from any flying debris or metal shavings that may occur during the drilling process.
Step 5: Start drilling

Double-check the position of your drilling point, align your drill bit with the mark, and start drilling at a slow and steady pace. Apply gentle pressure and let the drill bit do the work. Make sure to periodically stop drilling to remove any metal shavings and prevent the bit from overheating.
Remember to never force the drill or apply excessive pressure, as this can cause the drill bit to dull or snap, and potentially damage the steel stud.
By following these step-by-step instructions, you’ll be able to safely drill into a steel stud and complete your home improvement project with ease.
Why You Need to Drill into a Steel Stud
1. Hanging Heavy Objects:
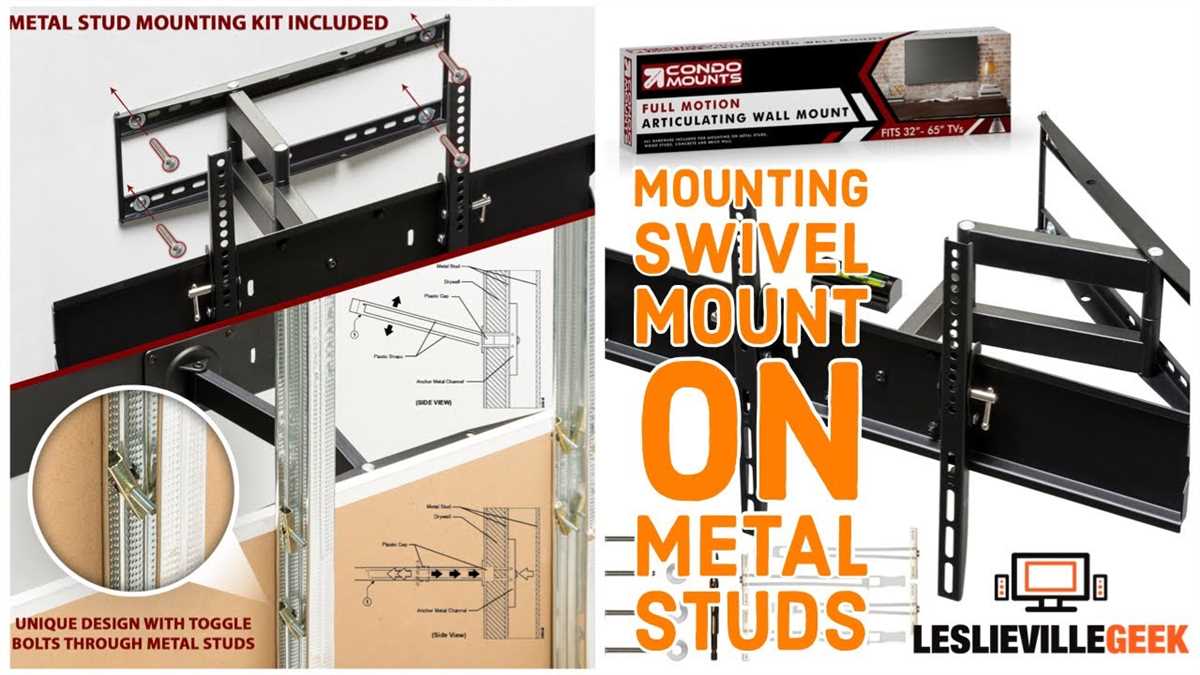
Steel studs are commonly used in construction for framing walls, especially in commercial and residential buildings. When you need to hang heavy objects, such as shelves, TV mounts, or cabinets, drilling into a steel stud provides a strong and secure anchor point.
2. Avoiding Electrical Wiring and Pipes:
Before drilling into a steel stud, it’s essential to locate any electrical wiring, plumbing pipes, or other utilities behind the wall. By drilling into the steel stud, you can avoid damaging these vital components and prevent potential hazards.
3. Structural Integrity:

When hanging objects on drywall, the weight is usually supported by attaching them to the wooden studs behind the drywall. However, steel studs offer higher structural integrity than wooden studs, making them a preferred choice for heavier loads and ensuring long-lasting support for your installations.
4. Flexibility and Versatility:
Drilling into a steel stud allows for flexibility and versatility in terms of positioning and attaching objects to the wall. Unlike wooden studs, steel studs can be spaced further apart, providing more options when planning the layout of your wall-mounted items. With the ability to anchor to steel studs, you can achieve the desired aesthetic and functional design in your space.
5. Stability and Durability:
Steel studs are known for their stability and durability. Unlike wood, steel does not warp, rot, or become infested with pests. By drilling into a steel stud, you can ensure that your wall-mounted objects remain securely in place for the long term.

6. Following Building Codes and Standards:

In many cases, building codes and standards require specific guidelines for hanging heavy objects or installing fixtures. By drilling into a steel stud, you can comply with these regulations and ensure the safety and stability of your installations.
Conclusion
Drilling into a steel stud provides numerous benefits, including a strong anchor point for hanging heavy objects, avoiding damage to electrical wiring and pipes, increased structural integrity, flexibility in wall layout, stability and durability, and compliance with building codes and regulations. When drilling into a steel stud, it’s important to use the appropriate tools and techniques to ensure a successful and safe installation.
Why Safety is Important
Safety is a crucial aspect when it comes to drilling into a steel stud. It not only protects you from potential accidents, but it also ensures the integrity and stability of the structure you are working on. Here are a few reasons why safety should be a top priority:
1. Personal Protection
- Wearing protective gear such as safety goggles, gloves, and ear protection can prevent injuries from flying debris and loud noises.
- Using a dust mask or respirator can help protect your lungs from harmful particles that may be released during drilling.
- Ensuring proper posture and body mechanics while drilling can reduce the risk of strains and muscle injuries.
2. Avoiding Structural Damage
Drilling into a steel stud without following safety precautions can cause damage to the stud itself, as well as the surrounding structure. This damage can compromise the stability and strength of the stud, leading to potential structural issues.

3. Preventing Electrical Hazards
When drilling into a steel stud, there is a risk of coming into contact with electrical wires that may be running through the walls. Failing to locate and avoid these wires can result in electric shocks, short circuits, or even fires. Therefore, using a stud finder or contacting a professional electrician beforehand is essential for safety.
4. Mitigating Fire Hazards
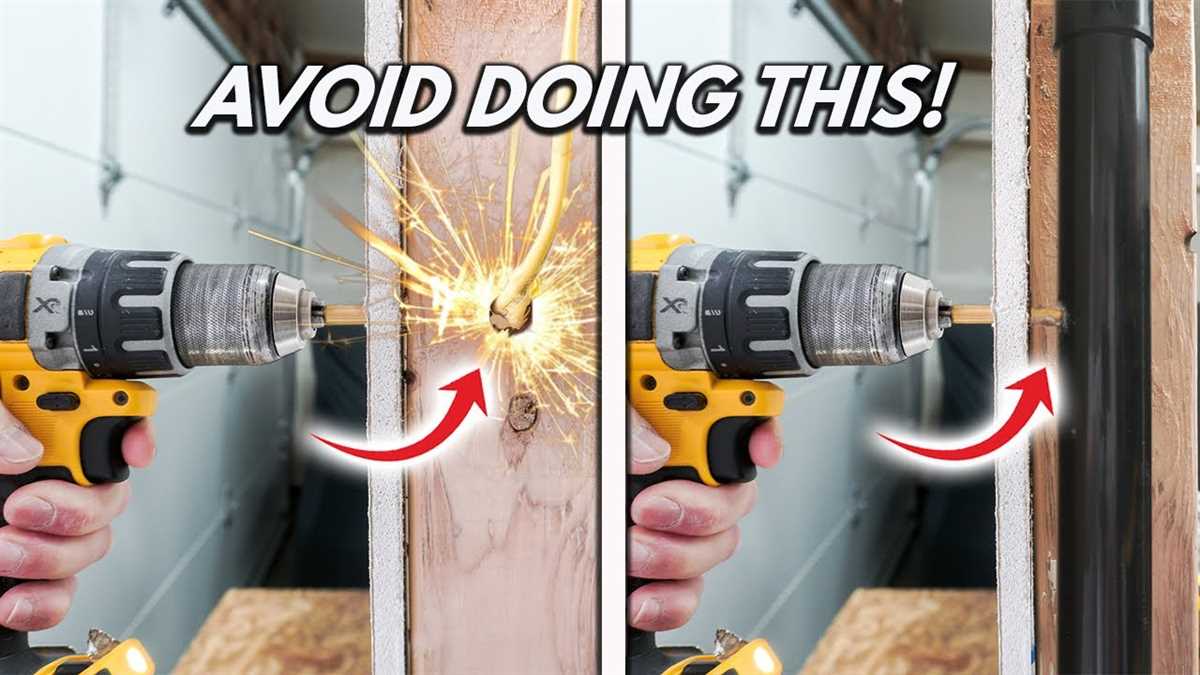
Drilling into a steel stud can create sparks, especially if the drill bit comes into contact with metal. These sparks can ignite flammable materials nearby, such as insulation or other construction materials. Taking precautions, such as keeping a fire extinguisher nearby, can help mitigate the risk of fire hazards.
5. Ensuring Overall Project Success
By prioritizing safety, you are ensuring that the project is carried out smoothly and without any setbacks caused by accidents or damage. Taking the time to follow safety guidelines and procedures can ultimately save time, money, and prevent future problems.
Remember, safety should always be the first consideration when it comes to any construction or DIY project. By following proper safety protocols, you can minimize risks and ensure a successful outcome.
Step 1: Gather the Necessary Tools
To safely drill into a steel stud, you will need to gather the following tools:
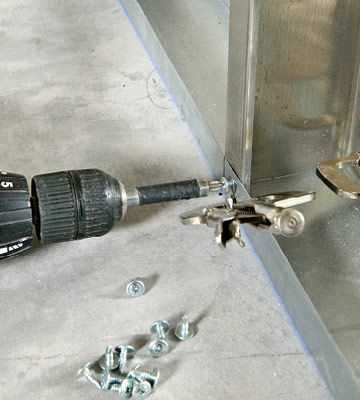
- Power drill: Choose a drill with enough power and speed to penetrate steel.
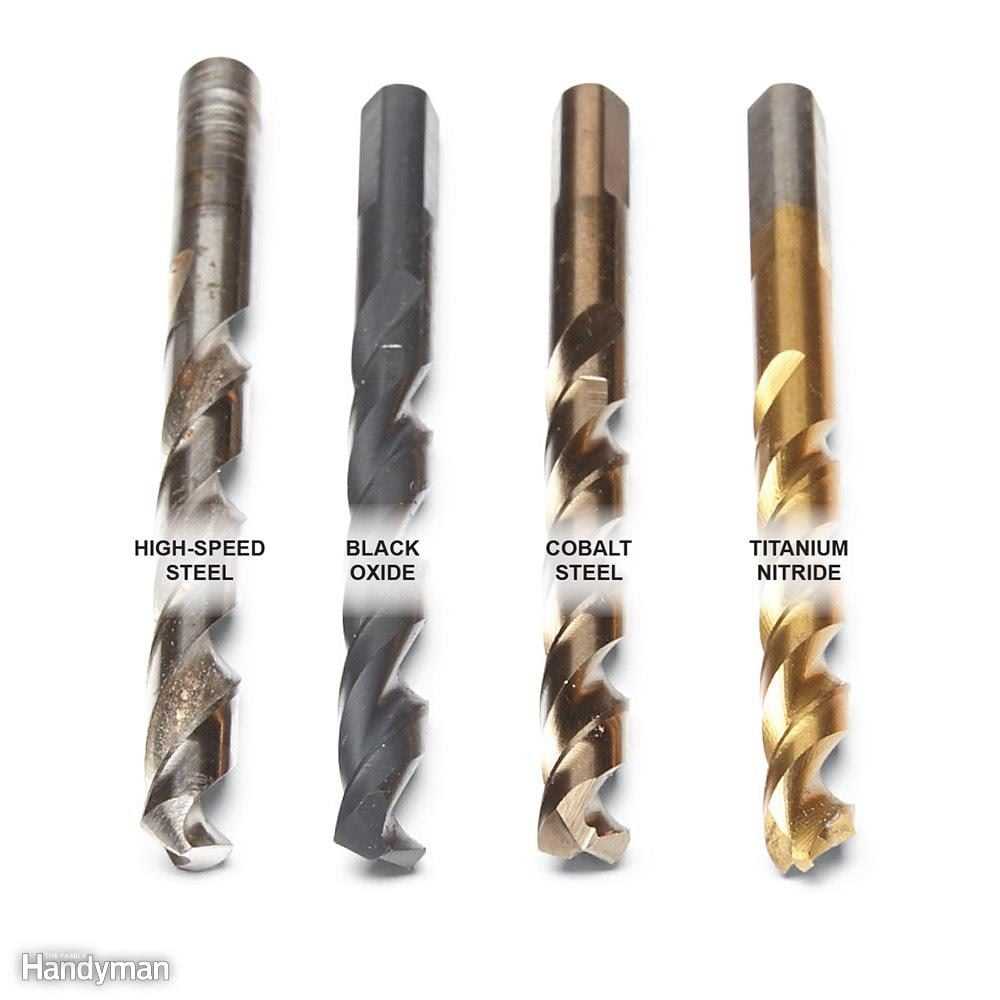
- Metal drill bit: Use a high-speed steel (HSS) or cobalt drill bit specifically designed for drilling through metal.
- Stud finder: Use a stud finder with a metal detection feature to locate the steel stud.
- Masking tape: Mark the drilling location on the steel stud with masking tape before drilling.
- Clamps or a workbench: Secure the steel stud or the workpiece to avoid movement during drilling.
- Safety glasses: Protect your eyes from metal shavings and debris.
- Ear protection: Use earplugs or earmuffs to protect your hearing from the noise of the drilling.
- Lubricant or cutting fluid: Apply a lubricant or cutting fluid to the drill bit to reduce friction and heat.
- Gloves: Wear gloves to protect your hands from sharp edges or metal splinters.
Once you have gathered these tools, you will be ready to proceed with drilling into the steel stud.
What You’ll Need
- A power drill with a suitable drill bit for metal
- Steel stud finder
- Masking tape
- Measuring tape or ruler
- Pencil or marker
- Safety goggles
- Gloves
- Drop cloth or tarp to protect the floor
- Vacuum or broom to clean up any debris
Where to Find the Tools
1. Local Hardware Store
One of the easiest places to find the tools you need to safely drill into a steel stud is your local hardware store. Hardware stores typically carry a wide range of tools, including power drills, drill bits, screwdrivers, and measuring tools. You can ask the store staff for assistance in selecting the right tools for your specific project.
2. Online Retailers
If you prefer the convenience of shopping from home, you can also find the necessary tools on various online retailers. Websites like Amazon, Home Depot, Lowe’s, and eBay offer a wide selection of tools for drilling into steel studs. You can compare prices, read reviews, and have the tools delivered right to your doorstep.
3. Rental Services
If you don’t want to invest in tools you may only use occasionally, you can consider renting them from a tool rental service. Many cities have rental companies that offer tools for rent at reasonable prices. This is a cost-effective option if you don’t want to spend money on purchasing tools that you won’t use frequently.
4. Borrow from Friends or Neighbors
Another option is to ask friends, family, or neighbors if they have the tools you need. Borrowing tools is a great way to save money and avoid buying tools that you might only need for one project. Just make sure to return the tools in good condition and express your gratitude by offering a small gesture of thanks.
5. Professional Tool Suppliers
If you are looking for high-quality, professional-grade tools, you may need to explore specialty tool suppliers. These suppliers cater to professionals in specific industries and offer a wide range of tools for various applications. While these tools may be more expensive, they are often designed for heavy-duty use and offer superior performance.
Regardless of where you decide to purchase or rent your tools, make sure to choose reputable brands and always prioritize safety. Investing in good quality tools will not only make the job easier, but also ensure your safety while drilling into steel studs.
Step 2: Prepare the Workspace
Before drilling into a steel stud, it is important to prepare your workspace properly to ensure a safe and efficient drilling process. Follow these steps to prepare your workspace:
- Gather the necessary tools: Before starting, gather all the tools you will need for the project. This may include a drill with a metal cutting drill bit, a stud finder, a tape measure, a level, safety goggles, and a dust mask.
- Clear the area: Clear the area around the steel stud where you plan to drill. Remove any furniture, decorations, or other objects that may obstruct your work or get damaged during the process.
- Ensure proper lighting: Make sure the area is well-lit so that you can see clearly while drilling. If necessary, use additional lighting such as a lamp or a work light to improve visibility.
- Check for electrical wiring: Use a stud finder with electrical detection capabilities to determine if there are any electrical wires running through or near the steel stud. Avoid drilling into areas where electrical wiring is present to prevent accidents or damage.
- Mark the drilling location: Use a pencil or a marker to mark the exact location on the steel stud where you plan to drill. This will help you stay precise and avoid unnecessary holes or mistakes.
- Secure the steel stud: If the steel stud you are working on is not securely fastened to the wall, use clamps or braces to hold it in place. This will prevent movement and make drilling easier and safer.
- Put on safety gear: Before drilling, put on safety goggles and a dust mask to protect your eyes and respiratory system from metal shards and dust that may be produced during the drilling process.
Clearing the Area
Before you begin drilling into a steel stud, it is important to clear the area to ensure a safe work environment. Follow these steps to properly clear the area:
- Remove any objects or furniture that may obstruct your drilling area. This includes chairs, tables, and other items that may be in close proximity to the stud.
- Clear the floor space around the stud. Make sure there are no loose items or debris on the floor that could cause you to trip or slip while drilling.
- Turn off any electrical sources that are near the stud. This includes lights, outlets, and appliances. It is important to prevent any possible electrical shock while drilling.
- Ensure proper ventilation in the area. Open windows or use fans to create a well-ventilated environment, especially if you are drilling in an enclosed space.
By clearing the area before drilling into a steel stud, you will reduce the risk of accidents and create a safer working environment.
Taking Safety Precautions
- Wear protective goggles or safety glasses to protect your eyes from any flying debris while drilling.
- Wear ear protection, such as earplugs or earmuffs, to minimize the noise from the drill and protect your hearing.
- Wear work gloves to protect your hands from sharp edges and prevent any injuries.
- Secure the area and remove any obstructions or objects that may be in the way of your drilling path.
- Make sure the power source is turned off before starting any drilling activities to avoid any electrical hazards.
- Use a stud finder to locate the position of the steel stud before drilling to avoid damaging any electrical wires or pipes that may be embedded in the wall.
- Mark the drilling spots using a pencil or marker to ensure accuracy and prevent drilling in the wrong place.
- Use a drill bit that is specifically designed for drilling into metal to ensure proper penetration and reduce the risk of the drill bit slipping or breaking.
- Apply steady pressure and avoid excessive force while drilling to prevent the drill bit from getting stuck or breaking.
- Regularly lubricate the drill bit with cutting fluid or a lubricating spray to reduce friction and prolong the life of the drill bit.
- Dispose of any debris or metal shavings properly to avoid injuries or accidents. Use a magnet or a dustpan and brush to collect the shavings.
- After completing the drilling, check the area for any sharp edges or protruding metal that may cause injuries. File or smooth out any rough edges if necessary.
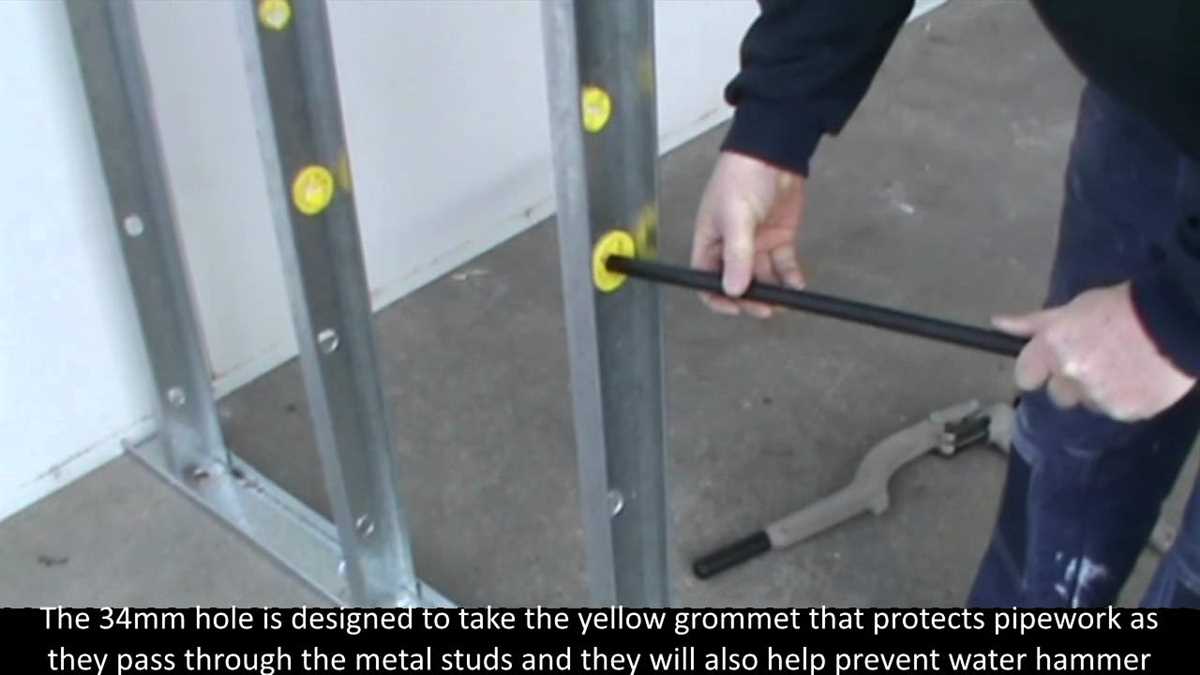
Step 3: Mark the Drilling Spot
Before you start drilling into the steel stud, it’s important to accurately mark the spot where you want to drill. This will help ensure that you hit the right spot and minimize any potential damage.
Here’s how to mark the drilling spot:
- Use a tape measure to measure and mark the desired location on the steel stud. Make sure to take into account the size and position of any fixtures or objects that need to be mounted.
- Using a pencil or marker, mark a small dot or an “X” on the spot where you will drill. This will serve as a guide and help you maintain accuracy during the drilling process.
Note: It’s important to be as precise as possible when marking the drilling spot. Measure twice and double-check your markings before proceeding with the drilling.
Locating the Stud
Before you begin drilling into a steel stud, it is crucial to locate the stud and ensure that you are drilling in the right spot. Here are a few methods you can use to find the stud:
1. Visual Inspection
Start by visually inspecting the surface of the wall. Steel studs are usually installed in a consistent pattern, so you can look for any rows of screw heads or dimples in the surface. These markings indicate the location of the studs behind the drywall.
2. Using a Stud Finder
A stud finder is a handy tool that uses electronic sensors to detect changes in density behind the walls. It can accurately identify the location of studs, electrical wires, and pipes. Follow the instructions provided with the stud finder to locate the steel stud.
3. Knocking Technique

If you don’t have a stud finder, you can use the knocking technique. Start by tapping the wall with your knuckles or a small hammer. As you move along the wall, listen for a solid, firm sound instead of a hollow one. The solid sound indicates that you have found a stud.
4. Measure from Corners
Another method is to measure from the corners of the wall to locate the studs. Steel studs are typically installed 16 or 24 inches apart, so you can measure from the corner and mark the spots accordingly. Repeat the process on the other side of the wall to confirm the locations.
Once you have located the steel stud with one of these methods, mark the spot using a pencil or tape. This will serve as a guide when you start drilling into the stud.
Remember, it is essential to locate the stud accurately to avoid damaging any electrical wires or pipes behind the wall. Take your time and use the appropriate method to ensure a safe and successful drilling process.
FAQ:
Is it safe to drill into a steel stud?
Yes, it is safe to drill into a steel stud if you follow the proper steps and precautions.
What tools do I need to drill into a steel stud?
You will need a drill, drill bits suitable for metal, a stud finder, a level, safety glasses, and hearing protection.
Can I use a regular drill to drill into a steel stud?
Yes, you can use a regular drill to drill into a steel stud as long as you use the correct drill bits for metal.
How do I find the center of a steel stud?
To find the center of a steel stud, you can use a stud finder. Simply slide the stud finder along the wall until it detects the edges of the stud, then mark the center between those edges.
What precautions should I take when drilling into a steel stud?
When drilling into a steel stud, it is important to wear safety glasses and hearing protection. You should also ensure that the drill bit is secured tightly in the drill and that you do not apply excessive force while drilling.
Video:


Meet Harrison Clayton, a distinguished author and home remodeling enthusiast whose expertise in the realm of renovation is second to none. With a passion for transforming houses into inviting homes, Harrison's writing at https://thehuts-eastbourne.co.uk/ brings a breath of fresh inspiration to the world of home improvement. Whether you're looking to revamp a small corner of your abode or embark on a complete home transformation, Harrison's articles provide the essential expertise and creative flair to turn your visions into reality. So, dive into the captivating world of home remodeling with Harrison Clayton and unlock the full potential of your living space with every word he writes.


