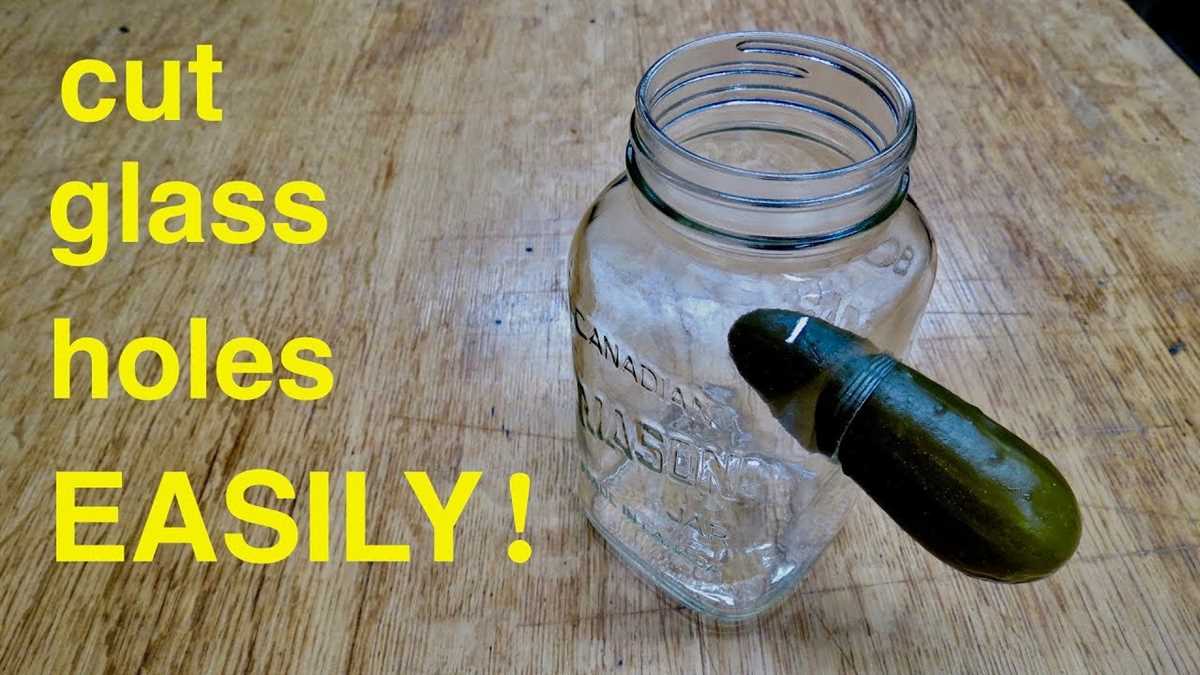
How to Safely Drill into a Glass Bottle: Step-by-Step Guide

Drilling into a glass bottle may seem like a daunting task, but with the right tools and techniques, it can be done safely and effectively. Whether you’re repurposing a bottle for a DIY project or creating a unique piece of art, this step-by-step guide will walk you through the process.
Step 1: Gather the necessary tools and materials.
Before you begin drilling, make sure you have the following items on hand:
- A glass bottle
- A diamond drill bit
- Masking tape
- A bucket of water
- Eye protection
- A drill
Step 2: Prepare the bottle.
First, thoroughly clean the bottle to remove any dirt or debris. Once it’s clean and dry, wrap a layer of masking tape around the area where you plan to drill. This will help prevent the drill bit from slipping and protect the glass from cracks or chips.

Step 3: Set up your drilling area.
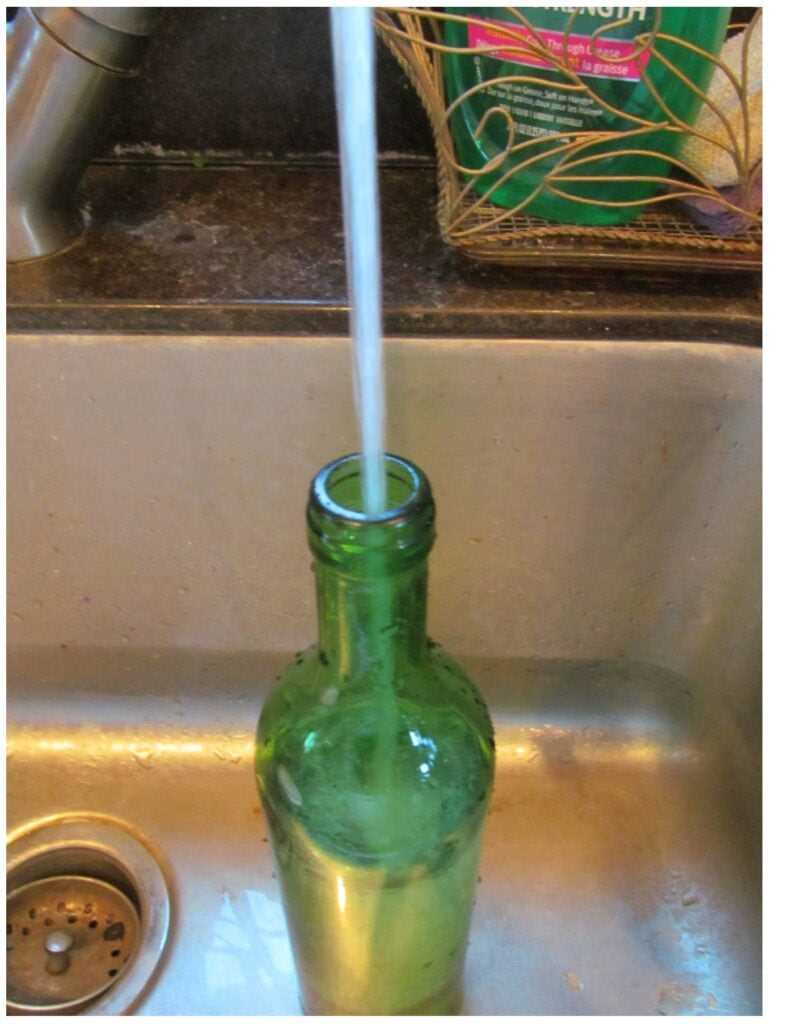
Place the bottle in a bucket of water, making sure it is fully submerged. The water will help to keep the glass cool and lubricate the drill bit, reducing the risk of overheating or cracking. Put on your eye protection to keep your eyes safe from any flying glass fragments.
Gather the necessary materials
- Glass bottle
- Electric drill
- Glass drill bit
- Tape
- Water
- Safety goggles
- Gloves
- Marker or pen
- C-clamp or vise
- Drilling lubricant (optional)
Prepare the bottle
Before you start drilling into a glass bottle, it is important to prepare the bottle properly. This will ensure that you have a successful drilling experience and minimize the risk of accidents or damage to the bottle.
- Select a suitable bottle: Choose a glass bottle that you want to drill into. Make sure it is clean and free of any labels or stickers.
- Wear protective gear: Safety should be your top priority, so make sure to wear protective gear such as safety glasses and gloves before starting the drilling process.
- Secure the bottle: Place the bottle on a sturdy work surface and ensure it is stable. You can use a clamp or secure it with a non-slip mat to prevent it from moving or rolling during drilling.
- Mark the drilling spot: Determine where you want to drill the hole and mark it with a permanent marker or adhesive tape. This will help you stay focused and ensure accurate drilling.
- Prepare the drilling area: Place a piece of scrap wood or a soft material like a towel underneath the bottle to provide support and prevent the glass from cracking or shattering during drilling.
By following these steps, you can properly prepare the glass bottle for drilling and create a safe working environment.
Make a guide hole
Before you start drilling into the glass bottle, it is important to create a guide hole. This will help to prevent the drill bit from slipping and keep it centered during the drilling process.

Steps to make a guide hole:
- Gather the necessary materials, including a glass bottle, a diamond drill bit, water, and a piece of scrap wood or rubber mat.
- Put on safety goggles and gloves to protect yourself from any potential shards of glass or accidents.
- Place the glass bottle on a stable surface, such as a workbench or table.
- Choose the area on the bottle where you want to drill the hole. It is recommended to drill near the base of the bottle where the glass is thicker.
- Mark the exact spot where you want to drill the hole with a permanent marker or a piece of tape.
- Place the piece of scrap wood or rubber mat underneath the bottle to provide support and prevent it from rolling or moving during the drilling process.
- Fill a container with water and submerge the marked spot on the bottle in the water. This will act as a lubricant and coolant to prevent the glass from cracking or shattering.
- Position the diamond drill bit on the marked spot of the bottle.
- Apply gentle pressure and begin drilling at a slow speed. Let the diamond drill bit do the work and avoid applying excessive force.
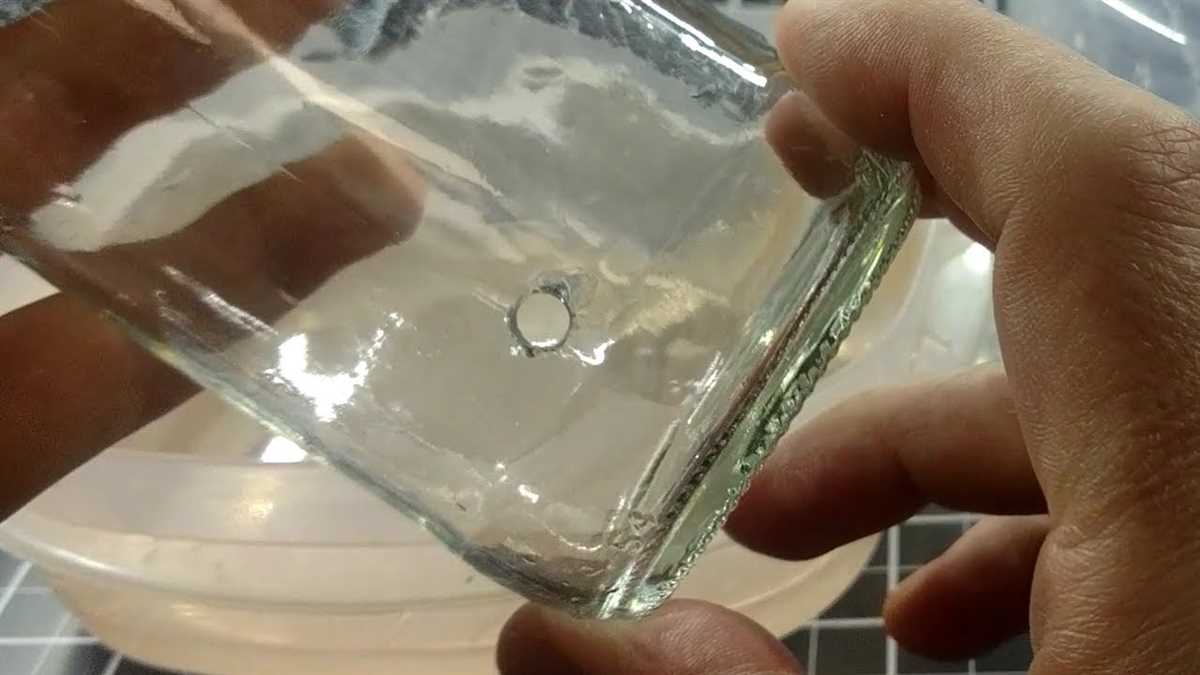
- Continue to drill until you create a small guide hole in the glass. This hole will act as a pilot hole for the larger hole you plan to drill.
- Once the guide hole is created, remove the diamond drill bit and the water container.
Now that you have successfully made a guide hole, you are ready to proceed with drilling the larger hole into the glass bottle.
Choose the right drill bit
Before you begin drilling into a glass bottle, it is essential to select the right drill bit. A proper drill bit will help ensure clean and precise holes, as well as prevent the glass from cracking or shattering.
Glass and tile drill bit

The most suitable type of drill bit for drilling into a glass bottle is a glass and tile drill bit. These drill bits are specifically designed for working with glass, ceramics, and tiles. They have a carbide or diamond tip that allows for clean and smooth drilling without damaging the glass.

Diamond core drill bit
If you are looking to create larger holes in the glass bottle, a diamond core drill bit is an excellent choice. These drill bits have a hollow center with diamond particles bonded to the rim, allowing for more efficient drilling of larger holes.
Avoid using regular drill bits
Regular metal or wood drill bits are not suitable for drilling into glass bottles. Using the wrong drill bit can lead to cracks, chips, or shattered glass. It is crucial to invest in the right drill bit specifically designed for working with glass materials.
When selecting a drill bit, ensure that it matches the size of the hole you want to create. Also, consider the type of glass you are drilling into, as different glasses may require different drill bits.
Secure the bottle
Before drilling into a glass bottle, it is important to secure it properly to prevent accidents or injuries. Here are some steps to ensure the bottle is securely held in place:

1. Choose a stable work surface
Select a stable and flat surface to work on, such as a workbench or table. Avoid working on uneven or slippery surfaces that can cause the bottle to shift during drilling.
2. Use a clamp or vise
Place the bottle inside a clamp or vise to hold it securely. Ensure that the clamp or vise is tightened enough to keep the bottle steady but not too tight as it may break the glass.
3. Wrap the bottle with a cloth or rubber jar opener
To provide additional grip, wrap the bottle with a cloth or use a rubber jar opener to prevent it from slipping while drilling. The cloth or rubber jar opener will also help to absorb any vibrations during the drilling process.
4. Position the bottle correctly
Make sure the bottle is positioned upright or at the desired angle, depending on your drilling needs. Ensure it is aligned properly and does not tilt.
5. Double-check the stability
Before starting to drill, double-check the stability of the bottle. Give it a gentle shake or tap it lightly to verify that it is securely held in place.

Following these steps will help create a safe and stable setup for drilling into a glass bottle, minimizing the risk of accidents or injuries.
Apply water as a lubricant
Drilling into glass can generate a lot of heat, which can crack or shatter the bottle. To prevent this, it is important to keep the glass cool while drilling. One effective way to do this is to use water as a lubricant.
Here’s how you can apply water as a lubricant when drilling into a glass bottle:
- Fill a small container or a spray bottle with water.
- Position the glass bottle on a stable surface, such as a workbench or table.
- Dip the drill bit into the water to ensure it is wet.
- Place the tip of the drill bit against the glass bottle where you want to make the hole.
- Apply gentle pressure to the drill bit and begin drilling slowly.
- As you drill, periodically dip the drill bit into the water to keep it wet. This will help to cool down the glass and reduce the risk of cracking or shattering.
- Continue drilling until you have made the desired hole in the glass bottle.
Note: It is essential to keep the drill bit and the glass wet throughout the drilling process to prevent overheating and damage to the glass. If you notice the glass getting too hot, stop drilling and allow it to cool down before continuing.
By using water as a lubricant, you can safely drill into a glass bottle without the risk of damaging it. Remember to take your time and be cautious throughout the process.
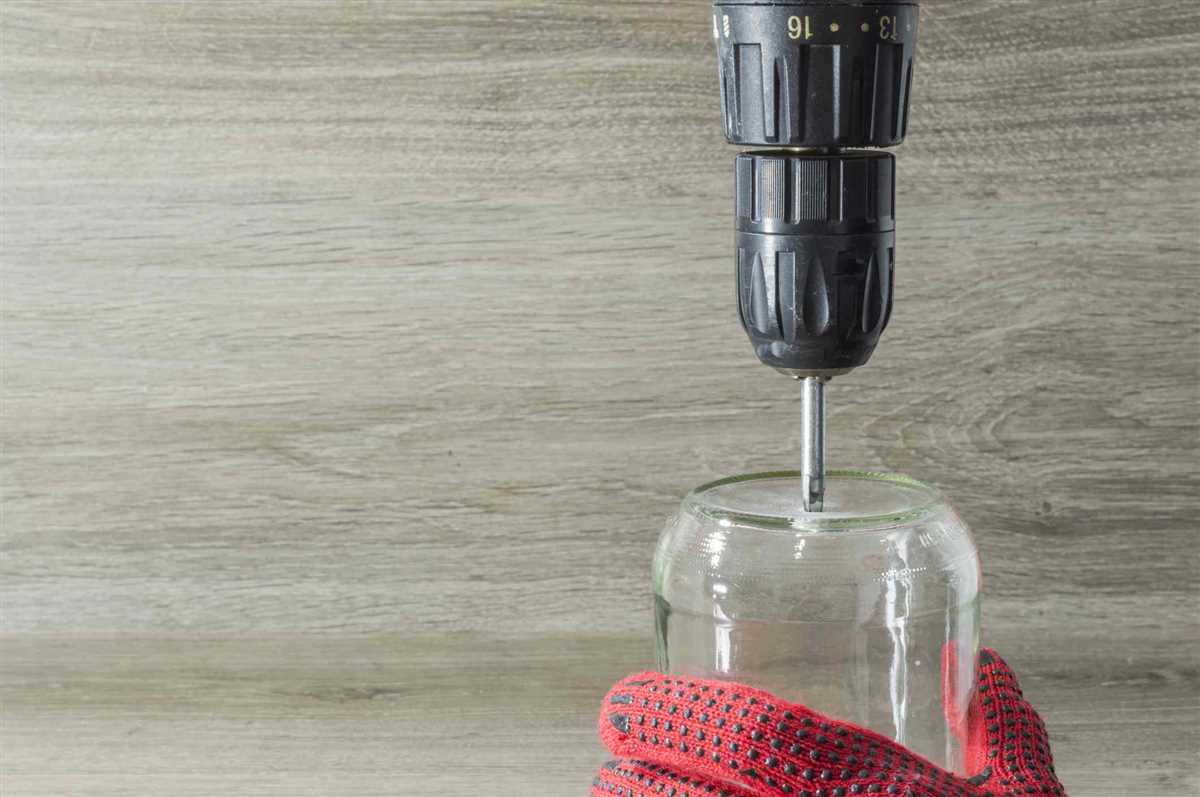
Start drilling
Now that you have prepared your work area and gathered the necessary tools, it’s time to start drilling into the glass bottle. Follow these steps carefully to ensure safety and success:
- Put on safety goggles and gloves: Before you begin drilling, make sure to protect your eyes and hands by wearing safety goggles and gloves. This will prevent any injuries from flying glass shards or accidental slips.
- Mark the drilling point: Use a marker or a piece of tape to clearly mark the point where you want to drill the hole. Double-check the placement to ensure it is exactly where you want it.
- Apply masking tape: Place a strip of masking tape over the area you marked for drilling. This will help prevent the drill bit from slipping and provide extra stability during the drilling process.
- Select the correct drill bit: Choose a drill bit specifically designed for drilling into glass or ceramic materials. Diamond-coated or tungsten carbide drill bits are recommended for this purpose.
- Secure the bottle: Place the glass bottle upright in a clamp or secure it in a vice grip. This will ensure stability and prevent the bottle from moving or rolling during drilling.
- Create a small pilot hole: Start by drilling a small pilot hole at the marked point. Apply gentle and consistent pressure while drilling to maintain control. Remove any loose glass debris with a brush or cloth.
- Begin drilling the main hole: Once the pilot hole is created, gradually increase the drill bit size until you reach the desired hole diameter. Remember to keep the drill bit lubricated with water to prevent overheating and ensure smooth drilling.
- Monitor drilling progress: Constantly monitor the drilling process to prevent overheating or cracking of the glass. Take breaks if necessary or use a cooling agent like water to maintain the temperature.
- Finish and clean up: Once the hole is drilled to the desired size, carefully remove the masking tape. Clean the bottle and the drilled hole with water to remove any debris or glass fragments.
Following these steps will help you safely and successfully drill into a glass bottle. Remember to take your time, be patient, and prioritize safety throughout the process.
Clean and finish
After drilling a hole into a glass bottle, it’s important to clean up any residue and finish the edges to ensure a smooth surface.
Cleaning the bottle
Start by removing any remaining glass shards or debris from the hole. Be careful not to cut your fingers, as the edges of the hole may still be sharp. Use a pair of needle-nose pliers or tweezers to remove any stubborn pieces.
Next, wash the bottle thoroughly with warm soapy water to remove any drilling lubricant or dust. Rinse the bottle thoroughly to ensure no residue is left behind.
Finishing the edges
To ensure a smooth finish, you can use a sandpaper or emery cloth to gently sand the edges of the hole. Be careful not to apply too much pressure, as this may cause the glass to crack or chip. Start with a coarse grit sandpaper and gradually move to a finer grit for a polished look.
Alternatively, you can use a diamond file or a glass grinder to smooth out the edges. These tools are specifically designed for working with glass and will help you achieve a professional finish.
Once you are satisfied with the smoothness of the hole, wipe the bottle clean with a damp cloth to remove any debris or dust. Your glass bottle is now ready for use!
FAQ:
What tools do I need to safely drill into a glass bottle?
To safely drill into a glass bottle, you will need a diamond drill bit, a drill press or a drill stand, a lubricant such as water or glass-cutting oil, and safety goggles.
Is it possible to drill into a glass bottle without shattering it?
Yes, it is possible to drill into a glass bottle without shattering it if you follow the proper technique. Using a diamond drill bit and applying steady pressure, along with using a lubricant to keep the bit cool, can help prevent the glass from cracking or breaking.
What is the best way to secure the glass bottle while drilling?
The best way to secure a glass bottle while drilling is to use a drill press or a drill stand. These tools will hold the bottle securely in place, allowing you to drill with accuracy and control.
Can I use a regular drill bit to drill into a glass bottle?
No, it is not recommended to use a regular drill bit to drill into a glass bottle. Regular drill bits are not designed for drilling glass and are more likely to cause the bottle to crack or break. It is best to use a diamond drill bit specifically designed for drilling glass.
What precautions should I take when drilling into a glass bottle?
When drilling into a glass bottle, it is important to wear safety goggles to protect your eyes from flying glass shards. It is also important to drill at a slow speed and apply consistent, even pressure to prevent the glass from cracking. Additionally, using a lubricant such as water or glass-cutting oil will help keep the drill bit cool and reduce the risk of breakage.
Video:


Meet Harrison Clayton, a distinguished author and home remodeling enthusiast whose expertise in the realm of renovation is second to none. With a passion for transforming houses into inviting homes, Harrison's writing at https://thehuts-eastbourne.co.uk/ brings a breath of fresh inspiration to the world of home improvement. Whether you're looking to revamp a small corner of your abode or embark on a complete home transformation, Harrison's articles provide the essential expertise and creative flair to turn your visions into reality. So, dive into the captivating world of home remodeling with Harrison Clayton and unlock the full potential of your living space with every word he writes.


