How to Safely Drill a Hole in Plexiglass: A Step-by-Step Guide

Drilling a hole in plexiglass can be a delicate process, as this material is prone to cracking or shattering if not handled properly. Whether you want to create a hole for mounting a picture frame or installing a light fixture, following the right steps can help you achieve a clean and safe result. In this step-by-step guide, we will walk you through the process of drilling a hole in plexiglass without causing any damage.
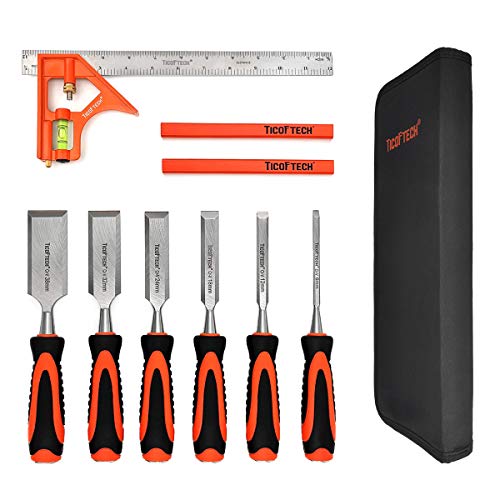
Step 1: Prepare the necessary tools and materials. You will need a power drill, a drill bit suitable for plastic materials, masking tape, a marker, a ruler or tape measure, and safety goggles. Make sure you have a clean and well-lit workspace before you begin.
Step 2: Measure and mark the spot where you want to drill the hole. Use a ruler or tape measure to ensure accuracy. Place a small piece of masking tape over the marked spot. This will help prevent the drill bit from slipping and provide additional protection against cracking or chipping.
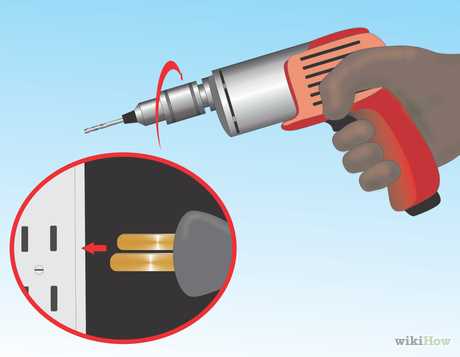
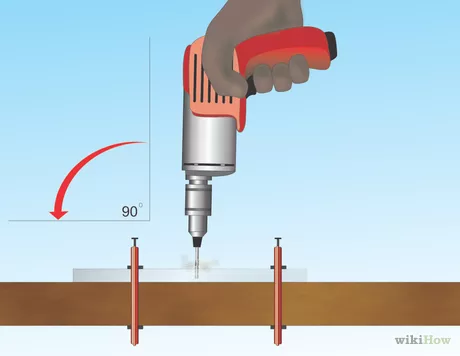
Step 3: Put on your safety goggles to protect your eyes from any flying debris. Start the drill at a slow speed and gradually increase as you proceed. Place the drill bit on the marked spot and gently apply pressure. Keep the drill perpendicular to the plexiglass to prevent any angle-related issues.
Step 4: Keep a steady hand and apply consistent pressure as you drill into the plexiglass. Avoid excessive force or pushing too hard, as this can increase the risk of cracking. Use a lubricant, such as water or a specialized cutting oil, to keep the drill bit and plexiglass cool. This will help prevent overheating and further minimize the chances of damage.

Step 5: Once the hole is drilled, remove the masking tape and inspect the plexiglass. If there are any rough edges or burrs, carefully sand them down with fine-grit sandpaper. This will ensure a smooth and clean finish. Clean up any debris or dust before using the drilled hole for its intended purpose.
Remember to take your time and proceed with caution when drilling plexiglass. By following these step-by-step instructions and using the right tools and techniques, you can safely create a hole without compromising the integrity of the material.
Understanding Plexiglass
Plexiglass, also known as acrylic glass or Perspex, is a lightweight and shatter-resistant material that is commonly used as a substitute for glass. It is made from a thermoplastic polymer called polymethyl methacrylate (PMMA). Plexiglass has several properties that make it popular in various industries, including construction, automotive, and signage.
Here are a few key characteristics of plexiglass:
- Transparency: Plexiglass is highly transparent, allowing for excellent light transmission. This makes it ideal for applications where visibility is important, such as windows, display cases, and picture frames.
- Durability: Despite being lightweight, plexiglass is incredibly durable and resistant to impact. It is much more resistant to shattering than traditional glass, making it a safer option in certain settings.
- Weather Resistance: Plexiglass has excellent weather resistance and can withstand exposure to UV rays without yellowing or degrading over time. This makes it suitable for outdoor applications such as signage and architectural glazing.
- Easy to Work With: Plexiglass is relatively easy to cut, shape, and drill, making it a versatile material for various DIY projects. However, it does require some special considerations when it comes to drilling to avoid cracking or chipping.
It is important to note that plexiglass can vary in thickness, so it is essential to select the right drill bit and drilling technique based on the specific thickness of the material you are working with. Additionally, taking appropriate safety precautions, such as wearing protective eyewear and gloves, is essential when working with plexiglass to minimize the risk of injury.

In the following sections, we will discuss step-by-step how to safely drill a hole in plexiglass, including the necessary tools and techniques to achieve clean and precise results.
Gathering the Necessary Tools
Before you begin drilling a hole in plexiglass, it’s important to gather all the necessary tools to ensure a safe and successful process. Here is a list of tools you will need:
- Safety glasses: Always wear safety glasses to protect your eyes from any flying debris or shards.
- Face mask: A face mask will help prevent inhalation of any particles that may be released during the drilling process.
- Drill: Use a drill with adjustable speed settings and a sharp drill bit.
- Drill bit: Choose a drill bit specifically designed for plexiglass, such as a twist drill bit or a brad point bit.
- Masking tape: Secure a piece of masking tape over the area where you will be drilling to prevent any cracking or chipping.
- Clamps: Use clamps to secure the plexiglass in place and prevent it from moving during drilling.
- Spray bottle with water: Keep a spray bottle filled with water nearby to cool down the drill bit and plexiglass as you drill.
- Sandpaper: You may need sandpaper to smooth down any rough edges after drilling.
Having all these tools ready before you start will help ensure that the drilling process goes smoothly and that you can work safely and efficiently with plexiglass.
Measuring and Marking the Hole
Before you begin drilling into your plexiglass, it’s important to measure and mark the hole accurately. This will ensure that your hole is in the desired location and the correct size. Follow these steps to properly measure and mark the hole:
- Place the plexiglass sheet on a flat surface, such as a workbench or table.
- Using a tape measure or ruler, measure the dimensions of the hole you want to drill. Take note of the width, length, and depth.
- Make light pencil marks on the plexiglass to indicate the perimeter of the hole.
- If necessary, use a straightedge or T-square to ensure that the marks are straight and aligned.
- Double-check the measurements and marks to ensure accuracy.
- If you are drilling multiple holes, it may be helpful to label each mark with a corresponding number or letter.
By carefully measuring and marking the hole, you will reduce the chance of making mistakes during the drilling process. Accurate measurements will result in a clean and precise hole in your plexiglass sheet.

Preparing the Drill and Bit
Before you begin drilling into plexiglass, it’s important to properly prepare your drill and bit to ensure a safe and clean hole. Follow these steps:
- Choose the right drill bit: Plexiglass is a type of acrylic plastic, so you’ll need a drill bit specifically designed for drilling into plastic. Look for a drill bit labeled “acrylic” or “plexiglass”. These bits usually have a sharp point and are made from carbide or high-speed steel.
- Select the appropriate bit size: The size of your hole will depend on the specific project you’re working on. Measure the diameter of the hole you need and select a drill bit of the corresponding size. It’s always better to start with a smaller bit and gradually increase the size if needed.
- Secure the drill bit: Insert the selected drill bit into the chuck of your drill, making sure it is held securely in place. Tighten the chuck to secure the bit, but be careful not to overtighten as this can damage the bit.
- Check the drill speed: Plexiglass is prone to melting if drilled at high speeds. Set your drill to a low or medium speed to avoid overheating the plastic. If your drill has adjustable speed settings, consult the manufacturer’s instructions for the recommended speed for drilling plastic materials.
- Prepare a backup surface: Position a scrap piece of wood or plastic underneath the plexiglass to provide support and prevent chipping or cracking. This backup surface also helps to prevent the drill bit from punching through and damaging the workbench or surface beneath the plexiglass.
Applying the Right Amount of Pressure
When drilling a hole in plexiglass, it is crucial to apply the right amount of pressure to prevent cracking or shattering. Here are some tips on how to apply the correct pressure:
- Start with low pressure: Begin by applying gentle pressure to the drill bit. Plexiglass is a delicate material, so it is important to start slowly and gradually increase the pressure.
- Use a steady hand: Keep a firm grip on the drill and use your other hand to support the plexiglass. This will help prevent vibrations and ensure a more precise drilling process.
- Let the drill bit do the work: Avoid pushing or forcing the drill bit through the plexiglass. Instead, allow the sharpness of the bit to cut through the material gradually. Applying too much pressure can cause the plexiglass to crack.
- Ensure proper lubrication: Lubricating the drill bit with water or a lubricant designed for plexiglass can reduce friction and heat, making it easier to drill through the material. Apply the lubricant periodically as you drill to keep the bit cool and prevent melting.
- Take breaks if needed: If you feel the drill bit starting to get too hot or the plexiglass beginning to melt, take short breaks to allow the material and the drill bit to cool down. This will help prevent damage to both the plexiglass and the drill.
By following these tips and applying the right amount of pressure, you can safely drill a hole in plexiglass without the risk of cracking or damaging the material.
Drilling the Hole
Step 1: Gather your materials
Before you begin, make sure you have all the necessary materials:

- Plexiglass sheet
- Power drill
- Drill bit suitable for use on plexiglass
- Masking tape
- Clamps
- Ruler or measuring tape
- Marker or pencil
- Safety goggles
- Gloves
Step 2: Mark the hole
Use a ruler or measuring tape to determine the exact spot where you want to drill the hole. Mark this spot on the plexiglass with a marker or pencil. Double-check your measurements to ensure accuracy.
Step 3: Prepare the plexiglass
Place the plexiglass sheet on a flat surface. Use clamps to secure it in place if necessary. It’s important to have a stable surface to work on.
Step 4: Apply masking tape
Before drilling, it’s a good idea to apply masking tape directly over the area where you will be drilling the hole. This will help prevent the plexiglass from cracking or chipping during the drilling process.
Step 5: Select the right drill bit
Choose a drill bit that is specifically designed for drilling into plexiglass. These drill bits are often made of carbide or have a special coating to reduce the risk of cracking or shattering the material.
Step 6: Put on safety gear
Before you start drilling, put on safety goggles and gloves to protect your eyes and hands from any potential flying debris.

Step 7: Start drilling
Line up the drill bit with the marked spot on the plexiglass. Hold the drill perpendicular to the surface of the plexiglass. Begin drilling slowly, applying gentle and steady pressure.
Step 8: Maintain a consistent speed
As you drill, make sure to maintain a consistent speed. Avoid stopping and starting abruptly, as this can cause the plexiglass to crack. Continuous and even pressure will help prevent any damage.
Step 9: Clean the hole
Once the hole is drilled, remove the masking tape and clean away any debris that may have accumulated around the hole. You can use a soft cloth or a brush to carefully clean the area.
Step 10: Test the hole
After drilling, it’s a good practice to test the hole by inserting a screw or other fastener to ensure it fits properly. This will help identify any issues or necessary adjustments.
Step 11: Remove any sharp edges
If there are any sharp or rough edges around the hole, use sandpaper or a file to smooth them out. This will help prevent any accidental cuts or injuries when handling the plexiglass.
Step 12: Safety first
Remember to always prioritize safety when drilling holes in plexiglass or any other material. Follow manufacturer guidelines, wear appropriate safety gear, and take necessary precautions to avoid accidents or injuries.
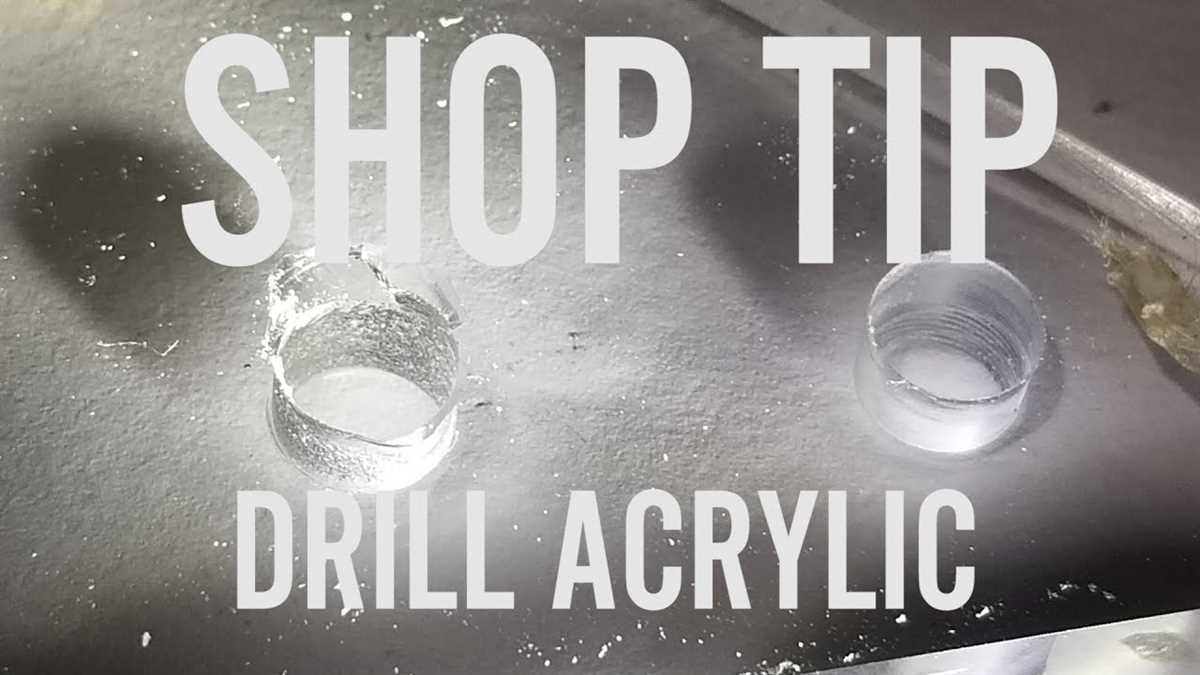
Preventing Cracks and Chips
When drilling a hole in plexiglass, it’s important to take precautions to prevent cracks and chips. Plexiglass is a delicate material that can easily crack or chip if not handled properly.
Choose the Right Drill Bit
Choosing the right drill bit is crucial in preventing cracks and chips. Opt for a drill bit that is specifically designed for drilling through plexiglass or other similar materials. Avoid using standard twist drill bits, as they can cause the plexiglass to crack or chip.
Use Pilot Holes
Before drilling the actual hole, it is recommended to create a pilot hole. A pilot hole is a small hole that is drilled first to guide the drill bit when drilling the larger hole. By using a pilot hole, you can reduce the risk of cracks and chips.
Secure the Plexiglass
Secure the plexiglass firmly in place before drilling. You can use clamps or a vise to hold it securely, ensuring that it remains stable throughout the drilling process. This will help prevent the plexiglass from flexing or vibrating, which can lead to cracks or chips.
Drill at a Slow Speed
When drilling through plexiglass, it’s important to use a slow speed setting on your drill. High speeds can generate excess heat, which can cause the plexiglass to melt or crack. By using a slow speed setting, you can minimize the risk of damage and preserve the integrity of the plexiglass.
Apply Constant Pressure
Apply a gentle and constant pressure when drilling the hole. Avoid applying excessive force, as this can increase the risk of cracks and chips. Let the drill bit do the work and allow it to cut through the plexiglass at its own pace.
Use Cooling Lubricant
To further prevent cracks and chips, you can use a cooling lubricant while drilling. This can help dissipate heat and reduce friction, making the drilling process smoother and safer for the plexiglass. Spray the cooling lubricant onto the drill bit periodically to keep it cool and lubricated.
Keep the Work Surface Clean
Keep the work surface clean and free from debris. Any small particles or debris can cause the drill bit to wander or catch, leading to cracks or chips in the plexiglass. Clean the work surface before drilling and periodically during the drilling process to ensure a smooth and successful outcome.
Work in a Stable Environment
Lastly, make sure you are working in a stable environment. Avoid drilling on unstable surfaces or in areas with excessive vibrations, as this can increase the risk of accidents. Find a stable workbench or table to set up your drilling station, and make sure to wear appropriate safety equipment, such as safety glasses and gloves.
Cleaning up and Finishing
Cleaning the Plexiglass
Once you have successfully drilled the hole in your plexiglass, it is important to clean up any debris or dust that may have accumulated on the surface. This will help ensure that the finished result is clean and professional-looking.
- Start by wiping down the plexiglass with a soft, lint-free cloth to remove any loose particles.
- Next, dampen a clean cloth with a mild, non-abrasive cleaner or isopropyl alcohol.
- Gently wipe the surface of the plexiglass, paying close attention to the area around the drilled hole.
- Finally, dry the plexiglass with a clean, dry cloth to remove any remaining moisture.
Polishing the Edges
Drilling plexiglass can sometimes leave rough edges around the hole. To achieve a smooth and polished finish, you can follow these steps:
- Start by using a fine-grit sandpaper or sanding block to gently sand down any rough edges around the hole.
- Work in small, circular motions to gradually smooth out the edges.
- Next, switch to a finer grit sandpaper and repeat the sanding process to further refine the edges.
- Once the edges are smooth, you can use a plastic polish or rubbing compound to add a glossy finish to the area around the hole.
- Apply a small amount of the polish to a soft cloth and gently buff the area in a circular motion.
- Continue buffing until the surrounding surface is smooth and shiny.
Protective Measures
After cleaning and finishing the drilled hole in the plexiglass, it is a good idea to take some protective measures to ensure its longevity:
- Consider applying a thin layer of acrylic sealant or adhesive around the hole to reinforce the area.
- Use a clear acrylic adhesive to ensure that the sealant blends in with the plexiglass.
- Avoid placing excessive pressure or weight on the hole to prevent cracking or damage.
- If applicable, install any necessary fittings or hardware to securely fasten objects to the hole.
- Regularly inspect the drilled hole and the surrounding area for any signs of wear or damage.
Conclusion
By following these cleaning and finishing steps, you can ensure that your drilled hole in plexiglass looks clean, professional, and is well-protected. Remember to take your time during the process and prioritize safety to achieve the best results.
FAQ:
What is plexiglass?
Plexiglass, also known as acrylic glass, is a transparent and lightweight material that is commonly used as a substitute for glass in various applications.
What are the advantages of using plexiglass?
There are several advantages of using plexiglass. Firstly, it is more durable and impact-resistant than glass. Secondly, it is lighter in weight, making it easier to handle and install. Lastly, plexiglass is more resistant to weathering and UV radiation, making it ideal for outdoor applications.
Why is it important to drill a hole in plexiglass safely?
It is important to drill a hole in plexiglass safely to prevent the material from cracking or shattering. Plexiglass is more prone to damage compared to glass, so drilling it improperly can result in irreparable damage. Following the proper drilling techniques will ensure that the hole is made smoothly and without any harm to the plexiglass.
Video:


Meet Harrison Clayton, a distinguished author and home remodeling enthusiast whose expertise in the realm of renovation is second to none. With a passion for transforming houses into inviting homes, Harrison's writing at https://thehuts-eastbourne.co.uk/ brings a breath of fresh inspiration to the world of home improvement. Whether you're looking to revamp a small corner of your abode or embark on a complete home transformation, Harrison's articles provide the essential expertise and creative flair to turn your visions into reality. So, dive into the captivating world of home remodeling with Harrison Clayton and unlock the full potential of your living space with every word he writes.