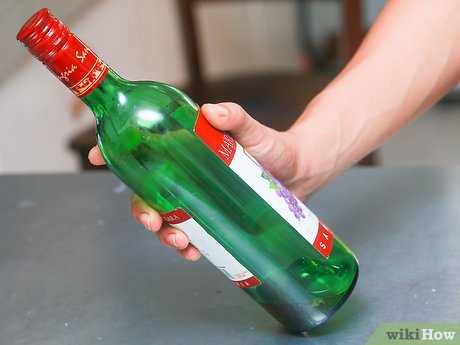
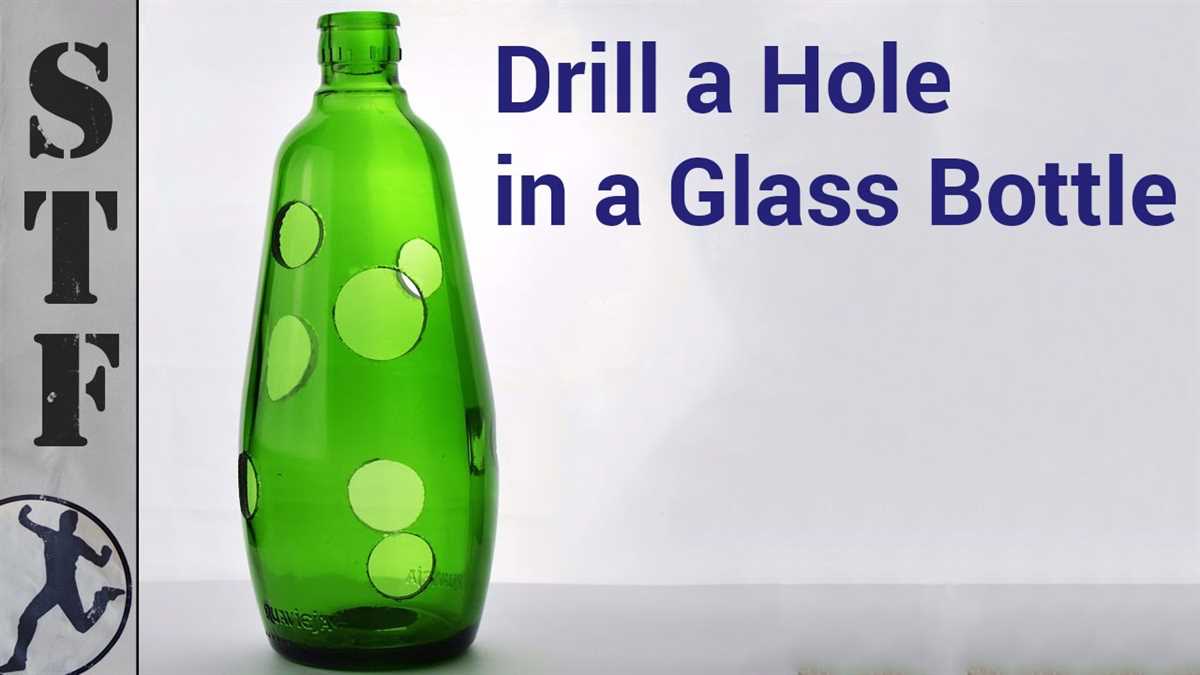
How to Safely Drill a Hole in a Glass Bottle

If you’ve ever wanted to turn a glass bottle into a decorative piece or repurpose it for a DIY project, drilling a hole in it can open up a world of possibilities. However, drilling into glass can be a delicate process that requires patience and the right tools. In this guide, we’ll walk you through the steps to safely drill a hole in a glass bottle, allowing you to create unique and personalized items for your home or as gifts.
Step 1: Gather the necessary materials
Before you begin, make sure you have all the necessary materials on hand. You’ll need a glass bottle, a diamond drill bit specifically designed for glass, a power drill, a bucket of water, and a piece of scrap wood or rubber mat to use as a base.
Step 2: Prepare the bottle
Clean the bottle thoroughly to remove any dirt or debris. Then, fill it with water, ensuring that the area you plan to drill into is completely submerged. This helps to keep both the drill bit and the glass cool during the drilling process, reducing the risk of cracking or shattering.

Step 3: Set up your work area
Place the piece of scrap wood or rubber mat on a stable surface. This will serve as a base to prevent the glass bottle from moving or rolling while you drill. Make sure the work area is well-lit and free of any distractions to ensure your safety.
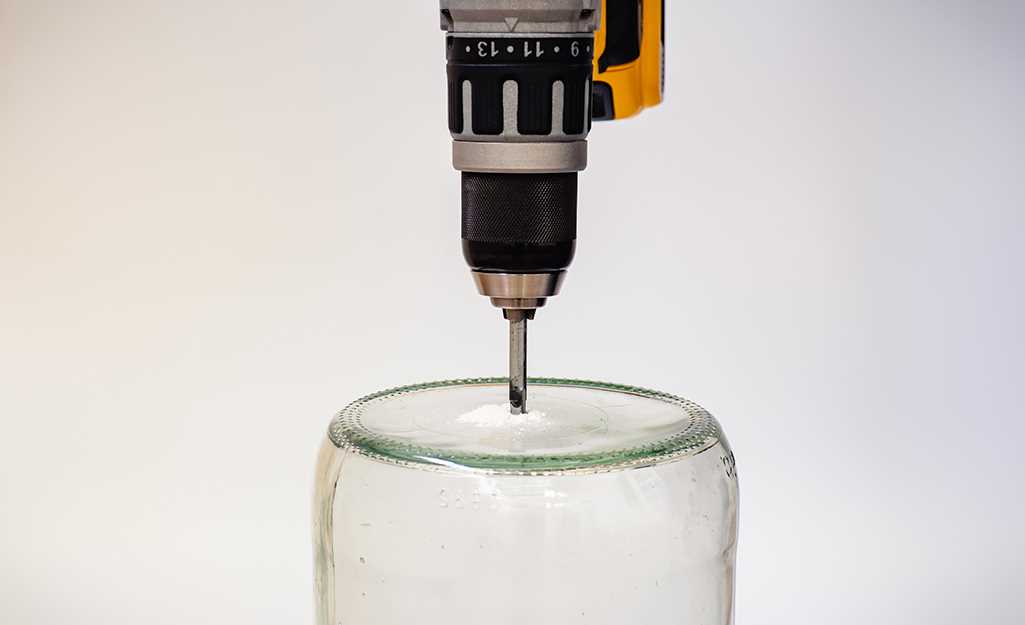
Step 4: Start drilling
Begin by setting your drill to a low speed and applying light pressure to the glass bottle. Start at a slight angle to create a groove, then gradually increase the angle until you’re drilling straight into the glass. Keep the drill bit wet by dipping it into the bucket of water frequently.
Step 5: Take breaks and check your progress

Drilling through glass can be a slow and precise process. Take breaks every few seconds to let the drill bit cool down and assess your progress. You should be able to see a small hole starting to form. If you notice any cracks or signs of stress in the glass, immediately stop drilling and seek professional assistance.
Step 6: Finishing touches
Once you’ve successfully drilled a hole in the glass bottle, remove it from the water and let it dry. You can now use the hole to insert a wire, string, or any other suitable material to create a hanging ornament or a vase for flowers. Remember to sand down the edges of the hole to ensure a smooth finish and reduce the risk of injury.
With these steps, you can safely and successfully drill a hole in a glass bottle. Remember to take your time, be patient, and always prioritize safety. Now, let your creativity flow and enjoy transforming ordinary glass bottles into stunning pieces of art or functional items for your home.
Safely Drill Glass Bottles: A Step-by-Step Guide

Introduction
Drilling a hole in a glass bottle may seem like a daunting task, but with the right tools and techniques, it can be done safely and effectively. In this step-by-step guide, we will walk you through the process of drilling a hole in a glass bottle, ensuring that you achieve the desired result without any accidents or damage to the bottle.
Materials and Tools
Before you begin, gather the following materials and tools:
- Glass bottle
- Safety goggles
- Marker or tape
- Drill
- Diamond hole saw or glass drill bit
- Lubricant (such as water or oil)
- Clamp
- Protective gloves
- Sandpaper or file
Step 1: Prepare the Bottle
Start by cleaning the bottle thoroughly to remove any dirt or residue. Dry it completely before proceeding. Then, place a strip of tape or mark the desired location for the hole with a marker. This will serve as a guide during the drilling process.
Step 2: Secure the Bottle
Use a clamp to secure the bottle in place. This will prevent it from slipping or moving during drilling, ensuring your safety and accuracy.
Step 3: Wear Safety Gear
Put on safety goggles and protective gloves to protect your eyes and hands from any potential debris or accidents.

Step 4: Lubricate the Bottle
Apply a lubricant, such as water or oil, to the area where you will be drilling. This will help to keep the drill bit cool and prevent the glass from cracking or shattering due to heat buildup.
Step 5: Begin Drilling
Slowly start drilling at a low speed, using light pressure. Make sure to keep the drill bit perpendicular to the bottle’s surface to avoid creating an uneven or slanted hole. Take breaks if needed to allow the drill bit and bottle to cool down.
Step 6: Clean and Smooth the Hole
Once the hole is drilled, remove the bottle from the clamp and clean off any remaining debris. Use sandpaper or a file to smooth the edges of the hole, making it safe to touch and handle.
Step 7: Test the Hole
Before using the bottle for its intended purpose, test the hole by inserting the desired object. Ensure that the hole is the correct size and that there are no sharp edges that could cause harm.
Conclusion
By following these step-by-step instructions, you can safely drill a hole in a glass bottle. Remember to take your time, wear the appropriate safety gear, and work cautiously to achieve the best results. Now you can enjoy crafting or repurposing glass bottles with ease!

Preparing for the Drill
When drilling a hole in a glass bottle, it is important to take certain precautions to ensure your safety and the success of your project. Here are some steps to follow before you start drilling:
- Gather the necessary safety gear: Before starting the drilling process, make sure to wear protective goggles and gloves. Glass shards can be dangerous, so it is crucial to protect your eyes and hands.
- Choose the right drill bit: Use a diamond or glass drill bit specifically designed for drilling through glass. These drill bits have a specialized design that can handle the hard surface of glass without causing cracks or shattered areas.
- Select a suitable work area: Find a flat and stable surface to work on. Make sure you have enough space to move around with the drill without bumping into anything.
- Prepare a stable support for the bottle: To prevent the glass bottle from moving or rolling during the drilling process, place it on a stable platform. You can use a cloth or foam pad to provide some cushioning.
- Mark the spot for drilling: Use a marker or tape to mark the exact spot where you want to drill the hole. This will help you stay on track during the drilling process.
- Secure the bottle: Before drilling, ensure the bottle is securely held in place. You can use clamps or a vice to hold the bottle steady, making it easier to drill without any wobbling or movement.
- Have a water source nearby: Glass can heat up quickly during the drilling process, which can cause cracks or fractures. To prevent this, it is important to keep the glass cool by using water as a lubricant. Have a small spray bottle or a container of water nearby to spray onto the drilling area as needed.
- Take your time and be patient: When drilling through glass, it is crucial to work slowly and steadily. Apply gentle pressure and let the drill bit do the work, rather than forcing it. Rushing the process or applying too much pressure can increase the risk of breaking the glass.
By following these steps and taking the necessary precautions, you can safely and successfully drill a hole in a glass bottle without any accidents or damage to the glass.
Gathering the Necessary Tools
- A glass bottle
- A water basin
- A drill
- A diamond drill bit suitable for glass
- Clamps or a vise
- A mask and safety goggles
- A lubricant or coolant, such as water or oil
Before you begin drilling a hole in a glass bottle, it’s important to gather all the necessary tools. Here is a list of the tools you will need:
- Glass bottle: Choose a glass bottle that you want to drill a hole into. Make sure it is clean and free from any labels or stickers.
- Water basin: Prepare a water basin or container to hold the bottle while you drill. This will help to keep the glass cool and prevent it from cracking or shattering.
- Drill: Use a regular handheld drill for this task. Make sure it is in good working condition and has a secure grip.
- Diamond drill bit: Use a diamond drill bit specifically designed for glass. These drill bits are more effective at cutting through glass without causing damage.
- Clamps or a vise: Secure the bottle in place using clamps or a vise. This will prevent it from moving or rolling while you drill.
- Mask and safety goggles: Wear a mask to prevent inhaling any glass dust or debris, and safety goggles to protect your eyes from any flying shards.
- Lubricant or coolant: Use a lubricant or coolant, such as water or oil, to keep the drill bit and glass cool during drilling. This will reduce the risk of overheating and cracking the glass.
Once you have gathered all the necessary tools, you are ready to move on to the next step: preparing the bottle for drilling.
Marking the Drilling Spot
Before you start drilling a hole in a glass bottle, it is important to mark the exact spot where the hole needs to be made. This will ensure accuracy and prevent any potential damage to the bottle.
Here are some steps to help you mark the drilling spot:
- Clean the bottle: Make sure the glass bottle is clean and free from any dirt or residue. This will allow you to see the surface clearly and make accurate markings.
- Measure and plan: Determine where you want the hole to be drilled on the bottle. You can use a measuring tape to mark the exact distance from the base or the top of the bottle.
- Use a marker or tape: Once you have determined the drilling spot, use a permanent marker or a piece of tape to make a clear and visible mark on the bottle. This will serve as a guide during the drilling process.
Tips:
- Make sure the marked spot is centered and level on the bottle to ensure a straight and even hole.
- If you are drilling multiple holes, it can be helpful to create a template using a piece of paper or cardboard. This will allow you to easily replicate the drilling spot on multiple bottles.
- Consider using a low-tack painter’s tape if you are concerned about leaving a permanent mark on the bottle. This can be easily removed after drilling.
By properly marking the drilling spot, you can ensure a successful and safe drilling process on a glass bottle.
Protecting Yourself and the Bottle
1. Wear Protective Gear
Before you begin drilling, it’s important to protect yourself by wearing the appropriate gear. This includes:
- Safety glasses or goggles to protect your eyes from flying debris
- Gloves to protect your hands from broken glass
- A dust mask or respirator to avoid inhaling glass particles
2. Choose the Right Drill Bit
Choosing the right drill bit is crucial to prevent damage to the glass bottle. Use a diamond-tipped drill bit or a carbide drill bit specifically designed for drilling into glass. These bits are more durable and less likely to break the glass.
3. Secure the Bottle
It’s important to secure the glass bottle in place to prevent it from moving or rolling during the drilling process. Consider using a vise or clamp to hold the bottle steady or place it on a non-slip surface.
4. Start with a Pilot Hole
Before drilling the final hole, it’s recommended to start with a smaller pilot hole. This will help guide the larger drill bit and reduce the risk of the glass cracking or shattering. Start with a 1/8 inch drill bit and gradually increase the size if necessary.
5. Use Water as Lubricant
Drilling glass can generate heat, which can increase the likelihood of the glass breaking. To reduce heat and friction, use water as a lubricant while drilling. Keep a small container of water nearby and dip the drill bit into it periodically while drilling.
6. Drill Slowly and Gently
When drilling into glass, it’s important to apply gentle, steady pressure. Avoid pushing too hard or drilling too quickly, as this can increase the risk of the glass breaking. Use a slow speed setting on your drill and let the drill bit do the work.
7. Clean the Glass
Once you have successfully drilled the hole, clean the glass bottle thoroughly. Use a damp cloth or sponge to remove any glass particles or debris that may have accumulated on the surface.
8. Dispose of Broken Glass Safely
Dispose of any broken glass or glass shards safely to prevent injuries. Place them in a sturdy bag or container and dispose of them, following your local waste disposal guidelines. Do not throw broken glass into regular trash bins.
9. Practice Caution
Always exercise caution when working with glass. If you’re unsure or uncomfortable, it’s best to seek assistance from a professional or someone with experience in drilling glass bottles.
Drilling the Hole
Before you begin drilling the hole in the glass bottle, it’s important to gather all the necessary tools and materials. Here’s what you’ll need:
- Safety goggles
- Glass drill bit
- Electric drill
- Masking tape
- Water or lubricant
Once you have everything ready, follow these steps:
- Put on your safety goggles to protect your eyes from any flying glass debris.
- Cover the area of the bottle where you want to drill the hole with masking tape. This will help prevent the glass from cracking or breaking during the drilling process.
- Fill a small container with water or lubricant, as this will help keep the drill bit cool and prevent the glass from shattering.
- Place the glass bottle on a stable surface, such as a workbench or table.
- Align the drill bit with the center of the masking tape on the bottle.
- Hold the electric drill firmly and begin drilling at a slow speed. Apply gentle pressure on the bottle, but be careful not to press too hard, as this may cause the glass to break.
- Continue drilling slowly and steadily until the drill bit penetrates the glass.
- Once the hole is drilled, remove the masking tape and wipe away any debris or excess lubricant.
Remember to always use caution when drilling glass, as it can be a delicate material. Take your time and follow these steps carefully to ensure a safe and successful drilling process.
Cooling the Bottle
After you have marked the spot where you want to drill the hole, it is important to cool the glass bottle to prevent it from cracking or shattering while drilling. Glass is a delicate material and can easily be damaged by heat, so this step is crucial to ensure the safety of the drilling process.
Here are some methods to cool the glass bottle:
- Ice Bath: Fill a container, such as a sink or a bucket, with cold water and add ice cubes. Submerge the glass bottle in the ice bath, making sure that the marked spot is completely covered. Leave the bottle in the water for a few minutes to cool down.
- Running Water: Alternatively, you can run cold tap water over the designated spot on the bottle. Hold the bottle securely and position it under the running water, allowing the cool water to flow over the area. Continue running the water for a few minutes until the bottle feels cool to the touch.
- Freezer: Another method is to place the glass bottle in the freezer for about 30 minutes. Make sure the bottle is stable and won’t tip over during this time. The extremely low temperature of the freezer will cool down the glass, minimizing the risk of cracking or shattering.
Remember to always handle the glass bottle with care, as cooling it does not guarantee that it won’t crack during drilling. Take your time and use gentle pressure when drilling to reduce the risk of damaging the bottle.
Finishing Touches
Once you have drilled the hole in your glass bottle, there are a few finishing touches you can add to enhance the overall appearance and functionality of the bottle.
Sanding the edges
After drilling a hole in the glass bottle, the edges may be rough or sharp. Use sandpaper to carefully sand down the edges. Start with a rough grit sandpaper and gradually work your way up to a finer grit. This will help smooth out the edges and make them safer to handle.
Cleaning the bottle
Before using your glass bottle, it’s important to clean it thoroughly. Rinse it with warm soapy water and scrub the inside and outside of the bottle. This will remove any debris or residue that may have accumulated during the drilling process.
Adding a sealant
If you plan on using the bottle for liquids, it’s a good idea to add a sealant to prevent any leakage. Silicone or epoxy sealants are commonly used for this purpose. Apply a small bead of sealant around the drilled hole, making sure to cover the entire area. Allow the sealant to fully cure before using the bottle.
Decorating the bottle
If you want to add a personal touch to your glass bottle, consider decorating it. You can use glass paint, markers, or even etching cream to create designs or add labels. Be creative and make your bottle unique to your style.
Using a cork or stopper
If the hole you drilled is large enough, you can use a cork or stopper to seal the bottle. Measure the diameter of the hole and choose a cork or stopper that fits securely. This will not only seal the bottle, but also add a decorative touch.
By following these finishing touches, you can ensure that your drilled glass bottle is safe, functional, and aesthetically pleasing. Remember to always wear protective gear while working with glass and exercise caution to avoid injuries.
Safety Tips and Precautions
Drilling a hole in a glass bottle can be a delicate task, so it’s important to take certain safety precautions to prevent accidents and injuries. Here are some safety tips to keep in mind when working with glass bottles:
- Protective Gear: Always wear safety goggles or glasses to protect your eyes from flying glass shards. Additionally, wearing gloves can help prevent cuts from broken glass.
- Work Area: Set up your work area in a well-ventilated space and ensure there is enough room to move around comfortably. Clear any clutter and ensure that there are no flammable materials nearby.
- Stabilize the Bottle: Before drilling, make sure the bottle is stable and won’t roll or move around. You can use a clamp or secure the bottle using a sturdy object.
- Use the Right Tools: Choose a drill bit specifically designed for glass or tile. These drill bits have a carbide or diamond tip that can withstand the hardness of glass without shattering it.
- Slow and Gentle Pressure: Apply slow and gentle pressure when drilling the hole. Using too much force or drilling too quickly can cause the glass to crack or shatter.
- Cooling and Lubrication: To prevent overheating and cracking, apply a lubricant, such as water or oil, to the drilling area. This will help keep the glass and drill bit cool.
- Take Breaks: If you’re drilling multiple holes or working on a large project, take breaks regularly to avoid fatigue. Working with tired hands can increase the risk of accidents.
- Proper Disposal: After you’re done drilling, carefully dispose of any broken glass or glass shards. Seal them in a sturdy container and label it as “Broken Glass” to prevent accidents.
Remember, drilling a hole in a glass bottle requires patience and caution. By following these safety tips and taking the necessary precautions, you can safely complete your project without any mishaps.
FAQ:
What tools do I need to safely drill a hole in a glass bottle?
To safely drill a hole in a glass bottle, you will need a glass drill bit, a power drill, masking tape, safety goggles, and a spray bottle filled with water.
What is the best type of drill bit to use for drilling glass?
The best type of drill bit to use for drilling glass is a diamond-tipped glass drill bit. These drill bits are specifically designed to prevent the glass from breaking or cracking during the drilling process.
Can I use a regular drill bit to drill a hole in a glass bottle?
No, it is not recommended to use a regular drill bit to drill a hole in a glass bottle. Regular drill bits are not designed for drilling through glass and can cause the glass to shatter or crack.
How do I prevent the glass from breaking while drilling?
To prevent the glass from breaking while drilling, you can use masking tape to create a small “X” over the spot where you want to drill the hole. This will help to distribute the pressure and reduce the risk of the glass cracking. Additionally, spraying water on the drilling area while drilling will help to lubricate the glass and keep it cool, reducing the risk of cracking.
What safety precautions should I take when drilling a hole in a glass bottle?
When drilling a hole in a glass bottle, it is important to take several safety precautions. First, always wear safety goggles to protect your eyes from any flying glass particles. Second, make sure to securely clamp the bottle in place to prevent it from moving while drilling. Lastly, be sure to work slowly and steadily, applying gentle pressure to avoid putting too much stress on the glass.
Is it possible to drill a hole in a glass bottle without cracking it?
Yes, it is possible to drill a hole in a glass bottle without cracking it if you use the proper tools and techniques. Using a diamond-tipped glass drill bit, applying masking tape and spraying water on the drilling area can help to reduce the risk of cracking. However, it is always important to proceed with caution and work slowly to minimize the chances of the glass breaking.
Video:


Meet Harrison Clayton, a distinguished author and home remodeling enthusiast whose expertise in the realm of renovation is second to none. With a passion for transforming houses into inviting homes, Harrison's writing at https://thehuts-eastbourne.co.uk/ brings a breath of fresh inspiration to the world of home improvement. Whether you're looking to revamp a small corner of your abode or embark on a complete home transformation, Harrison's articles provide the essential expertise and creative flair to turn your visions into reality. So, dive into the captivating world of home remodeling with Harrison Clayton and unlock the full potential of your living space with every word he writes.


