How to Replace a Drill Bit: Step-by-Step Guide

Replacing a drill bit is a simple process that any DIYer or homeowner should know. Whether you’re looking to upgrade to a new bit for a specific project or just need to replace a worn-out bit, this step-by-step guide will walk you through the process.
Step 1: Safety First
Before you begin, always make sure to turn off the power to your drill and unplug it from the outlet. This will help prevent accidents or injuries while replacing the drill bit.
Step 2: Loosen the Chuck
The chuck is the part of the drill that holds the bit in place. To loosen the chuck, hold onto the handle of the drill with one hand and twist the chuck counterclockwise with your other hand. You may need to use a chuck key or a pair of pliers to help loosen it.
Step 3: Remove the Old Bit
Once the chuck is loose, you can remove the old drill bit by pulling it straight out. Be sure to handle the bit with caution, as it may still be hot after use. Set the old bit aside or dispose of it properly.
Step 4: Insert the New Bit

Take your new drill bit and align the shank with the jaws of the chuck. Push the bit into the chuck as far as it will go. Then, tighten the chuck by twisting it clockwise until it feels secure. Avoid over-tightening, as this can damage the chuck or the bit.
Step 5: Test the Bit
Once the new bit is in place, plug in the drill and turn on the power. Test the bit by drilling a small hole into a scrap piece of wood or metal. If the bit is secure and functioning properly, you’re ready to start your project!
By following these simple steps, you can easily replace a drill bit and ensure that your drill is always ready for the next task at hand.
Prepare your drill
- Step 1: Turn off the drill and unplug it from the power source. Safety is important when working with power tools, so make sure the drill is not connected to any power source before starting the process of replacing the drill bit.
- Step 2: Remove the current drill bit. Depending on the type of drill you have, you may need to loosen a chuck or use a key to remove the bit. Refer to your drill’s instruction manual for specific instructions on how to remove the drill bit.
- Step 3: Inspect the chuck. Before inserting a new drill bit, make sure the chuck is clean and free of any debris. Dust or debris in the chuck can affect the grip and stability of the new bit.
- Step 4: Choose the right drill bit. Depending on the type of project you are working on, you may need a specific type or size of drill bit. It is important to use the correct drill bit for the job to ensure safety and effectiveness.
- Step 5: Lubricate the chuck. Applying a small amount of lubricant to the chuck can help improve the grip and ease the process of inserting and removing drill bits. Use a lubricant specifically designed for power tools.
Remove the current drill bit
Before you can replace the drill bit, you need to remove the current one. Follow these steps to do so:
- Disconnect the drill: Ensure that the drill is unplugged or the battery is removed to prevent any accidental starts.
- Check the chuck type: Determine whether your drill has a keyless chuck or a keyed chuck. Keyless chucks do not require a tool to loosen or tighten, while keyed chucks need a chuck key.
- Loosen the chuck: If your drill has a keyless chuck, hold the drill barrel firmly and rotate the chuck counterclockwise. For a keyed chuck, insert the chuck key into one of the holes on the side of the chuck and turn it counterclockwise to loosen the jaws.
- Remove the drill bit: As you loosen the chuck, the jaws will open. Pull out the current drill bit from the chuck by hand once it is loose enough.
If the drill bit is stuck, you may need to use a pair of pliers to grip the bit and twist it out of the chuck. Be careful not to damage the chuck or the drill bit while doing so. Once the bit is removed, you can proceed to install a new drill bit.

Choose the right replacement bit
When it comes to choosing the right replacement bit for your drill, there are several factors to consider. The type of work you will be doing, the material you will be drilling into, and the size of the hole you need to create all play a role in determining the best bit for the job. Here are a few things to keep in mind:
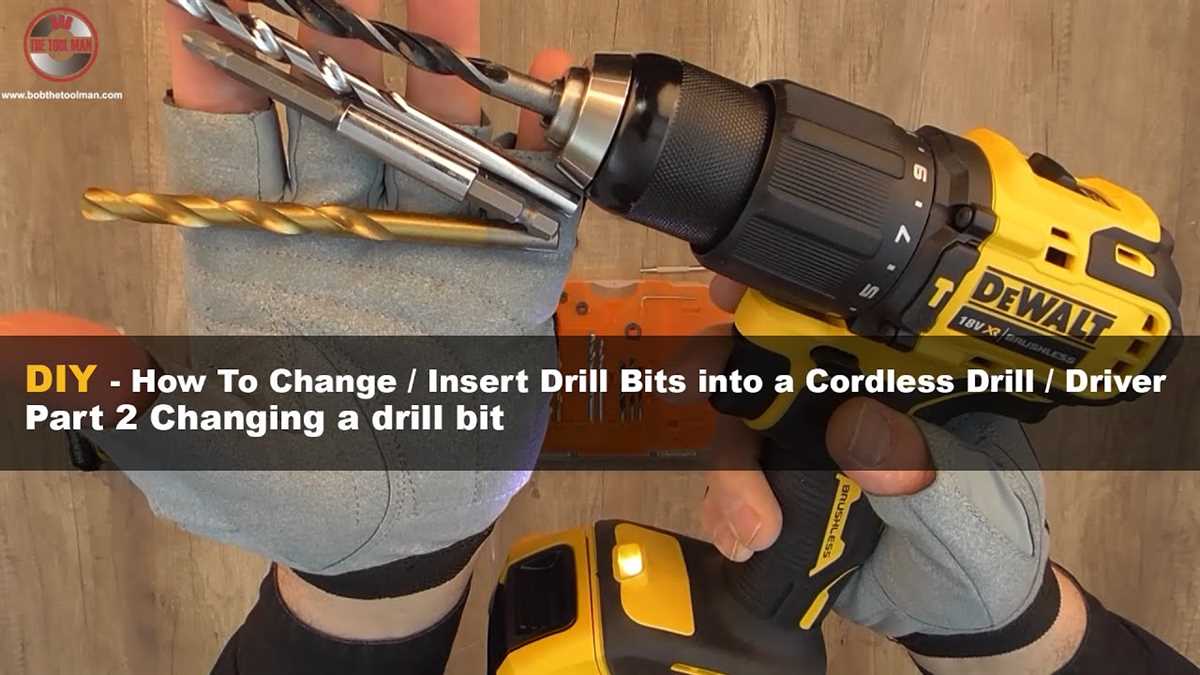
- Bit type: There are various types of drill bits available, such as twist bits, spade bits, paddle bits, and masonry bits, each designed for specific tasks and materials. Determine the type of bit that is most appropriate for the job you will be doing.
- Material: Consider the material you will be drilling into. For example, if you will be drilling into wood, a wood drill bit is the most suitable choice. On the other hand, if you will be drilling into metal or concrete, you will need a different type of bit specifically designed for those materials.
- Size: Drill bits come in various sizes, typically measured in inches or millimeters. Consider the size of the hole you need to create and choose a bit that matches that size.
- Quality: It’s important to choose a high-quality replacement bit that is made from durable materials. This will ensure that the bit is able to withstand the demands of your drilling tasks and will last for a long time.
By considering these factors and selecting the appropriate replacement bit, you can ensure that your drilling tasks are completed efficiently and effectively.
Prepare the replacement bit
Before you begin replacing the drill bit, you’ll need to gather a few tools and materials:
- A new drill bit that matches the size and type of the old bit
- A pair of gloves to protect your hands
- Safety glasses to protect your eyes
- A clean cloth or rag
Make sure the replacement bit is compatible with your drill. Check the label or the user manual of your drill to see the specific requirements for the drill bits.
Once you have everything ready, find a clean and well-lit area to work in. This will help you see what you’re doing and prevent accidents.

Insert the replacement bit
Once you have removed the old drill bit, it’s time to insert a new one. Follow these steps:
- Choose the appropriate replacement bit for your specific drilling needs. Make sure the new bit is compatible with your drill model.
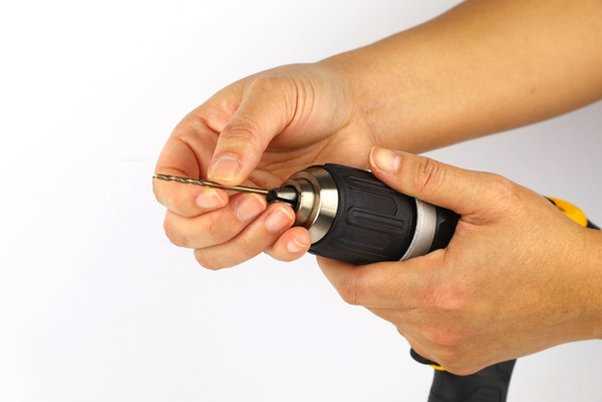
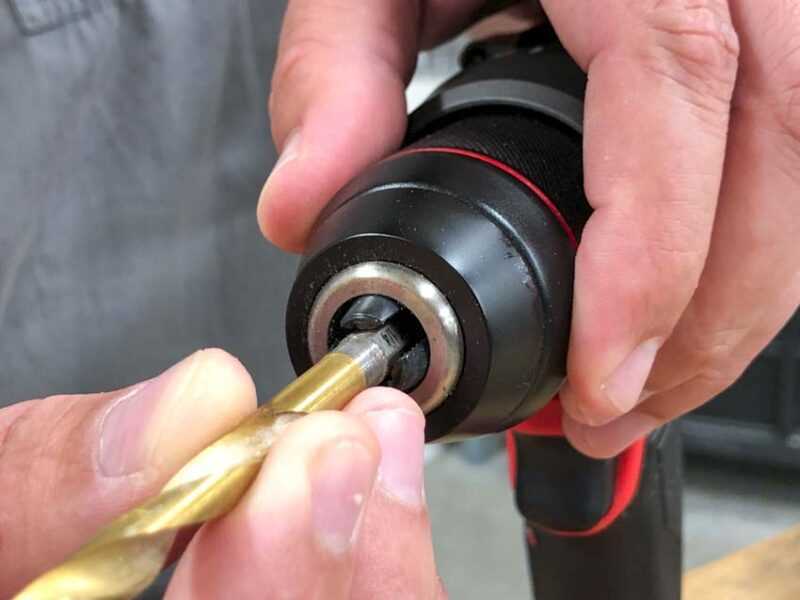
- Align the shank of the replacement bit with the chuck of your drill.
- Insert the bit into the chuck, ensuring that it is centered and fully seated.
- Tighten the chuck jaws securely around the bit using the chuck key or by hand if your drill has a keyless chuck.
- Give the bit a gentle tug to make sure it is securely held in place.
Important: Always make sure the drill is powered off and unplugged before inserting or changing a drill bit to avoid accidental injuries.
Once you have successfully inserted the replacement bit, you are ready to resume your drilling tasks with the proper tool for the job.
Take note of any specific instructions provided by the manufacturer for your drill model as the process may slightly differ between different brands and models.

Tighten the chuck
Once you have removed the old drill bit, it’s time to tighten the chuck to secure the new drill bit in place. Follow the steps below to properly tighten the chuck:
- Hold the drill with one hand, making sure your fingers are away from the chuck.
- Insert the new drill bit into the chuck, making sure it is lined up correctly with the jaws of the chuck.
- Rotate the chuck key clockwise to tighten the chuck. Make sure to apply enough pressure to securely hold the drill bit in place, but be careful not to overtighten.
- Once the chuck feels secure, give it a small twist in the opposite direction to ensure it is not loose.
- Double-check that the drill bit is straight and centered in the chuck before using the drill.
Remember to always refer to the manufacturer’s instructions for your specific drill model for any additional guidelines or precautions.
Test the new drill bit
Once you have successfully replaced the drill bit, it is important to test it before starting any drilling task. Testing the new drill bit will ensure that it is properly installed and functioning correctly.
Step 1: Secure the workpiece
Before testing the drill bit, make sure to secure the workpiece properly. This can be done by clamping it firmly to a workbench or using a vice grip, depending on the size and shape of the workpiece.
Step 2: Select an appropriate speed and torque setting

Refer to the user manual of your drill for guidance on selecting the appropriate speed and torque setting for the material you are drilling. This will help optimize the performance of the drill bit and prevent any damage to the workpiece.
Step 3: Mark the drilling location
Use a pencil or marker to mark the exact location where you want to drill. This will ensure accuracy and prevent any unnecessary mistakes during the drilling process.
Step 4: Drill a test hole
Start drilling a test hole at the marked location. Apply steady and even pressure on the drill while maintaining control. This will allow you to assess the performance of the new drill bit and check if it is drilling smoothly without any issues.
Step 5: Inspect the hole
After drilling the test hole, inspect it closely. Check for any signs of chipping, cracking, or rough edges. A clean and precise hole indicates that the new drill bit is working properly.
Step 6: Repeat if necessary
If you are satisfied with the performance of the new drill bit, you can proceed with your drilling task. However, if you notice any issues or are not happy with the results, repeat the process of replacing the drill bit and testing it again.
Remember, it is important to regularly inspect and replace drill bits as needed to maintain optimal performance and safety during your drilling tasks.
Properly store your drill bits
Properly storing your drill bits is essential to keeping them in good condition and easily accessible. By following the steps below, you can ensure that your drill bits are organized and ready to use when you need them.
Step 1: Clean your drill bits
Before storing your drill bits, it is important to clean them properly. Use a brush or cloth to remove any debris or dust that may have accumulated on the bits. This will help prevent corrosion and keep the bits in good working condition.
Step 2: Organize your drill bits
There are several ways to organize your drill bits depending on your preference and the space available. Here are a few options:
- Drill bit index: A drill bit index is a compact case that holds multiple drill bits in individual slots. This is a convenient option if you have a large collection of drill bits.
- Toolbox or tool chest: If you prefer to keep your drill bits with your other tools, a toolbox or tool chest with compartments or foam inserts can be a good choice. You can arrange your drill bits based on size or type.
- Wall-mounted storage: Wall-mounted storage options, such as a pegboard or magnetic strip, can be a space-saving solution. Hang your drill bits in order of size or type so that they are easy to find.
Step 3: Label your drill bits
To make it even easier to find the right drill bit, consider labeling each one. You can use a permanent marker or labels to indicate the size or type of drill bit. This will save you time and frustration when you are in the middle of a project.
Step 4: Store in a dry place
It is important to store your drill bits in a dry environment to prevent rust and corrosion. Avoid storing them in areas with high humidity or moisture. Consider using silica gel packets or a dehumidifier in your storage space to help keep your drill bits dry.
Step 5: Regularly inspect and maintain
Regularly inspect your drill bits for any signs of damage, wear, or dullness. If you notice any issues, replace or sharpen the drill bits as needed. Keeping your drill bits in good condition will ensure that they perform effectively and efficiently.
By properly storing your drill bits, you can extend their lifespan and always have the right bit at your fingertips. Follow these steps, and you’ll be ready for your next drilling project in no time.
FAQ:
What is a drill bit?
A drill bit is a cutting tool that is attached to a drill to create holes in various materials.
Why would I need to replace a drill bit?
You may need to replace a drill bit if it is worn out, damaged, or if you need to use a different type or size of bit for your project.
What tools do I need to replace a drill bit?
To replace a drill bit, you will need a pair of pliers or a chuck key (depending on the type of drill you have), a new drill bit, and possibly a screwdriver or Allen wrench.
Video:


Meet Harrison Clayton, a distinguished author and home remodeling enthusiast whose expertise in the realm of renovation is second to none. With a passion for transforming houses into inviting homes, Harrison's writing at https://thehuts-eastbourne.co.uk/ brings a breath of fresh inspiration to the world of home improvement. Whether you're looking to revamp a small corner of your abode or embark on a complete home transformation, Harrison's articles provide the essential expertise and creative flair to turn your visions into reality. So, dive into the captivating world of home remodeling with Harrison Clayton and unlock the full potential of your living space with every word he writes.


