How to Remove Bit from Hilti Hammer Drill: Step-by-Step Guide

Removing a bit from a Hilti hammer drill may seem like a simple task, but it is important to follow the correct steps to avoid any damage to the tool or injury to yourself. Whether you are replacing a worn-out bit or switching to a different size, this step-by-step guide will help you remove the bit from your Hilti hammer drill safely and efficiently.
Step 1: Power off and unplug the drill
Before attempting to remove the bit, it is crucial to ensure that the drill is powered off and unplugged. This step will prevent any accidental starts or injuries during the process.
Step 2: Engage the bit lock
Most Hilti hammer drills are equipped with a bit lock feature, which secures the bit in place. To engage the bit lock, rotate the chuck clockwise until it stops moving. This will lock the bit in place and prevent it from spinning while you remove it.

Step 3: Loosen the chuck
Using a chuck key or your hand, rotate the chuck counterclockwise to loosen it. Make sure to hold onto the chuck firmly as you turn it, as it may require some force to loosen. Continue to rotate the chuck until it is loose enough to remove the bit.
Step 4: Remove the bit
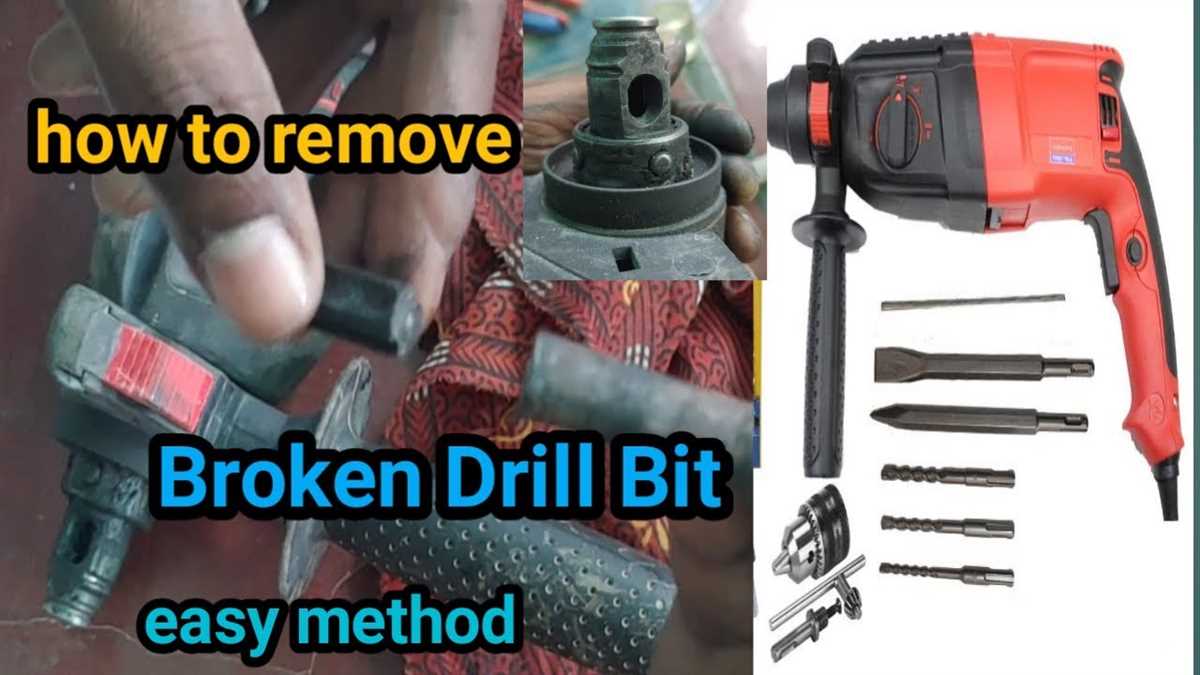
Once the chuck is loose, you can easily pull out the bit from the drill. Hold onto the chuck with one hand and firmly grasp the bit with your other hand. Gently pull the bit straight out of the chuck. If the bit is stuck, you can try tapping the chuck lightly with a rubber mallet to loosen it.
Step 5: Store the bit safely

After removing the bit from the drill, it is important to store it safely. Place it in a designated bit storage container or a protective case to prevent any damage or loss.
Following these step-by-step instructions will allow you to remove a bit from your Hilti hammer drill safely and efficiently. Remember to always exercise caution, and if you have any doubts, consult the instruction manual or seek professional assistance.
What is a Bit?
A bit is a tool that is used with a power drill or a hammer drill to create holes in various materials such as wood, metal, or concrete. It is commonly referred to as a drill bit or a drill head.
Bits come in different sizes and shapes depending on the type of drilling task. The most common types of bits include:

- Twist Bits: These are the most commonly used type of bits. They have a straight shank with two spiral grooves. They are designed for drilling holes in wood, plastic, and soft metals.
- Masonry Bits: These bits have a carbide tip for drilling into concrete, brick, or stone. They are usually used with a hammer drill to provide the necessary impact for drilling into these hard materials.
- Spade Bits: Also known as paddle bits, these are used for drilling larger diameter holes in wood. They have a flat, paddle-shaped blade with a pointed tip.
- Forstner Bits: These bits are used for drilling flat-bottomed holes in wood. They have a cylindrical shape with a center point and cutting edges on the sides.
- Countersink Bits: These bits are used to drill a hole with a tapered opening to accommodate the head of a screw. They often have a pilot drill bit to guide the countersink bit.
It is important to use the right type and size of bit for the specific drilling task to ensure the best results and to prevent damage to the drill or the material being drilled.
Why Remove a Bit from a Hilti Hammer Drill?
There are several reasons why you might need to remove a bit from a Hilti hammer drill. Here are a few common scenarios:
- Bit replacement: Over time, drill bits can become dull or damaged, affecting their performance. Removing the old bit allows you to replace it with a new one to ensure efficient drilling.
- Bit size change: Depending on your drilling needs, you may require different sizes of bits. Removing the current bit from the drill allows you to switch to a larger or smaller size as required.
- Bit type change: Different drilling tasks may require different types of drill bits. Removing the current bit from the Hilti hammer drill allows you to swap it out for a bit that is better suited to the specific drilling application.
- Maintenance or cleaning: Occasionally, drill bits can become clogged with debris or dirt, which can impact their performance. Removing the bit from the hammer drill allows you to clean or maintain it, ensuring optimal functionality.
Regardless of the reason, removing a bit from a Hilti hammer drill is a straightforward process that can be accomplished with a few simple steps. By following the step-by-step guide, you can quickly and safely remove the bit from your Hilti hammer drill and be ready for your next drilling task.
Step 1: Understand Your Hilti Hammer Drill
Before you begin removing the bit from your Hilti hammer drill, it’s important to first understand the different components and features of the tool. Familiarizing yourself with these details will make the process easier and help prevent any accidental damage to the drill or injury to yourself.
1.1 Check the Drill Model
Take a look at the drill and locate the model number. This information can usually be found on a sticker or plate, which is typically located near the handle or on the body of the drill. Knowing the model number is essential when looking for specific instructions or troubleshooting tips in the user manual.

1.2 Power Source

Determine the type of power source your Hilti hammer drill uses. There are two main types: corded drills that require an electrical outlet for power and cordless drills that are powered by rechargeable batteries. Understanding your drill’s power source will help you take the necessary precautions while removing the bit.
1.3 Chuck Type
Identify the type of chuck on your drill. The chuck is the part of the drill that holds the bit in place. Hilti hammer drills usually have either a keyless chuck or a keyed chuck. A keyless chuck allows you to tighten or loosen the chuck by hand, while a keyed chuck requires using a special key to secure or release the bit.
1.4 Hammer Function
Check if your drill has a hammer function. Hammer drills are designed for drilling through harder materials like concrete and masonry. This feature allows the drill to deliver a hammering action in addition to the rotational drilling motion. If your drill has a hammer function, make sure it is turned off before attempting to remove the bit.
1.5 Safety Precautions
Prioritize safety when using any power tool. Always wear protective gear such as safety glasses and gloves to protect your eyes and hands from debris and potential accidents. Familiarize yourself with the safety features of your Hilti hammer drill, such as the trigger lock or safety switch, and understand how to use them properly.

By understanding these key details about your Hilti hammer drill, you’ll be better prepared to safely and effectively remove the bit without causing any damage. Once you have a good grasp of your drill’s specifications, you can proceed to the next step of the removal process.
Familiarize Yourself with the Drill
Before attempting to remove the bit from your Hilti hammer drill, it’s important to familiarize yourself with the various parts and features of the drill. This will help you better understand how the bit is secured and how to properly remove it without damaging any components.
1. Power Source
Ensure that the drill is not connected to a power source before attempting to remove the bit. This will prevent any accidental starts or injuries while working on the drill.
2. Chuck
The chuck is the part of the drill that holds the bit in place. It is usually located at the front of the drill and can be tightened or loosened to secure or release the bit. Most Hilti hammer drills have a keyless chuck, which means you can tighten or loosen the chuck by hand.
3. Release Button
Some Hilti drills have a release button that needs to be pressed in order to release the chuck and remove the bit. Locate this button on your drill and make sure you understand how it functions.
4. Rotation Selection
Hilti hammer drills usually have a rotation selection switch that allows you to choose between forward and reverse rotation. Before removing the bit, make sure the drill is set to the correct rotation direction to avoid any complications.
5. Grip and Handle
Get familiar with the grip and handle of your Hilti hammer drill. This will allow you to maintain a firm hold on the drill while removing the bit, ensuring your safety and preventing any accidental drops.
6. Protective Gear
Before starting any work on your Hilti hammer drill, ensure that you are wearing appropriate protective gear such as safety glasses and gloves. This will protect you from any flying debris or potential injuries while working on the drill.
By familiarizing yourself with these aspects of the drill, you will be better prepared to safely remove the bit from your Hilti hammer drill without any issues. Remember to always refer to the drill’s user manual for specific instructions and guidelines.
Identify the Type of Bit You Have
Before attempting to remove the bit from your Hilti hammer drill, you need to identify the type of bit you have. There are several different types of bits that you may encounter, including the following:
- Standard Rotary Bits: These are the most common type of bits used in Hilti hammer drills. They have a round shank that fits into the drill chuck.
- SDS-Plus Bits: These bits have a special SDS-Plus shank that is compatible with Hilti hammer drills. They are often used for heavy-duty drilling or hammering applications.
- SDS-Max Bits: These bits have a larger SDS-Max shank and are designed for even more heavy-duty drilling or hammering tasks.
Once you have identified the type of bit you have, you can proceed with the appropriate method for removing it from your Hilti hammer drill.
Step 2: Gather the Necessary Tools
Before you begin the process of removing the bit from your Hilti hammer drill, you will need to gather a few tools. Having the right tools on hand will make the process easier and ensure that you can safely remove the bit without damaging the drill. Here are the tools you will need:
- Allen wrench: Most Hilti hammer drills come with an allen wrench that is specifically designed to loosen and tighten the chuck. If you don’t have an allen wrench, you can purchase one from a hardware store or online.
- Vice grip pliers: These pliers are used to provide an additional grip on the bit, making it easier to loosen and remove. Make sure you have a reliable pair of vice grip pliers on hand.
- Work gloves: When working with power tools, it is always important to protect your hands. Wear a pair of work gloves to prevent any injuries or accidents while removing the bit.
- Safety goggles: Safety goggles are essential for protecting your eyes from any debris or particles that may be released during the removal process. Make sure you have a pair of safety goggles that fit securely and provide adequate protection.
Once you have gathered these tools, you will be ready to move on to the next step of the process: loosening the chuck and removing the bit. Make sure you have a clean and well-lit workspace to ensure safe and efficient removal of the bit from your Hilti hammer drill.
What You Will Need
- Hilti hammer drill
- Chuck key or keyless chuck
- Replacement bit or drill bit set
- Safety glasses
- Gloves
Step 3: Prepare the Drill for Bit Removal
Before you start removing the bit from your Hilti hammer drill, it is important to prepare the drill for the process. This involves taking a few precautions to ensure your safety and prevent damage to the drill or bit.
Gather the necessary tools:
Before you begin, gather the following tools:
- Hammer drill
- Drill chuck key
- Pliers
- Protective gloves
- Safety goggles
Disconnect the drill from the power source:
Before proceeding, disconnect the drill from the power source by unplugging it or removing the battery, depending on the type of drill you have. This is a crucial step to ensure your safety during the bit removal process.
Secure the drill:
Place the drill on a stable and flat surface. This will prevent the drill from moving or falling while you are removing the bit.
Put on protective gear:
Before you begin removing the bit, put on your protective gloves and safety goggles. Gloves will protect your hands from sharp edges or any potential injuries, while safety goggles will prevent any debris or particles from getting into your eyes.
Stabilize the drill bit:
If the bit is loose or wobbly, you can stabilize it by squeezing the drill bit in a pair of pliers or using one hand to hold it steady. This will make it easier to remove the bit without any complications.
By following these steps and taking the necessary precautions, you can ensure a smooth and safe process of removing the bit from your Hilti hammer drill.
Turn Off the Drill
Before attempting to remove the bit from the Hilti hammer drill, it is important to turn off the power to the tool to ensure safety. Follow these steps to turn off the drill:
- Locate the power switch or trigger on the drill.
- Move the power switch to the “Off” position or release the trigger to stop the drill from rotating.
- Disconnect the drill from the power source, if applicable.
By turning off the drill and disconnecting it from power, you prevent any accidental starting of the drill while removing the bit, reducing the risk of injury.
Unplug the Drill
Before attempting to remove the bit from your Hilti hammer drill, it is crucial to ensure that the drill is unplugged. This step is necessary to prevent any accidents or injuries during the removal process.
Unplugging the drill will eliminate the risk of accidentally activating the drill while removing the bit, which could lead to personal injury or damage to the drill or surrounding objects.
- Locate the power cord of the drill.
- Follow the power cord until you reach the wall outlet.
- Gently unplug the drill from the wall outlet.
- Once the drill is unplugged, double-check that there is no power running to the drill by pressing the power switch on the drill.
By unplugging the drill, you are taking an important safety precaution and ensuring the removal process is safe and accident-free.
FAQ:
What is a Hilti hammer drill?
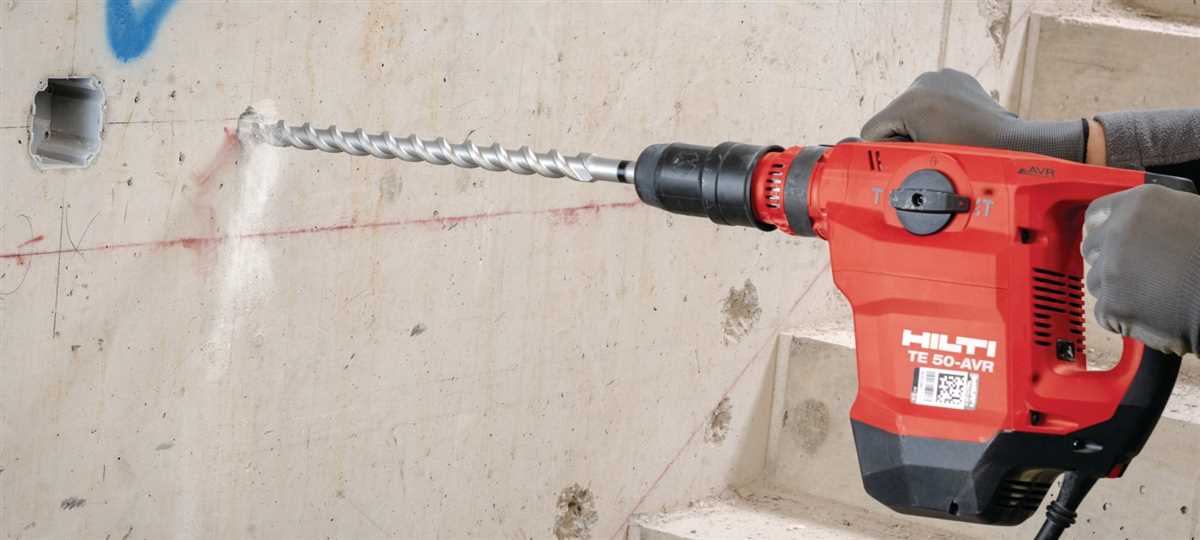
A Hilti hammer drill is a powerful tool used for drilling into tough materials such as concrete and masonry. It combines rotary drilling with a hammering action to create a more effective drilling process.
Why would I need to remove a bit from a Hilti hammer drill?
There are several reasons why you may need to remove a bit from a Hilti hammer drill. Some common reasons include changing to a different type or size of bit, replacing a worn or damaged bit, or simply removing the bit for storage or transportation purposes.
What tools do I need to remove a bit from a Hilti hammer drill?
To remove a bit from a Hilti hammer drill, you will need a chuck key or chuck wrench, depending on the type of chuck your drill has. You may also need a pair of pliers or adjustable wrench to assist with loosening tightly secured bits.
Video:


Harrison Clayton
Meet Harrison Clayton, a distinguished author and home remodeling enthusiast whose expertise in the realm of renovation is second to none. With a passion for transforming houses into inviting homes, Harrison's writing at https://thehuts-eastbourne.co.uk/ brings a breath of fresh inspiration to the world of home improvement. Whether you're looking to revamp a small corner of your abode or embark on a complete home transformation, Harrison's articles provide the essential expertise and creative flair to turn your visions into reality. So, dive into the captivating world of home remodeling with Harrison Clayton and unlock the full potential of your living space with every word he writes.