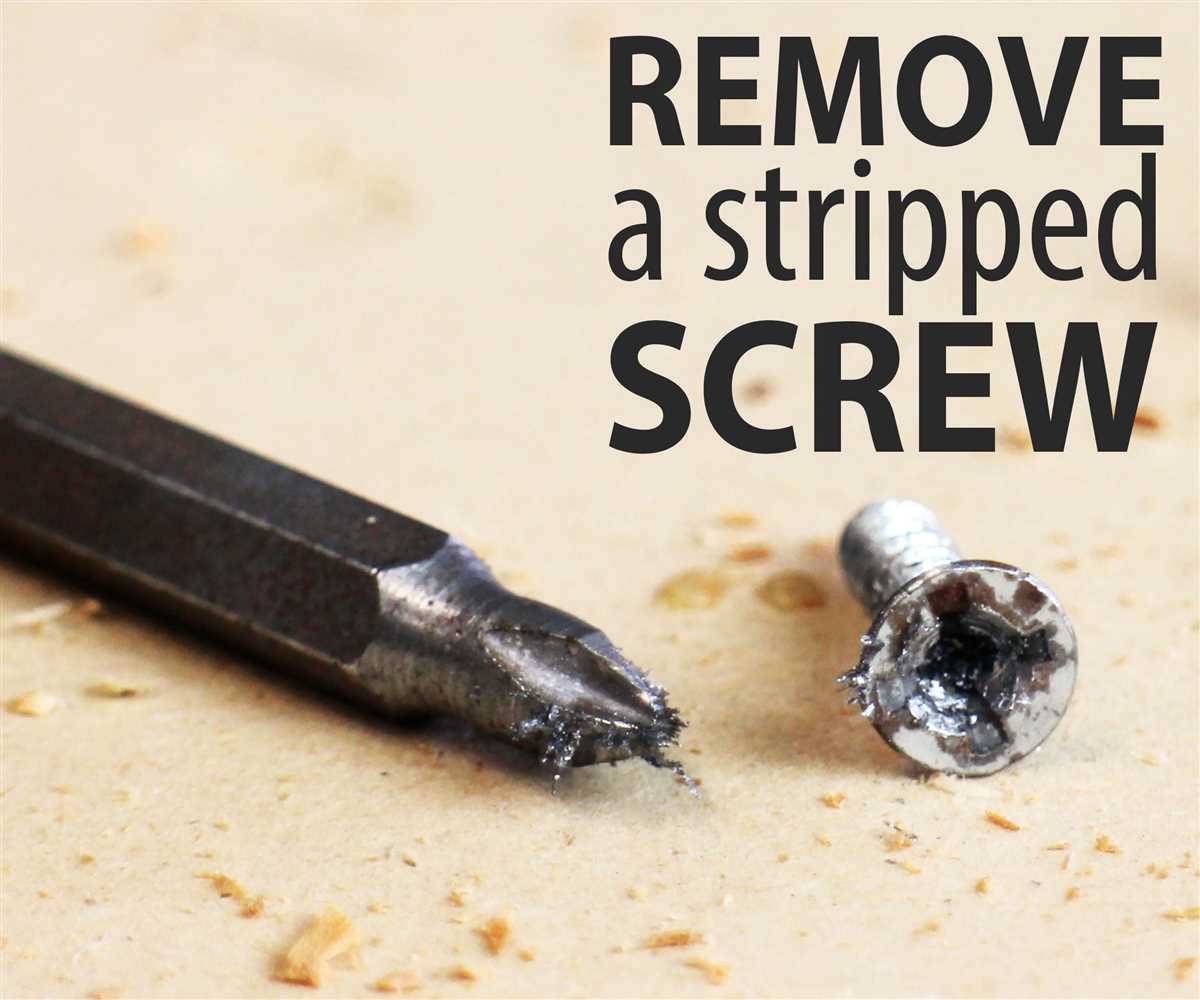
How to remove a screw with no head: easy step-by-step instructions
If you’ve ever encountered a screw with no head or a stripped screw, you know how frustrating it can be. But don’t worry, there are several methods you can try to remove the screw and get the job done. In this article, we will walk you through easy step-by-step instructions on how to remove a screw with no head.
Method 1: Using a rubber band or elastic band
This method is suitable for screws with a partially stripped or no head at all. First, place a thick rubber band or elastic band over the screw. Make sure it covers the entire screw head. Then, insert your screwdriver into the screw head and turn it counterclockwise. The rubber band or elastic band will provide extra grip and help you unscrew the screw.
Method 2: Using pliers or locking pliers
If the rubber band method doesn’t work, you can try using pliers or locking pliers. Grab the screw head with the pliers or locking pliers, applying firm pressure. Hold the screwdriver in the screw head while turning counterclockwise. The pliers will help provide extra grip and torque to remove the screw.

Method 3: Drilling a small hole
If both previous methods fail, you can try drilling a small hole into the screw. Use a drill bit that is slightly smaller than the diameter of the screw. Carefully drill into the center of the screw head. Once the hole is deep enough, switch the drill to reverse mode and slowly pull out the screw. The newly created hole will allow the screw to loosen and come out easily.
Remember: When attempting to remove a screw with no head, it’s important to take your time and go slowly. Apply gentle pressure and use the appropriate tools for the job. If one method doesn’t work, don’t be discouraged – try another one until you successfully remove the screw. Patience and perseverance will pay off!
By following these easy step-by-step instructions, you can successfully remove a screw with no head and complete your project without any hassle. Don’t let a stubborn screw ruin your plans – try these methods and get the job done!
Step 1: Gather the Necessary Tools
Before attempting to remove a screw with no head, make sure you have the following tools:

- A power drill or screwdriver
- A drill bit or screwdriver bit that fits the size of the screw
- A pair of pliers or a wrench
- A hammer
- A small piece of cloth or rubber
Having these tools ready will ensure that you have everything you need to successfully remove the screw.
Step 2: Determine the Type of Screw
Before you begin trying to remove a screw with no head, it is important to determine the type of screw you are dealing with. Different types of screws require different methods of removal, so it is crucial to identify the screw correctly.
Here are a few common types of screws:
- Phillips screw: This type of screw has a cross-shaped recess in the head and is commonly used in many applications.
- Flathead screw: Also known as a slotted screw, this type has a single straight slot in the head and is commonly used in woodworking.
- Torx screw: These screws have a six-point star-shaped recess in the head and are commonly found in electronic devices and appliances.
- Hex screw: Also known as an Allen screw, this type has a hexagonal recess in the head and is commonly used in machinery and furniture.
To determine the type of screw:

- Inspect the top of the screw to see if it has any identifiable markings or patterns.
- If there are no visible markings, try using a screwdriver or hex key to test different patterns or recess shapes that could indicate the type of screw.
- If all else fails, consult a hardware store or online resources for assistance in identifying the screw.
Remember: It is crucial to correctly identify the type of screw before proceeding to the next step, as using the wrong method or tool can damage the screw or surrounding material.
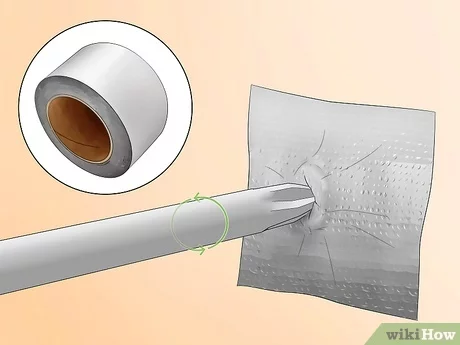
Step 3: Use a Rubber Band
If the screw has a flat head, or if the other methods have not worked, you can try using a rubber band to remove it. This method works best with smaller screws.
- Place a rubber band flat against the stripped screw.
- Press the rubber band firmly into the screw head.
- Insert your screwdriver into the screw head and turn it counterclockwise.
- The rubber band will provide friction and grip, allowing you to unscrew the stripped screw.
If the rubber band slips or loses its grip, try using a thicker or wider rubber band. You can also try using multiple rubber bands layered on top of each other.
Once you have successfully removed the screw, discard the rubber band as it may have stretched or become damaged during the process.

Step 4: Try Using Pliers
If the rubber band method didn’t work, don’t worry. Another effective approach you can try is using pliers to remove the screw with no head. Here’s how:
- Choose a pair of pliers that have a slim and pointed tip. Needle-nose pliers are usually a good option for this task.
- Position the pliers around the edges of the screw, as close to the screw head as possible.
- Apply a firm grip on the pliers and try turning them counterclockwise to loosen the screw.
- If the screw starts to rotate, continue turning until it comes out completely. If the screw doesn’t turn, proceed to the next step.
- If the screw is stuck and won’t move, try applying some additional lubricant, such as WD-40 or penetrating oil, to help loosen it.
- With the lubricant applied, wait a few minutes to allow it to penetrate the screw threads.
- Once the lubricant has had time to work, try using the pliers again to turn the screw counterclockwise.
- Apply steady pressure and try to slowly turn the screw until it comes out.
If the pliers method doesn’t work, don’t worry. There are still other techniques you can try to remove a screw with no head. Move on to the next step for an alternative solution.
Step 5: Apply Heat
If the screw is still difficult to remove after applying lubricant or using a rubber band, you can try applying heat to the surrounding area to expand the metal and loosen the grip of the screw. However, be cautious when working with heat as it can cause burns or damage to the surrounding materials.

- Before applying heat, ensure that the area is well-ventilated to prevent the accumulation of fumes.
- Use a heat source such as a hairdryer, heat gun, or a small torch to apply heat directly to the screw and the surrounding area. Remember to keep the heat source moving to avoid overheating a specific spot.
- Apply heat for a few minutes or until the metal feels warm to the touch. Heating the metal will cause it to expand, which can help in loosening the screw.
- If possible, try to hold the screwdriver in place while applying heat. This will allow the heat to transfer directly to the screw, further facilitating the loosening process.
- After applying heat, allow the metal to cool down for a few minutes. This will help the metal contract and may make it easier to remove the screw.
If the screw still doesn’t come out, you may need to consider other methods like drilling or using an extractor tool. Be patient and take your time to avoid damaging the surface or stripping the screw further.
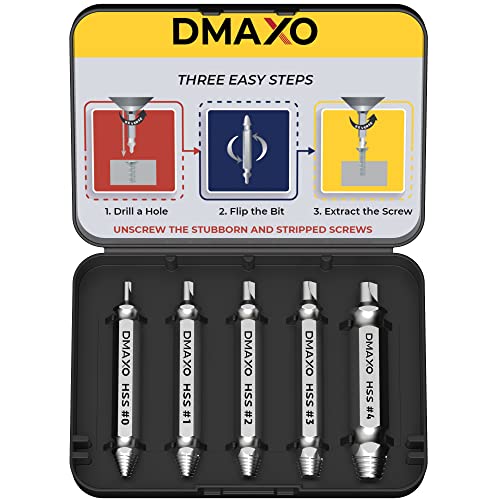
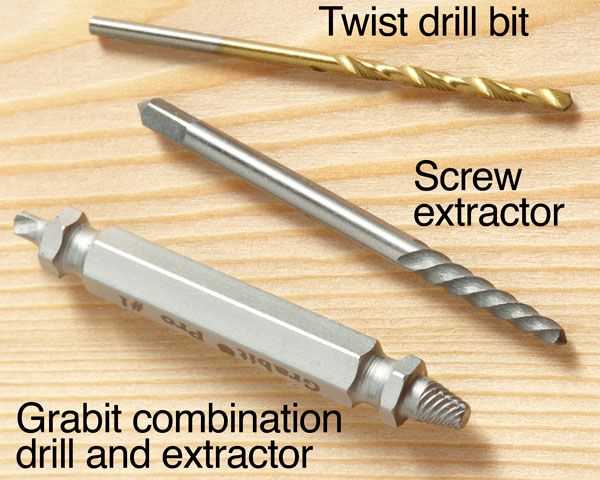
Step 6: Use a Screw Extractor
If the above methods haven’t worked, you can try using a screw extractor. A screw extractor is a special tool designed to remove screws with stripped or inaccessible heads. It has a reverse thread that digs into the screw, allowing you to turn it counterclockwise and remove it.
Here’s how to use a screw extractor:
- Select the right size screw extractor for your screw. Screw extractors come in various sizes, so choose one that matches the size of your screw.
- Attach the screw extractor to a drill. Most screw extractors have a hexagonal shank that fits into the chuck of a drill.
- Place the tip of the screw extractor into the stripped or inaccessible head of the screw.
- Apply steady pressure and turn the drill counterclockwise. The screw extractor will dig into the screw, allowing it to be removed.
- Continue turning until the screw is completely extracted.
Using a screw extractor can be an effective way to remove screws with no head. However, be cautious when using a drill and screw extractor, as excessive force or incorrect technique can cause damage to the surrounding material or make the situation worse.
If the screw extractor method doesn’t work, or if you’re uncomfortable using power tools, it may be best to seek the help of a professional or consult an expert in screw removal.
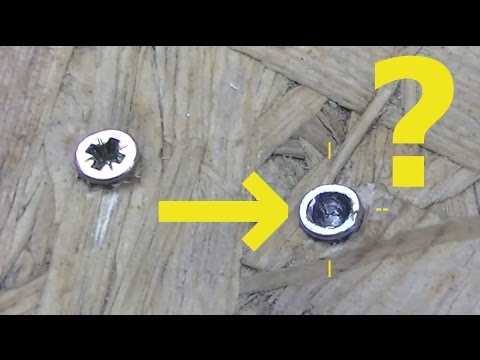
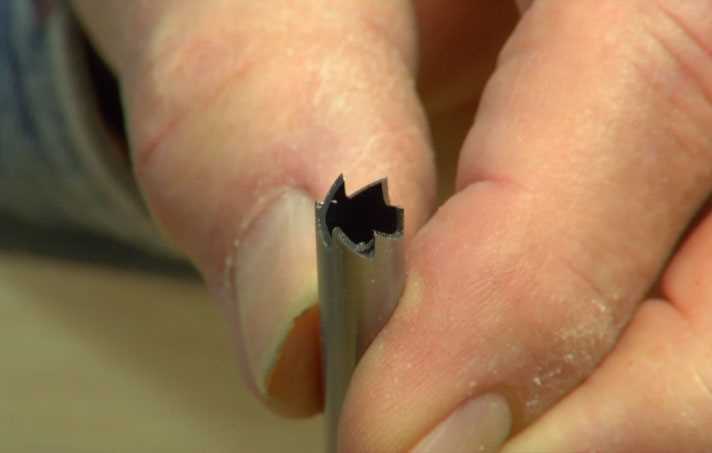
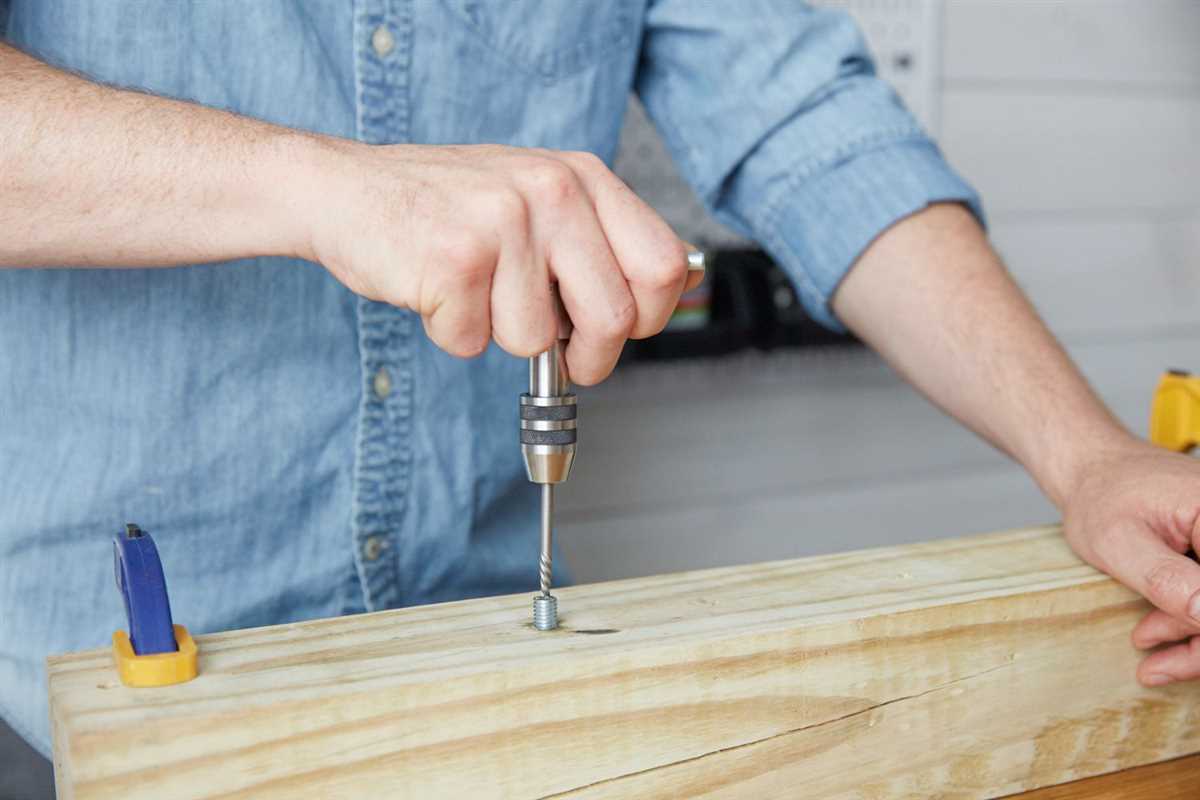
Step 7: Drill a Small Hole

Drilling a small hole is an effective method for removing a screw with no head. This step will allow you to create a new grip for your screwdriver or drill bit.
Follow these instructions to drill a small hole:
- Select the appropriate drill bit: Choose a drill bit that is slightly smaller than the diameter of the screw shaft. This will ensure that you don’t damage the surrounding material while drilling.
- Secure the material: Place the material in a vice or clamp to keep it steady during the drilling process. This will prevent any unnecessary movement and ensure a more accurate hole.
- Mark the center: Use a pencil or marker to mark the center of the screw shaft. This will help guide your drilling and ensure that the hole is centered.
- Start drilling: Position the drill bit on the center mark and apply light pressure. Start drilling slowly to create a pilot hole. It’s important to use a lower speed setting to prevent the drill bit from slipping or causing damage.
- Enlarge the hole: Gradually increase the drill speed and continue drilling until the hole is slightly larger than the screw shaft. Be careful not to drill too deep, as you don’t want to damage the underlying material.
- Clear any debris: Once the hole is drilled, remove any debris or wood shavings. This will ensure a clean and smooth surface for the next step.
Drilling a small hole offers a new grip point that allows you to loosen or remove the screw. Make sure to exercise caution and wear appropriate safety gear, such as safety goggles, when operating power tools.
Step 8: Contact a Professional if Necessary
If you’ve tried all the previous steps and still can’t remove the screw with no head, it may be time to call a professional for assistance. Some screws are extremely stubborn and require specialized tools or techniques to remove. A professional handyman or locksmith will have the expertise and tools needed to safely extract the screw without damaging the surrounding material.
When hiring a professional, be sure to choose someone with experience in screw extraction. They should have the necessary tools, such as a screw extractor or drill bits specifically designed for removing stripped screws. It’s also important to communicate the details of the problem and any attempts you’ve made to remove the screw prior to their arrival.
While it may be tempting to continue attempting to remove the screw yourself, doing so can cause further damage to the material or strip the screw even more. This can make it even more challenging for a professional to remove it later on. It’s best to leave the job to an expert if you’re unsure or have exhausted all other options.
Remember, safety should always be a priority when dealing with stubborn screws. If you’re unable to remove the screw and it’s causing frustration or potential harm, don’t hesitate to seek professional help. A professional can help safely remove the screw and ensure the integrity of the surrounding material is preserved.
FAQ:
What tools do I need to remove a screw without a head?
You will need a drill, a drill bit slightly smaller than the screw size, a pair of pliers, and some penetrating oil.
Is it possible to remove a screw without a head?
Yes, it is possible to remove a screw without a head by using a drill and a pair of pliers.
What should I do if the screw is stuck and won’t come out?
If the screw is stuck and won’t come out, you can try using some penetrating oil to loosen it. If that doesn’t work, you may need to use a drill bit slightly larger than the screw to drill a hole in the center and then use pliers to remove it.
Are there any risks involved in removing a screw without a head?
There can be some risks involved in removing a screw without a head, such as damaging the surrounding material or causing the screw to break off inside the hole. It is important to proceed with caution and use the right tools and techniques.
Video:


Meet Harrison Clayton, a distinguished author and home remodeling enthusiast whose expertise in the realm of renovation is second to none. With a passion for transforming houses into inviting homes, Harrison's writing at https://thehuts-eastbourne.co.uk/ brings a breath of fresh inspiration to the world of home improvement. Whether you're looking to revamp a small corner of your abode or embark on a complete home transformation, Harrison's articles provide the essential expertise and creative flair to turn your visions into reality. So, dive into the captivating world of home remodeling with Harrison Clayton and unlock the full potential of your living space with every word he writes.


