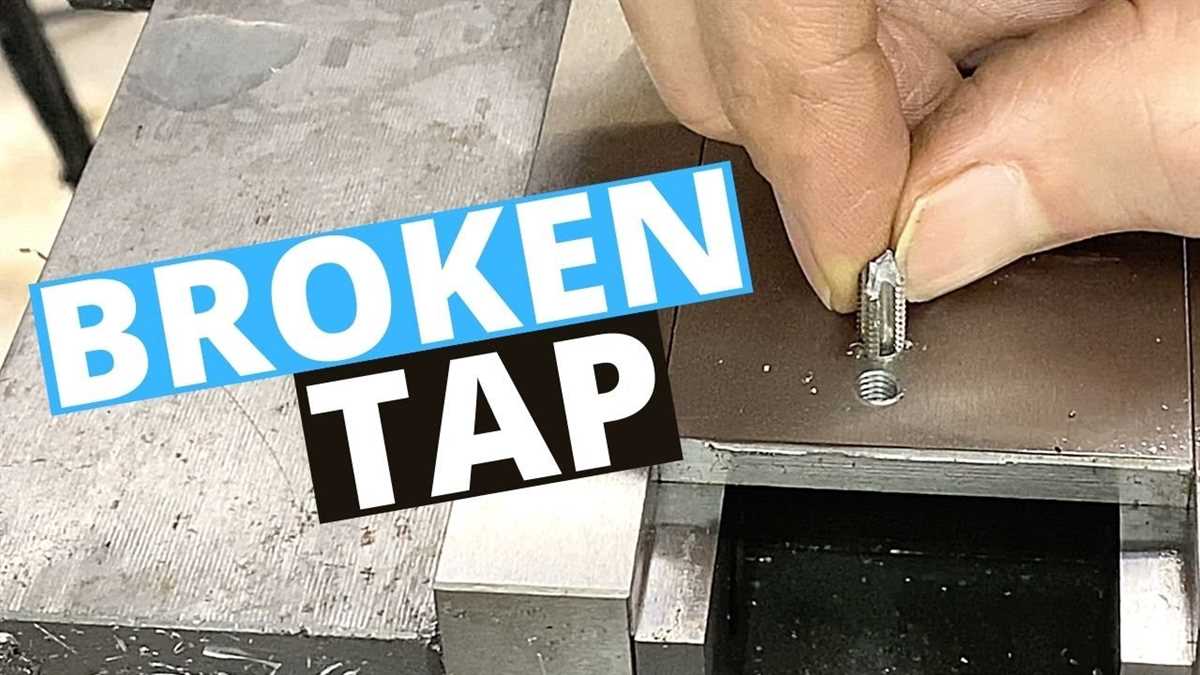
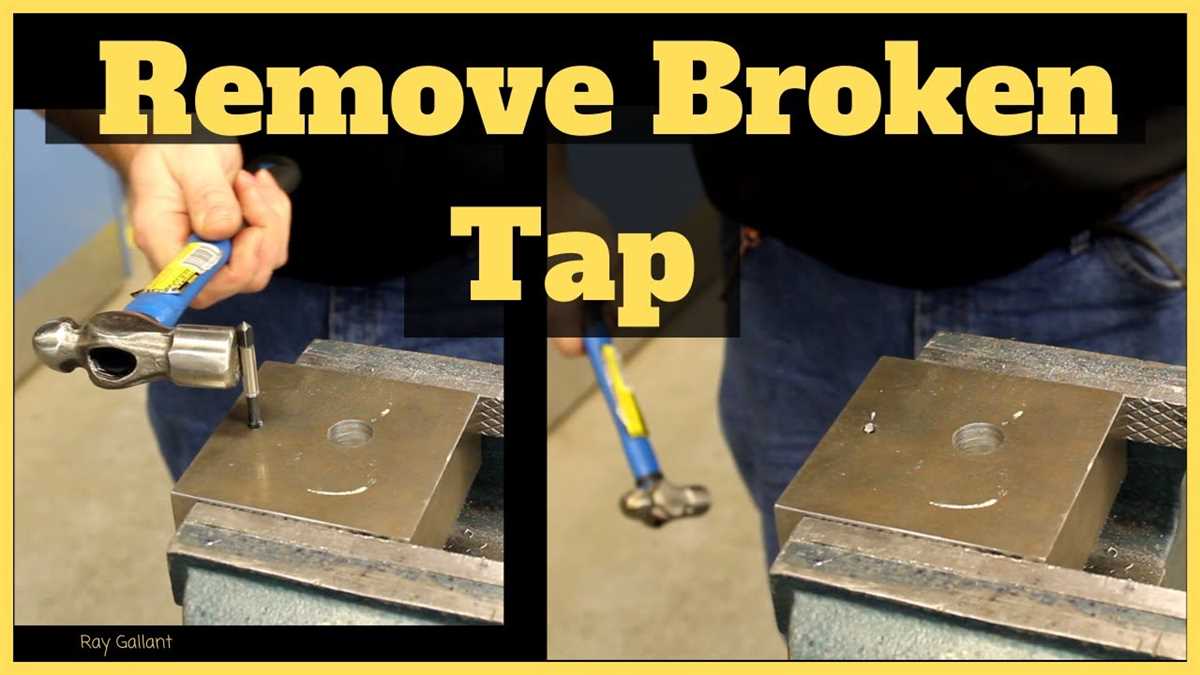
How to Remove a Broken Tap: Step-by-Step Guide

Removing a broken tap can be a frustrating and challenging task, but with the right tools and techniques, it is possible to do it yourself. Whether you are dealing with a tap that has snapped off or a tap that has broken while being used, it is important to proceed with caution to avoid further damage or injury.
One of the first steps to removing a broken tap is to assess the situation. Determine the extent of the damage and identify any potential obstacles that may complicate the removal process. Once you have a clear understanding of the situation, gather the necessary tools and materials.
Before you begin the removal process, it is important to take certain safety precautions. Make sure to wear protective gloves and eyewear to protect yourself from any flying debris. Additionally, it is important to work in a well-ventilated area to avoid inhaling any harmful fumes. If you are unsure about your ability to safely remove the broken tap, it may be best to call a professional.
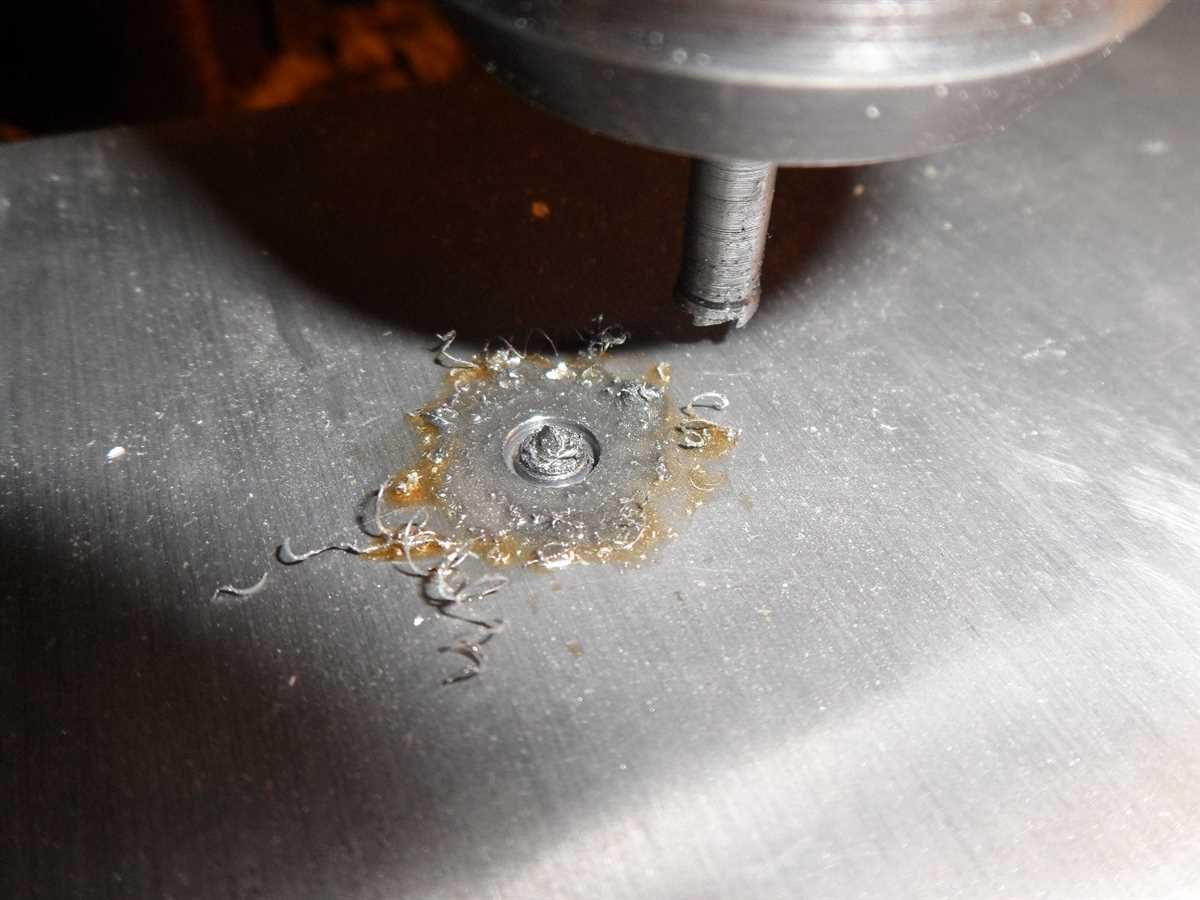
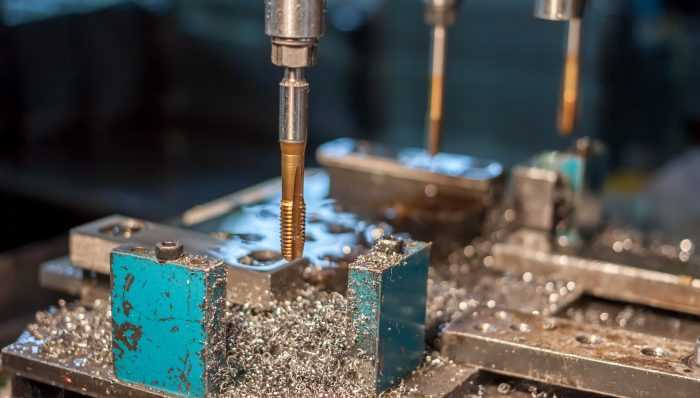
Next, you will need to carefully drill into the broken tap. Start by using a small drill bit and gradually work your way up to a larger one, if necessary. The goal is to create enough space around the tap to fit a tap extractor. The tap extractor will allow you to remove the broken tap by gripping onto it and turning it counterclockwise.
Once you have successfully removed the broken tap, it is important to inspect the surrounding area for any damage. If there are any signs of damage, such as cracks or leaks, it may be necessary to repair or replace the affected parts. Additionally, it is a good idea to thoroughly clean and lubricate the area to prevent any future issues.
In conclusion, removing a broken tap can be a challenging task, but with the right tools and techniques, it is possible to do it yourself. By taking the necessary safety precautions and following a step-by-step guide, you can successfully remove a broken tap and avoid further damage or injury.

Assess the Damage
Before attempting to remove a broken tap, it is important to assess the extent of the damage to determine the best course of action. There are a few factors to consider:
- Size of the tap: The size of the tap will impact the tools and methods that can be used for removal. Smaller taps may be easier to remove, while larger taps may require more specialized equipment.
- Type of tap: Different types of taps, such as thread taps or flute taps, may require different removal techniques. It is important to identify the type of tap before proceeding.
- Material of the tap: Taps can be made of various materials, such as steel, brass, or titanium. The material of the tap will affect its strength and the tools that are suitable for removal.
- Location of the tap: The location of the broken tap can also impact the approach to its removal. Taps that are located in hard-to-reach areas may require additional steps or specialized tools.
By assessing these factors, you can determine the best approach for removing the broken tap and minimize the risk of further damage. If you are unsure about the best course of action, it may be advisable to seek professional assistance.
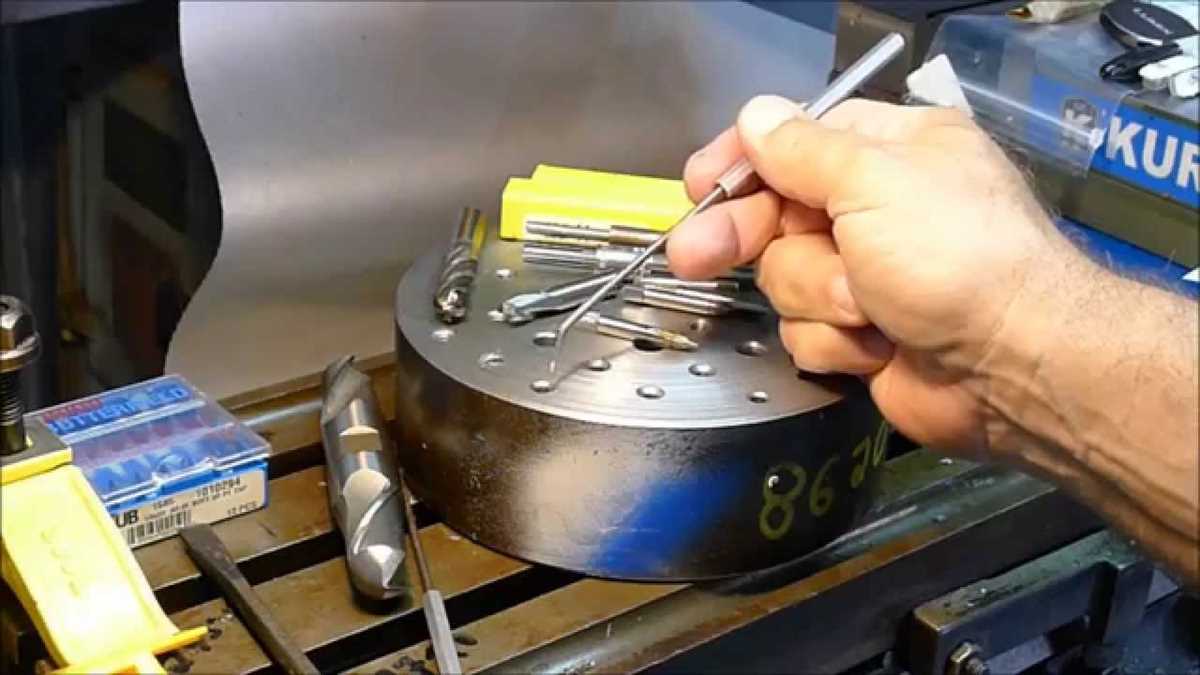
Gather the Necessary Tools
Before you start removing the broken tap, it is important to have all the necessary tools at hand. Here is a list of tools you will need:
- A tap wrench or adjustable wrench
- A tap extractor or screw extractor
- A drill with various drill bits
- Protective gloves
- Safety glasses or goggles
- Measuring tape or ruler
- Masking tape or marker
- Lubricating oil
- Clean cloth or rag
- A container for collecting metal shavings
Having all these tools ready will ensure that you are prepared to tackle the task efficiently and safely. It is important to use the correct tools for the job to avoid causing further damage to the tap or surrounding area.
Prepare the Work Area
Before you begin removing a broken tap, it’s important to properly prepare your work area. This will ensure that you have everything you need and that you can work efficiently and safely.
Gather Your Tools
Make sure you have all the necessary tools and equipment to remove the broken tap. Here are some of the tools you may need:
- Tap Extractor: This tool is specifically designed to remove broken taps.
- Drill: You may need a drill to create a hole in the broken tap for the extractor to fit into.
- Center Punch: A center punch can be used to create a guide hole for the drill.
- Lubricating Oil: Lubricating oil can help loosen the tap and make it easier to remove.
- Safety Glasses and Gloves: It’s important to protect your eyes and hands while working with tools.
Clean the Work Area

Before you start removing the broken tap, clean the work area to remove any debris or obstacles that could interfere with your work. Clear away any clutter and make sure your workbench or surface is clean and organized.
Secure the Workpiece
If the broken tap is attached to a workpiece, secure it in place to prevent any movement or slipping. Use clamps or a vice to hold the workpiece securely. This will ensure that you can work with precision and stability.
Take Safety Precautions
Remember to always prioritize safety when working with tools. Wear safety glasses to protect your eyes from flying debris and use gloves to protect your hands. Additionally, consider wearing ear protection if you will be using power tools for an extended period of time.
Apply Lubricant
Before attempting to remove a broken tap, it is essential to apply lubricant to the surrounding area. This will help loosen the tap and make it easier to remove. Here are the steps to apply lubricant:
- Start by cleaning the area around the broken tap using a degreaser or soap and water. This will remove any dirt, grime, or debris that may interfere with the lubricant.
- Once the area is clean, apply a generous amount of penetrating oil or lubricant to the tap. Make sure to get the lubricant into any cracks or crevices around the tap.
- Allow the lubricant to sit for a few minutes to penetrate and loosen the tap. This will help break up any rust or corrosion that may be holding the tap in place.
- If necessary, you can use a brush or toothbrush to gently scrub the tap and help the lubricant penetrate further.
It is important to note that not all lubricants are suitable for all types of taps. Make sure to choose a lubricant that is compatible with the specific material of your tap to avoid any damage.
Once the lubricant has had enough time to work, you can proceed to the next steps in removing the broken tap.
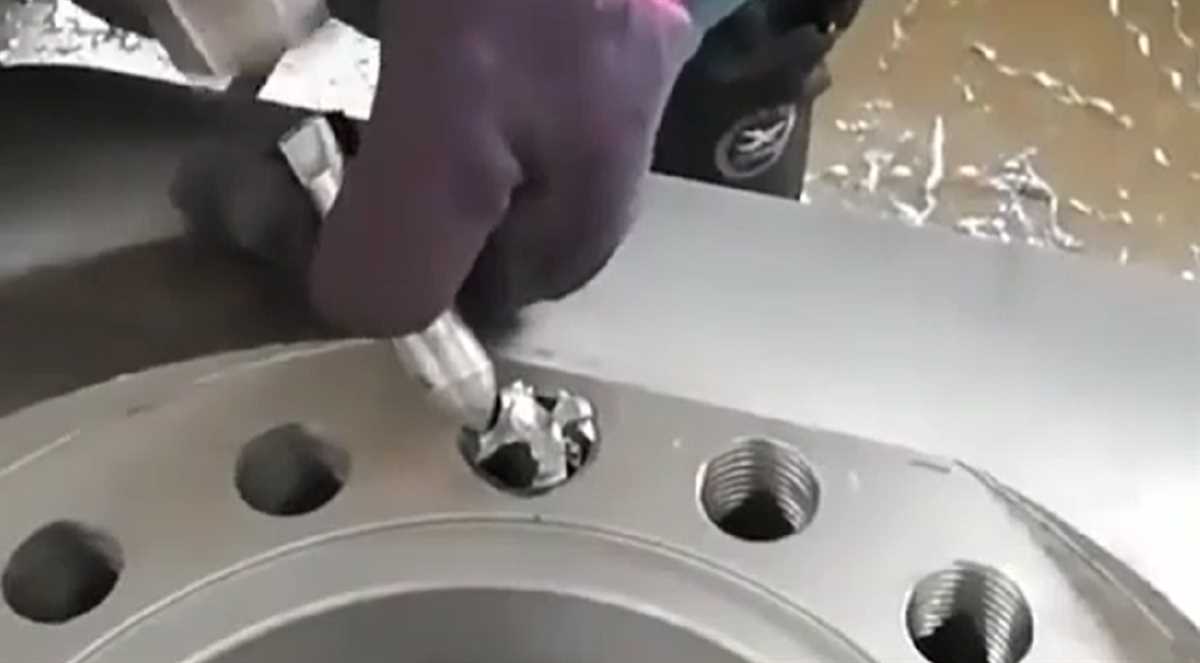
Use a Tap Extractor
If you have tried other methods without success, you may need to use a tap extractor to remove a broken tap. A tap extractor is a specialized tool designed to grip and remove the broken tap from the hole.
Here is a step-by-step guide on how to use a tap extractor:
- Begin by ensuring that the tap extractor is the correct size for the tap that needs to be removed. Tap extractors come in various sizes, so it’s important to choose the one that fits your tap.
- Secure the tap extractor into a tap wrench or adjustable wrench. The tap extractor will have a square or hexagonal shank that fits into the wrench.
- Place the tap extractor into the hole where the broken tap is located. Make sure it is aligned properly and seated securely in the hole.
- Apply steady pressure to the tap extractor by turning the wrench clockwise. Be careful not to apply too much force, as it can break the tap even further.
- If the tap extractor slips or doesn’t grip the tap securely, you may need to try a different size or type of tap extractor. Sometimes using a different method, such as drilling into the tap and using an extractor bit, may be necessary.
- Continue turning the tap extractor clockwise until the broken tap begins to loosen and can be removed from the hole.
- Once the tap is removed, clean the hole thoroughly to remove any debris or metal shavings.
Using a tap extractor can be a tricky process and requires patience and precision. If you are unsure or uncomfortable attempting this task yourself, it is always best to consult a professional or seek assistance.
Apply Heat
Applying heat to the broken tap can help to loosen it and make it easier to remove. This method works especially well if the tap is stuck due to corrosion or rust. Here’s how you can apply heat to remove a broken tap:
-
Gather the necessary tools: Before you begin, make sure you have a propane torch or a butane torch, heat-resistant gloves, and a fire extinguisher nearby in case of emergencies.
-
Prepare the work area: Clear any flammable materials or substances from the area around the broken tap. Make sure you have a fire-resistant surface or blanket to protect the surrounding area.
-
Ignite the torch: Using the provided instructions, ignite the torch and adjust the flame to a medium heat.
-
Apply heat to the tap: Direct the flame of the torch onto the broken tap, focusing on the base where it is attached to the surface. Move the flame in a circular motion to evenly distribute the heat.
-
Heat the tap for a few minutes: Continue applying heat to the tap for a few minutes. This will help to expand the metal and break any rust or corrosion that may be causing the tap to stick.
-
Try loosening the tap: After heating the tap, try to loosen it using a tap wrench or pliers. Apply steady pressure in a counterclockwise direction to try to remove the tap.
-
Repeat if necessary: If the tap does not loosen, apply heat again and repeat the process until the tap is successfully removed.
Note: It is important to exercise caution when using a torch. Make sure to follow all safety instructions and wear protective gloves. Keep a fire extinguisher nearby and be prepared to extinguish any flames that may occur. If you are unsure or uncomfortable using a torch, it may be best to seek professional help or advice.
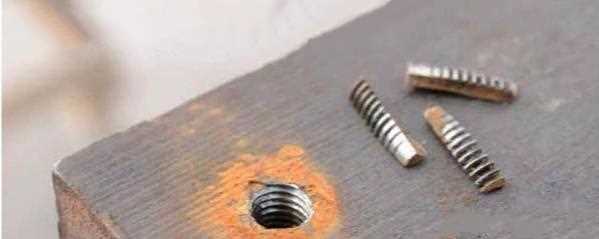
Tap Out the Broken Pieces
Once you have prepared the broken tap and secured it with a clamp, it’s time to start tapping out the broken pieces. This step requires precision and patience, as one wrong move could cause further damage.
Here is a step-by-step guide to tapping out the broken pieces:
- Choose the right tool: Before you begin, make sure you have the right tool for the job. A tap extractor or a set of tap removal pliers are commonly used for this purpose.
- Apply lubricant: Apply a generous amount of cutting oil or lubricant to the broken tap and the surrounding area. This will help in loosening the tap and reduce friction during the extraction process.
- Align the tool: Position the tap extractor or tap removal pliers over the broken tap, ensuring that the blades or jaws are aligned with the flutes of the tap.
- Apply pressure: With a firm grip on the tool, begin applying steady and even pressure in a counterclockwise direction. Be cautious not to apply excessive force, as it may cause the tap to break further.
- Rotate and tap: While maintaining pressure, gently rotate the tool back and forth to turn the tap counterclockwise. This combined motion of rotation and tapping will help to release the broken pieces.
- Alternate directions: If the tap doesn’t budge initially, try rotating it in the opposite direction (clockwise) for a few turns, and then resume the counterclockwise rotation. This alternating motion can help to loosen stubborn fragments.
- Remove the broken pieces: As the tap starts to loosen, carefully remove the broken pieces with a pair of pliers or tweezers. Take your time and ensure that all fragments are fully extracted.
- Inspect the thread: Once the broken tap is completely removed, inspect the thread in the hole to ensure that no remnants are left behind. Use a tap brush or a thread chaser to clean and restore the threads if necessary.
Remember, tapping out broken pieces can be a delicate process, so it’s important to work slowly and methodically. If you encounter any difficulties or the tap refuses to budge, it’s recommended to seek professional assistance to avoid further damage.
Clean and Inspect the Area
Before beginning the process of removing a broken tap, it is important to thoroughly clean and inspect the surrounding area. This will help ensure that there are no obstructions or debris that could interfere with the removal process. Additionally, inspecting the area will allow you to assess the extent of the damage and determine the best course of action for removal.
To clean the area, use a cloth or brush to remove any dirt, dust, or loose debris. Pay close attention to the immediate area around the broken tap, as well as the surrounding surfaces. It may be helpful to use a vacuum cleaner to thoroughly remove any smaller particles that may be difficult to see or reach.
Once the area is clean, visually inspect the broken tap and surrounding pipe or fixture. Look for any signs of additional damage, such as cracks, corrosion, or misalignment. It is important to identify any existing issues before attempting to remove the broken tap to avoid causing further damage.
If you notice any significant damage or are unsure about the best approach for removal, it may be beneficial to consult a professional plumber or tap removal specialist. They will have the knowledge and experience to assess the situation properly and provide appropriate recommendations for repair or replacement.
Overall, taking the time to clean and inspect the area before removing a broken tap will help ensure a smooth and successful removal process. It is an essential step in preparing the area and identifying any potential challenges that may need to be addressed.
FAQ:
What tools do I need to remove a broken tap?
To remove a broken tap, you will need a few tools including a tap wrench, a drill, a center punch, a hammer, a tap extractor, and a lubricating oil.
Can I remove a broken tap without any special tools?
Removing a broken tap without any special tools can be challenging. However, you may be able to use pliers or vise grips to grip and twist the broken tap out. Just keep in mind that this method may not always be successful.
What should I do if the broken tap is stuck really tight?
If the broken tap is stuck tightly in the material, you can try applying heat to the surrounding area to expand the material and loosen the tap. You can also try using a tapping fluid or penetrating oil to help loosen the tap before attempting to remove it.
Is it possible to remove a broken tap without damaging the surrounding material?
While it can be difficult, it is possible to remove a broken tap without damaging the surrounding material. The key is to use the right tools and techniques, such as drilling a guide hole and using a tap extractor. However, there is always a risk of damaging the material, so it’s important to proceed with caution.
Video:

How many sundays in 2023

Meet Harrison Clayton, a distinguished author and home remodeling enthusiast whose expertise in the realm of renovation is second to none. With a passion for transforming houses into inviting homes, Harrison's writing at https://thehuts-eastbourne.co.uk/ brings a breath of fresh inspiration to the world of home improvement. Whether you're looking to revamp a small corner of your abode or embark on a complete home transformation, Harrison's articles provide the essential expertise and creative flair to turn your visions into reality. So, dive into the captivating world of home remodeling with Harrison Clayton and unlock the full potential of your living space with every word he writes.


