How to remove a broken drill bit from wood: Tips and tricks

Having a broken drill bit stuck in wood can be a frustrating experience, but don’t worry – there are several methods you can try to remove it. Whether you’re a novice or an experienced woodworker, these tips and tricks can help you safely and efficiently remove a broken drill bit from wood.
Tip 1: Before attempting to remove the broken drill bit, it’s important to assess the situation and determine the best approach. If the drill bit is sticking out of the wood, you may be able to simply grip it with pliers and pull it out. However, if the drill bit is broken off inside the wood, you will need to use a different technique.
Tip 2: One effective method for removing a broken drill bit from wood is to use a screw extractor. Start by drilling a small hole into the broken drill bit using a drill bit that is slightly smaller in diameter. Then, insert the screw extractor into the hole and turn it counterclockwise to grip the broken drill bit. Slowly and steadily rotate the screw extractor to remove the broken drill bit from the wood.
Tip 3: If a screw extractor is not available, another option is to use a small chisel or an awl to carefully chip away at the wood around the broken drill bit. Start by creating a small groove around the broken drill bit, then gradually widen the groove by chipping away at the wood. Take caution to avoid damaging the surrounding wood or causing any splintering.
Tip 4: In some cases, applying heat to the broken drill bit can help loosen it from the wood. Use a soldering iron or a heat gun to apply heat to the broken drill bit for a few seconds. Be careful not to overheat the wood, as this can cause damage. Once the drill bit is heated, use pliers to carefully pull it out of the wood.

Remember: Safety should always be your top priority when working with tools. Take the necessary precautions, wear appropriate safety gear, and work in a well-ventilated area. If you are unsure about the best approach or lack experience, it may be best to consult a professional for assistance.
Removing a broken drill bit from wood can be a challenging task, but with these tips and tricks, you can overcome the challenge and get back to your project. Always approach the task with caution and patience, and don’t hesitate to seek professional help if needed. Happy woodworking!
What to do if the drill bit breaks
It’s frustrating when a drill bit breaks, especially if it’s stuck in the wood. However, there are several methods you can try to remove the broken drill bit:
- Stop drilling: As soon as you realize the drill bit has broken, stop drilling immediately. Continuing to drill could cause more damage to the wood and make it harder to remove the broken bit.
- Inspect the damage: Take a closer look at the broken drill bit and assess the situation. Are there any parts of the bit still sticking out from the wood? Is the bit broken off flush with the surface? Understanding the extent of the damage will help you choose the best removal method.
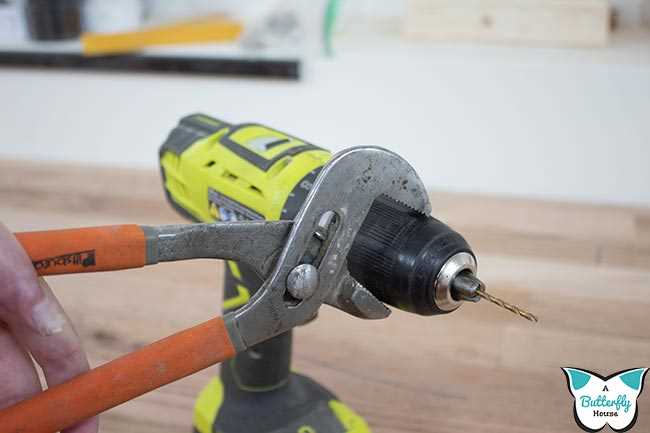
- Use pliers: If part of the broken drill bit is still sticking out from the wood, you can use pliers to grab onto it and pull it out. Make sure to wear thick gloves for protection and grip the broken bit firmly with the pliers to avoid it slipping and causing injury.
- Tap the bit: If the broken drill bit is flush with the wood surface, you can try tapping it gently with a hammer to loosen it. This may create enough vibration to dislodge the bit from the wood.
- Use a screw extractor: A screw extractor is a specialized tool designed to remove broken screws, bolts, or drill bits. It has a tapered, threaded end that digs into the broken bit and allows you to easily twist it out. Follow the instructions provided with the screw extractor for best results.
- Drill around the broken bit: In some cases, drilling around the broken bit can help loosen it. You can use a drill bit that is slightly larger than the broken one to create a hole around it. This may provide enough space to extract the broken bit with pliers or a screw extractor.
- Consult a professional: If you’re unable to remove the broken drill bit using the above methods, it may be time to seek professional help. A woodworking professional or a trained handyman will have the experience and tools necessary to safely remove the broken bit without causing further damage.
Remember, when working with power tools, it’s important to prioritize safety. Always wear safety goggles, gloves, and other appropriate protective gear. Take your time and proceed with caution to avoid accidents and further damage to the wood.
Tips and tricks for removing a broken drill bit from wood
1. Assess the situation
Before attempting to remove the broken drill bit, it’s important to assess the situation. Take a close look at the broken bit and determine how it is lodged in the wood. This will help you choose the best method of removal.
2. Use pliers or a vise grip
If the broken drill bit is sticking out of the wood, you can try using pliers or a vise grip to grip the exposed portion of the bit. Gently twist and pull the bit to remove it from the wood.
3. Tap it out

If the broken drill bit is stuck inside the wood and not protruding, you can try tapping it out. Use a small hammer or mallet to lightly tap on the top of the broken bit. The vibrations from the taps may help loosen the bit and allow it to be removed.
4. Use a screw extractor
If the broken drill bit is deeply lodged in the wood and cannot be removed with pliers or tapping, a screw extractor can be a handy tool. Choose a screw extractor that matches the size of the broken bit and follow the instructions to remove it.
5. Apply heat
If the broken drill bit is stubborn and won’t budge, applying heat may help. Use a heat gun or a small torch to apply heat to the wood around the broken bit. The expansion caused by the heat can sometimes loosen the grip of the wood on the bit, making removal easier.
6. Seek professional help
If all else fails and you are unable to remove the broken drill bit from the wood, it’s best to seek professional help. A professional handyman or woodworker will have the tools and experience necessary to safely remove the broken bit without causing further damage to the wood.
| Tip | Description |
|---|---|
| Assess the situation | Determine how the broken bit is lodged in the wood for proper removal method. |
| Use pliers or a vise grip | If the bit is sticking out, grip and twist it out with pliers or a vise grip. |
| Tap it out | Tap on the top of the broken bit to loosen it and remove it from the wood. |
| Use a screw extractor | A screw extractor can be used to remove deeply lodged broken bits. |
| Apply heat | Heat the wood around the broken bit to expand it and ease removal. |
| Seek professional help | If all else fails, consult a professional for safe removal. |
Materials and tools needed for removing a broken drill bit
- Pliers or vice grips
- Drill bit extractor set
- Drill with reverse function
- Hammer
- Nail punch or center punch
- Drill bits
- Safety goggles
- Gloves
When removing a broken drill bit from wood, it is important to have the right materials and tools on hand to ensure a successful extraction. Here are the key items you will need:
- Pliers or vice grips: These will be used to grip and twist the broken drill bit.
- Drill bit extractor set: This set includes specialized drill bits designed to remove broken bits.
- Drill with reverse function: The reverse function allows you to loosen and remove the broken drill bit.
- Hammer: The hammer may be needed to tap the drill bit extractor into the broken bit for easier removal.
- Nail punch or center punch: This tool can be used to create a small indentation on the broken bit, which can help guide the drill bit extractor.
- Drill bits: You may need various drill bits to create pilot holes or to drill into the broken bit if necessary.
- Safety goggles: Safety goggles should always be worn when working with power tools to protect your eyes from flying debris.
- Gloves: Gloves can provide additional protection while handling sharp tools and materials.
Having these materials and tools ready before attempting to remove a broken drill bit will help ensure a smoother and safer process.
Step-by-step guide for removing a broken drill bit
1. Assess the situation
Take a close look at the broken drill bit and the surrounding wood to determine the best course of action. Identify any obstacles or potential risks before proceeding.
2. Gather the necessary tools
Make sure you have the following tools on hand:
- Needle-nose pliers: These will be essential for gripping and extracting the broken drill bit.
- Drill bit extractor: This is a specialized tool designed specifically for removing broken drill bits. If you don’t have one, you can also use a screw extractor or any other small, grippy tool that can fit into the hole.
- Safety goggles: Protect your eyes from any flying debris or wood particles.
- Gloves: For added grip and to protect your hands.
3. Secure the wood
If possible, clamp the wood securely to prevent it from moving during the removal process. This will ensure stability and reduce the risk of injury.
4. Remove any excess debris
Carefully brush away any sawdust or wood chips around the broken drill bit to create a clear path for the extraction process.
5. Grip the broken drill bit with pliers
Using the needle-nose pliers, carefully grip the broken drill bit as close to the wood surface as possible. Make sure your grip is firm and secure.
6. Twist and pull
While maintaining a steady grip with the pliers, gently twist the broken drill bit counterclockwise to loosen it from the wood. Apply consistent pressure and gradually increase the force if needed.
7. Use a drill bit extractor or other gripping tool
If the broken drill bit is stubborn and cannot be removed using pliers alone, try using a drill bit extractor or another small gripping tool. Insert the extractor into the hole and turn it counterclockwise to apply additional torque.
8. Tap the extractor
If the extractor is not working as expected, tap it gently with a hammer to help create additional leverage. Be careful not to hit it too hard, as this can cause further damage to the wood or the extractor.
9. Continue twisting and pulling
Repeat the twisting and pulling motion with the pliers or extractor until the broken drill bit is completely removed from the wood. Take your time and be patient – rushing the process can lead to more problems.
10. Clean up and inspect
Once the broken drill bit is successfully removed, clean up any remaining debris, and inspect the hole for any damage. If necessary, fill the hole with wood filler and sand it down to create a smooth surface.
11. Dispose of the broken drill bit

Safely dispose of the broken drill bit in a proper disposal container or recycling center.
12. Learn from the experience
Reflect on what may have caused the drill bit to break and consider any necessary adjustments or precautions for future drilling projects. This will help prevent similar incidents from occurring in the future.
Common mistakes to avoid when removing a broken drill bit
When it comes to removing a broken drill bit from wood, it’s important to approach the task with caution and avoid common mistakes that can potentially make the situation worse. Here are some common mistakes to avoid:
- Using excessive force: Trying to forcefully remove a broken drill bit can cause further damage to the wood. It’s important to avoid applying too much pressure, as it can result in the bit becoming even more difficult to remove.
- Not wearing protective gear: Removing a broken drill bit can be hazardous, especially if the bit breaks and fragments fly off. Always wear safety goggles and gloves to protect yourself from any potential injuries.
- Using the wrong tools: Using the wrong tools can make the task more challenging and increase the risk of damaging the wood. Make sure to use the appropriate tools for removing the broken drill bit, such as pliers, drill bit extractors, or a small saw.
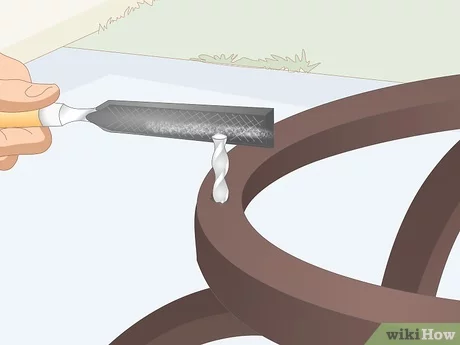
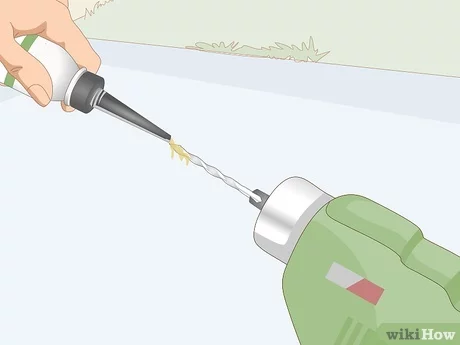
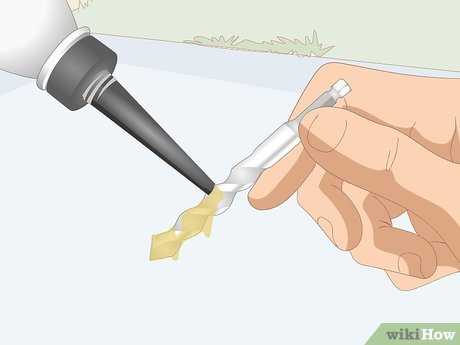
- Not lubricating the area: Lubricating the area around the broken drill bit can make it easier to remove. Applying a lubricant, such as WD-40, can help loosen the bit and minimize the chances of it getting stuck.
- Not tapping or drilling a pilot hole: Before attempting to remove the broken drill bit, it can be helpful to tap or drill a small pilot hole in the center of the broken bit. This can provide a starting point for easier extraction.
- Not seeking professional help: If you are unsure about how to safely remove the broken drill bit or if it is deeply embedded in the wood, it’s best to seek professional help. They have the necessary expertise and tools to remove the bit without causing further damage.
By avoiding these common mistakes, you can increase the chances of successfully removing a broken drill bit from wood without causing additional damage or injury.
Preventing a broken drill bit
While it can be frustrating to deal with a broken drill bit, there are steps you can take to minimize the risk of this happening in the first place. Here are some tips to prevent a broken drill bit:
- Choose the right drill bit: Different types of materials require different drill bits. Make sure to select the appropriate bit for the material you are working with, whether it’s wood, metal, or concrete. Using the wrong bit can increase the chances of it breaking.
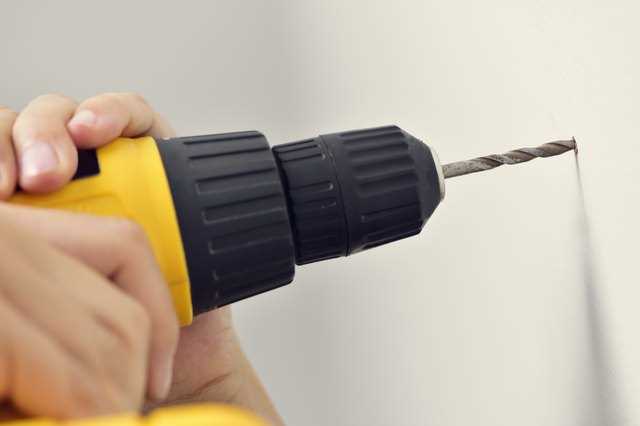
- Use the correct drilling technique: Apply steady pressure and avoid putting too much force on the drill. Let the drill bit do the work and avoid forcing it into the material. Using excessive force can cause the bit to snap.
- Secure your workpiece: Before drilling, ensure that your workpiece is firmly secured. This will prevent movement and reduce the risk of the drill bit getting caught in the wood or other materials.
- Inspect your drill bits: Regularly check your drill bits for any signs of wear or damage. If you notice any issues such as dullness, chipping, or bending, it’s important to replace the bit before using it again.
- Start with a pilot hole: When drilling into hardwood or thick materials, it’s often helpful to start with a smaller pilot hole before using a larger bit. This reduces the strain on the bit and reduces the chances of it breaking.
- Use cutting fluid: When drilling into harder materials like metal or concrete, using cutting fluid can help reduce friction and heat, extending the life of the bit and reducing the risk of breakage.
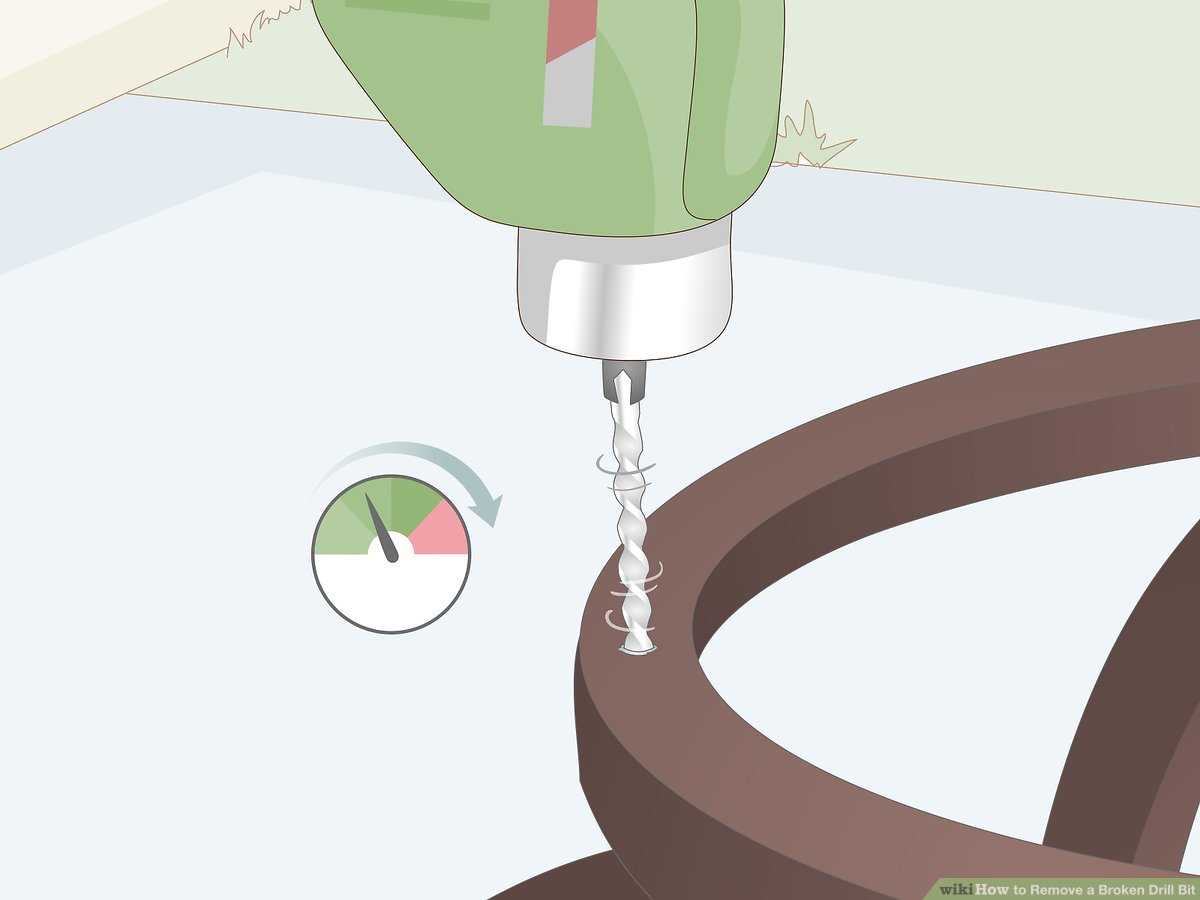
- Work at an appropriate speed: Different drill bits have different recommended drilling speeds. Make sure to adjust the drilling speed on your power drill according to the type of bit you are using and the material you are drilling into.
By following these tips, you can greatly reduce the likelihood of a broken drill bit and ensure a smoother and safer drilling experience.
Alternative methods for removing a broken drill bit from wood
When a drill bit breaks off inside wood, it can be frustrating and challenging to remove. However, there are alternative methods you can try to remove the broken drill bit without causing further damage to the wood. Here are a few techniques you can use:
1. Using pliers or vice grips
If the broken part of the drill bit is still visible above the wood surface, you can try using pliers or vice grips to grip onto the broken piece and slowly twist it counterclockwise to remove it. Make sure to apply steady pressure and be careful not to damage the surrounding wood.
2. Using a screw extractor
If the broken drill bit is too deeply embedded in the wood and cannot be easily reached, a screw extractor can be a helpful tool. First, drill a small hole into the broken drill bit using a drill bit that is slightly smaller than the extractor. Then, insert the extractor into the hole and turn it counterclockwise using a wrench or pliers. The extractor will grip onto the broken drill bit and allow you to remove it.
3. Using a center punch and hammer
If the broken drill bit is protruding slightly from the wood surface, you can use a center punch and a hammer to tap the broken drill bit in a counterclockwise direction. This technique can help loosen the drill bit and make it easier to remove.
4. Using a Dremel tool
If the above methods fail or if the broken drill bit is firmly stuck in the wood, you can try using a Dremel tool with a cutting wheel to carefully cut a small kerf into the broken drill bit. Once you have cut a groove, you can use a flathead screwdriver or chisel to pry and remove the broken drill bit from the wood.
5. Seeking professional assistance
If all else fails or if you are uncomfortable attempting to remove the broken drill bit yourself, it may be best to seek the help of a professional. A woodworking professional or a repair specialist will have the expertise and proper tools to safely remove the broken drill bit without causing further damage.
Remember, regardless of the technique you choose to use, take your time and be patient. Rushing the removal process can lead to more damage to the wood. If necessary, consult an expert for guidance and assistance.
When to seek professional help for removing a broken drill bit
While removing a broken drill bit from wood can be done by a DIY enthusiast with the right tools and techniques, there are certain situations where it may be best to seek professional help. Here are some scenarios where you should consider calling in a professional:
- When the broken drill bit is deeply embedded: If the broken drill bit is deeply embedded in the wood and you are unable to reach it or remove it using basic tools, it is advisable to seek professional help. They have specialized tools and expertise to safely remove the drill bit without causing further damage to the wood.
- When the wood is valuable or delicate: If the wood is valuable or delicate, such as antique furniture or a custom-made piece, it is better to leave the removal of the broken drill bit to professionals. They can assess the situation and use appropriate techniques to remove the drill bit without causing any damage to the wood.
- When you are unsure about the correct removal technique: If you are unsure about the correct technique to remove the broken drill bit or the potential risks involved, it is best to consult a professional. They can provide guidance based on their experience and knowledge, ensuring a safe and effective removal process.
- When you lack the necessary tools and equipment: Removing a broken drill bit may require specialized tools and equipment, such as extraction kits or drill press. If you do not have access to these tools, it is recommended to seek professional assistance. They will have the right tools to handle the situation properly.
- When you want to avoid potential injuries: Removing a broken drill bit can be a challenging and potentially dangerous task, especially if you are not familiar with the proper safety precautions. To avoid injuries or accidents, it is wise to hire professionals who are trained and experienced in handling such situations.
Ultimately, the decision to seek professional help for removing a broken drill bit depends on the specific circumstances and your comfort level with the task. If you are unsure or concerned about causing further damage, it is always better to consult a professional rather than risk making the situation worse.
FAQ:
What should I do if the drill bit breaks while drilling into wood?
If the drill bit breaks while drilling into wood, there are a few steps you can take to remove it. First, you should stop drilling immediately and assess the situation. If the broken drill bit is still sticking out of the wood, you can try using pliers or a pair of vice grips to gently pull it out. If the broken drill bit is flush with the surface of the wood, you can try using a small chisel or a pair of needle-nose pliers to carefully remove it. If these methods don’t work, you may need to use a drill bit extractor or consult a professional for assistance.
How can I prevent a drill bit from breaking in wood?
There are several ways to prevent a drill bit from breaking in wood. First, make sure you are using the correct type and size of drill bit for the job. Using a bit that is too small or too large for the hole you are drilling can cause it to break. Second, always make sure to apply steady and even pressure when drilling. If you push too hard or too unevenly, you increase the risk of the bit breaking. Third, periodically check the condition of your drill bits and replace any that are dull or damaged. Lastly, consider using a drilling lubricant or coolant to reduce friction and heat buildup, which can also help prevent breakage.
Are there any special tools I can use to remove a broken drill bit from wood?
Yes, there are special tools that can be used to remove a broken drill bit from wood. One such tool is a drill bit extractor. This tool is designed to grip onto the broken drill bit and allow you to easily remove it from the wood. Another tool that can be helpful is a left-hand drill bit. These drill bits are designed to rotate in the opposite direction of a regular drill bit, which can sometimes help to loosen and remove a broken bit. Additionally, needle-nose pliers, vice grips, and chisels can be used to carefully extract a broken drill bit from wood.
Can I use a hammer and nail to remove a broken drill bit from wood?
Using a hammer and nail to remove a broken drill bit from wood can be a risky and potentially damaging method. While it may work in some cases, it is generally not recommended as it can cause further damage to the wood or result in injury. It is better to use tools that are specifically designed for removing broken drill bits, such as pliers, vice grips, or a drill bit extractor. These tools provide more control and reduce the risk of causing additional damage.
What should I do if a broken drill bit is stuck deep in the wood?
If a broken drill bit is stuck deep in the wood, it can be more challenging to remove. One approach is to try using a pair of needle-nose pliers or vice grips to grip onto the exposed portion of the broken bit and gently twist it out. Another option is to carefully drill a small hole next to the broken bit and use a left-hand drill bit to try to loosen and remove it. If these methods are unsuccessful, you may need to consult a professional for assistance or consider replacing the piece of wood if it is feasible.
Are there any precautions I should take when removing a broken drill bit from wood?
Yes, there are a few precautions you should take when removing a broken drill bit from wood. First, always wear protective gloves and safety glasses to prevent injury. Broken drill bits can have sharp edges that can cause cuts, and debris or metal shavings can fly when removing the broken bit. Second, be careful not to apply too much force or pressure when attempting to remove the broken bit, as this could cause damage to the wood or increase the risk of injury. Lastly, if you are unsure or uncomfortable with removing the broken bit yourself, it is best to seek professional assistance.
Should I try to drill through the broken drill bit to remove it from wood?
Drilling through a broken drill bit to remove it from wood is generally not recommended. The broken bit can cause damage to the drill or cause it to become stuck in the wood even more. It is best to try other methods, such as using pliers, vice grips, or a drill bit extractor, to safely remove the broken bit. If these methods are unsuccessful, it is best to consult a professional for assistance.
Video:


Harrison Clayton
Meet Harrison Clayton, a distinguished author and home remodeling enthusiast whose expertise in the realm of renovation is second to none. With a passion for transforming houses into inviting homes, Harrison's writing at https://thehuts-eastbourne.co.uk/ brings a breath of fresh inspiration to the world of home improvement. Whether you're looking to revamp a small corner of your abode or embark on a complete home transformation, Harrison's articles provide the essential expertise and creative flair to turn your visions into reality. So, dive into the captivating world of home remodeling with Harrison Clayton and unlock the full potential of your living space with every word he writes.


