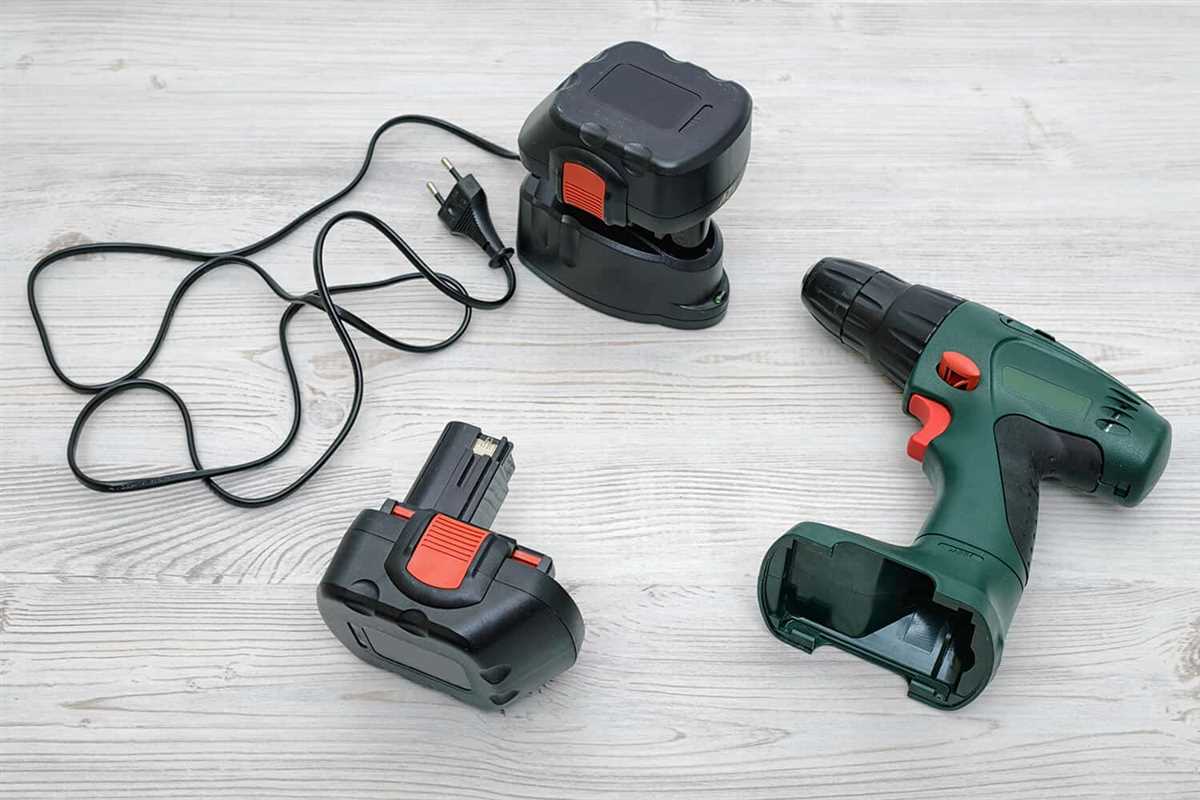
How to properly test a cordless drill battery charger

Having a reliable and functional cordless drill battery charger is essential for any DIY enthusiast or professional tradesperson. However, like any electronic device, chargers can sometimes malfunction or stop working altogether. To ensure that your cordless drill battery charger is working properly, it is important to perform regular testing and maintenance. In this article, we will discuss the steps to properly test a cordless drill battery charger.
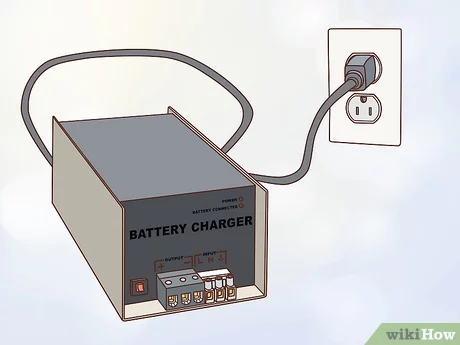
Step 1: Inspect the charger
Before testing the charger, it is important to visually inspect it for any signs of physical damage or wear. Check the power cord, plug, and charging terminals for any frayed wires, loose connections, or corrosion. If you notice any damage, it is recommended to replace the charger before proceeding with testing.
Step 2: Check the voltage
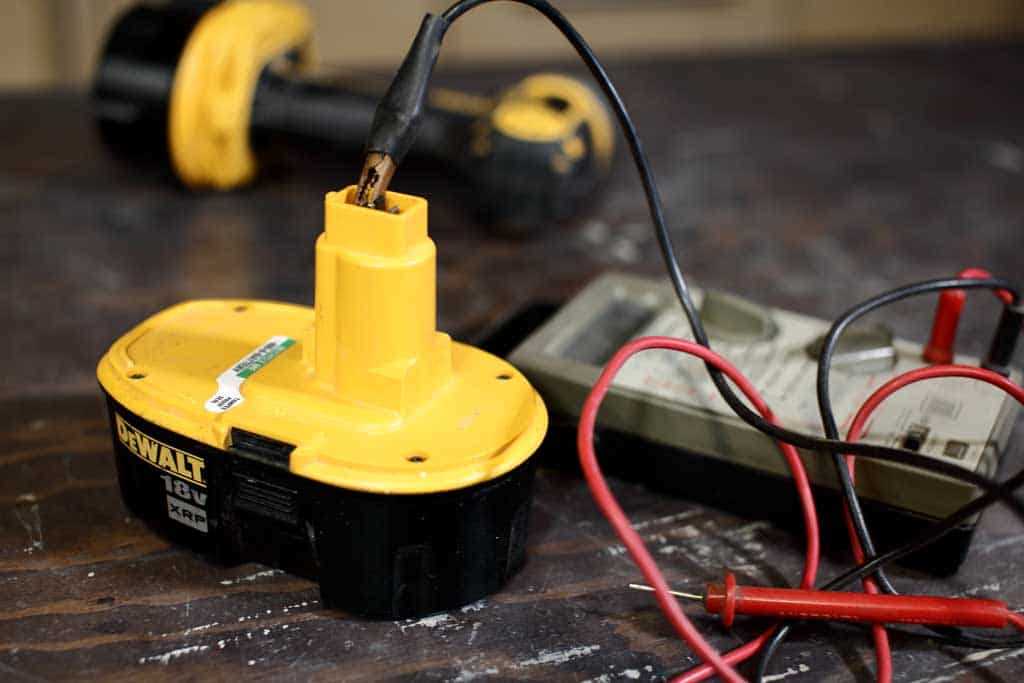
One of the most important factors to consider when testing a cordless drill battery charger is the voltage output. Using a multimeter, set it to the appropriate voltage range and carefully connect the probes to the charger’s positive and negative terminals. The voltage reading should match the charger’s specifications. If the voltage reading is significantly different or fluctuates, it may indicate a problem with the charger.

Step 3: Monitor the charging process
Once you have verified the voltage output, the next step is to monitor the charging process. Plug the charger into a power outlet and connect it to a compatible battery. Observe the charging indicators on the charger and the battery. The charging indicators should light up or blink according to the manufacturer’s instructions. If the indicators do not respond or display an error, it may indicate a malfunction in the charger.
Step 4: Test the battery
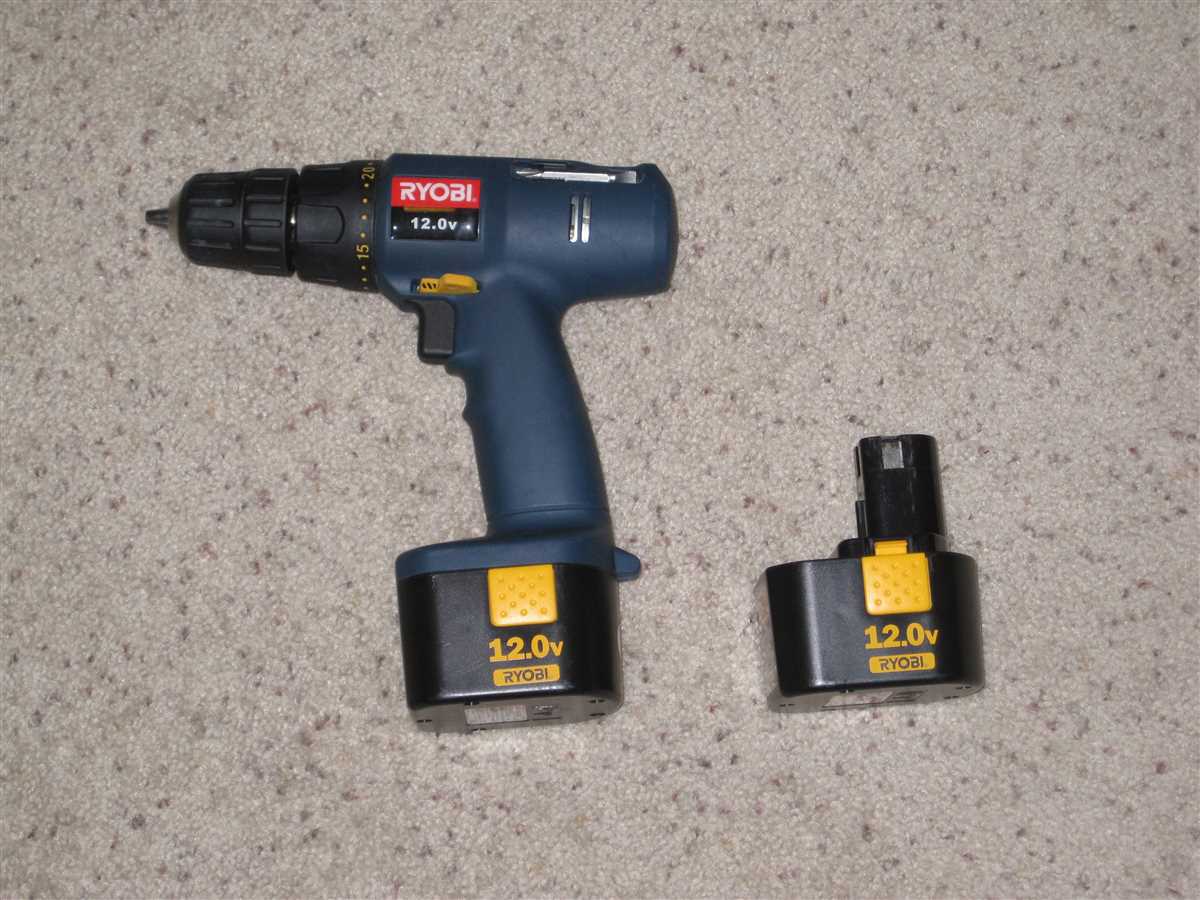
In addition to testing the charger, it is also important to test the battery being charged. Using a battery tester, check the voltage and overall condition of the battery. A healthy battery should have a voltage within the manufacturer’s specified range and should not show any signs of swelling or leakage. If the battery fails the test, it is recommended to replace it.
Step 5: Consult the manufacturer or a professional

If you encounter any issues or have doubts about the charger’s performance after testing, it is recommended to consult the manufacturer’s user manual or reach out to their customer support for guidance. Alternatively, you can also seek the assistance of a professional technician who specializes in cordless drill battery chargers.
In conclusion, regular testing and maintenance of a cordless drill battery charger are crucial to ensure its proper functionality. By following these steps, you can identify any potential issues and take the necessary steps to resolve them, ultimately prolonging the lifespan of your charger and batteries.
Why Testing a Cordless Drill Battery Charger is Important
Testing a cordless drill battery charger is important for several reasons. It ensures the charger is functioning properly and able to charge the battery effectively. This helps maintain the performance and lifespan of the battery, ensuring it can power the cordless drill efficiently.
1. Safety
Testing a cordless drill battery charger is crucial for safety reasons. Faulty chargers can overcharge batteries, leading to overheating and potentially causing a fire or explosion. By regularly testing the charger, you can identify any issues or malfunctions early on, preventing accidents and ensuring the charger is safe to use.
2. Efficiency
Testing the charger allows you to assess its efficiency in charging the battery. A properly functioning charger will charge the battery quickly and effectively, allowing you to use the cordless drill for longer periods of time without interruption. By testing the charger, you can verify that it is providing the necessary power to charge the battery efficiently.
![How to *Properly [(Fairly) Prepare to] Eat Leftover **Casserole, ***Enchiladas (Many Enchilada), a Test, a Spell, a Comedy | Mammy’s (*x4) Manners, a Fairy Grimoire](https://m.media-amazon.com/images/I/51DK7uDNg7L._SS520_.jpg)
3. Battery Performance and Lifespan
A charger that is not working properly can negatively impact the performance and lifespan of the battery. It may not charge the battery to its full capacity, resulting in reduced runtime for the cordless drill. Regularly testing the charger helps ensure the battery is charged optimally, extending its lifespan and allowing it to perform at its best.
4. Cost Savings
By testing the charger, you can identify any issues early on and take appropriate action. This can help avoid the need to replace the charger or battery prematurely, saving you money in the long run. Additionally, a charger that charges the battery efficiently can help maximize the usable life of the battery, reducing the need for frequent replacements.
5. Reliability
A properly tested charger ensures reliability when using the cordless drill. You can rely on the charger to charge the battery effectively, allowing you to complete your tasks without interruptions. This is particularly important for professionals who rely on their cordless drill for their work.
In conclusion, testing a cordless drill battery charger is important for safety, efficiency, battery performance and lifespan, cost savings, and reliability. Regularly testing the charger can help identify any issues or malfunctions early on and ensure that the charger is functioning properly. This ultimately maximizes the performance and lifespan of the battery, providing you with a reliable and efficient cordless drill.
Understanding the Importance of Regular Testing
Regular testing of a cordless drill battery charger is essential in ensuring its performance and longevity. By regularly testing the charger, you can identify any potential issues or malfunctions and take appropriate action to prevent further damage to the device or its batteries.
1. Ensures Safe Operation
Regular testing of a cordless drill battery charger helps to ensure safe operation. By testing the charger, you can check if it is working correctly and if all the safety features are functioning as intended. This can prevent any accidents or hazards that may arise from a faulty charger.
2. Extends Battery Life
Regular testing can help identify any issues with the charger that may be affecting the battery’s performance or lifespan. A faulty charger can overcharge or undercharge the batteries, which can result in reduced battery life. By testing the charger regularly, you can detect and rectify any problems, ensuring that the batteries are charged optimally and their lifespan is maximized.
3. Improves Efficiency
A properly functioning charger ensures that the batteries are charged efficiently and quickly. Regular testing allows you to monitor the charger’s output and verify if it is performing at the expected levels. This helps to identify any issues that may be affecting the charger’s efficiency and take corrective measures to improve its performance.
4. Saves Time and Money
Regular testing can help identify any issues with the charger early on, before they escalate into more significant problems. By addressing these issues promptly, you can avoid costly repairs or replacements. Additionally, ensuring that the charger is operating optimally can save you time, as you won’t have to wait for extended charging times or deal with unexpected battery failures.
5. Peace of Mind
Regularly testing the cordless drill battery charger provides peace of mind, knowing that it is in good working condition. You can have confidence in the charger’s reliability and performance, knowing that it has been tested and checked for any potential issues.
In conclusion, regular testing of a cordless drill battery charger is crucial for ensuring safe operation, extending battery life, improving efficiency, saving time and money, and providing peace of mind. By incorporating regular testing into your maintenance routine, you can ensure that your charger functions optimally and that your batteries are always ready for use.
Step-by-Step Guide to Testing a Cordless Drill Battery Charger
Testing a cordless drill battery charger is an essential process to ensure that it is functioning properly and safely. Here is a step-by-step guide to help you test your cordless drill battery charger:
Step 1: Read the Manual
Before starting the testing process, it is important to read the manual that came with your cordless drill battery charger. The manual will provide specific instructions and safety guidelines for testing the charger. Familiarize yourself with the information to ensure a successful test.
Step 2: Visual Inspection
Visually inspect the cordless drill battery charger for any signs of physical damage or wear. Check for frayed wires, loose connections, or noticeable stains. If you notice any issues, do not proceed with testing and contact the manufacturer for further guidance.
Step 3: Power Source
Ensure that the cordless drill battery charger is properly plugged into a functioning power source. Make sure the outlet is providing the correct voltage to the charger. Verify that the power cord is in good condition and properly connected to the charger.
Step 4: Charging Indicator
Most cordless drill battery chargers have a charging indicator light or display. Plug in a known working battery into the charger and observe the charging indicator. It should light up or show the charging progress, indicating that the charger is receiving power and functioning correctly.
Step 5: Charging Time
Place a fully discharged battery into the charger and note the time it takes for the battery to fully charge. Consult the manual for the recommended charging time for your specific battery model. If the charging time significantly deviates from the recommended time, it could indicate an issue with the charger.
Step 6: Battery Temperature
While the battery is charging, monitor its temperature. A cordless drill battery charger should not overheat the battery during the charging process. If you notice excessive heat or a significant increase in temperature, stop the charging process immediately and disconnect the battery.
Step 7: Charging Complete
Once the battery is fully charged, the charger should automatically stop the charging process. Observe the charging indicator to ensure it indicates a full charge. Remove the battery from the charger and check its voltage using a multimeter if necessary to ensure it is fully charged.
Step 8: Repeat Test
For a thorough test, repeat the charging process with multiple batteries. This will help identify consistent charging patterns and ensure that the charger is capable of properly charging different batteries. Note any discrepancies in the charging process and contact the manufacturer if necessary.
By following this step-by-step guide, you can effectively test your cordless drill battery charger and ensure its proper functioning. Regular testing will help prevent potential safety hazards and allow you to enjoy a reliable and long-lasting charger for your cordless drill.
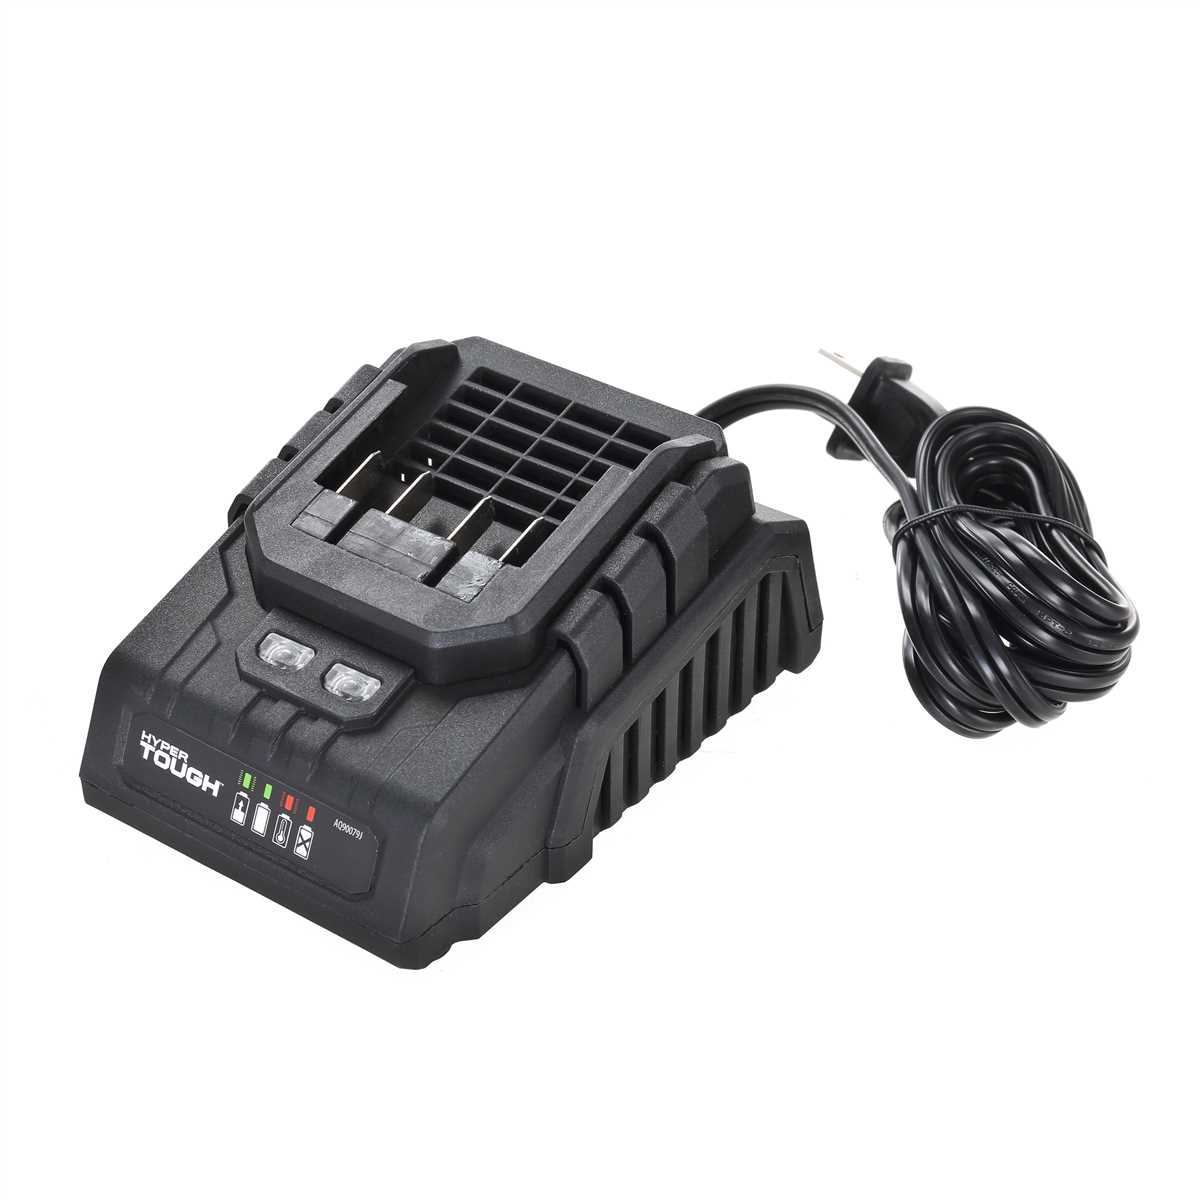
Tools and Equipment Needed for Testing
Multimeter
A multimeter is a versatile tool that can be used to test various electrical properties of a cordless drill battery charger. It can measure voltage, current, and resistance, which are essential for assessing the health and performance of the charger.
Battery Tester
A battery tester is specifically designed to test the capacity and condition of batteries. It can determine if the charger is providing the correct charge voltage and if the battery is holding a charge as expected. It is a useful tool for verifying the effectiveness of the charger.
Load Tester
A load tester is used to simulate a load on a battery and measure its performance under such conditions. By connecting the charger to the load tester, you can assess if the charger is able to deliver the necessary power to the battery and maintain it during operation.
Discharge Device
A discharge device is used to fully discharge a battery before testing. This is important to ensure that the battery is completely drained and ready to be recharged. It helps verify if the charger is capable of fully charging the battery after complete discharge.
Dummy Load
A dummy load is a resistive load that simulates the normal operation of the drill on the battery. It allows you to test if the charger can provide enough power to the drill battery under typical usage conditions.
Power Supply
A power supply can be used to provide a controlled voltage input to the charger. This is useful for testing the charger’s capability to handle different voltage inputs and ensure that it operates correctly within the specified range.
Environmental Test Equipment
Environmental test equipment, such as a temperature and humidity gauge, can be used to assess the charger’s performance under different environmental conditions. This is important to ensure that the charger can operate efficiently and safely in various situations.
Documentation and Test Plan
It is important to keep track of the testing process and results. This includes creating a test plan that outlines the specific tests to be performed and documenting the measurements and observations during testing. This documentation can be useful for future reference and troubleshooting.
Safety Equipment
When working with electrical equipment, safety should always be a priority. Safety equipment, such as insulated gloves, safety goggles, and protective clothing, should be worn to prevent accidents and injuries.
Common Issues and Problems to Identify
When testing a cordless drill battery charger, there are several common issues and problems that you may come across.
1. Overheating
- If the battery charger gets excessively hot while in use, it may indicate a problem with the internal components or a malfunctioning cooling system.
- Overheating can reduce the efficiency and lifespan of the charger, and in some cases, it can even pose a safety risk.
- Check for any visible signs of damage, such as melted plastic or burnt smells, and consider discontinuing use if overheating continues.
2. Slow Charging
- If the battery charger takes an unusually long time to charge the batteries, it may suggest a problem with the charging circuit or the batteries themselves.
- Ensure that the batteries are properly inserted and connected, and try using different batteries to rule out any issues with them.
- Additionally, check the charger’s voltage output to confirm that it is within the acceptable range for your batteries.
3. No Charging
- If the battery charger fails to charge the batteries at all, there may be a problem with the charger’s power supply or the charging circuit.
- Make sure that the charger is plugged into a functioning power outlet and that the power cord is securely connected.
- If the charger has an indicator light, check if it is illuminated when connected to power. If not, it may indicate a power supply issue.
- Consider testing the charger with a different power outlet or using a different power cord if possible.
4. Inconsistent Charging
- If the charger provides inconsistent charging, such as charging one battery faster than the others or fluctuating charging speeds, it could be a sign of a faulty charging circuit or an issue with the batteries.
- Check the charger’s compatibility with the batteries you are using and ensure that they are compatible with each other.
- Inspect the charging contacts on both the charger and the batteries for any dirt, corrosion, or physical damage that may affect the charging process.
- Clean the contacts if necessary and ensure a secure connection between the batteries and the charger.
5. Reduced Battery Life
- If the batteries charged by the charger seem to have a significantly reduced runtime, it may indicate an issue with the charger or the batteries themselves.
- Check the charger’s performance with different batteries to determine if the problem lies with the charger or the batteries.
- If multiple batteries experience reduced runtime, it may suggest a problem with the charger.
- Consider contacting the manufacturer or seeking professional assistance to diagnose and resolve the issue.
Remember that proper maintenance and care can help prevent many of these issues. Regularly clean the charger and ensure that it is stored in a cool and dry area to prolong its lifespan.
The Role of Voltage and Amperage in Testing
When testing a cordless drill battery charger, it is important to understand the role of voltage and amperage in the charging process. Voltage and amperage are two key electrical characteristics that determine how effectively a charger can charge a battery. Here is a breakdown of both of these factors and how they affect the testing process.
Voltage
Voltage represents the electrical potential difference between two points in a circuit. In the case of a charger, voltage is the amount of electrical pressure that pushes the current through the battery. The voltage rating of a charger is typically specified by the manufacturer and is usually higher than the battery’s voltage rating. This is because the charger needs to provide a higher voltage in order to overcome the resistance in the battery and deliver a charge.
When testing a charger, it is important to ensure that the charger has the correct voltage rating for the battery. Using a charger with a higher voltage can result in overcharging, which can damage the battery and reduce its overall lifespan. On the other hand, using a charger with a lower voltage may not fully charge the battery and reduce its performance.
Amperage
Amperage, also known as current, represents the flow of electrical charge through a circuit. In the context of a charger, amperage refers to the rate at which the charger can supply current to the battery. A higher amperage rating means that the charger can deliver more current to the battery, resulting in faster charging times.
When testing a charger, it is important to ensure that the amperage rating is suitable for the battery. Using a charger with a lower amperage rating may result in slow charging times, while using a charger with a higher amperage rating may cause the battery to overheat and risk damage.
Testing Considerations
When testing a cordless drill battery charger, it is essential to consider both the voltage and amperage ratings. Here are some key points to keep in mind during the testing process:
- Check the voltage and amperage ratings specified by the manufacturer for both the charger and the battery.
- Verify that the charger’s voltage rating matches or slightly exceeds the battery’s voltage rating to ensure proper charging.
- Ensure that the charger’s amperage rating is suitable for the battery to avoid slow charging or overcharging.
- Use a voltmeter and ammeter to measure the charger’s voltage and amperage output while charging the battery.
- Monitor the charging process to ensure that the charger is providing a consistent voltage and amperage within the specified range.
By understanding the role of voltage and amperage in testing a cordless drill battery charger, you can ensure that the charger is capable of effectively charging the battery without risking damage or reduced performance.
Testing the Charger’s Charging Time and Efficiency
1. Fully Discharge the Battery
Before testing the charger’s charging time and efficiency, it is important to start with a fully discharged battery. Use the cordless drill until the battery is completely drained. This will ensure accurate testing results.
2. Note the Battery’s Capacity
Take note of the battery’s capacity, which is usually measured in ampere-hours (Ah). This information can usually be found on the battery or in the user manual. Knowing the battery’s capacity will help you assess the charger’s efficiency during the testing process.
3. Connect the Battery to the Charger
Connect the fully discharged battery to the charger following the manufacturer’s instructions. Ensure that the connections are secure and properly aligned.
4. Start the Charging Process
Once the battery is connected to the charger, start the charging process. Keep track of the time it takes for the battery to reach a full charge.
5. Monitoring the Charging Progress
Throughout the charging process, monitor the progress of the battery’s charge. Some chargers have LED indicators or digital displays that show the charging status. If possible, note any fluctuations or abnormalities in the charging process.
6. Calculate the Charging Efficiency
To calculate the charger’s charging efficiency, divide the battery’s capacity by the charging time and multiply by 100. The formula is as follows:
Charging Efficiency = (Battery Capacity / Charging Time) x 100
7. Compare the Results
Compare the calculated charging efficiency with the manufacturer’s specifications or industry standards. This will help you assess whether the charger is performing as expected or if there are any potential issues.
8. Repeat the Testing Process
For more accurate results, it is recommended to repeat the testing process multiple times and take an average of the calculated charging efficiencies. This can help account for any variations or anomalies that may occur during the testing.
9. Take Note of any Abnormalities
If you notice any abnormalities such as overheating, unusual sounds, or significantly longer charging times, make a note of these observations. They could indicate a potential issue with the charger that may require further investigation or servicing.
10. Document and analyze the Results
Document your testing results, including the calculated charging efficiencies, any abnormalities observed, and any other relevant information. Analyze the results to determine the charger’s overall performance and whether it meets your expectations and requirements.
By following these steps, you can properly test a cordless drill battery charger’s charging time and efficiency, helping you assess its performance and identify any potential issues.
Ensuring Safety during the Testing Process
1. Wear appropriate protective gear
When working with batteries and chargers, it is important to prioritize safety. Make sure to wear protective gloves and safety glasses to prevent any accidents or injuries.
2. Check for any visible damage
Before starting the testing process, carefully inspect the cordless drill battery charger for any visible damage. Look for signs of corrosion, frayed wires, or loose connections. If you notice any issues, do not proceed with the testing and consider seeking professional assistance.
3. Ensure proper ventilation
Testing batteries can release potentially harmful gases. It is essential to work in a well-ventilated area to reduce the risk of inhaling these gases. Open windows or use exhaust fans to ensure proper airflow.
4. Use a dedicated testing area
Designate a specific area for testing batteries and chargers. This area should be away from flammable materials and should have a fire extinguisher nearby as a precautionary measure.
5. Follow manufacturer’s instructions
Always refer to the manufacturer’s instructions for the specific cordless drill battery charger you are testing. Different chargers may have different testing procedures, so it is crucial to follow the provided guidelines to ensure accurate and safe testing.
6. Keep a safe distance
While testing the charger, it is essential to keep a safe distance from the battery. This precaution will help minimize the risk of any potential accidents, such as explosions or electrical shocks.
7. Use appropriate testing equipment
Ensure that you have the necessary testing equipment, such as a multimeter, to accurately measure the voltage and current output of the charger. Using the wrong equipment can lead to inaccurate readings and potentially cause harm.
8. Monitor the temperature
During the testing process, keep an eye on the temperature of the battery and charger. If you notice any excessive heat or unusual temperature fluctuations, immediately stop the testing and unplug the charger. High temperatures can indicate a malfunction or potential danger.
9. Dispose of defective or damaged Chargers safely
If you determine that the cordless drill battery charger is defective or damaged, it is crucial to dispose of it properly. Contact your local waste management facility or follow the manufacturer’s guidelines to ensure safe and environmentally friendly disposal.
Overall, ensuring safety during the testing process of a cordless drill battery charger is essential. By following these safety precautions, you can minimize the risk of accidents or injuries and effectively test the charger for its functionality.
Troubleshooting Tips and Solutions
1. Check the Power Source
First, ensure that the cordless drill battery charger is properly plugged into a functioning power outlet. Use a different outlet or extension cord to rule out any power supply issues.
2. Inspect the Charging Connections
Check the charging connections on both the battery and the charger. Make sure that they are clean and free from any debris or corrosion. If necessary, gently clean the contacts using a soft cloth or a cotton swab dipped in rubbing alcohol.
3. Verify Compatibility
Ensure that the battery and the charger are compatible with each other. Check the battery’s specifications and compare them to the charger’s requirements. Using an incompatible charger may result in improper charging or damage to the battery.
4. Test with a Different Battery
If possible, test the charger with a different battery that is known to be working. This will help determine whether the issue lies with the battery or the charger itself. If the charger works with the different battery, the original battery may need to be replaced.
5. Check for Overheating
During the charging process, monitor the temperature of both the battery and the charger. If either becomes excessively hot to the touch, discontinue charging immediately and allow them to cool down. Overheating can indicate a malfunction or a faulty component.
6. Contact the Manufacturer
If you have followed the troubleshooting steps above and the charger still does not work or charges improperly, contact the manufacturer for further assistance. They may be able to provide additional troubleshooting steps or arrange for a repair or replacement.
FAQ:
Why is it important to test a cordless drill battery charger?
Testing a cordless drill battery charger is important to ensure that it is functioning properly and providing the correct charging voltage. This helps prevent damage to the battery and ensure that it charges efficiently.
How can I test the voltage output of a cordless drill battery charger?
To test the voltage output of a cordless drill battery charger, you will need a multimeter. Set the multimeter to measure DC voltage and then connect the probes to the positive and negative terminals of the charger. The multimeter should display the voltage output of the charger.
What should I do if the cordless drill battery charger is not providing the correct voltage?
If the cordless drill battery charger is not providing the correct voltage, there may be a problem with the charger. You should stop using the charger and consult the manufacturer’s instructions or contact customer support for further assistance. It may be necessary to repair or replace the charger.
Can I use a different brand’s charger for my cordless drill battery?
It is generally recommended to use the charger specifically designed for your cordless drill battery. Different brands may have different charging requirements and using a charger that is not compatible can potentially damage the battery or result in inefficient charging.
How often should I test my cordless drill battery charger?
It is a good practice to test your cordless drill battery charger regularly, especially if you use it frequently. This can help identify any issues with the charger early on and ensure that it is always functioning properly. A suggested frequency is at least once every few months.
Are there any safety precautions to keep in mind when testing a cordless drill battery charger?
Yes, there are a few safety precautions to keep in mind when testing a cordless drill battery charger. First, make sure the charger is unplugged before performing any tests. Second, always wear appropriate safety goggles and gloves when working with electrical equipment. Lastly, follow the manufacturer’s instructions and guidelines when testing the charger.
Video:


Meet Harrison Clayton, a distinguished author and home remodeling enthusiast whose expertise in the realm of renovation is second to none. With a passion for transforming houses into inviting homes, Harrison's writing at https://thehuts-eastbourne.co.uk/ brings a breath of fresh inspiration to the world of home improvement. Whether you're looking to revamp a small corner of your abode or embark on a complete home transformation, Harrison's articles provide the essential expertise and creative flair to turn your visions into reality. So, dive into the captivating world of home remodeling with Harrison Clayton and unlock the full potential of your living space with every word he writes.


