How to Patch Drill Holes in Drywall: Step-by-Step Guide

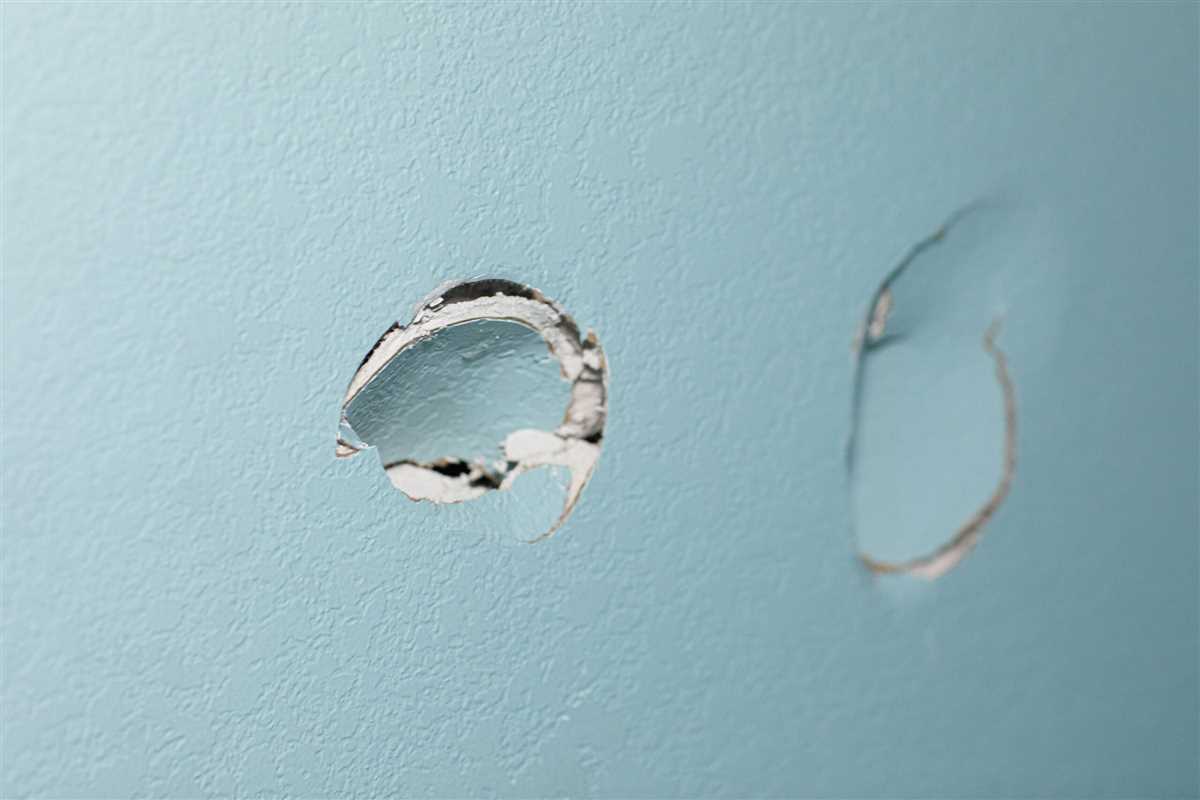
Drilling holes in drywall is a common task, whether you’re hanging shelves, mounting a TV, or installing a new light fixture. However, once your project is complete and you remove the hardware, you’re often left with unsightly holes in your drywall. Fortunately, patching these holes is a relatively simple process that can be done with just a few basic tools and materials. In this step-by-step guide, we’ll walk you through the process of patching drill holes in drywall, so you can restore your walls to their original condition.
Before you begin patching drill holes in drywall, it’s important to gather all the necessary materials. You’ll need a putty knife, sandpaper or a sanding block, drywall joint compound, a patching kit or mesh tape, and some touch-up paint. These items can be found at your local hardware store or home improvement center. Once you have everything you need, you’re ready to get started.
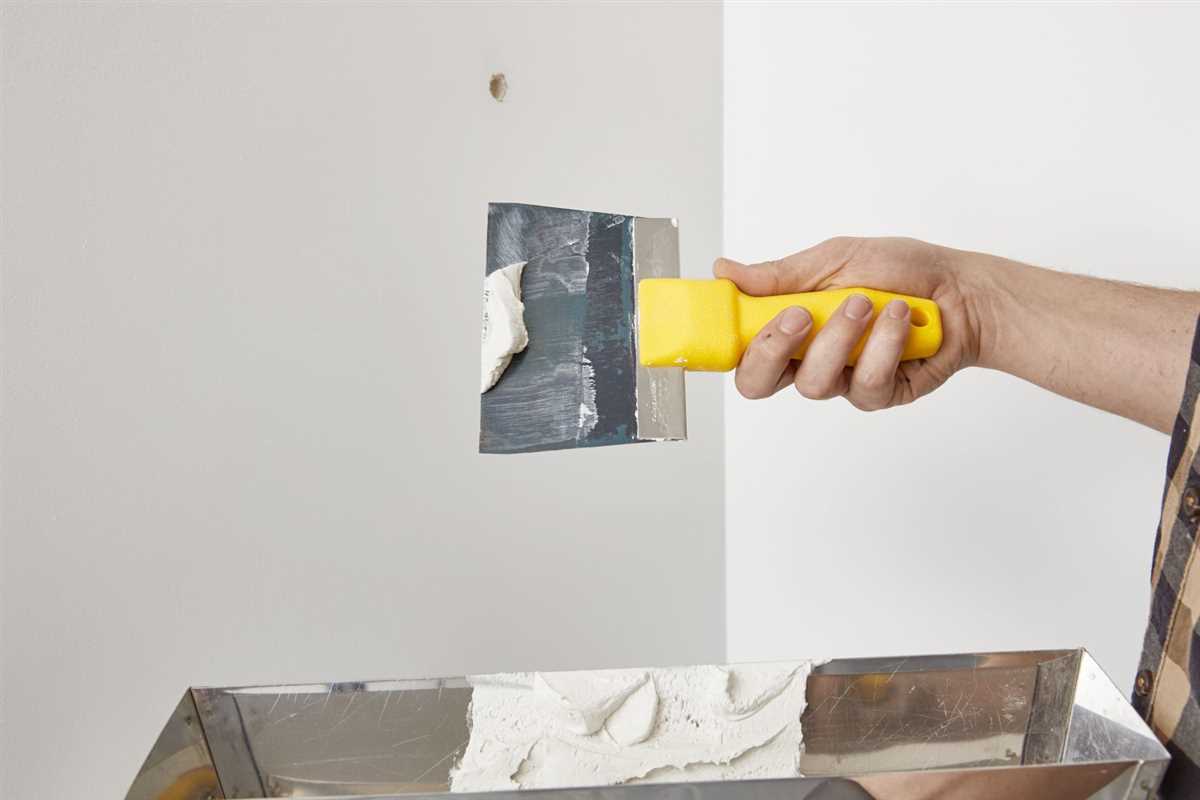
To begin the patching process, clean the area around the hole with a damp cloth to remove any dust or debris. Next, take your patching kit or mesh tape and place it over the hole, making sure it covers the entire area. If you’re using mesh tape, cut it to the appropriate size using scissors or a utility knife. Then, use your putty knife to apply a thin, even layer of joint compound over the tape or patching kit. Smooth out the compound with the putty knife, feathering the edges so it blends seamlessly with the surrounding wall. Allow the compound to dry according to the manufacturer’s instructions.
Preparing the Materials
Before you begin patching drill holes in drywall, it’s important to gather all the necessary materials. This will ensure that you have everything you need to complete the task efficiently. Here are the materials you’ll need:
- Drywall compound or joint compound
- Drywall tape
- Drywall repair patch
- Sanding block or sandpaper
- Putty knife
- Primer
- Paint
- Paintbrush or roller
- Drop cloth
- Clean cloth or sponge
- Water
Make sure you have enough drywall compound, as you may need to apply multiple layers to achieve a smooth finish. It’s also a good idea to have extra drywall repair patches on hand in case you encounter any additional holes during the process.

Additionally, be sure to wear proper protective gear, such as gloves and safety goggles, to protect yourself from any potential hazards.
Gathering the Tools
Before you start patching drill holes in drywall, it’s essential to gather all the necessary tools. Having the right tools at hand will make the process easier and ensure a successful outcome. Here’s a list of tools you’ll need:
- Drywall saw or utility knife: To cut out a clean hole around the damaged area.
- Sanding block or sandpaper: To smooth the patched area once it’s dry.
- Putty knife: For applying spackling compound or joint compound.
- Joint compound or spackling compound: To fill and smooth the patched area.
- Measuring tape: To measure the damaged area and cut out the appropriate patch.
- Patch material (drywall or mesh patch): To cover the hole in the drywall.
- Screwdriver: To remove any screws or anchors before patching.
- Drywall screws: To secure the patch material to the drywall.
- Drop cloth or plastic sheet: To protect the surrounding area from debris.
- Primer and paint: To finish the patched area and blend it with the rest of the wall.
Make sure to have all these tools ready before you begin the patching process. This way, you won’t have to interrupt your work to search for missing tools, and you can maintain a smooth workflow.
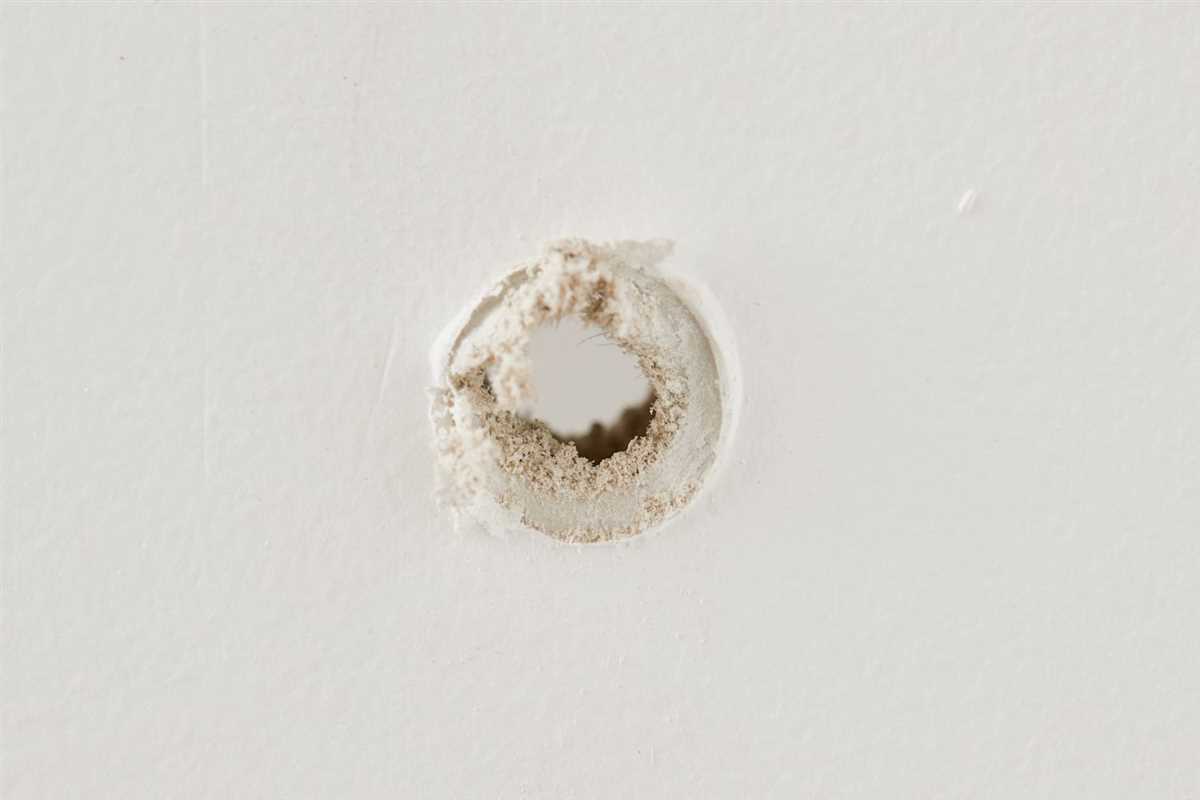
Measuring and Marking the Hole

Before you can patch a drill hole in drywall, you need to properly measure and mark the area to be repaired. This will ensure that your patch fits perfectly and blends seamlessly with the rest of the wall.
Follow these steps to measure and mark the hole:
- Gather your supplies: Before starting the measuring and marking process, make sure you have all the necessary materials, such as a tape measure, pencil, and level.
- Assess the size of the hole: Measure the diameter of the hole using a tape measure. This will help you determine the size of the patch needed.
- Mark the center of the hole: Use a pencil to mark the center of the hole. This will serve as a reference point for your measurements.
- Extend the edges of the hole: Use a straight edge or level to draw lines from the center mark to the outer edges of the hole. This will create a square or rectangular shape around the hole.
- Measure the dimensions of the square: Use a tape measure to measure the length and width of the square or rectangular shape you just created. This will help you cut the patch to the correct size.
- Transfer the measurements to the patch: Place the patch material on a flat surface and use a pencil to mark the dimensions of the square or rectangle onto the patch.
- Cut the patch to size: Use a utility knife or drywall saw to cut along the marked lines on the patch material. Take your time and make precise cuts to ensure a snug fit.
Once you have completed the measuring and marking process, you are ready to move on to the next step: preparing the hole for patching.
Cutting the Patch
To patch a drill hole in drywall, you’ll need to cut a patch that fits perfectly into the hole. Here’s how you can do it:
- Measure the size of the hole using a tape measure or ruler. Take note of the length and width.
- Using a utility knife, cut a piece of drywall that is slightly larger than the hole to allow for a snug fit.
- Hold the patch against the wall, aligning it with the edges of the hole.
- Trace the outline of the patch onto the wall using a pencil or marker.
- Remove the patch and use a drywall saw or utility knife to carefully cut along the traced outline. Make sure to cut along the lines accurately.
- Test the fit of the patch by placing it into the hole. It should fit snugly without any gaps.
Remember to wear safety glasses and exercise caution while cutting the patch to avoid any accidents.

Applying the Patching Compound

After preparing the hole and applying the self-adhesive mesh patch, it’s time to apply the patching compound. This compound will fill in the hole and create a smooth surface for painting or applying texture.
Here is a step-by-step guide on how to apply the patching compound:
- Mix the compound: Start by mixing the patching compound according to the manufacturer’s instructions. Add water or another liquid as required and mix until you achieve a smooth consistency.
- Apply the compound: Take a putty knife or a drywall knife and scoop some of the compound onto it. Hold the knife at a slight angle and spread the compound over the hole, starting from the center and working your way outward. Make sure to press the compound into the mesh patch to ensure good adhesion.
- Smooth the surface: Once the hole is filled, use the flat edge of the knife to smooth the surface of the patching compound. Feather the edges of the compound outward to blend it with the surrounding wall. Keep in mind that the more you feather the edges, the smoother the patch will be.
- Let it dry: Allow the patching compound to dry completely. The drying time will depend on the type of compound used, so refer to the manufacturer’s instructions for the recommended drying time.
- Sand and prime: Once the patching compound is dry, sand the surface with fine-grit sandpaper to achieve a smooth finish. Wipe away any dust with a clean cloth, and then apply a coat of primer to the patched area before painting.
By following these steps, you can effectively patch drill holes in drywall and create a seamless repair that blends in with the rest of the wall.
Sanding the Patched Area

After the patch has been applied and the joint compound has dried, it’s time to sand the area until it’s smooth and seamless with the surrounding wall.
Here are the steps to properly sand the patched area:
- Start by using a medium-grit sandpaper (around 120 grit) to sand the patched area. Use smooth, even strokes to avoid creating uneven surfaces.
- Move the sandpaper in a circular motion, covering the entire patched area. Be careful not to sand too vigorously, as this can create more damage to the surrounding drywall.
- Check the smoothness of the patched area by running your hand over it. If you still feel any bumps or unevenness, continue sanding until it feels smooth to the touch.
- Once you’re satisfied with the overall smoothness, switch to a fine-grit sandpaper (around 220 grit) to further refine the surface. Repeat the same circular motion, focusing on blending the patched area seamlessly with the rest of the wall.
- Wipe away any dust generated from sanding using a clean cloth or a vacuum cleaner with a brush attachment.
Important Tips:
- To avoid creating excessive dust, consider using a sanding sponge instead of sandpaper. Sanding sponges are convenient as they can be rinsed and reused multiple times.
- Wear a dust mask and protective eyewear when sanding to protect yourself from inhaling dust particles.
- If you accidentally sand through the joint compound, apply another thin layer and allow it to dry before continuing with the sanding process.
Once the patched area has been sanded smooth, you can proceed to prime and paint the surface to match the rest of the wall.
Priming and Painting
Step 1: Prepare the Surface
Before applying primer and paint, it is important to prepare the patched area properly.

- Sand the patched area using a fine-grit sandpaper to smoothen the surface.
- Wipe away any dust or debris with a clean cloth or tack cloth.
Step 2: Apply Primer
Priming the patched area will ensure that the paint adheres properly and provides a smooth and even finish.
- Choose a suitable primer for your project, such as a latex-based primer for drywall.
- Use a brush or roller to apply a thin and even coat of primer over the patched area.
- Allow the primer to dry completely according to the product instructions.
Step 3: Paint the Patched Area
Once the primer is dry, you can proceed to paint the patched area to match the surrounding wall.
- Choose a paint color that matches the existing wall color. If necessary, bring a small sample of the wall paint to the store for color matching.
- Apply the paint to the patched area using a brush or roller. Start with a thin coat to ensure even coverage.
- Allow the paint to dry completely before applying additional coats if needed. Follow the drying time mentioned on the paint can.
Step 4: Blend the Paint
To achieve a seamless look, it is important to blend the patched area with the surrounding wall.
- Gently feather the edges of the painted patch with a dry brush or sponge to blend the new paint with the old paint.
- Check the patched area from different angles to ensure that it matches the rest of the wall.
Following these steps will help you achieve a professional-looking patch that seamlessly blends with the rest of your drywall.
Finishing Touches and Cleanup
Once you have patched the drill holes in your drywall, there are a few finishing touches and cleanup steps to take to ensure a smooth and seamless repair.
1. Sand the patched area
After the spackling or joint compound has dried, use a fine-grit sandpaper to smooth down the patched area. Gently sand the surface until it is flush with the surrounding wall, being careful not to sand too much and create a depression.
2. Wipe away dust
Use a damp cloth or sponge to wipe away any dust created during the sanding process. This will ensure a clean surface for the next step.
3. Apply primer
Before painting, it is important to apply a primer to the patched area. This will help the paint adhere properly and provide a more even finish. Use a brush or roller to apply the primer according to the manufacturer’s instructions.
4. Paint the patched area
Once the primer is dry, you can paint the patched area to match the surrounding wall. Use a brush or roller to apply the paint, taking care to blend it seamlessly with the rest of the wall. Allow the paint to dry completely before adding additional coats if necessary.
5. Clean up the workspace
After you have finished patching and painting the drill holes, it is important to clean up your workspace. Dispose of any debris, wipe down your tools, and store them properly for future use. This will help keep your work area tidy and ready for the next project.
By following these finishing touches and cleanup steps, you can achieve a professional-looking result when patching drill holes in drywall.
FAQ:
What tools do I need to patch drill holes in drywall?
You will need a putty knife, sandpaper, joint compound, drywall patch, and a drill for this task.
Can I patch small drill holes in drywall without using a patch?
Yes, you can patch small drill holes in drywall without using a patch. Simply fill the hole with joint compound and smooth it out using a putty knife.
What is the first step in patching drill holes in drywall?
The first step in patching drill holes in drywall is to clean the area around the hole by removing any loose drywall or debris.
How do I apply joint compound to patch the drill holes?
To apply joint compound to patch the drill holes, use a putty knife to spread a thin layer of compound over the hole, making sure to feather the edges for smooth blending with the wall.
Do I need to sand the patched area after applying joint compound?
Yes, after applying joint compound and allowing it to dry, you will need to sand the patched area using fine-grit sandpaper to create a smooth and even surface.
Video:


Meet Harrison Clayton, a distinguished author and home remodeling enthusiast whose expertise in the realm of renovation is second to none. With a passion for transforming houses into inviting homes, Harrison's writing at https://thehuts-eastbourne.co.uk/ brings a breath of fresh inspiration to the world of home improvement. Whether you're looking to revamp a small corner of your abode or embark on a complete home transformation, Harrison's articles provide the essential expertise and creative flair to turn your visions into reality. So, dive into the captivating world of home remodeling with Harrison Clayton and unlock the full potential of your living space with every word he writes.


