How to Mix Grout Without a Drill: Easy DIY Tips and Techniques
When it comes to tiling projects, mixing grout is an essential step. However, not everyone has access to a power drill, which is commonly used to mix grout quickly and efficiently. Fortunately, there are several easy DIY tips and techniques to mix grout without a drill. Whether you’re a seasoned DIY enthusiast or a beginner, these methods will help you achieve a smooth and consistent grout mixture for your tiling projects.
One of the easiest ways to mix grout without a drill is to use a mixing stick or a wooden dowel. Simply place the grout powder in a mixing container, add the recommended amount of water, and use the stick or dowel to stir the mixture until it reaches a smooth and homogenous consistency. This method may require a bit more effort compared to using a drill, but it is simple and effective.
Another technique to mix grout without a drill is to use a handheld whisk or a fork. Start by placing the grout powder in a container, then add water gradually while whisking or stirring with the fork. Continue whisking or stirring until the grout mixture is smooth and free of lumps. This method allows for better control over the consistency of the grout and is especially useful for small tiling projects.
If you’re facing a larger tiling project and need to mix a significant amount of grout, consider using a mortar and pestle. This traditional tool is typically used for grinding spices, but it can also be a handy alternative for mixing grout. Pour the grout powder into the mortar, add water gradually, and use the pestle to mix and grind the mixture until it reaches a smooth and creamy texture. This method may require more time and effort, but it can be a satisfying and effective way to mix grout without a drill.
Overall, while a power drill may be the most efficient tool for mixing grout, there are several easy DIY tips and techniques that can be used as alternatives. Whether you choose to use a mixing stick, a handheld whisk or fork, or even a mortar and pestle, these methods allow you to achieve a smooth and consistent grout mixture for your tiling projects. So, don’t let the absence of a drill hold you back from completing your next tiling project.

About Mixing Grout
Mixing grout is an essential step in any tile installation project. Properly mixed grout ensures that the tiles are securely adhered to the surface and provides a finished, professional look.
Grout is a mixture of cement, sand, and water that is used to fill in the spaces between tiles. It helps to hold the tiles in place, prevents water infiltration, and enhances the overall appearance of the tiled surface.
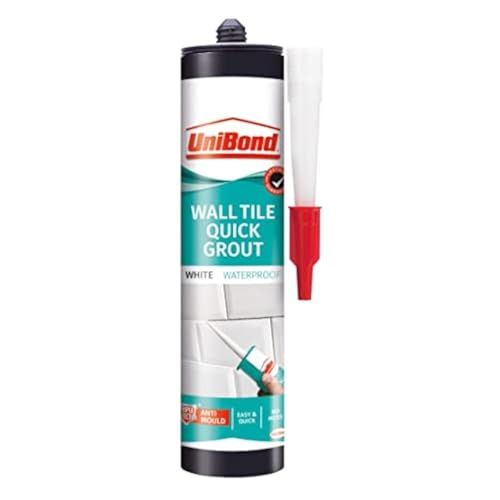
There are different types of grout available, such as sanded grout and unsanded grout, each designed for specific applications and tile types. It’s important to choose the right type of grout for your project to ensure optimal results.
Mixing grout by hand can be done without using a drill or any other power tools. This method is suitable for smaller projects or if you don’t have access to a drill. It requires a bit more effort and time, but it is still effective.
To mix grout by hand, you will need a sturdy bucket or a mixing tray, a grout float or a putty knife, and a grout mixing paddle or a wooden stick. Simply pour the necessary amount of dry grout into the bucket or tray, add water gradually, and then mix it thoroughly until it reaches the desired consistency. Make sure to follow the manufacturer’s instructions on the grout package for the correct water-to-grout ratio.

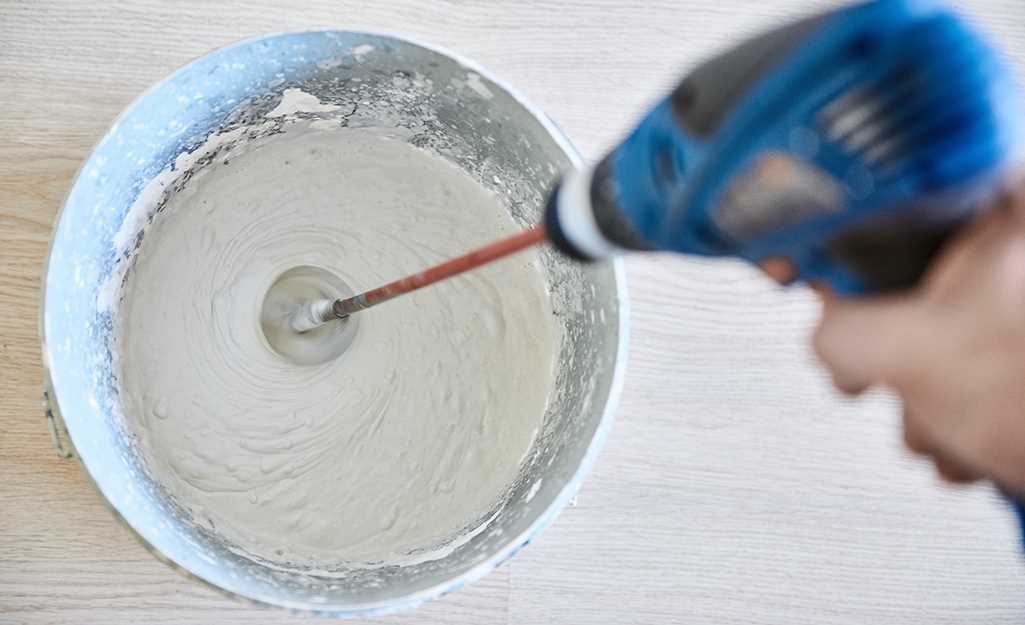
If you have a large tile installation project or prefer a faster and more efficient method, using a drill with a grout mixing paddle attachment is recommended. This allows for quicker and more thorough mixing, ensuring a consistent and well-blended grout.
- Choose a drill with variable speeds to control the mixing process.
- Attach the grout mixing paddle to the drill securely.
- In a clean bucket or tray, pour the desired amount of grout.
- Add water gradually while mixing with the drill on a low speed.
- Continue mixing until the grout reaches a smooth and creamy consistency.
- Always refer to the manufacturer’s instructions and recommendations for the correct water-to-grout ratio and mixing time.
Properly mixed grout is crucial for a successful tile installation. Take the time to mix it correctly, whether by hand or with a drill, to ensure strong adhesion and a beautiful finished result.
Why Mix Grout Without a Drill?
Mixing grout without a drill can be a useful skill to have, especially if you don’t own a power tool or need to mix small amounts of grout. While using a drill with a mixing attachment is a common and convenient method, there are several reasons why you might choose to mix grout without a drill:
- Cost: Purchasing a drill and a mixing attachment can be expensive, especially if you only plan on using it for small projects. Mixing grout by hand can save you money.
- Portability: If you are working on a job site that doesn’t have electricity or you need to mix grout in a hard-to-reach area, using a drill may not be an option. Mixing grout by hand allows for more flexibility in these situations.
- Precision: When mixing grout by hand, you have more control over the consistency and texture of the mixture. This can be beneficial if you have specific requirements or preferences for your grout.
- Small batches: If you only need a small amount of grout for a small project or touch-up work, it may not be worth setting up and cleaning a drill. Mixing by hand can be quicker and easier for these situations.
In conclusion, while using a drill with a mixing attachment is a popular method for mixing grout, there are several reasons why you might choose to mix grout without a drill. Whether it’s for cost savings, portability, precision, or small batches, mixing by hand can be a practical and efficient alternative.
Benefits of Hand Mixing Grout
Hand mixing grout can be a time-consuming task, but it offers several benefits compared to using a drill. Here are some advantages of hand mixing grout:

- Cost-effective: Mixing grout by hand does not require any expensive equipment, such as a drill or a mixer. This can help save money, especially if you are working on a small project or don’t have access to power tools.
- Control over consistency: When mixing grout by hand, you have more control over the consistency of the mixture. You can adjust the amount of water and powder to achieve the desired thickness and texture, ensuring that it is suitable for your specific project.
- Less mess: Hand mixing grout allows for better control and prevents splashing, reducing the amount of mess and cleanup required. This is particularly beneficial when working in tight spaces or when dealing with delicate surfaces that can be easily damaged.
- Flexibility: With hand mixing, you have the flexibility to mix smaller batches of grout as needed. This is ideal for projects where you don’t need a large quantity of grout or when you need to mix different colors or types of grout for various sections.
- Hands-on experience: Mixing grout by hand can be a rewarding experience, as it allows you to feel and understand the consistency of the mixture. This hands-on approach can help you develop a better understanding of grout and improve your skills in working with it.
Tools for Mixing Grout
When it comes to mixing grout, there are a few essential tools that you’ll need to have on hand. While a drill is often used to mix grout quickly and efficiently, you can still mix grout without a drill using these alternative tools:
1. Heavy-Duty Mixing Paddle
A heavy-duty mixing paddle is a popular tool for mixing grout. It features a long handle with a paddle attachment at the end. This tool is manually operated and can be used to mix grout in a bucket or a mixing tray. Simply insert the paddle into the grout mixture and use a stirring motion to combine the ingredients.
2. Margin Trowel
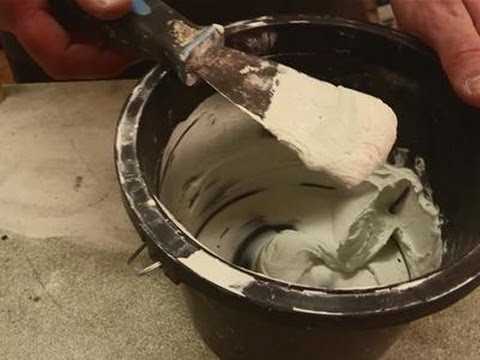
A margin trowel is a versatile tool that can be used for a variety of purposes, including mixing grout. This tool features a flat, rectangular blade that is ideal for scooping and mixing grout. Use the margin trowel to scoop up the dry grout mix and then work it into a paste-like consistency by adding water and mixing. This method requires a bit more elbow grease than using a drill, but it can still get the job done.
3. Grout Float
A grout float is a tool that is typically used for applying grout to tile surfaces. However, it can also be used to mix grout. The flat, rubber surface of the float can be used to mix the grout ingredients together. Simply add the dry grout mix to a bucket or mixing tray, and use the float to stir and combine the ingredients. This method is a bit unconventional but can work in a pinch if you don’t have other tools available.

4. Wooden Stir Stick
If you don’t have any of the above tools on hand, a wooden stir stick can be used as an alternative. Simply insert the stick into the grout mixture and use it to stir and combine the ingredients. This method will require more manual effort and may take longer than using a drill or the other tools mentioned above, but it can still be effective in small-scale grouting projects.
It’s important to note that using these alternative tools may require more time and effort compared to using a drill. Additionally, be sure to follow the manufacturer’s instructions for mixing grout to ensure the best results.
Traditional Mixing Tools
While using a drill to mix grout is the most efficient and convenient method, there are several traditional tools you can use if you don’t have access to a drill. These tools require a bit more manual labor, but they can still help you achieve a well-mixed grout consistency.
1. Mixing Paddle or Whisk
A mixing paddle or whisk is a hand tool that consists of a long handle with a paddle-shaped or whisk-like head. It can be used to manually mix grout in a bucket. Simply insert the paddle or whisk into the grout mixture and move it in a circular motion to mix the ingredients together. Repeat this process until the grout reaches a smooth and homogenous consistency.
2. Trowel
A trowel is a flat, rectangular tool with a handle that is commonly used for spreading and smoothing materials like concrete, mortar, and grout. To mix grout with a trowel, start by pouring the dry grout powder into a mixing bucket. Then, slowly add water while stirring with the trowel to incorporate the water into the grout. Continue mixing and adding water until you achieve the desired consistency.

3. Margin Trowel
A margin trowel is a smaller version of a trowel, usually with a pointed tip. It is commonly used for smaller-scale mixing projects. To mix grout with a margin trowel, follow the same process as with a regular trowel. However, the smaller size of the margin trowel may require more effort to mix the grout thoroughly.
4. Mixing Stick or Wooden Dowel
A mixing stick or wooden dowel can be used as a makeshift mixing tool for grout. It can be helpful for smaller batches of grout or touch-up work. Simply insert the stick or dowel into the grout mixture and stir it in a circular motion to combine the ingredients. Keep stirring until the grout is well-mixed and reaches the desired consistency.
5. Handheld Whisk or Spoon
If you don’t have any of the traditional mixing tools mentioned above, a handheld whisk or spoon can also be used to mix grout. While it may require more effort and time to achieve a consistent mixture, it is still possible to mix grout effectively using these basic kitchen utensils. Simply stir the grout mixture in a circular motion until it becomes smooth and uniform.
Alternative Mixing Tools
If you don’t have access to a drill for mixing grout, there are several alternative tools you can use. These options may require a bit more manual effort, but they can still get the job done effectively.
1. Mixing Paddle
A mixing paddle is a versatile tool that can be used for various mixing tasks. It typically has a long handle with a wide, flat head that features slots or holes. To mix grout with a mixing paddle, simply insert the paddle into a bucket filled with the grout mixture and stir it manually. Make sure to use firm and consistent strokes to thoroughly mix the grout. This method allows you to control the speed and intensity of the mixing process.
2. Handheld Mixer
A handheld mixer is a small, portable device that can be used to mix grout manually. It consists of a motorized handle with rotating blades. To mix grout with a handheld mixer, place the mixer into the container holding the grout mixture and turn it on. Move the mixer around the container, ensuring that the blades come into contact with all parts of the mixture. This method provides faster and more efficient mixing compared to manual methods, but it still requires some physical effort.
3. Trowel and Bucket
If you prefer a more traditional approach, you can mix grout with a trowel and bucket. Start by pouring the desired amount of grout into the bucket and then add water according to the manufacturer’s instructions. Use a trowel to mix the grout and water together, making sure to scrape the sides and bottom of the bucket to incorporate all the dry grout. Continue mixing until you achieve a smooth and consistent consistency. This method requires more manual labor, but it can be effective if you don’t have access to other mixing tools.
Remember, regardless of the mixing tool you choose, it’s important to follow the manufacturer’s instructions and mix the grout thoroughly to achieve the desired results. Take your time and ensure that all the dry grout is properly blended with the water before applying it to your project.
Step-by-Step Guide
1. Gather Your Materials
Before you begin mixing grout without a drill, gather all the necessary materials. This includes:
- A bucket or mixing container
- A grout float or trowel
- Grout powder
- Water
- Measuring cup
2. Measure the Grout Powder
Follow the instructions on the grout package to determine the correct ratio of grout powder to water. Use a measuring cup to measure the appropriate amount of grout powder and pour it into the mixing container.
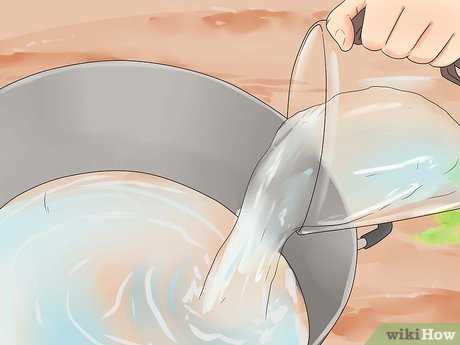
3. Add Water
Slowly pour water into the mixing container, using the recommended ratio from the grout package. It is best to start with a smaller amount of water and add more as needed, to avoid ending up with grout that is too runny. Stir the mixture with a grout float or trowel as you add the water.
4. Mix Thoroughly
Continue stirring the grout mixture until it reaches a smooth and creamy consistency. You may need to add more water or grout powder to achieve the desired consistency. Make sure there are no lumps or dry spots in the mixture.
5. Let the Mixture Rest
Allow the grout mixture to rest for a few minutes to allow the grout powder to fully absorb the water. During this time, the mixture may thicken slightly. Give it a final stir before using.
6. Use the Grout
Apply the mixed grout to the desired surface using a grout float or trowel. Make sure to press the grout firmly into the gaps between the tiles or stones. Remove any excess grout from the surface using the edge of the float or a damp sponge.
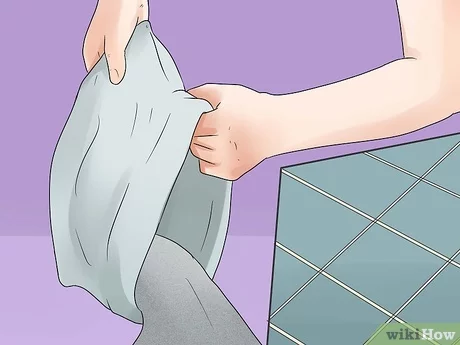
7. Clean Up
After applying the grout, clean up any excess grout from the tiles or stones using a damp sponge or cloth. Rinse the sponge regularly to avoid spreading grout residue. Allow the grout to dry and cure according to the instructions on the grout package.
8. Seal the Grout (optional)
Once the grout has fully cured, you may choose to seal it to enhance its durability and appearance. Follow the instructions on the grout sealer packaging to properly seal the grout.
Preparing the Mixing Area
Before you start mixing the grout, it’s important to properly prepare your mixing area. This will help ensure a clean and efficient process.
1. Gather the Necessary Materials
- Grout powder
- Water
- Measuring cup
- Mixing container
- Grout float or trowel
- Sponge or damp cloth
2. Choose a Suitable Mixing Container
Select a mixing container that is large enough to accommodate the amount of grout you need to mix. A plastic bucket or a mixing tray specifically designed for grout mixing works well.
3. Clean the Mixing Container
Make sure the mixing container is clean and free of any debris or residue from previous mixing sessions. This will prevent any unwanted substances from contaminating the grout mixture.
4. Create a Level Mixing Surface

Place the mixing container on a level surface that is easy to clean. A flat, stable workbench or a piece of plywood is ideal for this purpose. Avoid mixing the grout directly on the floor or any uneven surface.
5. Protect the Mixing Area
Spread a drop cloth, plastic sheet, or newspaper around the mixing area to protect the surrounding surfaces from potential splatters or spills. This will make the cleanup process much easier.
6. Wear Protective Gear
Put on protective gear such as gloves, safety goggles, and a mask to protect yourself from any potential irritants or harmful particles present in the grout mixture.
7. Read and Follow the Instructions
Before starting the mixing process, carefully read the instructions on the grout packaging. Follow the recommended proportions and mixing instructions provided by the manufacturer.
8. Set up Adequate Ventilation
Ensure that the mixing area is well-ventilated to prevent the accumulation of fumes from the grout mixture. Open windows and doors or use a fan if necessary.
9. Have a Water Source Nearby
Keep a water source, such as a sink or a bucket of water, nearby for rinsing tools and adjusting the consistency of the grout mixture if needed.
By properly preparing the mixing area, you’ll be ready to mix grout without a drill in a clean and efficient manner.
Measuring Grout and Water
Before you start mixing your grout, it’s important to measure out the appropriate amounts of grout and water. Improper measurements can result in a mixture that is too dry or too runny, making it difficult to work with and compromising the strength and stability of the grout.
Materials Needed:
- Grout powder
- Water
- Measuring cup
Steps:
- Refer to the manufacturer’s instructions on the grout packaging to determine the correct ratio of water to grout. This ratio can vary depending on the type and brand of grout you are using.
- Use a measuring cup to accurately measure out the appropriate amount of water needed for your grout mixture.
- Slowly pour the water into a clean mixing container. A bucket or a large plastic container with a pouring spout can work well for this purpose.
- Add a small amount of grout powder to the water, following the recommended ratio provided by the manufacturer. It’s important to start with a small amount of powder and gradually add more as needed to achieve the desired consistency.
- Use a mixing paddle or a grout float to blend the water and grout powder together. Stir in a circular motion, making sure to scrape the sides and bottom of the container to ensure all the powder is incorporated.
- Continue adding small amounts of grout powder and mixing until you reach the desired consistency. The grout should have a smooth, creamy texture that holds its shape when scooped up with a trowel or grout float.
Note: It’s important to mix the grout thoroughly to avoid any clumps or dry spots in the mixture. Take your time and keep stirring until the grout is well combined.
Mixing the Grout
When it comes to mixing grout without a drill, there are a few different methods you can try. Whether you don’t have a drill on hand or you simply prefer a more manual approach, these DIY tips and techniques will help you mix your grout quickly and easily.
Method 1: Hand Mixing
If you don’t have a drill, you can mix grout by hand using a mixing paddle or a grout float. Follow these steps:
- Start by pouring the grout mix into a clean bucket.
- Add water to the bucket according to the manufacturer’s instructions. It’s important to use the right amount of water for the specific grout mix you’re using.
- Hold the mixing paddle or grout float with both hands and stir the mixture in a circular motion. Make sure to scrape the sides and bottom of the bucket to incorporate all the dry grout.
- Continue mixing until the grout has a smooth and consistent texture without any lumps.
Method 2: Manual Mixing with a Trowel
If you don’t have a mixing paddle or a grout float, you can also mix grout with a trowel. Here’s how:
- Pour the grout mix into a clean bucket.
- Add water according to the manufacturer’s instructions and mix it with a trowel until the dry grout is fully incorporated.
- Continue mixing with the trowel, adding small amounts of water if necessary, until the grout reaches the desired consistency.
Method 3: Using a Hand Mixer
If you have a hand mixer but no drill, you can use it to mix grout. Follow these steps:
- Attach the appropriate mixing attachment to the hand mixer.
- Pour the grout mix into a clean bucket.
- Add water as instructed by the manufacturer and insert the hand mixer into the bucket.
- Turn on the hand mixer and mix the grout until it reaches a smooth and consistent texture.
Tips for Mixing Grout Without a Drill
- Always follow the manufacturer’s instructions for the specific grout mix you’re using.
- Wear protective gloves and goggles when mixing grout to avoid skin irritation and eye injuries.
- If the grout mix becomes too thick, add small amounts of water gradually until it reaches the desired consistency.
- Make sure to mix the grout thoroughly to prevent any dry spots or lumps.
- Clean your tools immediately after mixing grout to prevent it from hardening.
With these DIY tips and techniques, you can mix grout without a drill and successfully complete your tiling project. Just remember to take the necessary safety precautions and follow the manufacturer’s instructions for the best results.
FAQ:
Can I mix grout without a drill?
Yes, you can mix grout without a drill. There are alternative methods that you can use, such as mixing it by hand with a grout mixing paddle or using a paint stick to mix the grout. These methods may take more time and effort, but they can still be effective.
What is the advantage of using a drill to mix grout?
Using a drill with a grout mixing attachment can make the mixing process much faster and easier. The drill’s power and speed can help create a smooth and consistent mixture of grout. It can also help save you time and effort compared to mixing by hand.
Do I need any special tools to mix grout without a drill?
No, you don’t necessarily need any special tools to mix grout without a drill. However, having a grout mixing paddle or a paint stick can make the process easier. These tools help ensure that the grout is mixed thoroughly and evenly.
How do I mix grout by hand?
Mixing grout by hand requires a bit of physical effort, but it can be done. Start by pouring the grout powder into a bucket. Then, slowly add water while continuously stirring the mixture with a grout mixing paddle or a paint stick. Keep stirring until the grout reaches a smooth and consistent texture.
Is it possible to mix grout without a power tool?
Yes, it is possible to mix grout without a power tool. While a drill can make the process faster and easier, you can still achieve good results by mixing grout by hand. Just make sure to follow the proper mixing techniques and take your time to ensure a consistent mixture.
Are there any alternatives to a drill for mixing grout?
Yes, there are alternatives to a drill for mixing grout. Some people use a grout mixing paddle, which can be attached to any type of drill, while others prefer using a paint stick or a mud mixer. These tools can help create a smooth and well-blended grout mixture without the need for a power tool.
What are some tips for mixing grout without a drill?
When mixing grout without a drill, it’s important to take your time and be patient. Make sure to mix the grout thoroughly and evenly by continuously stirring it with a grout mixing paddle or a paint stick. It can also help to add the water gradually to achieve the desired consistency. Additionally, follow the manufacturer’s instructions on the grout packaging for the correct water-to-grout ratio.
Video:


Meet Harrison Clayton, a distinguished author and home remodeling enthusiast whose expertise in the realm of renovation is second to none. With a passion for transforming houses into inviting homes, Harrison's writing at https://thehuts-eastbourne.co.uk/ brings a breath of fresh inspiration to the world of home improvement. Whether you're looking to revamp a small corner of your abode or embark on a complete home transformation, Harrison's articles provide the essential expertise and creative flair to turn your visions into reality. So, dive into the captivating world of home remodeling with Harrison Clayton and unlock the full potential of your living space with every word he writes.


