How to Mix Concrete with a Drill: A Step-by-Step Guide

Concrete is a versatile material that is used in many construction projects. Whether you’re building a new patio, laying a foundation, or repairing a driveway, knowing how to mix concrete is an essential skill. While there are several methods to mix concrete, using a drill is a quick and efficient way to get the job done.
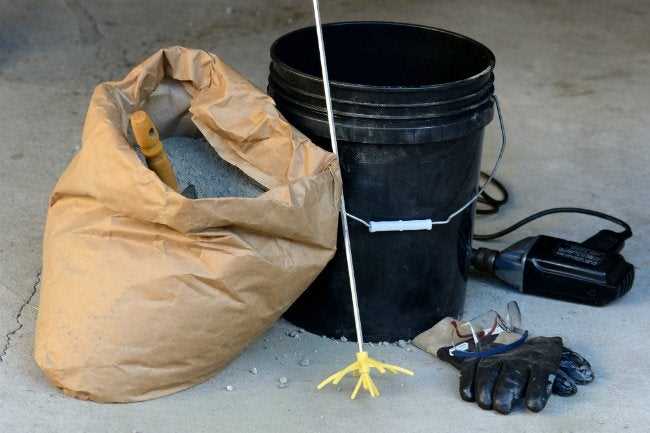
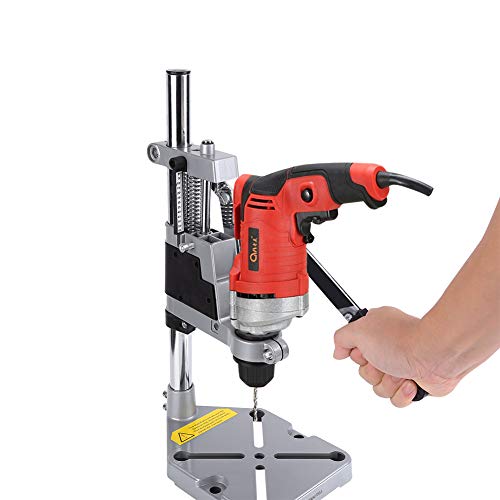
To begin, you’ll need a few tools and materials. First, gather your safety equipment, including gloves, goggles, and a dust mask. Next, gather your materials, which will include cement, sand, gravel, and water. You’ll also need a drill with a mixing paddle attachment, a bucket or wheelbarrow for mixing, and a hose for water.
Once you have all your materials ready, it’s time to start mixing. Begin by putting on your safety equipment and combining the cement, sand, and gravel in the bucket or wheelbarrow. Use a shovel to mix the dry materials together until they are well-combined. This step is important to ensure that the concrete has the right proportions of each ingredient.
Tools and Materials Needed
Tools:
- Electric drill with a mixing paddle attachment
- Measuring tape
- Mixing container
- Water source (hose or buckets)
- Wheelbarrow or mixing tray
- Trowel
- Gloves
- Protective eyewear
Materials:
- Concrete mix
- Water
- Gravel or sand (if necessary)
Note: The exact tools and materials needed may vary depending on the specific project and the quantity of concrete required. It’s always a good idea to consult the instructions provided with the concrete mix for any additional tools or materials that may be recommended.
Preparing the Work Area
Clear the Area
Before you start mixing concrete, it is important to clear the work area of any debris or obstacles. Remove any loose rocks, sticks, or other items that could interfere with the mixing process or pose a safety hazard.

Set Up the Tools
Next, gather all the necessary tools and materials for the job. This typically includes a drill with a mixing paddle attachment, a bucket or mixing container, water, and the concrete mix. Make sure the drill is fully charged and in good working condition.
Protective Gear
Wearing the right protective gear is essential when working with concrete. Put on safety goggles to protect your eyes from dust and debris. Wear heavy-duty gloves to protect your hands from irritation or injury. Additionally, consider wearing a dust mask to prevent breathing in the fine particles of the concrete mix.
Layout the Work Area
Place a sturdy tarp or plastic sheeting on the ground to protect it from any splatters or spills during the mixing process. This will make for easier clean-up later. Make sure the tarp is larger than the area where you will be mixing the concrete to catch any spills.
Check the Weather
Before you begin mixing, check the weather forecast. Avoid mixing concrete outdoors if it is raining, as the excess moisture can affect the quality of the final mix and make it more difficult to work with. If possible, choose a clear and dry day for your concrete mixing project.
Measuring the Concrete Components
Before you start mixing concrete with a drill, you need to accurately measure the components. It’s important to measure the right proportions of materials to ensure the strength and durability of the concrete.
Here is a step-by-step guide on how to measure the concrete components:
- Gather the necessary materials: You will need cement, sand, gravel or crushed stone, and water. Make sure you have the appropriate amounts for your specific project.
- Determine the concrete ratio: Different projects require different concrete ratios. The most common ratio is 1:2:3, which means one part cement, two parts sand, and three parts gravel or crushed stone. However, you may need to adjust the ratio based on the strength requirements of your project.
- Use a measuring container: To accurately measure the components, use a measuring container such as a bucket or a wheelbarrow. Make sure the container is clean and free of debris.
- Add the components in the correct order: Start by adding the cement to the measuring container. Level it off and make sure it is a full and even measurement. Then add the sand, followed by the gravel or crushed stone. Again, level off each component and ensure accurate measurements.
- Mix the components together: Once you have measured the components, you can start mixing them together with a drill. Follow the instructions in the rest of this guide to properly mix the concrete.
Measuring the concrete components accurately is crucial for the success of your project. Take your time and double-check your measurements before proceeding with the mixing process.
Adding the Concrete Components to the Mixing Container
Before you start mixing the concrete, you will need to gather all the necessary components and prepare your mixing container. Here is a step-by-step guide on how to add the concrete components to the mixing container:
Step 1: Prepare the Mixing Container
Start by selecting a clean and sturdy mixing container. It should be large enough to hold the amount of concrete you need to mix. Make sure the container is placed on a stable surface, such as a concrete slab or plywood.
Step 2: Measure the Water
Use a measuring container to measure the amount of water needed for the concrete mix. Refer to the instructions on the concrete packaging or the recipe you are following to determine the correct water-to-cement ratio.
Step 3: Add the Water to the Mixing Container
Pour the measured amount of water into the mixing container. It is recommended to add the water first before adding the other components, as it helps to evenly distribute them.
Step 4: Measure the Concrete Mix
Measure the appropriate amount of dry concrete mix according to the desired concrete-to-water ratio. You can use a shovel, bucket, or any other suitable container to measure the mix.
Step 5: Add the Concrete Mix to the Mixing Container
Pour the measured amount of concrete mix into the mixing container on top of the water. It is important to add the concrete mix gradually to prevent clumping and ensure proper mixing.
Step 6: Start Mixing
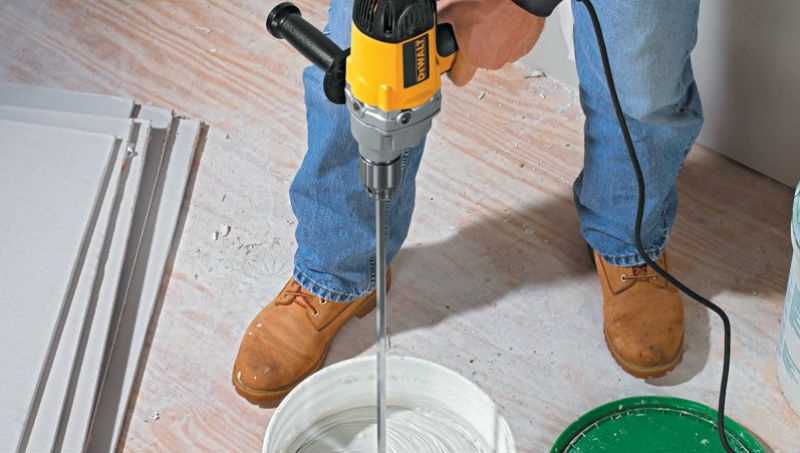
Attach the mixing paddle to your drill. Insert the paddle into the mixing container and set your drill to low speed. Start mixing the water and concrete mix together, moving the paddle in a circular motion around the container.
Step 7: Check the Consistency
As you mix, keep an eye on the consistency of the concrete. It should have a thick, but pourable consistency. If it appears too dry, gradually add small amounts of water and continue mixing.
Step 8: Continue Mixing
Mix the components for several minutes, until you achieve a uniform consistency and all the dry mix is fully blended with the water. Make sure to scrape the sides and bottom of the mixing container to incorporate any unmixed materials.
Step 9: Inspect the Mixture
Once the concrete is thoroughly mixed, inspect the mixture for any dry pockets or lumps. Break up any clumps with the drill paddle and continue mixing until the entire mixture is smooth and uniform.
Step 10: Ready to Use
Your concrete mix is now ready to be used for your desired project. Pour it into a wheelbarrow or directly onto your working area and start your concrete project!
Remember to follow any specific instructions or guidelines provided by the concrete manufacturer or your project recipe to ensure the best results.
Mixing the Concrete with a Drill
To mix concrete with a drill, you will need the following materials:
- Concrete mix
- Water
- Drill with a mixing paddle attachment
- Bucket
- Measuring tools
- Protective gear (gloves, goggles, mask)
Step 1: Prepare the Concrete Mix
Before starting the mixing process, make sure you have a proper ratio of concrete mix and water. Refer to the manufacturer’s instructions or the bag of concrete mix for the recommended ratio.
Step 2: Attach the Mixing Paddle to the Drill
Insert the mixing paddle attachment into the chuck of the drill. Make sure it is secured tightly before moving on to the next step.
Step 3: Measure the Water
Use a measuring tool, such as a bucket or a measuring cup, to measure the required amount of water according to the ratio specified. It is essential to be precise with the measurements for the desired consistency of the concrete mix.
Step 4: Start Mixing
Pour the concrete mix into a large bucket. Then, slowly pour the measured water into the bucket while stirring the mixture with the drill and mixing paddle attachment. Begin at a low speed to avoid splashing and gradually increase the speed as the mixture starts to combine.
Step 5: Continue Mixing
Continue mixing the concrete until it reaches a smooth and consistent texture. Pay attention to any lumps or dry pockets and make sure they are fully mixed in.
Step 6: Check the Consistency
To check the consistency of the concrete mix, lift the paddle out of the mixture and observe how the mix falls off. It should flow smoothly and evenly without being too thick or too runny. Adjust the water or concrete mix accordingly until the desired consistency is achieved.
Step 7: Use the Mixed Concrete
Once the concrete mix is thoroughly blended and has reached the desired consistency, it is ready to be used. Pour it into the desired mold, form, or construction site, and follow the appropriate steps for curing and setting as recommended for your specific project.
Remember to clean the mixing paddle and drill thoroughly after use to prevent the concrete from drying and hardening on the equipment.
Checking the Consistency of the Concrete
After mixing the concrete with the drill, it’s important to check its consistency before using it for any construction projects. The consistency of the concrete refers to its texture and workability, which can affect its strength and durability.
Here are a few ways to check the consistency of the concrete:
- Slope Test: Take a shovel and scoop up a small amount of the mixed concrete. Lift the shovel and let the concrete slide off. If the concrete slides off smoothly without excessive sticking or clumping, it is considered to have a good workable consistency.
- Slump Test: The slump test is commonly used to measure the consistency of concrete. Fill a slump cone or a cylindrical container with the mixed concrete. Gently remove the cone and observe the slump, which refers to the amount of slump or settlement of the concrete. A slump of about 2-4 inches is generally considered ideal for most construction projects. However, the desired slump may vary depending on the specific requirements of the project.
- Cohesion Test: Cohesion is an important characteristic of concrete that indicates its ability to hold together. To perform a cohesion test, take a handful of the mixed concrete and squeeze it firmly in your hand. If the concrete holds its shape and doesn’t crumble or fall apart easily, it indicates good cohesion.
It’s important to note that the consistency of the concrete can be adjusted by adding more water or dry mix, depending on whether it’s too dry or too wet. However, always follow the recommended guidelines and consult with a professional if needed, as adding too much water can weaken the concrete and affect its overall strength.
Pouring and Finishing the Concrete
1. Prepare the area
Before pouring the concrete, make sure the area is properly prepared. This includes removing any debris, clearing the area of any plants or vegetation, and dampening the ground if necessary. It is also important to set up the forms or molds to contain the concrete.
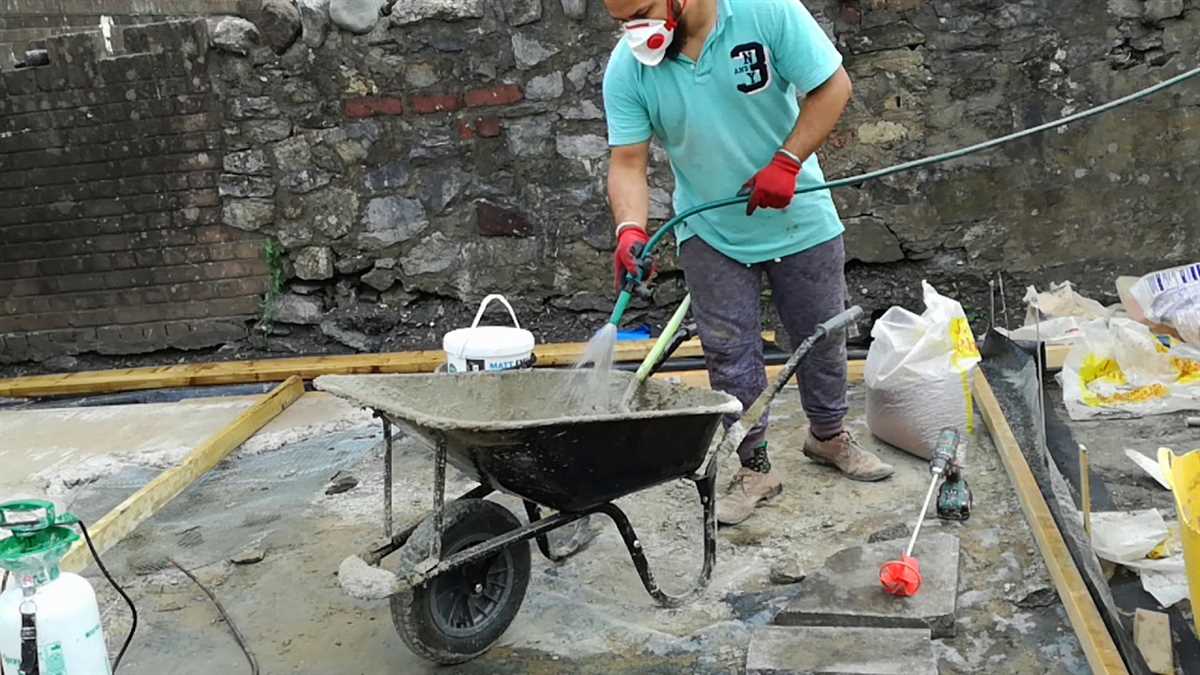
2. Mix the concrete
Using the drill and mixing attachment, follow the previous steps to mix the concrete in a wheelbarrow or mixing tub. Once the desired consistency is reached, it is ready to be poured.
3. Pour the concrete
- Start pouring the concrete into the forms or molds, starting from one corner and working your way across to ensure even distribution.
- Use a shovel or trowel to help spread the concrete and fill in any gaps or low spots.
- Continue pouring and spreading until all forms are filled.
4. Level and smooth the surface
- Use a screed board to level the concrete, dragging it along the forms to remove any excess and create a smooth surface.
- Fill in any low spots or voids with additional concrete and repeat the screeding process.
5. Finish the surface
There are various finishing techniques to give the concrete surface the desired texture or appearance:
- Use a bull float to smooth the surface and help fill in any small imperfections.
- For a textured finish, use a broom to create light brush strokes across the surface.
- To create a decorative pattern, use stamps or stencils to imprint designs onto the concrete.
6. Cure the concrete
After finishing the surface, it’s important to properly cure the concrete to ensure strength and durability. Cover the concrete with plastic sheeting or use a curing compound to prevent moisture loss. Let the concrete cure for at least 7 days before subjecting it to heavy use or traffic.
FAQ:
Is it possible to mix concrete without a mixer?
Yes, it is possible to mix concrete without a mixer. One way to do it is by using a drill with a mixing paddle attachment.
What type of drill should I use to mix concrete?
You should use a powerful drill, preferably one with a ½-inch chuck and a variable speed setting. This will ensure that the drill can handle the mixing paddle and provide enough power for mixing the concrete.
Do I need any special attachments for the drill to mix concrete?
Yes, you will need a mixing paddle attachment for the drill to mix concrete. This paddle is specifically designed for mixing heavy materials like concrete.
What are the advantages of using a drill to mix concrete?
Using a drill to mix concrete has several advantages. It is a more affordable option compared to buying or renting a concrete mixer. It also allows for more control over the mixing process, as you can easily adjust the speed and direction of the drill. Additionally, using a drill with a mixing paddle attachment makes it easier to mix small batches of concrete.
Video:

Meet Harrison Clayton, a distinguished author and home remodeling enthusiast whose expertise in the realm of renovation is second to none. With a passion for transforming houses into inviting homes, Harrison's writing at https://thehuts-eastbourne.co.uk/ brings a breath of fresh inspiration to the world of home improvement. Whether you're looking to revamp a small corner of your abode or embark on a complete home transformation, Harrison's articles provide the essential expertise and creative flair to turn your visions into reality. So, dive into the captivating world of home remodeling with Harrison Clayton and unlock the full potential of your living space with every word he writes.