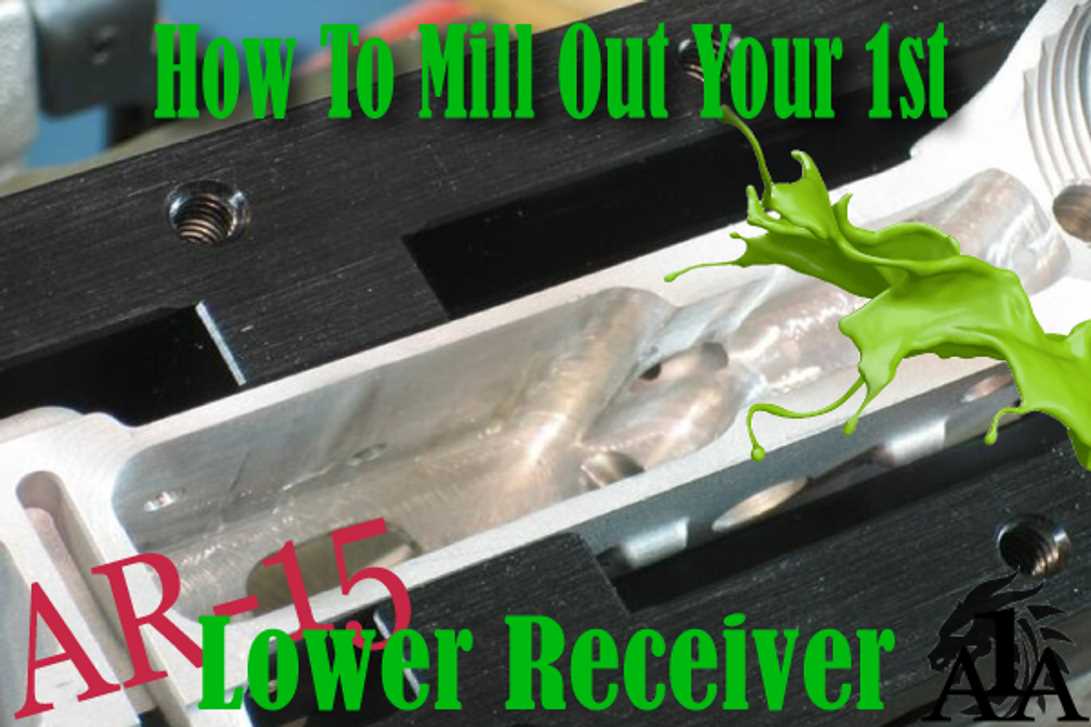
How to Mill 80 Lower with Drill Press: Step-by-Step Guide

Mill 80% lowers have become increasingly popular among firearms enthusiasts in recent years. These unfinished lower receivers offer a cost-effective way to build your own AR-15 or AR-10 rifle or pistol. While some advanced tools and skills are typically needed to complete the milling process, many enthusiasts have found success using a drill press.
Milling an 80% lower with a drill press requires careful planning, precision, and attention to detail. This step-by-step guide will walk you through the process, highlighting key considerations and providing helpful tips along the way.
Before you begin, it’s important to understand the legal implications and requirements of milling your own lower receiver. Make sure to check local, state, and federal laws, as well as any applicable regulations or restrictions. Once you have a clear understanding of the legal landscape, you can proceed with the milling process.
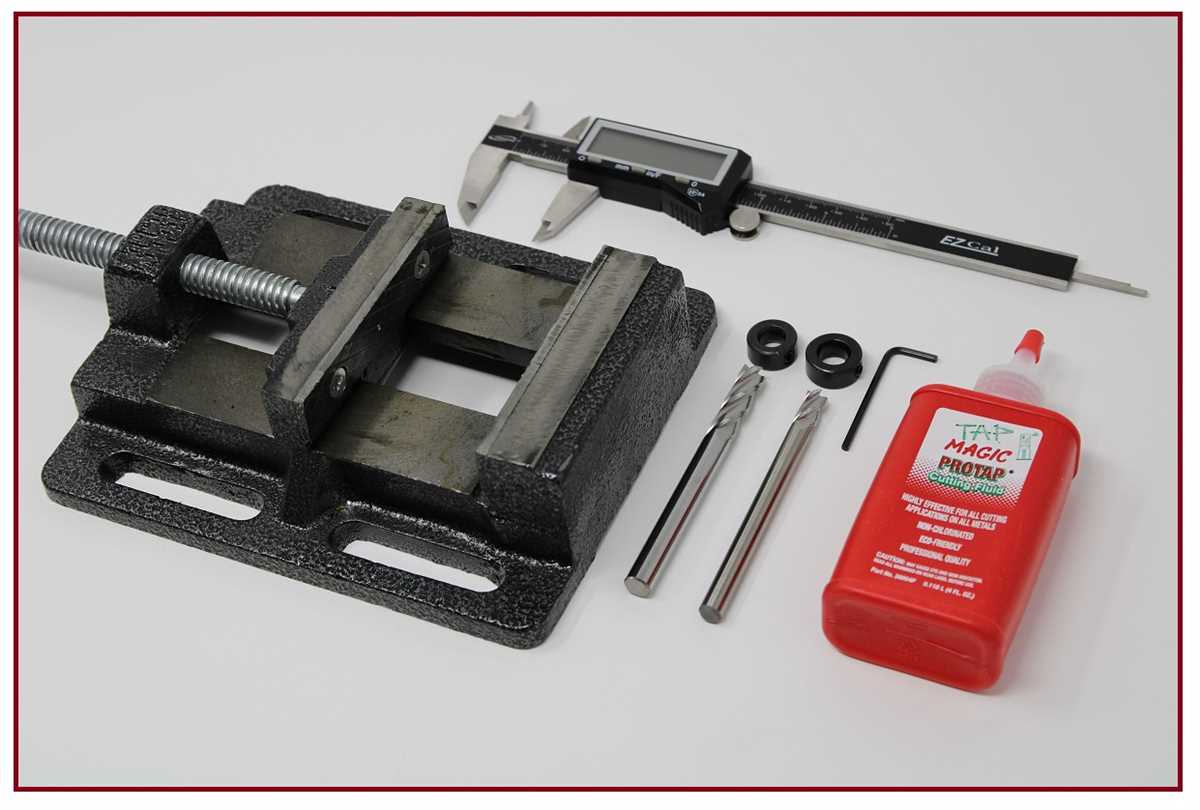
First, gather all the necessary tools and materials. You will need a drill press with a milling vise, appropriate drill bits, end mills, and measuring tools. Safety equipment, such as safety goggles and ear protection, is also essential. Additionally, ensure your work area is clean, well-lit, and properly organized.
Choosing the Right Equipment
When it comes to milling an 80 lower with a drill press, it is essential to choose the right equipment to ensure precision and safety. Below are the key pieces of equipment you will need:

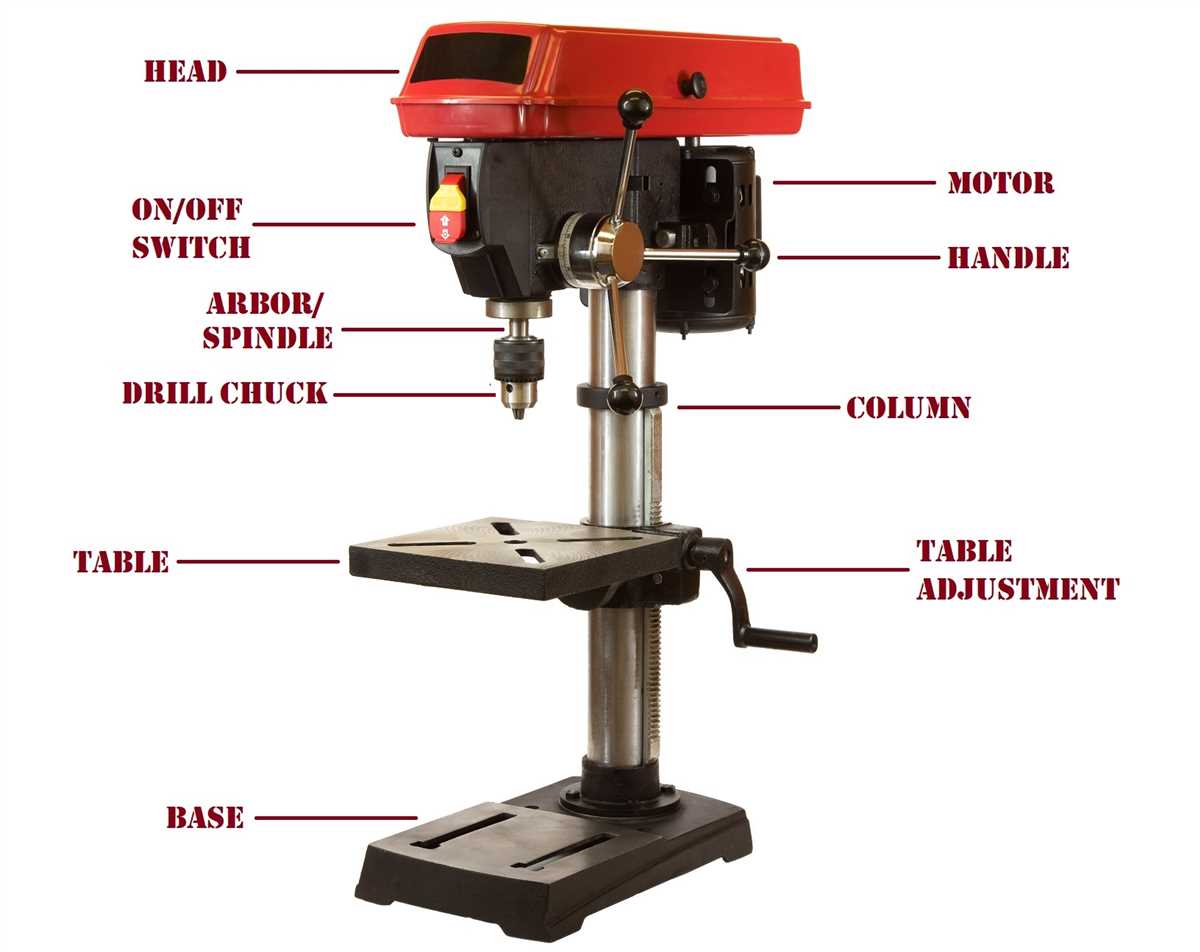
1. Drill Press
A drill press is the main tool you will use to mill the 80 lower. It provides stability, precision, and control while drilling the necessary holes. When selecting a drill press, consider its power, speed settings, and adjustable table for accurate positioning.
2. Vise
A vise is a crucial accessory that holds the 80 lower securely in place during the milling process. Look for a vise that is compatible with your drill press and has sturdy construction for stability.
3. End Mill Bit
An end mill bit is a cutting tool that is used to remove material from the 80 lower during the milling process. It is important to choose an end mill bit that is specifically designed for aluminum and has the appropriate cutting diameter and flute length for your project.
4. Cutting Fluid
Using a cutting fluid will help to reduce heat and extend the life of your end mill bit. Look for a cutting fluid that is designed for aluminum and has good cooling properties.
5. Safety Equipment
Always prioritize safety when working with power tools. Make sure to wear safety glasses to protect your eyes from chips and debris. Additionally, wearing ear protection and a dust mask is recommended to reduce noise and dust exposure.
By choosing the right equipment, you can ensure a smoother milling process and achieve accurate results when milling an 80 lower with a drill press.
Gathering the Necessary Tools
Before you start milling your 80% lower with a drill press, it’s important to gather all the necessary tools to ensure a smooth and successful process. Here are the tools you’ll need:
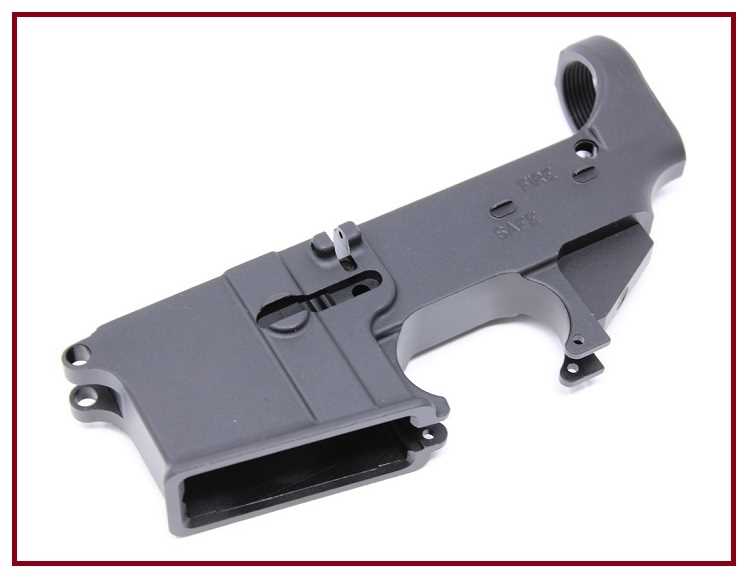
- 80% Lower Receiver: Make sure you have an 80% lower receiver specifically designed for your firearm platform.
- Drill Press: A drill press is a stationary tool that provides precise drilling capabilities. It’s an essential tool for milling your lower receiver.
- Drill Bits: You’ll need a few different sizes of drill bits to perform different milling operations. Make sure you have the appropriate drill bits for the specific lower receiver you’re working on.
- End Mill Bit: An end mill bit is used for removing material during the milling process. It’s an essential tool for creating the necessary pockets and cavities in the lower receiver.
- Drill Press Vise: A drill press vise is used to securely hold the lower receiver in place while milling. It provides stability and ensures accurate milling.
- Cutting Fluid: Cutting fluid is used to lubricate and cool the drill bits and end mill bit during the milling process. It helps to prolong the life of the tools and improve the quality of the milling.
- Safety Gear: It’s crucial to wear appropriate safety gear during the milling process. This includes safety glasses, ear protection, and a dust mask to protect yourself from flying debris and harmful particles.
- Calipers: Calipers are used to measure the dimensions of the milling operations and ensure accuracy and precision.
- Workbench: You’ll need a stable and sturdy workbench to mount your drill press and provide a suitable surface for milling the lower receiver.
Make sure you have all the necessary tools before you begin the milling process. This will help you work efficiently and achieve the best results.
Preparing the Workspace

Gather the necessary materials
Before you start milling the lower receiver, it’s important to gather all the necessary materials and tools. This will ensure that you have everything you need within reach and can work efficiently. Some of the materials and tools you will need include:
- An 80% lower receiver
- A drill press
- A milling bit
- A vise
- Safety glasses
- Ear protection
- Wearing appropriate clothing
- Measuring tools
- Clamps
Set up your workspace
After collecting all the necessary materials, it’s time to set up your workspace. The following steps will help you create a clean and organized work environment:
- Choose a well-lit area: Find a location with good lighting, either natural or with bright artificial lights. This will help you see the details of your work clearly.
- Clean your workspace: Clear the table or bench you will be working on, removing any clutter or debris. Clean the surface with a damp cloth to ensure there is no dust or dirt that could interfere with the milling process.
- Secure the drill press: If your drill press is not already mounted to a stable surface, use clamps or bolts to secure it to a table or bench. This will prevent any movement or vibrations during the milling process.
- Organize your tools: Arrange all your tools, materials, and safety equipment within easy reach of your workspace. This will save you time and make the milling process more efficient.
- Position the vise: Set up the vise on your workspace and ensure it is securely attached. This will hold the lower receiver in place during the milling process.
Ensure safety precautions
Safety should be a top priority when working with power tools and machinery. Take the following safety precautions before you begin milling the lower receiver:
- Wear safety glasses to protect your eyes from any flying debris.
- Wear ear protection to reduce the noise generated by the drill press.
- Wear appropriate clothing, including long sleeves and pants, to protect your skin from any potential hazards.
- Remove any loose jewelry or accessories that could get caught in the drill press.
By following these steps, you will be well-prepared to start milling the 80% lower receiver with your drill press in a safe and organized workspace.

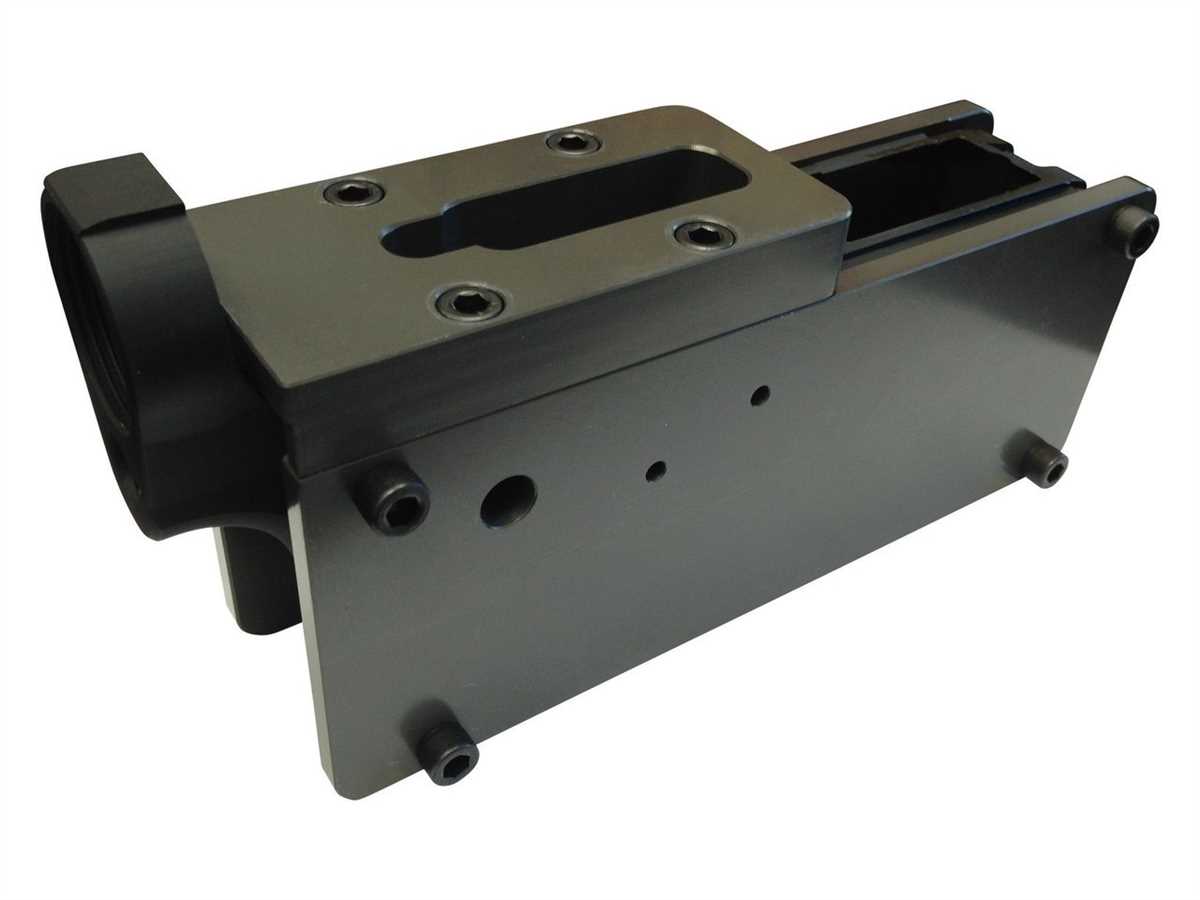
Securing the 80% Lower Receiver
Before beginning the milling process, it is important to properly secure the 80% lower receiver. This ensures stability and reduces the risk of accidents. Here are the steps to securely fasten the receiver:
- Place the 80% lower receiver securely in a vise. Make sure the vise jaws are tightened enough to hold the receiver firmly in place.
- Position the receiver so that it is level and aligned with the milling bit. This will ensure accurate cuts and prevent any damage to the receiver.
- Use additional clamps or fixtures if necessary to provide extra support and stability to the receiver. This may be especially helpful if the receiver is larger or heavier.
- Double-check that the receiver is securely fastened and will not move or shift during the milling process.
Note: It is important to take necessary safety precautions such as wearing protective eyewear, gloves, and positioning the drill press in a well-ventilated area.
By properly securing the 80% lower receiver, you can ensure a safe and accurate milling process. This step is crucial to achieving the desired results and maintaining the integrity of the receiver.
Setting up the Drill Press
Before you begin milling your 80 lower with a drill press, it is essential to set up the drill press properly. By following the steps below, you can ensure optimal performance and safety:

1. Secure the Drill Press
Start by placing the drill press on a sturdy workbench or table. Make sure the surface is level and can support the weight of the drill press.
2. Align the Drill Press Table
Adjust the table of the drill press so that it is parallel to the drill bit. Use the table adjustment screws or knobs to move the table up or down and left or right until it is properly aligned.
3. Install the Vise
Attach a vise to the drill press table. The vise will hold the 80 lower securely in place during the milling process. Make sure the vise is properly tightened to prevent any movement when drilling.
4. Mount the Drill Bit
Select the appropriate drill bit for the milling process. Ensure that it is compatible with the size and material of the 80 lower. Insert the drill bit into the drill press chuck and tighten it securely.
5. Adjust the Depth Stop
Determine the desired depth for the milling operation. Adjust the depth stop on the drill press to the appropriate setting to ensure consistent and accurate milling depths.
6. Check Safety Features
Before starting the milling process, ensure that all safety features on the drill press are functioning correctly. Test the emergency stop button and make sure the spindle guard is in place.
7. Secure the 80 Lower
Place the 80 lower into the vise, ensuring that it is securely held in place. Double-check the positioning and tightness of the vise before proceeding.
Once you have successfully set up the drill press, you are ready to begin milling your 80 lower. Remember to always wear appropriate safety gear, such as safety glasses and ear protection, and follow all necessary safety precautions.
Milling the 80% Lower Receiver

Step 1: Prepare the work area and safety precautions
Before starting the milling process, make sure to clear the work area and gather all the necessary tools and materials. Ensure that you are wearing the proper safety gear, such as safety glasses and gloves, to protect yourself from any potential risks or injuries.
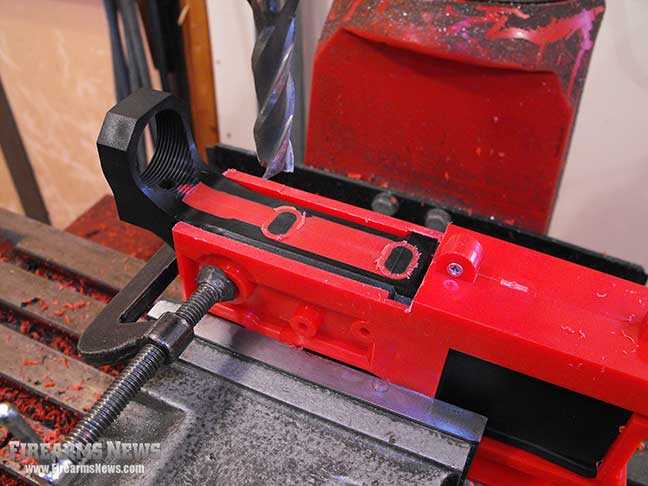
Step 2: Secure the lower receiver
Place the 80% lower receiver in a milling vise, ensuring that it is firmly secured. The milling vise will help stabilize the receiver and prevent it from moving or vibrating during the milling process.
Step 3: Install the appropriate milling bit
Choose the appropriate milling bit for your specific lower receiver. The type of bit to use may vary depending on the material of the receiver and the desired outcome. Consult the manufacturer’s instructions or guidelines for recommendations on which milling bit to use.
Step 4: Set the depth and speed
Adjust the depth and speed settings on your drill press to match the specifications provided by the manufacturer. This will help ensure that you mill the receiver to the correct dimensions and prevent any damage to the part.
Step 5: Begin the milling process
Slowly lower the milling bit onto the receiver and begin removing the material. Take your time and proceed with caution to prevent any mistakes or accidents. It is recommended to make multiple passes, gradually increasing the depth each time, rather than trying to remove all the material in one pass.
Step 6: Clean and inspect the receiver
Once you have completed the milling process, carefully remove the receiver from the vise. Use a brush or compressed air to remove any swarf or debris from the milled area. Inspect the receiver for any imperfections or errors in the milling process.
Step 7: Test fit and finish
Before proceeding with further assembly, test fit the receiver with other components to ensure proper fit and alignment. If necessary, use a file or sandpaper to make any adjustments or smoothing on the milled surfaces. Once satisfied, you can proceed with finishing and assembling the lower receiver.
Step 8: Clean up
After completing the milling process, clean up the work area and properly store all the tools and materials used. Dispose of any waste material or debris in an appropriate manner.
Step 9: Final thoughts
Milling an 80% lower receiver can be a challenging yet rewarding project. It is important to follow all safety precautions and take your time to ensure accurate and precise milling. Always refer to the manufacturer’s instructions and guidelines for best results.
Cleaning and Finishing the Lower Receiver
After milling your 80 lower with a drill press, it’s important to properly clean and finish the lower receiver before assembly. This will ensure the longevity and reliability of your firearm.
Tools and Materials Needed:
- Compressed air
- Lint-free cloth
- Solvent cleaner
- Brushes
- Gun oil or lubricant
- Sandpaper (various grits)
Cleaning Steps:
- Start by removing any metal shavings or debris using compressed air. Make sure to thoroughly blow out all the crevices and holes of the lower receiver.
- Next, use a lint-free cloth or rag to wipe down the entire lower receiver. This will remove any remaining dust or residue.
- Apply a solvent cleaner to a brush and scrub the lower receiver. Pay special attention to the areas where the milling was performed. This step will help remove any excess material or oils.
- Rinse the lower receiver with clean water to remove any solvent cleaner residue. Make sure to dry it thoroughly to prevent any rusting.
Finishing Steps:
- Inspect the lower receiver for any imperfections or rough spots. Use sandpaper of various grits to smooth out these areas until you achieve a desired finish.
- Apply a thin coat of gun oil or lubricant to prevent rust and corrosion. Make sure to cover all the exposed metal surfaces.
Additional Tips:
- Always wear safety glasses and gloves when working with solvents or power tools.
- Take your time and be patient during the cleaning and finishing process. Rushing can lead to mistakes and an inferior final product.
- Follow the manufacturer’s instructions for the solvent cleaner and gun oil for best results.
- Regularly inspect and clean your firearm to maintain its optimal performance and longevity.
By properly cleaning and finishing your lower receiver after milling, you can ensure that it is ready for assembly and will provide reliable performance when you are ready to use your firearm.
Verifying the Receiver’s Compliance
Before proceeding with the milling process, it is essential to ensure that the receiver is compliant with the necessary regulations. The receiver should meet the legal definition of an 80% lower receiver and should not possess characteristics that would classify it as a firearm.
Determine the Legal Definition of an 80% Lower Receiver

An 80% lower receiver refers to a partially completed receiver that is not considered a firearm by law. To verify its compliance, you need to understand the legal definition of an 80% lower receiver in your jurisdiction. This information can be obtained through local laws and regulations.
Inspect the Markings and Features
Examine the receiver for any markings or features that could classify it as a firearm. These include holes, drill points, or cavities that have been pre-machined beyond the 80% threshold. Ensure that the receiver does not have any serial numbers or other markings that match those of a completed firearm receiver.
Check for Firearms Components
Verify that the receiver does not have any completed firearms components, such as a trigger group or a barrel attached. If any parts that are considered essential to the functioning of a firearm are present, the receiver may be classified as a firearm.
Consult Legal Authorities if Uncertain

If you are unsure about the compliance of the receiver or have any questions regarding its classification, it is always advisable to consult with legal authorities or experts in your jurisdiction. They can provide guidance and ensure that you are in compliance with the law before proceeding with the milling process.
Keep Documentation
It is essential to maintain all documentation related to the receiver, including receipts, invoices, and any legal correspondence. This documentation will serve as proof of the receiver’s compliance in case of any legal inquiries or audits.
Disclaimer
This article is for informational purposes only and should not be considered legal advice. Compliance with local laws and regulations is the responsibility of the individual. Always consult with relevant legal authorities or experts to ensure compliance before engaging in any milling or firearms-related activities.
FAQ:
What is an 80 lower?
An 80 lower refers to an unfinished firearm receiver that is not considered a firearm by the ATF. It is called “80 lower” because it is roughly 80% complete.
What is a drill press?
A drill press is a stationary tool used to drill holes in various materials. It provides more precision and power compared to a handheld drill.
Why would someone want to mill an 80 lower?
Some gun enthusiasts prefer to mill their own 80 lowers to have more control over the customization and build process of their firearms. It allows them to create a personalized firearm that meets their specific preferences.
What materials do I need to mill an 80 lower with a drill press?
To mill an 80 lower with a drill press, you will need an 80% lower receiver, a drill press, a vise, an end mill bit, cutting fluid, safety glasses, and ear protection.
Can I mill an 80 lower without a drill press?
While it is technically possible to mill an 80 lower without a drill press, using a drill press provides more accuracy and control. It is highly recommended to use a drill press for better results.
Video:


Harrison Clayton
Meet Harrison Clayton, a distinguished author and home remodeling enthusiast whose expertise in the realm of renovation is second to none. With a passion for transforming houses into inviting homes, Harrison's writing at https://thehuts-eastbourne.co.uk/ brings a breath of fresh inspiration to the world of home improvement. Whether you're looking to revamp a small corner of your abode or embark on a complete home transformation, Harrison's articles provide the essential expertise and creative flair to turn your visions into reality. So, dive into the captivating world of home remodeling with Harrison Clayton and unlock the full potential of your living space with every word he writes.


