How to Make a Hole in Wood Without a Drill

Creating a hole in wood can be a common task for various DIY projects, but what if you don’t have a drill? Whether you’re looking to add a decorative touch, install a hook, or simply need a small hole for a screw, there are alternative methods you can use to achieve your goal without a drill.
One method is to use a hammer and a nail. By positioning the nail on the spot where you want the hole and tapping it gently with the hammer, you can gradually create a hole. This method is best suited for smaller holes and requires patience and precision.
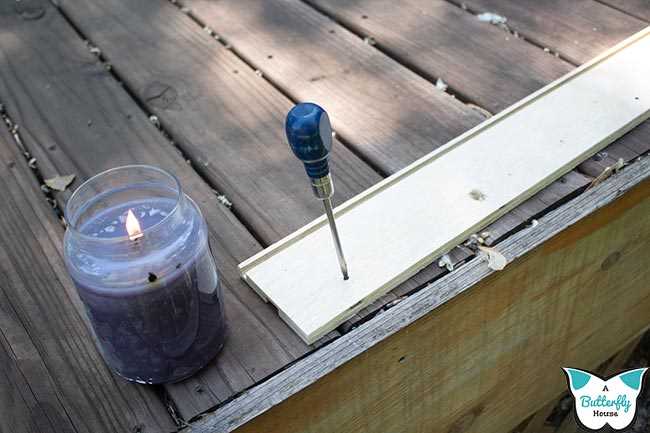
Another option is to use a screwdriver. If you have a screwdriver with a sharp point, you can twist it into the wood, gradually applying pressure until it creates a hole. This method works best for softer woods and smaller holes as it may be difficult to twist a screwdriver through harder woods.
For larger holes, you can use a chisel and a hammer. By scoring the wood with the chisel and then tapping gently with the hammer, you can create a hole or notch in the wood. This method requires more skill and precision, but it can be an effective way to make larger holes without a drill.
While using alternative methods to make a hole in wood without a drill can be useful in certain situations, it’s important to remember that a drill is typically the most efficient and precise tool for the job. If you find yourself needing to make holes often, investing in a drill may be a worthwhile investment.

What is Woodworking
Woodworking is the art or craft of creating objects from wood using different tools and techniques. It involves shaping, carving, and joining wood to make furniture, decorative items, and other useful objects. Woodworking requires skill, patience, and creativity.
Types of Woodworking
There are different types of woodworking that vary in the level of complexity and the tools used:
- Carpentry: Carpentry focuses on constructing structures made of wood, such as buildings, bridges, and frameworks. Carpenters work on large-scale projects and often use power tools to cut, shape, and join wood.
- Cabinet Making: Cabinet making involves creating custom furniture and cabinets. Cabinet makers use precise measurements and joinery techniques to construct high-quality pieces.
- Woodcarving: Woodcarving is the art of carving designs or sculptures from wood. It requires intricate detailing and the use of carving tools, such as chisels and gouges.
- Woodturning: Woodturning involves shaping wood using a lathe. By spinning the wood rapidly, woodturners can create cylindrical or symmetrical shapes, such as bowls and vases.
- Woodworking for Hobbyists: Many people enjoy woodworking as a hobby. They create small projects like cutting boards, jewelry boxes, or picture frames using basic hand tools.
Tools Used in Woodworking
Woodworking requires a variety of tools for different tasks. Some commonly used tools include:
- Saws: Saws are essential for cutting wood. There are various types of saws, such as handsaws, jigsaws, miter saws, and table saws, each serving a specific purpose.
- Chisels: Chisels are used for carving and shaping wood. They come in different sizes and shapes and are often used with a mallet.
- Drills: Drills are used for making holes in wood to insert screws or dowels. Hand drills, power drills, and drill presses are commonly used in woodworking.
- Clamps: Clamps are used to hold pieces of wood together while glue dries or when joining them. They ensure a strong and secure bond between the pieces.
- Routers: Routers are used for shaping edges, creating intricate designs, and hollowing out spaces in wood. They can be handheld or mounted on a table.
Safety in Woodworking
Woodworking can be a dangerous activity if proper safety precautions are not taken. It is essential to wear protective gear, such as safety glasses, ear protection, and dust masks, to prevent injuries. Working in a well-ventilated area and using sharp tools can also minimize the risk of accidents.
| Tips |
|---|
| Always read and follow the instructions provided with tools and materials. |
| Keep your workspace clean and organized to avoid tripping hazards. |
| Use push sticks or blocks when working with small pieces on power tools. |
| Avoid wearing loose clothing or jewelry that can get caught in tools. |
| Use sharp tools to reduce the risk of slips and unintentional injuries. |

By following safety guidelines and continuously improving skills, woodworking can be a rewarding and fulfilling hobby or profession.
Importance of Drilling Holes
Drilling holes in wood is a fundamental and important step in many woodworking projects. Whether you are building furniture, installing shelves, or working on a DIY project, drilling holes is necessary for a variety of reasons:
- Joinery: Drilled holes are often used to join pieces of wood together. Whether it’s through dowels, screws, or nails, drilling holes provides the necessary space for the fasteners to secure the pieces together.
- Preventing Splitting: Wood has a natural tendency to split along the grain when fasteners or other forces are applied. By drilling a hole before inserting a screw or nail, you can reduce the likelihood of the wood splitting, making the joint or connection more secure.
- Cleaner Finishes: Drilling holes allows for a cleaner, more professional-looking finish. By using countersunk holes, you can recess the heads of screws or nails, creating a flush surface that can be easily sanded or finished.
- Routing Wires: Drilling holes is essential for routing wires or cables through furniture or walls. By creating a hole, you can hide unsightly wires and ensure a neater, more organized appearance.
- Ventilation: In certain projects, drilling holes can improve ventilation, such as in cabinets or enclosures. This allows for better airflow and can help prevent the buildup of heat, humidity, or odors.
Note: It’s important to use the right drill bit size for each specific project to ensure the hole is the correct size and depth. This will help achieve the desired result and prevent any damage to the wood.
Methods of Making Holes in Wood
There are several methods that you can use to make holes in wood without a drill. These methods are especially useful when you don’t have access to power tools or don’t want to create too much noise and mess. Here are some of the commonly used methods:

1. Nail and Hammer
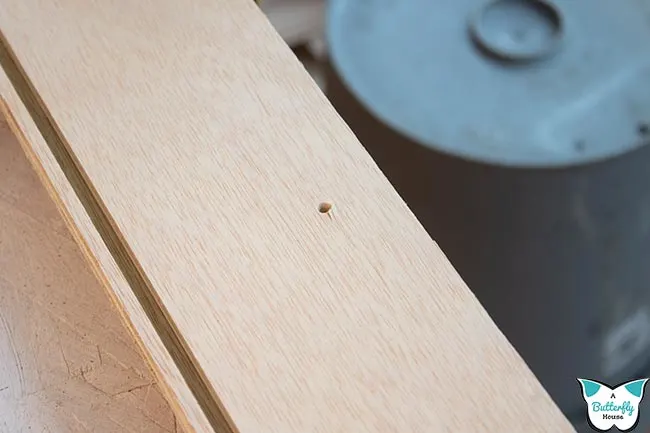
One of the simplest and most common methods is to use a nail and a hammer. Start by placing the nail on the wood at the desired location for the hole. Hold the nail steady with one hand and use the hammer to drive it into the wood. Continue hammering until the nail goes all the way through, creating a hole. This method is best for smaller holes.
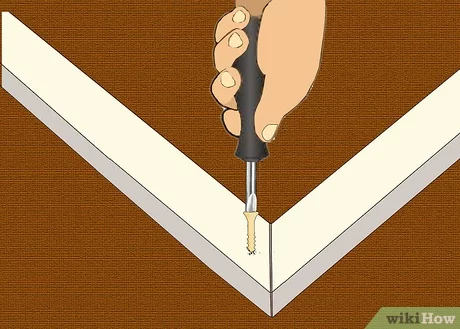
2. Screwdriver and Hammer
If you don’t have a nail, you can also use a screwdriver and a hammer. Choose a screwdriver that has a flat and wide tip. Position the screwdriver on the wood where you want the hole and gently tap it with the hammer. Apply firm pressure and keep tapping until the screwdriver goes through the wood, creating a hole. This method is suitable for larger holes.
3. Awl
An awl is a pointed tool that is specifically designed for making holes. It looks like a pencil with a sharp point. Place the tip of the awl on the wood at the desired location for the hole. Apply downward pressure and twist the awl back and forth to create a hole. This method is great for precise and small-sized holes.
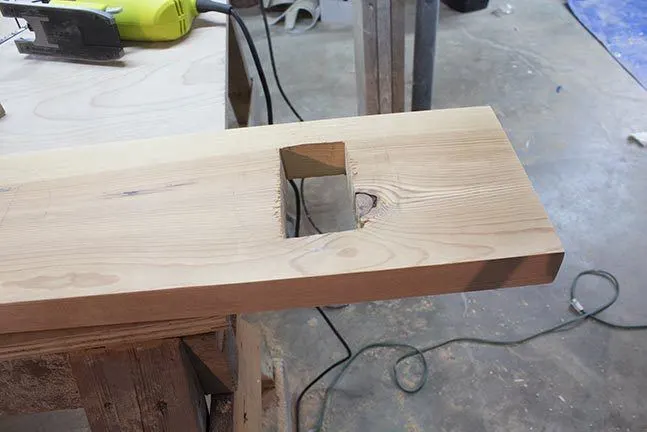
4. Chisel and Hammer
A chisel is an effective tool for creating larger and neater holes in wood. Start by marking the outline of the hole on the wood. Place the chisel perpendicular to the wood and align it with the marked outline. Use the hammer to strike the chisel and make a small cut. Repeat this process around the outline until you have made a complete hole. This method requires practice and precision.

5. Spade Bit or Hole Saw
If you have access to a few tools, you can use a spade bit or hole saw attachment for hand drilling. These tools usually have a pointed center that helps guide them into the wood. Attach the spade bit or hole saw to a hand drill or power drill. Position it on the wood where you want the hole and apply steady pressure while rotating the bit or saw. This method is more efficient and suitable for larger holes.
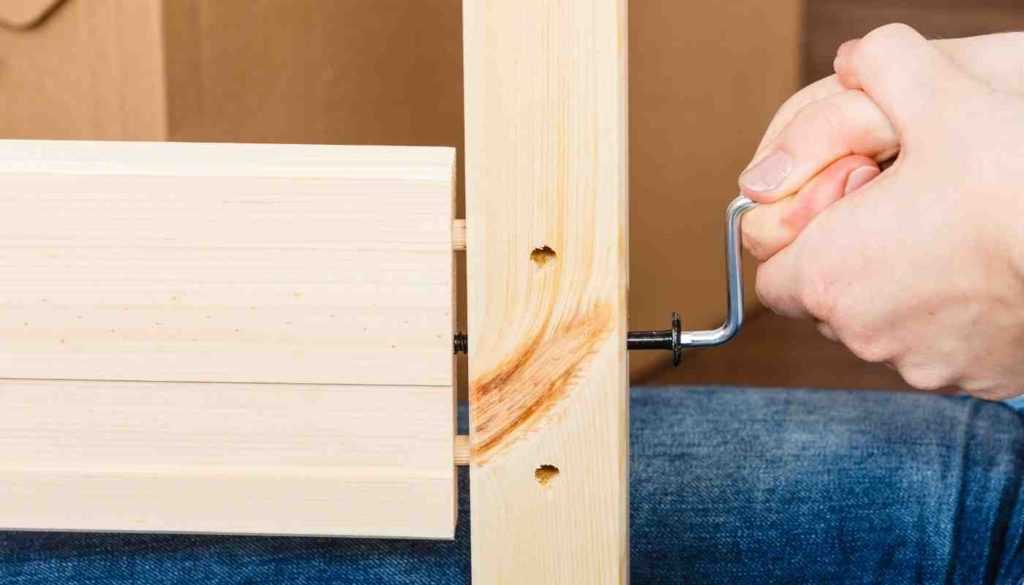
6. Forstner Bit or Auger Bit
If you need to create larger and more precise holes in wood, you can use a handheld brace with a forstner bit or auger bit attachment. This method requires more effort and control but results in clean and accurate holes. Position the bit on the wood where you want the hole and rotate the brace clockwise while applying downward pressure. Pause periodically to clear wood chips and continue until you have reached your desired depth.
Regardless of the method you choose, always prioritize safety by wearing protective goggles and gloves. Take your time, be patient, and practice to improve your hole-making skills.
Using a Screwdriver and Hammer
Materials Needed
- Screwdriver
- Hammer
- Wood piece
- Marker or pencil
Instructions
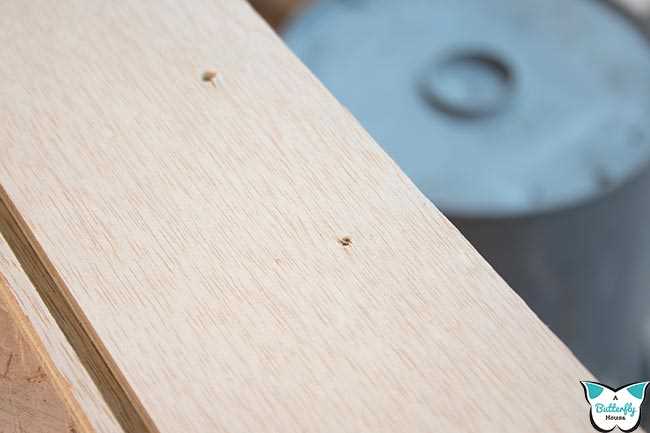
- Prepare the wood piece by marking the spot where the hole needs to be made using a marker or pencil.
- Select a screwdriver that matches the desired size of the hole.
- Hold the screwdriver firmly and position it vertically over the marked spot on the wood.
- Tap the back of the screwdriver with a hammer to create an indentation in the wood.
- Once the indentation is made, reposition the screwdriver at a slight angle.
- Continue tapping the screwdriver with the hammer while applying downward pressure to slowly create a hole in the wood.
- Repeat the process until the desired hole depth is reached.
Tips
- Use a screwdriver with a flat head for smaller holes and a screwdriver with a pointy head for larger holes.
- Be patient and tap gently to avoid splitting or damaging the wood.
- Make sure to wear appropriate safety gear, such as safety glasses, when working with tools.
- Practice on scrap wood before attempting to make holes in a project piece.
Using Chisels and Mallet
If you don’t have access to a drill, one way to make a hole in wood is by using chisels and a mallet. This technique requires some skill and precision, but it can be effective for smaller holes or when drilling is not an option.

Materials needed:
- Chisels of various sizes (1/4 inch, 1/2 inch, etc.)
- A mallet
- A pencil or marking tool for marking the hole
- Safety goggles and gloves
Steps:
- Mark the spot: Begin by marking the exact location where you want the hole to be. It’s important to be precise to ensure accuracy.
- Prepare the chisel: Choose a chisel size that matches the diameter of the hole you want to make. Sharpen the chisel if necessary using a sharpening stone or sandpaper.
- Create a starter hole: Use a small chisel or awl to create a starter hole by gently tapping it with a mallet. This will provide a guide for the larger chisel.
- Position the larger chisel: Align the larger chisel with the starter hole, making sure it is perpendicular to the wood surface.
- Make small cuts: Begin making small cuts around the circumference of the hole. This can be achieved by gently tapping the chisel with a mallet, applying consistent pressure and gradually increasing the depth of each cut.
- Remove wood chips: As you make cuts, use a chisel or a brush to remove the wood chips from the hole to maintain visibility and prevent them from interfering with the cutting process.
- Continue cutting: Gradually deepen the cuts until you reach the desired depth. Take your time and work slowly to avoid any mistakes.
- Smooth the edges: Once the cut is complete, use a sandpaper or a file to smooth the edges of the hole. This will ensure a clean finish.
Remember to always wear safety goggles and gloves when working with chisels and mallets to protect your eyes and hands from potential injuries. Additionally, take breaks as needed to prevent fatigue and maintain precision in your work.
Using a Wood Burning Tool
If you don’t have a drill, another method you can use to make a hole in wood is by using a wood burning tool. A wood burning tool, also known as a pyrography pen, is typically used for creating decorative designs on wooden surfaces, but it can also be effective for making holes.
Step 1: Safety Precautions
Before you begin, it’s important to take some safety precautions:
- Wear protective goggles to shield your eyes from any flying wood chips or sparks.
- Work in a well-ventilated area or wear a mask to avoid inhaling any fumes.
- Ensure that the wood burning tool is unplugged when not in use.
Step 2: Choose the Right Tip
Wood burning tools usually come with a variety of interchangeable tips. For creating holes, you’ll want to select a tip that is thin and pointed. The sharper the tip, the easier it will be to make a clean hole.
Step 3: Mark the Hole

Use a pencil or marker to mark the location of the hole on the wood. This will serve as a guide for where to apply the wood burning tool.
Step 4: Heat Up the Wood Burning Tool
Plug in the wood burning tool and allow it to heat up. Read the manufacturer’s instructions for the recommended heat setting.
Step 5: Burn the Hole
Using the heated wood burning tool, slowly and steadily apply pressure to the marked area to burn a hole. Start at the center of the mark and gradually work your way outward. Keep the tool at a slight angle to prevent it from slipping on the wood surface.

Step 6: Adjust the Size
If the initial hole created is not large enough, you can use the wood burning tool to enlarge it. Simply apply more pressure and move the tool in a circular motion to widen the hole to the desired size.
Step 7: Finish and Clean Up
Once you have created the hole to your desired size, unplug the wood burning tool and allow it to cool down. Use sandpaper to smooth any rough edges around the hole, if necessary.
Remember to always exercise caution when using a wood burning tool, as it can get extremely hot and cause burns. Follow the manufacturer’s instructions and keep safety a priority throughout the process.
Using a Hand Drill
A hand drill is a manual tool that can be used to create holes in wood. It is a simple device consisting of a handle, a chuck, and a bit. Follow the steps below to use a hand drill to make a hole in wood.
Materials Needed:
- Hand drill
- Wood piece
- Drill bit suitable for wood
- Clamp (optional)
Procedure:
- Choose the location on the wood where you want to create the hole. Mark the spot with a pencil or a marking tool.
- Secure the wood piece by clamping it to a workbench or any stable surface. This will prevent it from moving while drilling.
- Insert the appropriate drill bit into the chuck of the hand drill. Tighten the chuck to secure the drill bit in place.
- Hold the hand drill firmly by the handle with one hand, and position the drill bit at the marked spot on the wood.
- Apply steady pressure and start rotating the hand drill handle clockwise. This will set the drill bit in motion and create a hole in the wood.
- Continue rotating the handle in a clockwise direction with a steady pressure until the drill bit penetrates through the wood and creates the desired hole.
- Once the hole is complete, release the pressure on the handle of the hand drill to stop the rotation of the drill bit.
- Remove the hand drill from the hole and inspect the hole for any rough edges or splinters.
- Sand the edges of the hole, if necessary, to smooth out any rough areas.
- Clean the wood piece and the hand drill to remove any wood chips or dust.
Using a hand drill requires some physical effort, but it can be a suitable option for small woodworking projects or when a power drill is not available.
Alternative Tools for Making Holes
While a drill is the most common tool for making holes in wood, there are several alternative tools that can be used if you don’t have a drill available. These tools may require a bit more effort and time, but they can still be effective for smaller holes and simple woodworking projects.
1. Screwdriver
A screwdriver can be used as a makeshift tool for making holes in wood. Simply choose a screwdriver with a sharp, pointed end and use it to create a pilot hole by applying pressure and turning it clockwise. This method is best suited for small holes and softer types of wood.
If you need a larger hole, you can use the screwdriver to gradually widen the pilot hole by moving it in a circular motion while applying more pressure.
2. Chisel
A chisel can also be used to make holes in wood. Start by creating a small indentation on the surface of the wood using a hammer and the sharp end of the chisel. Then, use the chisel to carefully remove wood around the indentation in a circular motion. Continue chiseling until the desired hole size is achieved.
Keep in mind that this method requires precision and patience to avoid damaging the wood. It is better suited for making larger holes or square-shaped holes.
3. Hole Saw
A hole saw is a specialized tool that can be used to make larger holes in wood. It consists of a circular cutting blade with saw teeth and a drill bit in the center. Attach the hole saw to a power drill and position it on the wood where you want the hole to be. Apply steady pressure and slowly drill into the wood. The hole saw will cut through the wood, creating a clean and precise hole.
This method is best suited for larger holes, such as those needed for installing doorknobs or electrical outlets. However, it requires the use of a power drill.
4. Hole Punch
A hole punch tool, commonly used for paper, can also be used for small holes in thin wood. This tool typically has a hollow circular blade on the end that punches through material when pressure is applied. Place the hole punch on the wood where you want the hole and strike it firmly with a hammer. The blade will cut through the wood, creating a hole.
Keep in mind that this method is only suitable for thin wood and small holes, as the hole punch tool may not have enough cutting power for larger or thicker pieces of wood.
5. Hand Saw
If you need to make a longer straight hole, a hand saw can be used. First, mark the area where you want the hole. Then, using the hand saw, carefully cut along the marked lines, making sure to stay within your desired hole area. This method requires precision and control to create clean and straight holes.
However, it can be time-consuming and may not be suitable for making small or precise holes.
6. Hot Nail or Metal Rod
For small holes or when other tools are not available, you can use a hot nail or metal rod to burn a hole in the wood. Heat the nail or rod until it becomes red hot using a flame source, such as a blowtorch or a stove burner. Once heated, press the hot nail or rod onto the wood and apply pressure. The heat will burn and melt the wood fibers, creating a hole.
Exercise extreme caution when using this method, as it involves working with heat and fire. Additionally, this method is not suitable for precision or delicate woodworking projects.
Conclusion
While a drill is the most efficient and precise tool for making holes in wood, there are alternative tools that can be used in a pinch. These tools include screwdrivers, chisels, hole saws, hole punches, hand saws, and hot nails or metal rods. Depending on your project and the size of the hole needed, one of these tools may be a suitable alternative to a drill.
Using a Hole Saw
A hole saw is a cylindrical cutting tool that is typically used to create large, round holes in wood, plastic, and metal. It consists of a circular blade with sharp teeth and a pilot drill bit in the center. Hole saws come in various sizes, allowing you to create holes of different diameters.
To use a hole saw to make a hole in wood without a drill, follow these steps:
- Choose the appropriate hole saw size for the hole you want to create. Make sure the hole saw is compatible with your power drill or hand drill.
- Mark the center point of the hole on the wood’s surface using a pencil or a marking tool.
- Secure the wood firmly in place using clamps or a vise to prevent it from moving during the cutting process.
- Attach the hole saw to the drill, making sure it is tightly secured.
- Position the pilot drill bit of the hole saw on the center point you marked earlier.
- Apply steady pressure and start the drilling process by turning on the drill. Make sure to keep the drill perpendicular to the wood’s surface.
- Continue drilling until the hole saw cuts through the wood completely.
- Once the hole is created, remove the hole saw from the drill and clean any wood shavings or debris from the hole.
It’s important to note that using a hole saw can be more challenging than using a standard drill bit, especially if you’re not familiar with the tool. Therefore, it’s advisable to practice on scrap wood before attempting to make a hole in a final piece.
Additionally, be mindful of the sawdust and wood particles generated during the cutting process. Wear appropriate safety goggles, a dust mask, and consider working in a well-ventilated area.
Using a Forstner Bit
A Forstner bit is a specialized drilling tool that is designed to create clean and precise holes in wood. It consists of a cylindrical cutting head with a central point and sharp edges. Here is how you can use a Forstner bit to make a hole in wood without a drill:
- Select the appropriate size of Forstner bit for the hole you want to make. Forstner bits come in various sizes, so choose one that matches your desired hole diameter.
- Secure the wood piece that you want to drill onto a stable surface, such as a workbench or a clamp.
- Mark the center of the hole on the wood surface using a pencil or a marking tool.
- Position the Forstner bit on the marked center point and hold it firmly in place. Make sure the cutting edges of the bit are aligned with the outline of the hole.
- With the Forstner bit in position, apply downward pressure to start drilling into the wood. Begin slowly to prevent the bit from jumping or wandering.
- Continue drilling at a steady pace, applying consistent pressure. The Forstner bit will cut through the wood, creating a clean and precise hole.
- Once the hole is complete, retract the Forstner bit and remove it from the wood. You may need to clear away any wood chips or debris from the hole.
- Inspect the hole to ensure it meets your desired specifications. If necessary, you can use sandpaper or a file to smooth the edges of the hole.
Using a Forstner bit can be an effective method for making precise and accurate holes in wood without a drill. It is important to take your time and use proper safety precautions while operating the Forstner bit to avoid any accidents or injuries.
FAQ:
What are some alternatives to using a drill to make a hole in wood?
There are several alternatives to using a drill to make a hole in wood. One option is to use a screwdriver and a hammer to create a hole. Another option is to use a chisel and a mallet to carve out a hole. Additionally, you can use a hole saw or a spade bit attachment for an electric drill.
Can I use a nail to make a hole in wood?
Yes, you can use a nail to make a small hole in wood. Simply position the nail on the wood and tap it gently with a hammer until it penetrates the surface. However, it is important to note that using a nail may not produce as clean of a hole as using a drill or other tools designed for this purpose.
I don’t have any tools. How else can I make a hole in wood?
If you don’t have any tools available, you can still make a hole in wood using friction. Find a sturdy stick or rod with a pointed end, such as a metal rod or a sharpened pencil. Press the pointed end against the wood and rotate the stick or rod in a twisting motion. With enough pressure and rotational movement, you should be able to create a hole in the wood.
Is it possible to use fire to make a hole in wood?
While it is technically possible to use fire to make a hole in wood, it is not recommended. Using fire to create a hole is highly dangerous and can lead to uncontrolled flames and potential injuries. It is best to use safer and more effective methods, such as using a drill or other tools specifically designed for woodworking tasks.
Video:


Harrison Clayton
Meet Harrison Clayton, a distinguished author and home remodeling enthusiast whose expertise in the realm of renovation is second to none. With a passion for transforming houses into inviting homes, Harrison's writing at https://thehuts-eastbourne.co.uk/ brings a breath of fresh inspiration to the world of home improvement. Whether you're looking to revamp a small corner of your abode or embark on a complete home transformation, Harrison's articles provide the essential expertise and creative flair to turn your visions into reality. So, dive into the captivating world of home remodeling with Harrison Clayton and unlock the full potential of your living space with every word he writes.