How to Make a Clapton Coil Without a Drill

When it comes to building coils for your vaping device, a Clapton coil is a popular choice among experienced vapers. This type of coil provides enhanced flavor and vapor production, making it a favorite among cloud chasers. However, making a Clapton coil typically requires a drill and some specialized tools. But what if you don’t have access to a drill? Don’t worry, you can still make a Clapton coil without a drill!
To make a Clapton coil without a drill, you’ll need a few basic tools and materials. First, you’ll need a sturdy table or work surface to secure your wire. You’ll also need a pair of wire cutters, tweezers or pliers, and of course, wire. For the Clapton wire, you’ll need a thicker gauge core wire and a thinner gauge wrapping wire. The core wire should be a higher resistance wire, such as kanthal, while the wrapping wire can be nichrome or stainless steel.
Once you have your tools and materials ready, you can begin making your Clapton coil. Start by straightening out your core wire, ensuring that it’s free of any kinks or bends. Then, take your wrapping wire and tightly wrap it around the core wire, making sure to maintain an even spacing between each wrap. You can use your fingers or a pair of tweezers to hold the wrapping wire in place as you wrap it around the core wire.
Continue wrapping the wrapping wire around the core wire until you reach the desired length of your Clapton coil. The more wraps you have, the greater the surface area of your coil, which will result in more vapor production. Once you’ve finished wrapping the wire, use your wire cutters to trim off any excess wrapping wire, leaving only a small tail.
After you’ve trimmed off the excess wire, you can install your Clapton coil in your vaping device. Use your tweezers or pliers to gently compress the coil, ensuring that the wraps are tightly together. Then, attach the ends of the coil to the positive and negative terminals of your device, making sure to tighten the screws securely.

With your Clapton coil installed, you can now begin enjoying the enhanced flavor and vapor production that it provides. Remember to always take care when building coils, and never exceed the recommended wattage for your coil. Happy vaping!
What is a Clapton Coil?
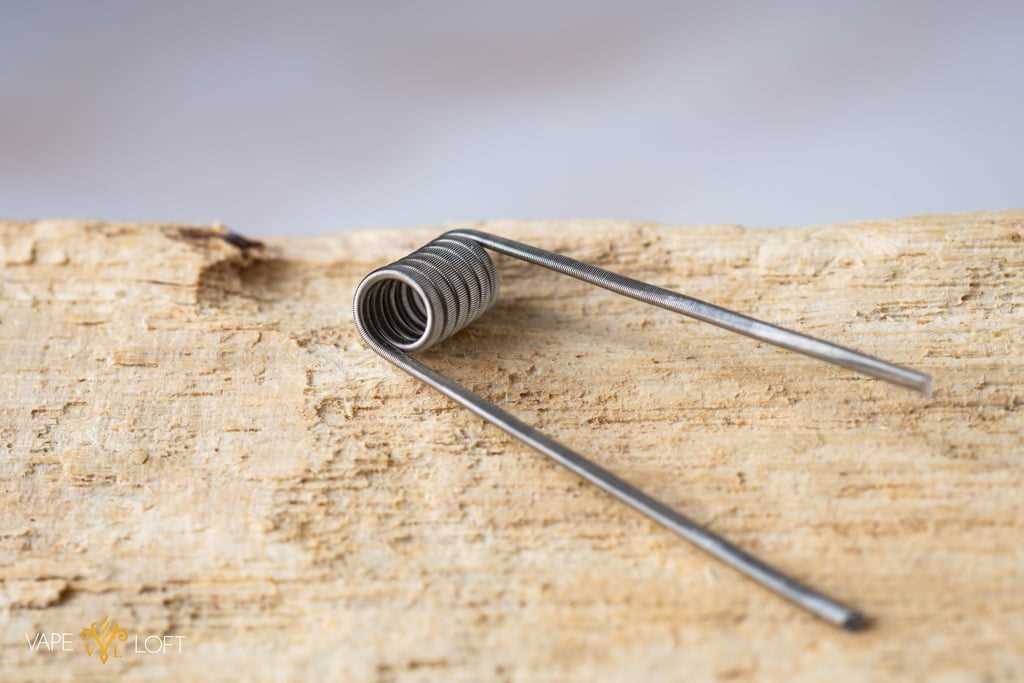
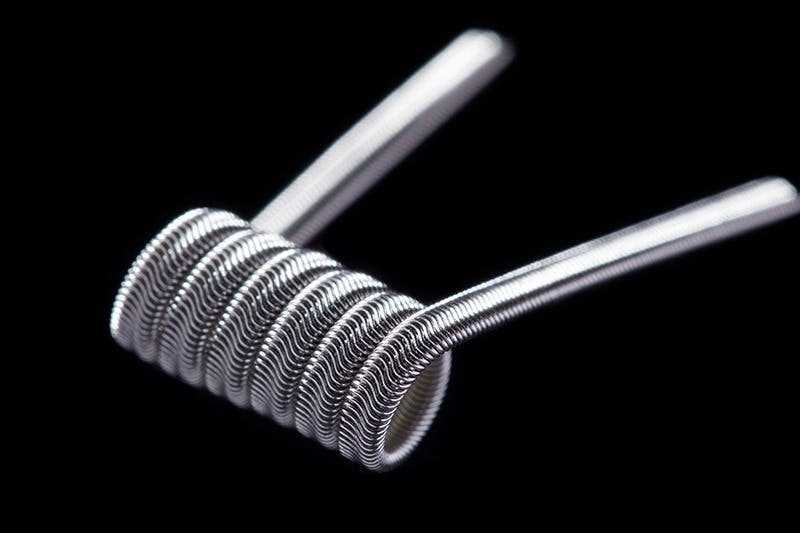
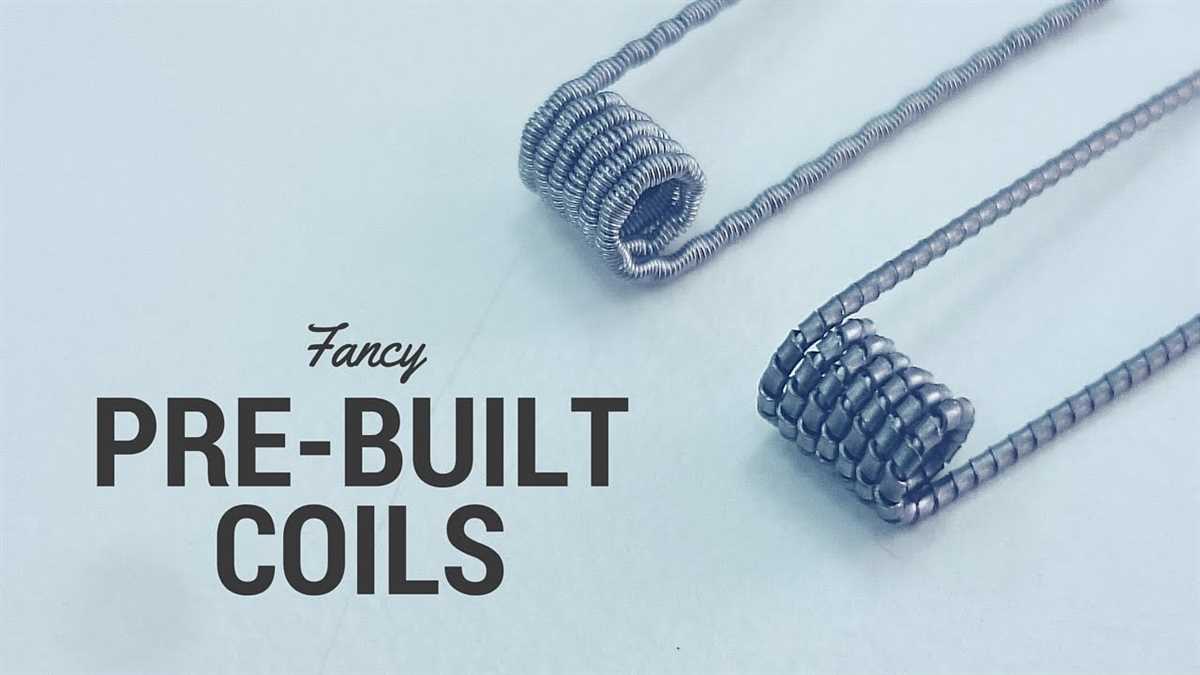
A Clapton coil is a type of coil used in vaping devices. It is made by wrapping a thin wire around a thicker wire, creating a coil with a larger surface area. This design increases the coil’s ability to heat up the e-liquid, resulting in bigger clouds and more intense flavor.
The Clapton coil gets its name from its resemblance to a guitar string – it features a central wire with one or more smaller wires wrapped around it. The central wire is typically made of Kanthal or stainless steel, while the outer wrapping wire is often made of Nichrome or Kanthal.
The main advantage of using a Clapton coil is that it provides a larger heating surface area compared to a regular coil. This extra surface area allows for more e-liquid to come into contact with the coil, resulting in better vapor production and flavor intensity.
Clapton coils are popular among experienced vapers who enjoy producing large vapor clouds and rich flavors. They can be used in a variety of vaping devices, including rebuildable atomizers and sub-ohm tanks.

Overall, the Clapton coil is a popular choice for vapers looking to enhance their vaping experience and achieve a more intense flavor and vapor production.
Why Make a Clapton Coil Without a Drill?
When it comes to building your own coils for vaping, a Clapton coil is a popular choice. It’s a coil that consists of a thin wire wrapped around a thicker wire, creating a unique texture and surface area. This design allows for better vapor production, flavor delivery, and overall vaping experience.
Typically, a drill is used to create a Clapton coil by wrapping the thin wire around the thicker wire at a high speed. However, not everyone has access to a drill or may prefer not to use one. In such cases, making a Clapton coil without a drill can be a viable option.
Benefits of Making a Clapton Coil Without a Drill
1. Accessibility: Not everyone has a drill readily available, especially if you’re new to coil building or don’t have the necessary tools. Making a Clapton coil without a drill allows you to create this type of coil using alternative methods that are more accessible.
2. Convenience: Even if you have a drill, it may not always be convenient to use it. Making a Clapton coil without a drill can be a quicker and more convenient option, especially if you’re in a hurry or want to experiment with different coil styles on the go.

3. Skill Development: Building a Clapton coil without a drill requires different techniques and skills. By learning how to create a Clapton coil without a drill, you can enhance your coil building skills and become more versatile in your vaping journey.
Alternative Methods for Making a Clapton Coil Without a Drill
There are several alternative methods you can use to make a Clapton coil without a drill:
- Hand Wrapping: This involves manually wrapping the thin wire around the thicker wire. While it may take more time and effort, it can still result in a well-performing Clapton coil.
- Clip Method: This method involves using small clips or clamps to hold the thin wire in place while you manually wrap it around the thicker wire. It can make the process easier and more efficient.
- Using a Spool: If you have a spool that rotates freely, you can spin it with your hands while feeding the thin wire onto the thicker wire. This mimics the rotating motion of a drill and can create a similar effect.
- Using a Screwdriver: Another option is to use a screwdriver as a makeshift spindle. You can secure the thicker wire to the handle of the screwdriver and manually wrap the thin wire around it.
These methods may require more patience and practice compared to using a drill, but they can yield similar results and allow you to enjoy the benefits of a Clapton coil without the need for specialized equipment.
Overall, making a Clapton coil without a drill can be a practical and rewarding alternative. It gives you the flexibility to create this popular coil style using alternative methods, allowing you to enjoy a better vaping experience while expanding your coil building skills.
Getting Started

Welcome to the guide on how to make a Clapton coil without a drill. This tutorial will walk you through the process of creating a Clapton coil using simple tools that you might already have at home. Whether you’re a beginner or an experienced vaper, this method is a great alternative if you don’t have access to a drill or simply prefer a more hands-on approach.
What is a Clapton Coil?
A Clapton coil is a type of coil used in rebuildable atomizers (RBAs) that consists of two or more wires. It is known for its increased surface area, which allows for better heat distribution and vapor production. The outer wire is wrapped tightly around a thinner inner wire, creating a patterned look and enhancing the coil’s performance.
Tools and Materials Needed
Before we get started, let’s go over the tools and materials you’ll need:
- A core wire – It can be any gauge of Kanthal or stainless steel wire that you prefer. Thicker gauges like 24 or 26 will work best.
- A wrapping wire – This wire should be thinner than the core wire to create the desired pattern. Typically, 32 or 34-gauge Kanthal wire is used.
- A screwdriver or a coil jig – This will act as the mandrel for wrapping the wires.
- A pair of wire cutters – These will be used to cut the wires to the appropriate lengths.
- A pair of ceramic tweezers – These will allow you to pinch and shape the coil while firing.
- A vape mod or an ohm reader – This will be used to check the resistance of the coil and to test its performance.
Important Safety Considerations
It’s important to exercise caution and follow safety guidelines when building coils. Here are some important safety considerations:

- Make sure to work on a stable and fire-resistant surface.
- Ensure that your hands are dry and clean before starting.
- Do not apply excessive force when wrapping the wires.
- Be careful when handling the wires as they may have sharp edges.
- Always check the resistance of the coil using an ohm reader or a vape mod.
- Familiarize yourself with the proper use and maintenance of your vaping device.
With these safety considerations in mind, let’s move on to the next step: preparing the wires for wrapping.
Gather the Materials
Before you start making a clapton coil without a drill, you’ll need to gather the following materials:
- A resistance wire (such as Kanthal or Nichrome)
- A larger gauge wire (such as a 22 or 24 gauge)
- A screwdriver or coil jig
- A pair of wire cutters
- A pair of tweezers
- A ceramic rod or screwdriver for wrapping the coil
- A small piece of cotton or other wicking material
It’s important to note that the resistance wire and larger gauge wire should have a similar resistance to ensure the clapton coil functions properly.
Once you have gathered all the necessary materials, you can proceed to the next step of the process.
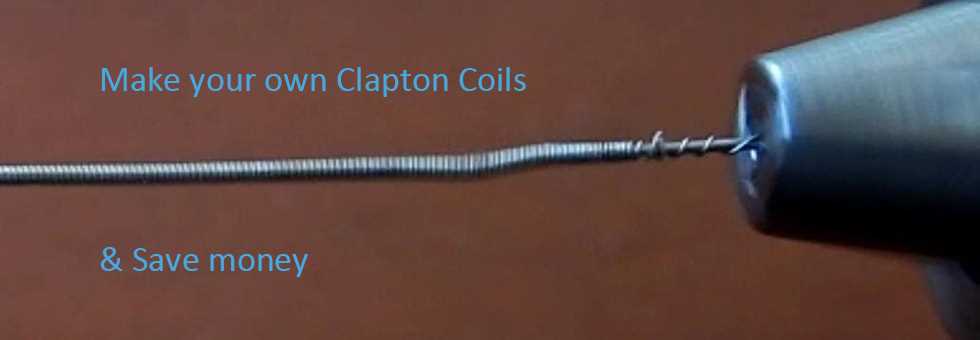
Prepare the Wire
The first step in making a clapton coil without a drill is to prepare the wire that will be used. You will need two types of wire for this process – a core wire and a wrapping wire.
The core wire is the thicker gauge wire that will be the base of the coil. You can choose the gauge based on your personal preference, but it is recommended to use a thicker wire for better stability.
The wrapping wire, on the other hand, is a thinner gauge wire that will be wrapped around the core wire. This wire is responsible for creating the clapton pattern and adding more surface area to the coil.
Before starting, make sure to measure and cut both the core wire and the wrapping wire to the desired length. It is recommended to cut them a bit longer than you actually need, as you can always trim off the excess later.
Once the wires are cut to the desired length, straighten them out as much as possible. This can be done by running the wires between your fingers or through a wire straightening tool if you have one.
After straightening the wires, it’s time to attach them together. Take the wrapping wire and hold it tightly against the core wire at one end. Make sure the two wires are lined up parallel to each other.
Using your fingers, carefully wrap the wrapping wire around the core wire while maintaining tension. Make sure to keep the wraps as close together as possible for a neat and even clapton pattern.
Continue wrapping the entire length of the core wire until you reach the other end. Make sure to keep the tension consistent throughout the process to avoid any loose or uneven wraps.
Once the wrapping is complete, trim off any excess wrapping wire at the end. You can use wire cutters or a pair of scissors for this step.
Now that the wires are combined and trimmed, you have a completed clapton coil ready to be used in your vaping device.
Hand-Twisting the Clapton Coil
If you don’t have a drill or prefer a more hands-on approach, you can also make a clapton coil by hand-twisting the wire. While this method may take a bit longer and require more patience, it can still produce excellent results.
Materials Needed:
- Core wire (usually Kanthal or nichrome)
- Outer wire (usually Kanthal)
- Wire cutters
- Screwdriver or coil jig
- Ceramic tweezers
Steps to Hand-Twist the Clapton Coil:
- Start by straightening the outer wire. Use your fingers or a pair of ceramic tweezers to remove any kinks or bends in the wire.
- Take the core wire and wrap it tightly around a screwdriver or coil jig. Leave a small section at the end unwrapped for connecting to the positive terminal of your atomizer.
- Hold the outer wire parallel to the core wire and begin wrapping it around the coil. Make sure the outer wire is tightly wound and evenly spaced along the length of the coil.
- Use your fingers or ceramic tweezers to press the outer wire against the core wire, ensuring that the two wires are tightly joined together.
- Continue wrapping the outer wire until you reach the desired length of your coil. Be careful not to overlap the wire too much, as this can lead to hotspots and uneven heating.
- Once you have finished wrapping, use wire cutters to trim off any excess outer wire.
Tips for Hand-Twisting:
- Take your time and be patient. Hand-twisting requires more manual dexterity and precision compared to using a drill, but with practice, you can achieve great results.
- Keep the wires taut and evenly spaced throughout the wrapping process to ensure a uniform coil.
- After completing the coil, use ceramic tweezers to strum the coil. This helps to remove any hotspots or inconsistencies.
- Make sure to thoroughly clean the coil before use to remove any oil, dirt, or debris. This can be done by heating the coil slightly and then gently brushing it with a clean, dry toothbrush.
Anchor the Wire
Once you have cut your desired length of wire, you will need to anchor it to something sturdy to create tension for wrapping the coil. There are a few different methods you can use to anchor the wire:
1. Pliers
One simple method is to use a pair of pliers to hold one end of the wire. You can grip the wire with the pliers and then use your other hand to apply tension as you wrap the coil.
2. Clamps
If you have a pair of clamps, you can use them to secure one end of the wire. Clamp one end of the wire in one clamp and then use the second clamp to hold the wire in place. This will provide a stable anchor that will allow you to easily wrap the coil.
3. Vise
If you have a vise, you can use it to anchor the wire. Simply place one end of the wire in the vise and tighten it securely. This will provide a stable anchor point that will allow you to wrap the coil.
4. Tape
If you don’t have any tools or clamps, you can use a piece of tape to anchor one end of the wire. Stick one end of the wire to a table or a flat surface using tape. Make sure the tape is secure so that it doesn’t come loose while you are wrapping the coil.
5. Other Objects
If none of the above options are available to you, you can get creative and use other objects to anchor the wire. For example, you can use a heavy book to hold one end of the wire while you wrap the coil.
Whichever method you choose, make sure that the wire is securely anchored before you start wrapping the coil. This will ensure that you can apply the necessary tension to create a tight and consistent coil.
Hand-Twist the Outer Wire
If you don’t have a drill, you can still make a clapton coil by hand-twisting the outer wire. Here’s how you can do it:
- Start by cutting a piece of outer wire that is longer than the inner wire. The extra length will be needed for twisting.
- Hold one end of the outer wire in your non-dominant hand and the inner wire in your dominant hand.
- Place the end of the inner wire against the outer wire, leaving a small amount of overlap.
- Using your dominant hand, start twisting the inner wire around the outer wire in a clockwise direction.
- Continue twisting the inner wire tightly around the outer wire as you move along its length.
- Make sure to maintain tension on both wires to ensure a tight twist.
- Once you reach the end of the outer wire, cut any excess inner wire and use pliers to secure the twisted end.
Hand-twisted clapton coils may not be as tightly wound as those made with a drill, but they can still provide good vapor production and flavor. Keep in mind that hand-twisting requires more precision and patience, so take your time and practice to achieve the desired results.
Wrap the Inner Wire
Now that you have your materials ready, it’s time to start wrapping the inner wire. This wire will serve as the core of your Clapton coil.
Step 1: Choose your gauge
First, you’ll need to decide on the gauge of the inner wire. This will depend on your personal preference and the desired resistance of your coil. A lower gauge wire will have a lower resistance, while a higher gauge wire will have a higher resistance.
Step 2: Secure the inner wire
Take one end of the inner wire and secure it to a stable surface, such as a table or desk. You can use a tape or a clamp to keep it in place.
Step 3: Start wrapping
Hold the spool of outer wire in one hand and the inner wire in the other. Start wrapping the outer wire around the inner wire, leaving a small gap between each wrap. This gap will allow the e-liquid to flow through the coil and provide better flavor.
Step 4: Maintain tension
As you wrap the outer wire, make sure to maintain tension to ensure a tight and neat coil. You can use your fingers or a pair of pliers to hold the wire and apply gentle pressure.
Step 5: Continue wrapping
Continue wrapping the outer wire until you reach the desired length of the Clapton coil. This can vary depending on your preferences and the size of your atomizer.
Step 6: Cut and secure
Once you have wrapped the desired length, cut the outer wire from the spool. Make sure to leave some excess wire to secure the ends. Use a pair of wire cutters to trim the excess inner wire as well.
Step 7: Remove the coil
Carefully remove the coil from the stable surface and gently slide it off the inner wire. Be careful not to deform the coil or damage the wraps.
Now you have successfully wrapped the inner wire for your Clapton coil. The next step is to install it in your atomizer and start enjoying the enhanced flavor and vapor production!
Installing the Clapton Coil
Once you have made your Clapton coil, it’s time to install it onto your vaping device. Follow the steps below to properly install the Clapton coil:
- Make sure your vaping device is turned off. Safety first!
- Remove the old coil from your device, if there is one installed.
- Inspect the deck of your device to make sure it is clean and free of any debris or e-liquid residue.
- Take the Clapton coil and carefully insert one end of it into the positive post hole on the deck.
- Using a screwdriver or coil jig, tighten the screw on the positive post to secure the coil. Make sure it is snug and properly aligned.
- Now, take the other end of the Clapton coil and insert it into the negative post hole on the deck.
- Tighten the screw on the negative post to secure the coil. Again, ensure that it is snug and properly aligned.
- Once the coil is securely fastened, use wire cutters to trim any excess wire sticking out.
- Gently pulse the coil with short bursts of power to check for hot spots or any uneven heating.
- If you notice any hot spots, use ceramic tweezers to strum the coil and eliminate the hot spots.
After following these steps, your Clapton coil should be successfully installed and ready for vaping. Make sure to prime the coil with e-liquid before using it for the best flavor and performance.
FAQ:
Can I make a Clapton coil without a drill?
Yes, you can make a Clapton coil without a drill by using manual techniques. It may take more time and effort, but it is possible.
What are the tools needed to make a Clapton coil without a drill?
To make a Clapton coil without a drill, you will need a wire, a screwdriver or a pen, pliers, wire cutters, and a steady hand.
Is it difficult to make a Clapton coil without a drill?
Making a Clapton coil without a drill can be a bit more challenging compared to using a drill. It requires more manual effort and precision. However, with practice and patience, it is definitely possible to achieve good results.
Video:


Meet Harrison Clayton, a distinguished author and home remodeling enthusiast whose expertise in the realm of renovation is second to none. With a passion for transforming houses into inviting homes, Harrison's writing at https://thehuts-eastbourne.co.uk/ brings a breath of fresh inspiration to the world of home improvement. Whether you're looking to revamp a small corner of your abode or embark on a complete home transformation, Harrison's articles provide the essential expertise and creative flair to turn your visions into reality. So, dive into the captivating world of home remodeling with Harrison Clayton and unlock the full potential of your living space with every word he writes.


