How to Install Screw Anchors Without a Drill
If you have ever needed to hang something on a wall but didn’t have a drill, you may have found yourself at a loss for how to proceed. However, there is a solution – using screw anchors. Screw anchors are small plastic or metal devices that provide stability and support for screws when there is no solid structure behind the surface you are working with. This allows you to hang items securely, even without a drill.
Installing screw anchors without a drill may seem daunting at first, but with the right technique, it can be done easily. The key is to use the right tools and follow the correct steps. In this article, we will guide you through the process of installing screw anchors without a drill, so you can confidently hang items on your walls.
Note: Before you begin, it is important to determine the type of wall you are working with. Different walls require different types of screw anchors, so make sure you choose the right ones for your project.
To install screw anchors without a drill, you will need a few basic tools: a hammer, a screwdriver, and a pair of pliers. You will also need the appropriate screw anchors for your wall type. Once you have gathered your materials, you can begin the installation process.
What Are Screw Anchors?
Screw anchors, also known as wall anchors or screw-in anchors, are devices used for securing objects to walls, ceilings, or other surfaces. They are designed to provide stability and support for items that cannot be supported by screws or nails alone.
Screw anchors are especially useful in instances where the walls or surfaces are made of materials that are too weak or brittle to hold a screw on their own, such as drywall or plaster. They are commonly used to hang things like mirrors, shelves, pictures, and decorations.

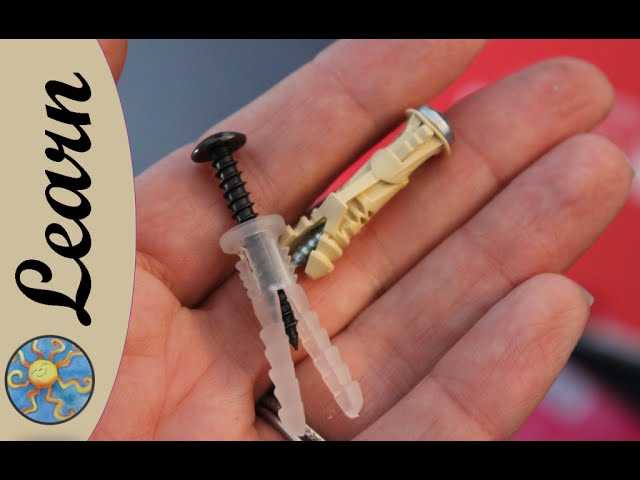
Screw anchors typically consist of a threaded screw that is inserted into the wall or surface, and an expandable sleeve or flange that grips and holds the screw in place. When the screw is tightened, the sleeve expands and creates a secure anchor point.
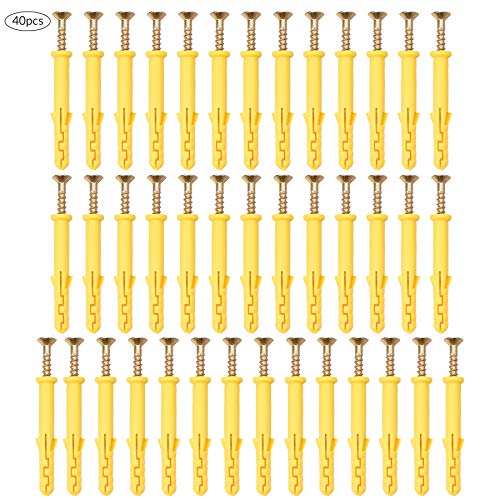
There are different types of screw anchors available, including plastic anchors, metal anchors, and self-drilling anchors. The type of anchor required will depend on factors such as the weight of the object being hung and the type of surface it will be mounted on.
Plastic anchors are often used for lightweight applications and are easy to install. Metal anchors, on the other hand, are more durable and suitable for heavier loads. Self-drilling anchors, as the name suggests, have a drill bit attached and can be installed without the need for drilling pilot holes.
Before installing screw anchors, it is important to assess the weight and size of the object being hung, as well as the condition of the wall or surface. It is recommended to consult the manufacturer’s instructions or seek professional advice if unsure about the appropriate type and size of anchor to use.
When Are Screw Anchors Used?
Screw anchors, also known as wall anchors or drywall anchors, are used when you need to securely fasten an object to a wall, ceiling, or other surface that may not have sufficient support or stability. They are commonly used in situations where the surface is made of drywall, plaster, or other materials that may not be strong enough to hold the weight of the object.

Some common scenarios where screw anchors are used include:
- Hanging shelves or cabinets on a wall.
- Mounting a TV or computer monitor to a wall.
- Installing curtain rods or blinds.
- Hanging artwork or mirrors.
- Securing light fixtures or smoke detectors.
Screw anchors are particularly useful in situations where the object being anchored is heavy or requires frequent use. They provide additional stability and support, preventing the object from falling or becoming loose over time.
It’s important to choose the right type and size of screw anchor for your specific installation. Factors to consider include the weight of the object, the type of surface, and the location of any studs or other structural supports. Proper installation is essential to ensure the anchor can hold the weight of the object and provide long-lasting stability.
Overall, screw anchors are a versatile and reliable solution for securely fastening objects to walls and other surfaces. They are easy to install and provide peace of mind knowing that your objects are securely anchored in place.
Step 1: Prepare the Surface
Before installing screw anchors without a drill, it is important to prepare the surface properly. Follow these steps to ensure a secure installation:

- Clear the area: Remove any debris or obstructions from the surface where the screw anchors will be installed. This will help ensure a clean and smooth installation.
- Clean the surface: Use a clean cloth or brush to remove any dirt, dust, or grease from the area. This will help improve the adhesive strength of the screw anchors.
- Mark the installation points: Use a pencil or marker to mark the exact spots where the screw anchors will be installed. Make sure to measure and mark these points accurately to ensure proper alignment.
- Pre-drill pilot holes (optional): If the surface is too hard or you want to make the installation easier, you can pre-drill pilot holes using a drill bit that matches the size of the screw anchors. This will help prevent the surface from cracking or splitting during installation.
- Check for electrical wires or plumbing: Before proceeding with the installation, it is important to check for any electrical wires or plumbing behind the surface. Use a stud finder or consult a professional if needed to avoid any potential hazards.
By properly preparing the surface before installing screw anchors, you can ensure a secure and stable attachment, even without using a drill.
Clean and Dry the Area
Before installing screw anchors without a drill, it is important to ensure that the area where you will be placing the anchors is clean and dry. This will help to ensure that the anchors adhere properly and provide a strong and secure hold.
Start by removing any debris or dirt from the surface where the anchors will be installed. You can use a brush or a cloth to sweep away any loose particles. If there is any residue or sticky substances on the surface, you can clean it with a mild detergent or rubbing alcohol.
Once the surface is clean, make sure it is completely dry before proceeding with the installation. Moisture can compromise the adhesive strength of the screw anchors, so it is important to ensure that the area is dry to prevent any issues in the future.

Take a clean cloth or paper towel and thoroughly dry the surface. Pay special attention to any areas that may collect moisture, such as corners or crevices. Make sure that there are no damp spots remaining before moving on to the next step.
Mark the Location for the Screw Anchor
Before installing the screw anchor, it’s important to mark the exact location where it will be placed. This will help ensure that the anchor is installed in the correct position and will provide optimal support.
- Measure and mark the spot: Use a measuring tape to determine the desired location for the screw anchor. Mark the spot with a pencil or a marker.
- Check for any obstructions: Before proceeding, it’s important to check for any obstructions such as electrical wires, pipes, or studs behind the chosen location. Use a stud finder or a wire detector to ensure that it’s safe to proceed with the installation.
- Double-check the placement: Take a moment to review the marked spot and ensure that it aligns with your desired installation location. Make any adjustments if necessary.
Once you have marked the location for the screw anchor and ensured that there are no obstructions, you’ll be ready to proceed with the installation. The next step will be to prepare the surface and insert the screw anchor.
Step 2: Select the Right Screw Anchor
Before you start installing screw anchors without a drill, it’s important to choose the right type of screw anchor for your project. There are several factors to consider when selecting a screw anchor, including the type of surface you are working with, the weight load requirements, and the size of the screw anchor.
1. Surface type:

First, consider the type of surface you will be installing the screw anchor into. Different screw anchors are designed to work best with specific surface materials, such as drywall, concrete, or wood. Make sure to choose a screw anchor that is compatible with the surface you are working with to ensure proper and secure installation.
2. Weight load requirements:
Next, determine the weight load requirements for your project. Screw anchors are rated based on their weight capacity. Make sure to choose a screw anchor that is capable of supporting the weight of the object or fixture you will be installing. It’s always better to choose a screw anchor with a higher weight capacity than necessary to ensure a strong and secure hold.
3. Size of the screw anchor:
Finally, consider the size of the screw anchor. Screw anchors come in different sizes to accommodate different screw sizes. The size of the screw anchor should match the size of the screws you will be using. You can find this information on the packaging or in the product specifications. Using the right size screw anchor will help ensure a secure and stable installation.
By taking these factors into account, you can choose the right screw anchor for your project and ensure a successful installation. Once you have selected the appropriate screw anchor, you can move on to the next step of the installation process.
Determine the Weight and Type of Load
Before installing screw anchors without a drill, it is important to determine the weight and type of load that the anchors will need to support. This will help ensure that the chosen screw anchors are strong enough to hold the load securely.
Here are some steps to help determine the weight and type of load:
- Identify the object: Determine what object or fixture needs to be installed. This could be anything from a shelf or mirror to a curtain rod or TV mount.
- Estimate the weight: Estimate the weight of the object. If you are unsure, consult the manufacturer’s specifications or use a scale to get an accurate measurement.
- Consider the type of load: Determine the type of load that will be placed on the screw anchors. Is it a static load that stays in one place, or will there be movement or vibration?
- Assess the installation location: Consider where the screw anchors will be installed. Is it a wall, ceiling, or floor? What is the material of the surface?
After determining the weight and type of load, you can then select the appropriate screw anchors. Different screw anchors are designed to support different weights and types of loads, so it is important to choose the right one for your specific application.
It is also a good idea to consult the manufacturer’s instructions for the screw anchors you are using, as they may have specific guidelines and recommendations for installation.
Choose the Correct Size and Material
Before installing screw anchors without a drill, it is important to choose the correct size and material for your project. The size and material of the screw anchor will depend on the weight and type of object you are hanging.
Size
When selecting screw anchors, consider the weight of the object you are hanging. Different sizes of screw anchors can support different weights. It is important to choose a size that can adequately support the weight of the object.
Typically, screw anchors are available in sizes ranging from #6 to #14, with #6 being the smallest and #14 being the largest. The size is usually indicated on the packaging of the screw anchors. You can also consult the manufacturer’s guidelines or a weight capacity chart to determine the appropriate size for your project.
Material
There are different materials available for screw anchors, and the material you choose will depend on the type of surface you are installing them on.
- Plastic: Plastic screw anchors are commonly used for lightweight applications. They are easy to install and can be used on drywall, plaster, or other softer surfaces.
- Zinc Alloy: Zinc alloy screw anchors are suitable for medium-weight applications. They are corrosion-resistant and can be used on surfaces such as concrete, brick, or stone.
- Steel: Steel screw anchors are the strongest option and are ideal for heavy-duty applications. They are durable and can be used on a variety of surfaces, including concrete, brick, or wood.
Consider the surface material and the weight of the object when choosing the material for your screw anchors. Additionally, make sure to check the manufacturer’s recommendations for the specific material you choose.
Step 3: Pre-Drilling (if Needed)
If you are working with a harder surface or a larger screw anchor, you may need to pre-drill a hole before installing the anchor. Pre-drilling can help ensure that the anchor goes in smoothly and securely.
Materials Needed:
- Power drill with appropriate drill bit
- Tape measure or ruler
- Masking tape
Instructions:
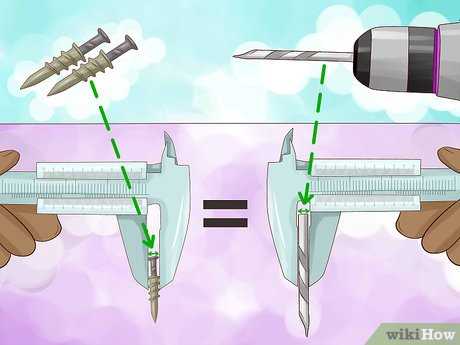
- Measure the length of the screw anchor to determine the appropriate drill bit size.
- Attach the appropriate drill bit to your power drill.
- Put a piece of masking tape on the drill bit to mark the depth of the hole.
- Hold the power drill perpendicular to the surface where you want to install the screw anchor.
- Start drilling slowly, applying gentle and steady pressure.
- Once you reach the marked depth, stop drilling and remove the drill bit.
- Clean out any debris from the hole.
Now you are ready to insert the screw anchor into the pre-drilled hole. Refer to the specific instructions for installing the screw anchor to complete the installation process.
Use a Hammer and Nail
If you don’t have a drill, you can still install screw anchors using a hammer and nail. Here’s how:
- Choose the location where you want to install the screw anchor.
- Hold the screw anchor against the wall or surface in the desired location.
- Use a pencil to mark the spot where you will drive the nail.
- Position the nail on the mark and hold it at a slight angle towards the wall or surface.
- Using a hammer, strike the nail firmly to drive it partially into the wall or surface. Be careful not to hit your hand.
- With the nail partially driven, remove it from the wall or surface.
- Place the screw anchor over the hole where the nail was and press it firmly against the wall or surface.
- Take the hammer and gently tap the screw anchor into place until it is flush with the wall or surface.
- Now, the screw anchor is ready for you to insert the screw and secure your item in place.
- Insert the desired screw into the screw anchor and tighten it until secure.
Using a hammer and nail to install screw anchors may take more time and effort compared to using a drill, but it can be an effective method if you don’t have access to power tools. Just remember to be cautious while using the hammer and nail to avoid any accidents or damage to your walls or surfaces.
FAQ:
Can I install screw anchors without using a drill?
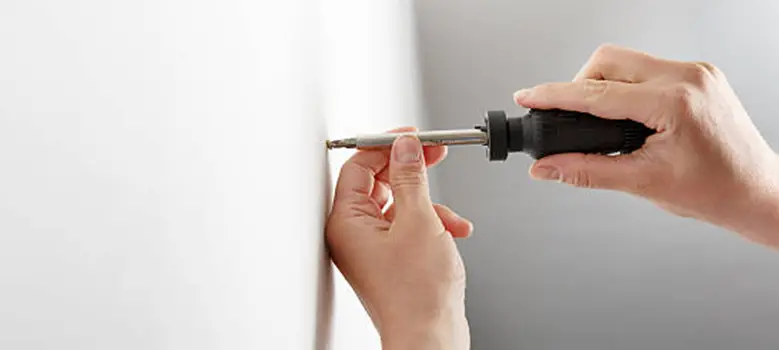
Yes, you can install screw anchors without using a drill. Although a drill can make the process easier and faster, there are alternative methods that can be used, such as using a screwdriver or a hammer.
What tools do I need to install screw anchors without a drill?
To install screw anchors without a drill, you will need a screwdriver, hammer, and possibly a pair of pliers. These tools will allow you to manually screw in the anchor and secure it in place.
What is the best method for installing screw anchors without a drill?
The best method for installing screw anchors without a drill is to first mark the location where you want to install the anchor. Then, using a screwdriver or a hammer, drive the anchor into the wall or surface until it is securely in place. Make sure to apply sufficient force and check that the anchor is level and sturdy.
Video:

How to inject saxenda

Harrison Clayton
Meet Harrison Clayton, a distinguished author and home remodeling enthusiast whose expertise in the realm of renovation is second to none. With a passion for transforming houses into inviting homes, Harrison's writing at https://thehuts-eastbourne.co.uk/ brings a breath of fresh inspiration to the world of home improvement. Whether you're looking to revamp a small corner of your abode or embark on a complete home transformation, Harrison's articles provide the essential expertise and creative flair to turn your visions into reality. So, dive into the captivating world of home remodeling with Harrison Clayton and unlock the full potential of your living space with every word he writes.