How to Install a Drill Bit in a Dewalt Impact Driver: A Step-by-Step Guide

Drill bits are essential tools for any DIY enthusiast or professional contractor. Being able to quickly and easily switch between drill bits can save you time and effort on the job. One popular choice for power tool users is the Dewalt Impact Driver, known for its power and durability. If you’re new to using an impact driver or simply need a refresher on how to install a drill bit, this step-by-step guide will walk you through the process.
Step 1: Choose the Correct Size Drill Bit
Before you begin, make sure you have the correct size drill bit for your project. The Dewalt Impact Driver is compatible with a wide range of drill bit sizes, so be sure to check the requirements for your specific task. Using the wrong size drill bit can lead to inefficient drilling and potential damage to your materials.
Step 2: Prepare the Impact Driver
With your drill bit in hand, it’s time to prepare the impact driver. Turn off the power and remove any battery or power source before proceeding. Locate the chuck, which is the part of the impact driver that holds the drill bit. Some impact drivers have a keyless chuck, while others require a chuck key for tightening and loosening the chuck.

Step 3: Insert the Drill Bit
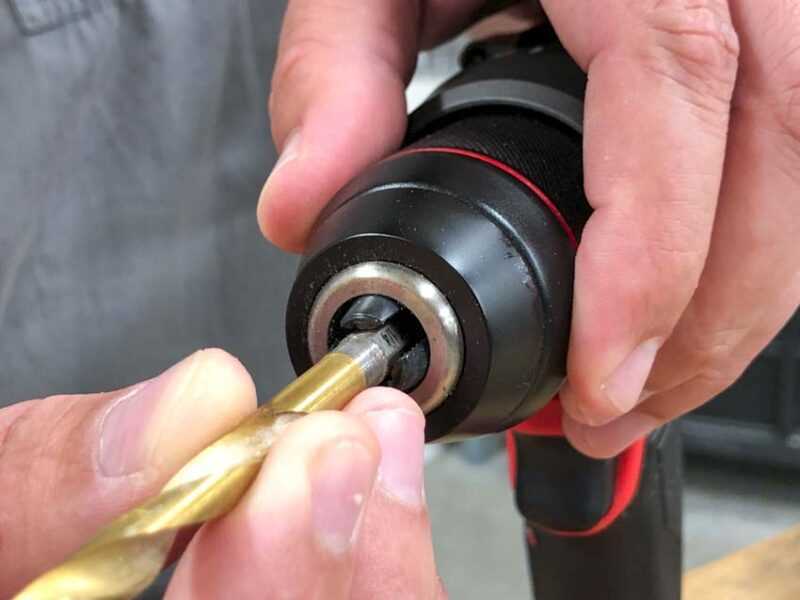
Insert the drill bit into the chuck, aligning the shank with the jaws of the chuck. If your impact driver has a keyless chuck, simply hold the chuck with one hand and turn the chuck sleeve counterclockwise to open the jaws. Push the drill bit into the chuck until it is fully inserted. For impact drivers with a chuck key, insert the key into the holes on the chuck and turn it counterclockwise to open the jaws. Once the jaws are open, insert the drill bit and tighten the chuck by turning the key clockwise.
Step 4: Secure the Drill Bit
After inserting the drill bit, securely tighten the chuck to ensure the drill bit is held firmly in place. For keyless chucks, turn the chuck sleeve clockwise until you feel it tighten around the drill bit. If you have a chuck key, continue turning it clockwise until the chuck is tightly secured. It’s essential to have a tight and secure chuck to prevent the drill bit from slipping during operation.
Step 5: Test the Drill Bit

With the drill bit properly installed, it’s time to test the impact driver. Turn on the power and activate the driver to ensure the drill bit is functioning correctly. If there are any issues or the drill bit appears loose, repeat steps 2-4 to reinsert and secure the drill bit.
Following these steps will help you confidently and safely install a drill bit in your Dewalt Impact Driver. Remember to always exercise caution and follow the manufacturer’s instructions for your specific impact driver model. With the right drill bit and a properly installed chuck, you’ll be ready to tackle any drilling project that comes your way.
Step 1: Gather the Necessary Tools and Materials
Before you can start installing a drill bit in your Dewalt impact driver, you will need to gather the necessary tools and materials. Having everything ready beforehand will make the process much smoother and more efficient.
Tools:
- Dewalt impact driver
- Drill bits
- Chuck key
Materials:
- Drill bit set
Make sure you have a variety of drill bits in different sizes. This will allow you to choose the appropriate bit depending on the task at hand.

Additionally, check that your Dewalt impact driver is in good working condition and the chuck key is easily accessible. The chuck key is used to tighten the drill bit securely in the chuck.
Step 2: Prepare the Dewalt Impact Driver

Before installing the drill bit, it’s important to properly prepare the Dewalt Impact Driver to ensure smooth and efficient operation. Follow these steps to get your impact driver ready:
- Make sure the Dewalt Impact Driver is powered off and unplugged from any power source.
- Check the cleanliness of the impact driver. Wipe off any dirt, dust, or debris using a clean cloth.
- Inspect the chuck of the impact driver. Ensure that it is clean and free from any obstructions. Use a brush or compressed air to remove any debris from the chuck.
- Verify the condition of the chuck jaws. Make sure they are not damaged or worn out. If any damage is detected, contact Dewalt customer service for assistance.
- Ensure that the chuck is fully open by turning the chuck counterclockwise. This will allow easy insertion of the drill bit.
- Inspect the drill bit to ensure it is in good condition. Look for any signs of damage or wear, and replace if necessary.
- Grip the drill bit firmly by the shank and align it with the chuck of the impact driver.
- Insert the drill bit into the chuck, making sure that it is seated securely and not wobbling.
- Tighten the chuck by turning it clockwise. Use the chuck key or a firm grip to ensure the chuck is fully tightened.
- Give the drill bit a gentle tug to confirm that it is securely locked in place.
Now that the Dewalt Impact Driver is properly prepared, you are ready to move on to the next step: installing the drill bit.
Step 3: Select the Right Drill Bit
When it comes to using a drill bit in a Dewalt impact driver, it’s important to choose the right size and type of bit for the job you are working on. Here are some factors to consider when selecting the right drill bit:

- Size: Determine the size of the hole you need to drill. Drill bits come in a variety of sizes, ranging from small diameters to larger ones. Refer to the project specifications or measurements to select the correct size.
- Type: Consider the type of material you will be drilling into. Different drill bits are designed specifically for different materials, such as wood, metal, or concrete. Ensure you choose a bit that is suitable for the material you are working with.
- Coating: Some drill bits have special coatings that can enhance their performance. For example, titanium-coated drill bits are known for their durability and ability to withstand high-speed drilling. If you anticipate heavy or frequent use, consider investing in a coated drill bit.
- Specialty Bits: Depending on your project, you may need a specialty drill bit. Examples include spade bits for large holes in wood, masonry bits for drilling into bricks or concrete, or hole saws for creating larger holes in various materials.
Once you have determined the size, type, and any specialty requirements for your drill bit, you are ready to move on to the next step.
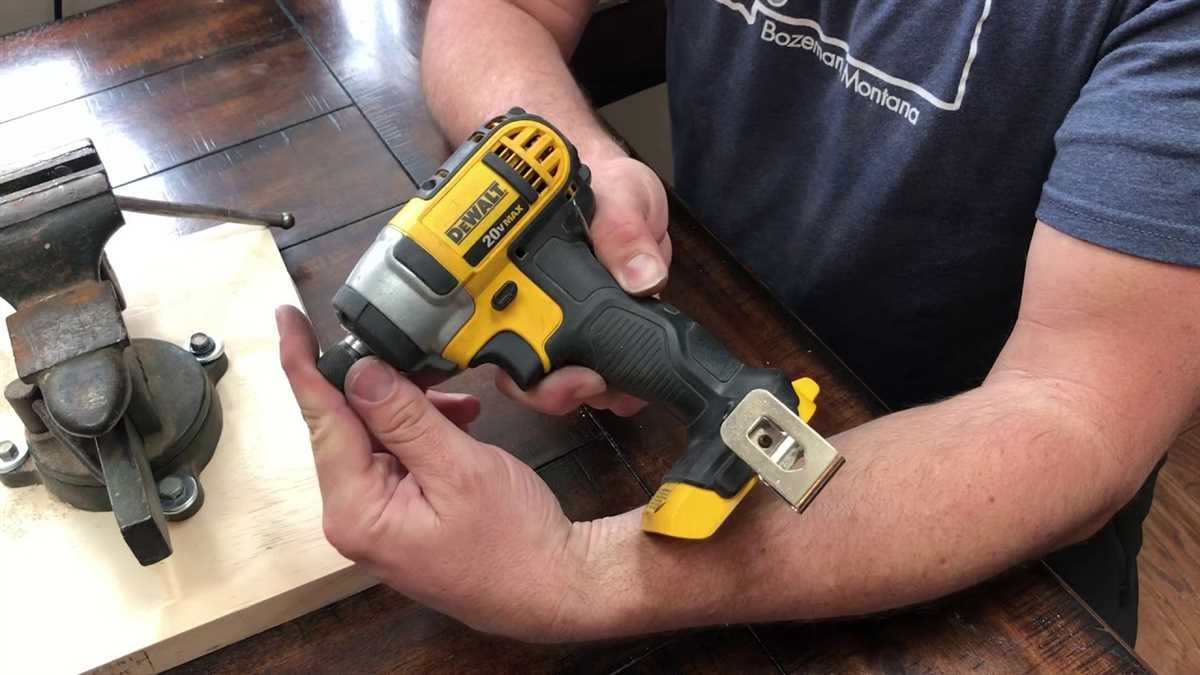
Step 4: Loosen the Chuck
Now that you have your drill bit ready, it’s time to loosen the chuck of your Dewalt impact driver. The chuck is the part of the drill that holds the drill bit in place. Loosening the chuck will allow you to insert the drill bit into the driver.
To loosen the chuck, follow these steps:
- Hold the impact driver firmly in one hand.
- Locate the chuck at the front of the driver. It is the part that rotates and tightens around the drill bit.
- With your free hand, firmly grip the chuck and turn it counterclockwise. You may need to apply some force to loosen it.
- Keep turning the chuck until it is loose enough to accept the drill bit.
Make sure to loosen the chuck enough so that you can easily insert the drill bit, but not so loose that it won’t hold the bit securely.

Once the chuck is sufficiently loosened, you are ready to move on to the next step: inserting the drill bit into the Dewalt impact driver.
Step 5: Insert the Drill Bit
Once you have chosen the appropriate drill bit for your project, it is time to insert it into the Dewalt impact driver. Follow the steps below to ensure proper installation:
- Make sure the impact driver is powered off and disconnected from any power source before proceeding.
- Locate the chuck at the front of the impact driver. The chuck is the part of the tool that holds the drill bit in place.
- Rotate the chuck counterclockwise to open it. This will loosen the jaws of the chuck.
- Insert the shank of the drill bit into the chuck. The shank is the smooth, cylindrical part of the drill bit that fits into the chuck.
- Continue inserting the drill bit until it is fully seated in the chuck.
- Tighten the chuck by rotating it clockwise. You can do this by hand, or if necessary, use a chuck key or the built-in chuck key feature on the impact driver.
- Make sure the drill bit is securely held in place by giving it a gentle tug.
Once the drill bit is properly inserted and secured in the chuck, you are ready to use the Dewalt impact driver for your drilling needs. Just remember to always wear appropriate safety gear and follow best practices when operating power tools.
Step 6: Tighten the Chuck
Now that you have inserted the drill bit into the chuck of the Dewalt impact driver, it’s time to tighten the chuck to secure the bit in place. Follow these simple steps to tighten the chuck:
- Hold the drill with one hand, firmly gripping the handle for stability.
- With your free hand, grasp the chuck firmly and rotate it clockwise to tighten.
- Continue rotating the chuck until it is securely tightened and the drill bit is held firmly in place.
- Check the grip of the chuck by gently tugging on the drill bit. If it doesn’t move, you have successfully tightened the chuck.
It is important to ensure that the chuck is tightened securely to prevent the drill bit from slipping or falling out during use. A loose chuck can lead to accidents or damage to the drill bit.
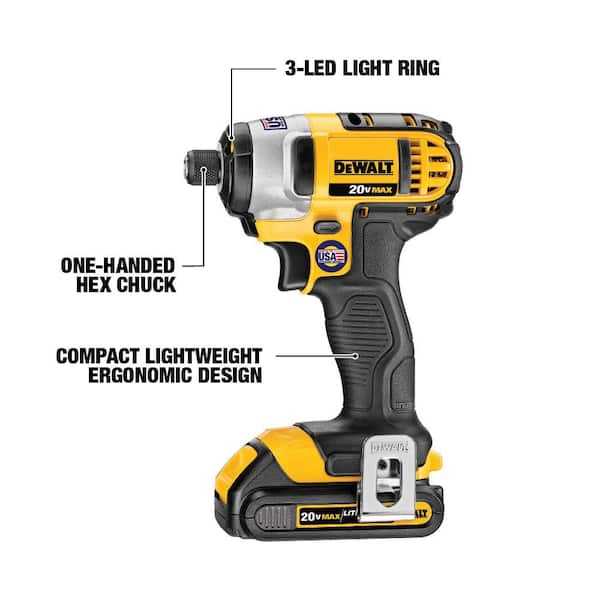
In some Dewalt impact drivers, there may be a feature called “auto-lock” or “one-handed chuck” that allows you to tighten the chuck with one hand. If your drill has this feature, simply hold the chuck in place and squeeze the trigger to activate the auto-lock mechanism.
Remember to always wear protective eyewear and follow safety guidelines when working with power tools.
Step 7: Check the Secure Installation
After you have successfully installed the drill bit into your Dewalt impact driver, it is important to ensure that it is securely in place before you begin using it. This will help prevent any accidents or damage to the drill bit or your workpiece.
Here are the steps to check the secure installation of the drill bit:
- Turn off the Dewalt impact driver and unplug it from the power source if applicable.
- Visually inspect the drill bit to make sure it is straight and properly mounted in the chuck.
- Manually try to spin the drill bit in the chuck. It should not move or wobble. If you notice any movement, the drill bit may not be securely installed.
- If the drill bit is not securely installed, ensure that you have tightened the chuck properly. Use the chuck key or your hand to tighten the chuck until the drill bit is firmly held in place.
- Once the drill bit is securely installed, give it a gentle pull to check if it stays in place. It should not come loose.
- If the drill bit is still not secure, repeat the installation steps from the beginning and make sure to follow them correctly.
Checking the secure installation of the drill bit is essential for safe and efficient drilling. By following these steps, you can ensure that your drill bit is properly installed and ready for use.
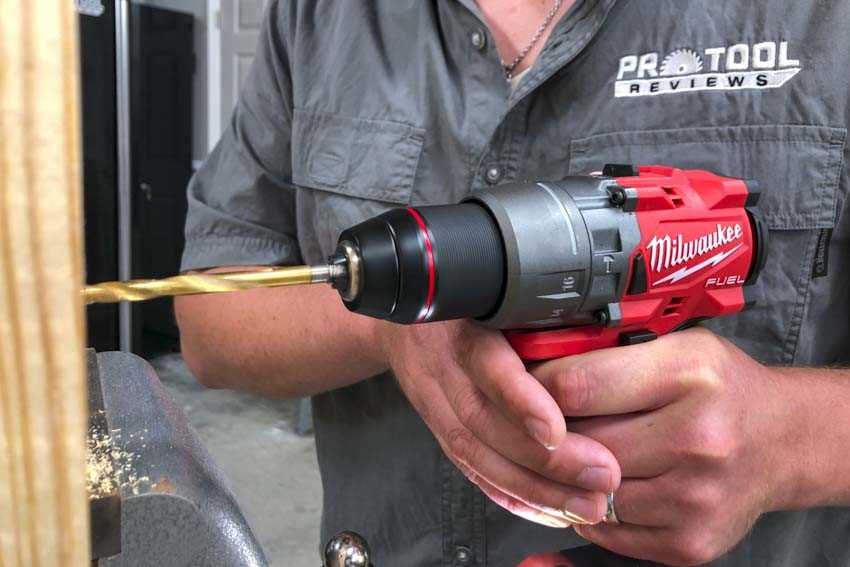
Step 8: Test the Drill Bit in the Dewalt Impact Driver
After successfully installing the drill bit into the Dewalt Impact Driver, it is important to test it out to ensure everything is functioning properly. Here are the steps to test the drill bit:
- Securely hold the Dewalt Impact Driver with one hand and the workpiece with the other hand.
- Position the drill bit on the desired spot on the workpiece.
- Apply gentle pressure to the Dewalt Impact Driver to engage the drill bit with the workpiece.
- Activate the Dewalt Impact Driver by pressing the trigger button.
- Observe the drill bit as it rotates and penetrates the workpiece.
- Ensure that the drill bit is drilling smoothly and without any excessive wobbling.
- If you notice any issues, such as the drill bit slipping or the Dewalt Impact Driver vibrating excessively, stop drilling immediately and check the installation of the drill bit.
- If the drill bit is working properly, continue drilling as necessary.
It is important to regularly check the drill bit and the Dewalt Impact Driver for any signs of wear or damage. Replace the drill bit if it becomes dull or damaged and ensure that the Dewalt Impact Driver is in good working condition for optimal results.
FAQ:
Why do I need to install a drill bit in a Dewalt impact driver?
You need to install a drill bit in a Dewalt impact driver in order to use it for drilling holes in various materials.
What is the first step in installing a drill bit in a Dewalt impact driver?
The first step is to make sure that the impact driver is turned off and disconnected from the power source.
Do I need any special tools to install a drill bit in a Dewalt impact driver?
No, you don’t need any special tools. All you need is the impact driver itself and the drill bit you want to use.
How do I insert the drill bit into the Dewalt impact driver?
To insert the drill bit, you need to pull back the collar on the chuck, insert the drill bit into the chuck, and release the collar to secure the bit in place.
Can I use any size of drill bit with a Dewalt impact driver?
No, you need to make sure that the drill bit you are using is compatible with the chuck size of your Dewalt impact driver. Most impact drivers can accommodate drill bits with a 1/4-inch hex shank.
Is there anything else I need to do after installing the drill bit?
Yes, you should always check that the drill bit is securely installed before using the impact driver. You should also adjust the speed and torque settings on the impact driver according to the material you are drilling into.
Video:


Meet Harrison Clayton, a distinguished author and home remodeling enthusiast whose expertise in the realm of renovation is second to none. With a passion for transforming houses into inviting homes, Harrison's writing at https://thehuts-eastbourne.co.uk/ brings a breath of fresh inspiration to the world of home improvement. Whether you're looking to revamp a small corner of your abode or embark on a complete home transformation, Harrison's articles provide the essential expertise and creative flair to turn your visions into reality. So, dive into the captivating world of home remodeling with Harrison Clayton and unlock the full potential of your living space with every word he writes.


