How to Hammer a Nail into a Concrete Wall without a Drill

When it comes to hanging things on a concrete wall, most people think they need a drill. While a drill can certainly make the job easier, it’s not the only option. In fact, there are a few techniques you can use to hammer a nail into a concrete wall without a drill. Whether you’re trying to hang a picture frame or install a shelf, these methods can help you get the job done.
Method 1: Using a Masonry Nail
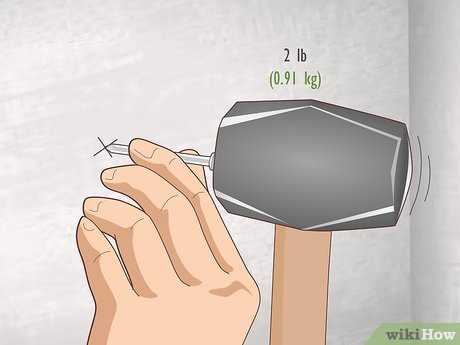
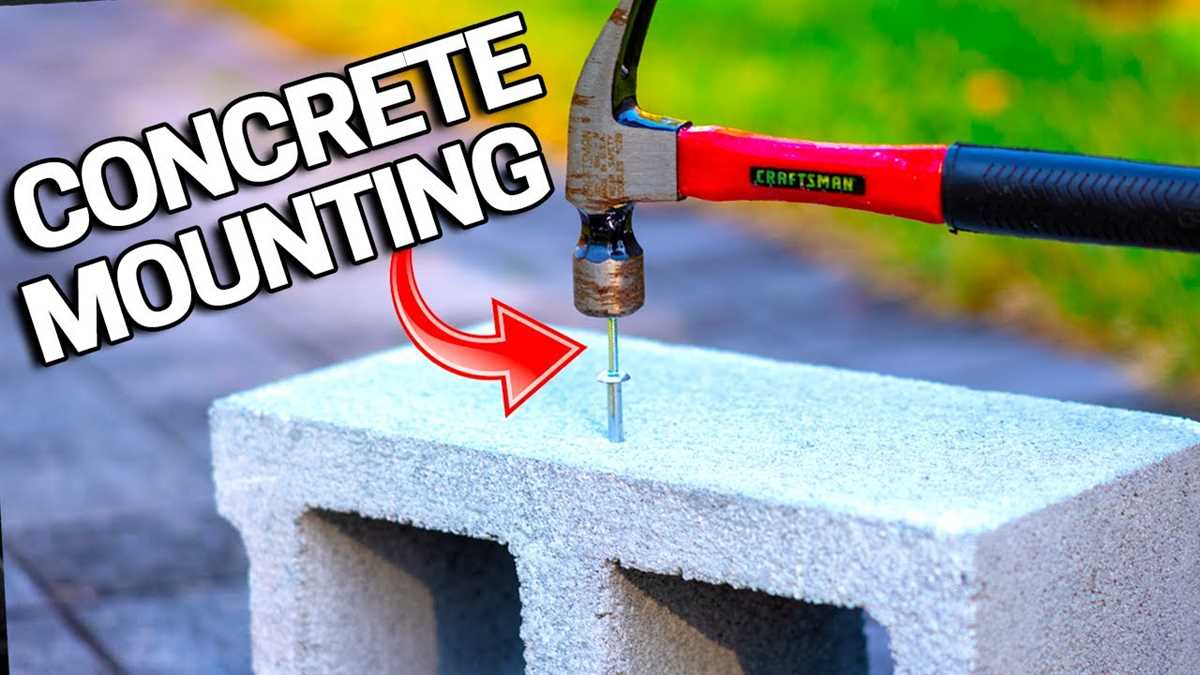
If you don’t have a drill, but still want to hammer a nail into a concrete wall, you can use a masonry nail. These nails are specifically designed for use in concrete and other hard materials. To use a masonry nail, first mark the spot where you want to place the nail. Then, hold the nail in place and firmly strike it with a hammer. Make sure to use a hammer with a solid head and a good amount of force, as concrete can be tough to penetrate.
Method 2: Using a Nail and Anchor
If you’re hanging something heavier on a concrete wall, you may want to use a nail and anchor combination. This method involves first drilling a small pilot hole into the concrete. Then, insert a plastic or metal anchor into the hole. Finally, place the nail into the anchor and use a hammer to drive it into the wall. This method provides extra support and stability, making it ideal for heavy objects.

Note: It’s important to wear protective eyewear and gloves when hammering nails into concrete walls. Additionally, always double-check the weight and size limits of the nails and anchors you are using.
While using a drill may be the easiest way to hang something on a concrete wall, it’s not the only option. By using a masonry nail or a nail and anchor combination, you can successfully hammer a nail into a concrete wall without a drill. Just make sure to take proper safety precautions and choose the appropriate tools for the job. With a little patience and practice, you’ll be able to securely hang your items on a concrete wall with ease.
How to Safely Hammer a Nail into a Concrete Wall
Introduction
Hammering a nail into a concrete wall can be a challenging task, especially without the use of a drill. However, with the right tools and techniques, it is possible to safely hammer a nail into a concrete wall. This article will provide step-by-step instructions on how to do so.
Tools and Materials Needed
- Hammer
- Masonry nail
- Work gloves
- Safety glasses
- Concrete wall anchor (optional)
Step 1: Prepare the Tools and Workspace
Before starting, gather all the necessary tools and materials. It is essential to wear work gloves and safety glasses to protect yourself from potential injuries. Clear the workspace and ensure there are no obstacles that may hinder your work.
Step 2: Choose the Right Nail
It is crucial to select a masonry nail specifically designed for concrete walls. These nails have a hardened tip that can penetrate concrete more effectively.
Step 3: Identify the Wall’s Composition
Determine the composition of the wall before hammering a nail into it. Some walls may have a thin layer of plaster or stucco over the concrete, while others may be pure concrete. This information will help you choose the correct technique.

Step 4: Locate the Spot for Hammering
Use a tape measure or a level to locate the exact spot where you want to hammer the nail. Mark the spot lightly with a pencil or a chalk line for accuracy.
Step 5: Pre-Drilling (Optional)
If the wall is pure concrete or you want to ensure a stronger hold, you can pre-drill a hole using a masonry bit and a hammer drill. This will make it easier to hammer the nail into the wall.
Step 6: Start Hammering
Grip the masonry nail firmly with one hand and hold the hammer with the other hand. Position the nail at a slight angle and start tapping it lightly with the hammer. Gradually increase the force until the nail starts to penetrate the concrete.
Step 7: Hammer the Nail In
Continue hammering the nail with controlled force until it reaches the desired depth. Be careful not to hit the concrete wall too hard, as it may cause cracks or damage.
Step 8: Use a Concrete Wall Anchor (Optional)
If you want to hang heavy objects on the concrete wall, it is recommended to use a concrete wall anchor. Insert the anchor into the hole you drilled or the hole created by the nail. Then, tighten the anchor using a screwdriver or the appropriate tool for the anchor you are using.
Step 9: Test the Stability
Once the nail is securely hammered into the concrete wall or the anchor is properly installed, gently tug or push the nail to ensure it is stable and can hold the intended weight. If the nail feels loose, consider using a larger nail or a different anchoring method.
Conclusion
By following these steps, you can safely hammer a nail into a concrete wall without the use of a drill. Ensure you have the right tools and take precautions to protect yourself from any potential injuries. Remember to choose the appropriate nail and consider using a concrete wall anchor for added stability when hanging heavier objects.
Gather necessary tools
- A hammer – Select a hammer that is suitable for the size of the nail you will be using.
- A concrete nail – Choose a concrete nail that is long enough to securely hold your item on the wall.
- Protective goggles – It is important to wear protective goggles to shield your eyes from any flying debris.
- Masonry nail set – A masonry nail set can be used to create a pilot hole in the concrete, making it easier to insert the nail.
- Tape measure – Use a tape measure to accurately measure the location for your nail.
- Pencil – Use a pencil to mark the spot on the wall where you will be hammering the nail.
- Masking tape – Masking tape can be used to create a guide for the depth of the nail.
- Hammer drill (optional) – If available, a hammer drill can be used to initially create a hole in the concrete.
Choose the right nail
When it comes to hammering a nail into a concrete wall without a drill, it’s important to choose the right nail for the job. Using a nail that is not suitable for concrete can result in the nail breaking or not remaining securely in place. Here are some factors to consider when selecting a nail:
1. Material
Choose a nail that is made of a strong and durable material, such as hardened steel or concrete nails. These materials are designed to withstand the hardness of concrete and provide a secure hold.
2. Size
The size of the nail is also crucial. A nail that is too short may not penetrate the concrete deep enough, while a nail that is too long can cause the concrete to crack. The length of the nail should be chosen based on the thickness of the concrete and the weight of the object you are hanging.
3. Pointed tip
A nail with a pointed tip, such as a masonry or concrete nail, is ideal for hammering into concrete. The pointed tip allows for easier penetration into the concrete surface and helps to prevent the nail from bending or breaking during the process.
4. Head type
Consider the type of head on the nail. For hanging lightweight objects, a nail with a small head, such as a finishing nail, may be sufficient. However, for heavier objects, it is recommended to use a nail with a larger head, such as a masonry nail, to provide more stability and support.
5. Corrosion-resistant coating
If you are hammering a nail into an outdoor concrete wall or in a damp area, choose a nail with a corrosion-resistant coating. This coating helps to protect the nail from rust and ensures a longer lifespan.
It is crucial to choose the right nail for hammering into a concrete wall without a drill to ensure a secure and long-lasting hold. By considering factors such as material, size, tip type, head type, and coating, you can select the most suitable nail for your specific needs.
Prepare the wall surface
Before you begin hammering a nail into a concrete wall, it’s important to properly prepare the surface to ensure the nail goes in smoothly and securely. Follow these steps to prepare the wall surface:
- Clean the wall: Use a stiff brush or broom to remove any dirt, dust, or debris from the area where you plan to hammer the nail. This will help create a clean and flat surface for the nail to penetrate.
- Mark the spot: Use a pencil or marker to mark the exact spot on the wall where you want to hammer the nail. This will ensure accuracy and help you maintain control over the hammering process.
- Locate a solid area: Use a stud finder or tap along the wall to identify a solid area where you can hammer the nail. Concrete walls can have different levels of density, so finding a solid area will ensure that the nail stays secure.
- Measure the depth: If you have a longer nail or need to hammer it deeper into the wall, you may want to mark the desired depth on the nail itself. This will help you control the depth and prevent the nail from going too far into the wall.
- Protective gear: It’s important to wear safety goggles and gloves to protect yourself from any debris or flying particles that may occur during the hammering process.
By preparing the wall surface properly, you’ll have a better chance of successfully hammering a nail into a concrete wall without a drill.
Mark the spot
- Before you start hammering a nail into a concrete wall, it’s important to mark the spot where you want to place the nail. This will ensure precision and prevent any unnecessary mistakes.
- Begin by determining the exact location where you want to hang your item. Use a measuring tape or a ruler to measure and mark the desired height and position on the wall.
- Once you have marked the spot, make sure to double-check its accuracy. It’s essential to ensure that the item will be level and properly aligned on the wall.
- Consider using a straightedge or a level to ensure accuracy. Place it against the wall vertically or horizontally and make any adjustments necessary to achieve a perfectly straight line.
- If you’re hanging multiple items, it’s a good idea to mark all the spots before you start hammering.
- Using a pencil or a marker, make a small dot or mark on the wall at the exact spot where you want to place the nail. This will serve as a guide when it comes time to start hammering.
Create a pilot hole
Before hammering a nail into a concrete wall, it is advisable to create a pilot hole. A pilot hole is a small hole that serves as a guide for the nail, making it easier to drive it into the concrete without any damage.
Follow these steps to create a pilot hole:
- Mark the desired location: Use a pencil or marker to mark the spot on the concrete wall where you want to place the nail.
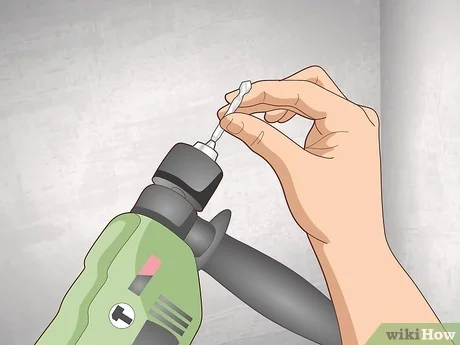
- Choose the right drill bit: Select a drill bit that is suitable for drilling into concrete or masonry. A masonry drill bit is usually made of carbide and has a sharp point.
- Attach the drill bit to a hammer drill: If you have access to a hammer drill, it is the best tool to use for drilling into concrete. Attach the chosen drill bit securely to the drill.
- Put on safety gear: Before starting the drilling process, put on safety glasses and work gloves to protect yourself from any potential debris.
- Drill the pilot hole: Position the drill perpendicular to the marked spot and apply gentle pressure. Start the drill at a low speed to create a small indentation in the concrete. Increase the speed gradually as you continue drilling until you reach the desired depth for the pilot hole.
- Clean the hole: Remove any debris or dust from the pilot hole by blowing it out or using a vacuum. This will ensure a proper fit for the nail.
Creating a pilot hole before hammering a nail into a concrete wall reduces the risk of the nail breaking or the wall crumbling. It also makes the process smoother and prevents the concrete from cracking. Remember to always exercise caution and wear appropriate safety gear when working with tools.
Position the nail
Before you begin hammering the nail into the concrete wall, it is important to position it correctly. Here are the steps to follow:
- Identify the right spot: Determine where you want to hang or attach the object on the concrete wall. Make sure you choose a sturdy part of the wall that can support the weight of the object.
- Measure and mark: Use a measuring tape to measure the desired height or distance from the floor or other reference point. Mark the spot with a pencil or marker.
- Place the nail: Take the nail and position it vertically at the marked spot on the wall. Hold it firmly with your fingers or use a pair of pliers to stabilize it.
- Slightly tilt the nail: Tilt the nail slightly towards the wall, creating a small angle. This will help the nail penetrate the concrete easier.
Note: It is essential to wear safety goggles and gloves when working with concrete and using a hammer. The force exerted during hammering can cause chips or debris to fly off, which can be dangerous.
Hammer the nail
Step 1: Prepare the surface
- Clear any debris or dust from the area where you want to hammer the nail into the concrete wall.
- Clean the surface using a brush or broom to ensure that it is free from any dirt.
Step 2: Mark the spot
- Use a pencil or marker to mark the exact spot where you want to hammer the nail.
- Make sure to measure and mark the spot accurately to ensure the nail goes in the right place.
Step 3: Get the right tools
Gather the necessary tools:
- Hammer: Make sure you have a sturdy hammer that is suitable for hammering nails into concrete.
- Nail: Choose a nail that is appropriate for the size and weight of the object you want to hang on the wall.
Step 4: Hammer the nail
- Hold the nail firmly between your thumb and index finger.
- Position the nail’s tip on the marked spot on the concrete wall.
- Using the hammer, apply firm and steady pressure to drive the nail into the concrete.
- Continue hammering until the nail is firmly secured in place.
Step 5: Hammer alternatives
If you are having trouble hammering the nail into the concrete wall, you can try using these alternatives:
- Concrete adhesive: Apply a small amount of concrete adhesive to the back of the object you want to hang. Press the object firmly against the wall and hold it in place for a few minutes until the adhesive sets.
- Masonry screws: Use masonry screws and a screwdriver or drill to secure the object to the concrete wall.
Step 6: Safety precautions
Remember to take proper safety precautions when hammering a nail into a concrete wall:
- Wear safety goggles to protect your eyes from debris.
- Wear work gloves to protect your hands.
- Keep your fingers and body clear of the hammering area.
Step 7: Clean up
Once you have successfully hammered the nail into the concrete wall, clean up any debris or dust that may have accumulated during the process.
Step 8: Test the nail
After hammering the nail, hang the object you intended to hang and make sure it is secure. Give it a gentle tug to ensure that it is properly anchored to the wall.
Secure the nail
Once you have positioned the nail on the marked spot, securely hold it with your hand to prevent it from moving during hammering. This will ensure that the nail goes straight into the concrete wall without any deviations.
Warning: Be cautious while handling the nail to avoid any injuries. It is recommended to wear protective gloves.
Here are a few methods to secure the nail:
1. Use a wooden block
Place a wooden block or a small piece of scrap wood right under the nail. This will provide stability and make it easier to secure the nail into the concrete.
2. Use adhesive tape
If you don’t have a wooden block, another option is to use adhesive tape. Apply a piece of tape over the nailhead and stick it firmly to the concrete surface. This will prevent the nail from slipping or moving while you hammer it.
3. Use a clamp or a vise
If you have access to a clamp or a vise, you can secure the nail by clamping it tightly. Position the clamp or vise beneath the nail, ensuring that it holds the nail in place throughout the hammering process.
4. Utilize a brick or a heavy object
If none of the above options are available, you can place a brick or any other heavy object against the nail. This will provide stability and keep the nail steady as you hammer it into the concrete wall.
Remember, the goal is to hold the nail securely without interfering with the hammering process. Choose the method that works best for you based on the materials you have on hand.
FAQ:
Can I hang a picture on a concrete wall without a drill?
Yes, you can hang a picture on a concrete wall without a drill. One method you can use is hammering a nail into the wall by following a few simple steps.
What tools do I need to hammer a nail into a concrete wall?
To hammer a nail into a concrete wall, you will need a few tools, such as a hammer, concrete nails, a center punch, and safety glasses.
How do I find the right spot to hammer a nail into a concrete wall?
To find the right spot to hammer a nail into a concrete wall, you can use a stud finder or tap the wall to listen for a solid sound. Avoid areas with rebar or other obstructions.
What is the best way to prepare the wall before hammering a nail into it?
The best way to prepare the wall before hammering a nail into it is to clean the area where you want to hammer the nail and make sure it is free from dust and debris. You can use a brush or a vacuum cleaner to remove any dirt.
Do I need to wear any safety gear while hammering a nail into a concrete wall?
Yes, it is recommended to wear safety glasses while hammering a nail into a concrete wall to protect your eyes from flying debris.
What are some tips for hammering a nail into a concrete wall?
Here are some tips for hammering a nail into a concrete wall: make sure to use the right size and type of nail, use a center punch to create a starting point, hold the nail at a slight angle, and hammer it in gently but firmly.
Can I use any type of nail to hammer into a concrete wall?
No, you cannot use any type of nail to hammer into a concrete wall. You need to use specially designed concrete nails that are strong enough to penetrate the hard surface of the concrete.
Video:


Meet Harrison Clayton, a distinguished author and home remodeling enthusiast whose expertise in the realm of renovation is second to none. With a passion for transforming houses into inviting homes, Harrison's writing at https://thehuts-eastbourne.co.uk/ brings a breath of fresh inspiration to the world of home improvement. Whether you're looking to revamp a small corner of your abode or embark on a complete home transformation, Harrison's articles provide the essential expertise and creative flair to turn your visions into reality. So, dive into the captivating world of home remodeling with Harrison Clayton and unlock the full potential of your living space with every word he writes.


