How to Find the Perfect Spot to Drill in a Wall

Finding the perfect spot to drill in a wall can be a challenging task, especially if you’re not familiar with the construction of your home or the materials used. However, with a few simple techniques and a bit of patience, you can locate the ideal spot to drill without causing any damage to your walls.
One of the first things to consider when looking for the perfect spot to drill is the purpose of the hole. Are you hanging a picture frame, installing a shelf, or drilling for electrical wires? Knowing the purpose will help you determine the size and depth of the hole, as well as the location.
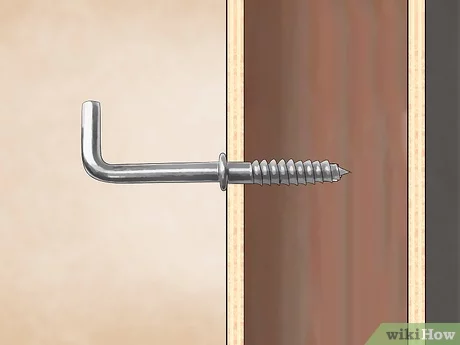
Next, you’ll need to identify the type of wall you’re working with. Is it drywall, plaster, or concrete? Each type requires different techniques for drilling. Drywall is the easiest to work with, as you can simply use a stud finder to locate the studs behind the wall. Studs provide a secure anchor point for hanging heavy objects.
If you’re dealing with plaster or concrete walls, you’ll need to use a different approach. You can use a stud finder with a built-in metal detector to locate any pipes or electrical wires that may be hidden behind the wall. It’s important to avoid drilling into these areas to prevent any damage or accidents.
Once you’ve identified the type of wall and determined the purpose of the hole, it’s time to measure and mark the spot. Use a tape measure to find the exact location where you want to drill. Then, use a pencil to make a small mark on the wall. This will serve as your guide when drilling. If you’re unsure about the location, you can always start with a small pilot hole to test the spot before drilling a larger hole.
Remember to always use the appropriate drill bit for the material you’re drilling into. For example, use a masonry bit for concrete or a wood bit for studs. Additionally, it’s important to wear protective gear, including safety glasses and gloves, to prevent any injuries during the drilling process.

By following these steps and taking necessary precautions, you can find the perfect spot to drill in a wall and successfully complete your home improvement projects. Remember to always double-check your measurements and take your time to avoid any unnecessary mistakes. Happy drilling!
Understanding Wall Composition
Before you start drilling in a wall, it is important to understand its composition. Walls are typically made up of several layers, each serving a different purpose. By understanding the different layers, you can determine the best spot to drill without causing any damage.
1. Exterior Layer
The exterior layer of a wall is what you see on the outside of a building. It can be made of various materials such as brick, stucco, or siding. The thickness of this layer can vary depending on the construction of the building.
2. Insulation
Underneath the exterior layer, you will often find an insulation layer. This layer helps to regulate the temperature inside the building and provides soundproofing. Insulation can be made of materials like fiberglass, foam, or cellulose.
3. Sheathing
Next, there is a layer of sheathing. Sheathing is typically made of plywood or oriented strand board (OSB) and provides additional structural support to the wall. It also helps to prevent moisture from entering the wall.

4. Studs
The studs are vertical boards or metal beams that provide the main support for the wall. They are typically spaced at regular intervals and are often made of wood or metal. It is important to avoid drilling directly into the studs unless necessary, as this can weaken the wall’s structure.
5. Drywall
The innermost layer of the wall is the drywall. This is the layer that you will be drilling into. Drywall is a panel made of gypsum and is used to create a smooth, paintable surface. It is important to be cautious when drilling into drywall to avoid damaging the structure behind it.
6. Electrical Wiring and Pipes
Behind the drywall, there may be electrical wiring and pipes running through the wall. It is essential to be aware of the location of these before drilling to prevent any damage or injury. You can use a stud finder or consult building plans to determine the placement of these components.
By understanding the composition of a wall, you can choose the best spot to drill while minimizing the chances of causing any damage. Always be cautious and use appropriate tools and techniques when drilling into a wall.

Finding Wall Studs
Finding wall studs is an important step in drilling into a wall. Wall studs are vertical boards or beams within the wall that provide support for the structure. They are typically spaced 16 or 24 inches apart and are often the best place to anchor heavy objects.
There are several methods you can use to locate wall studs:
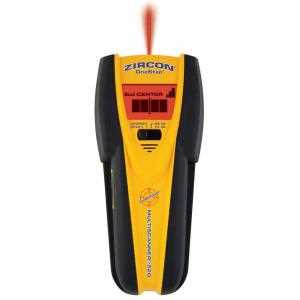
- Using a Stud Finder: A stud finder is a handheld device that uses sensors to detect changes in density behind the wall. Simply press the stud finder against the wall and move it slowly until it indicates the presence of a stud. Mark the stud’s location with a pencil.
- Looking for Visual Clues: In some cases, you can find studs by looking for visual clues. These clues may include seams or nails in the drywall, electrical outlets or switches, or even baseboards or crown molding. Once you have found one stud, you can measure to find the location of the others.
- Knocking on the Wall: Another method is to tap on the wall and listen for changes in sound. A hollow sound likely indicates that you are between studs, while a solid sound indicates the presence of a stud.
If you are having trouble finding studs using these methods, you can also try using a magnet. Most studs are made of wood, so a magnet may be attracted to the nails or screws that hold the drywall to the stud.
Once you have located a stud, it’s a good idea to verify its position using another method before drilling. This will ensure that your holes are accurate and that you avoid hitting any electrical wiring or plumbing behind the wall.
| Method | Pros | Cons |
|---|---|---|
| Stud Finder | Accurate and reliable | May require a battery |
| Visual Clues | No special tools required | May not be as accurate |
| Knocking on the Wall | No special tools required | Subjective and less reliable |
| Using a Magnet | No special tools required | Less reliable and may not work on non-wood studs |
By using one or a combination of these methods, you can effectively find wall studs and ensure that your drilling is accurate and secure.

Using a Stud Finder
A stud finder is a small handheld device that can help you locate the studs or beams in a wall. These are essential when you are drilling into a wall to hang heavy objects or to ensure that you aren’t damaging any structural elements. Here is how you can use a stud finder to find the perfect spot to drill in a wall:
Step 1: Choose the Right Stud Finder
There are different types of stud finders available in the market, including magnetic stud finders, electric stud finders, and electronic stud finders. Each type uses a different technology to detect studs. Consider the type of wall you have and the features you need, and choose the right stud finder accordingly.
Step 2: Familiarize Yourself with the Controls
Before you start using the stud finder, make sure you read the instruction manual and understand how the controls work. Most stud finders have a power button, a calibration button, and a detection mode button. Knowing how to operate these controls will help you get accurate results.
Step 3: Calibrate the Stud Finder
Calibrating the stud finder is an important step that ensures accurate detection. Follow the instructions provided with your stud finder to calibrate it properly. This usually involves placing it on a flat surface and pressing the calibration button.
Step 4: Start Scanning
Hold the stud finder against the wall and slowly move it horizontally. Start from one side of the wall and move across until you find a stud. The stud finder will emit a sound or light up when it detects a stud. Mark the spot where the stud is located.

Step 5: Use Multiple Scans
To ensure accuracy, it’s a good idea to perform multiple scans along the wall. This will help you confirm the location of studs and also identify the exact width of the stud. Mark the spots where the stud finder detects a stud using a pencil or masking tape.
Step 6: Determine the Gap Between Studs
Use a measuring tape to measure the distance between the marked studs. Typically, studs are placed 16 inches or 24 inches apart, center to center. Knowing the gap between the studs will help you find additional stud locations if needed.
Using a stud finder is a quick and efficient way to locate studs in a wall. By following these steps, you will be able to find the perfect spot to drill without causing any damage to the wall or compromising its structural integrity.
Locating Electrical Wires
Using a Stud Finder
A stud finder is a useful tool for locating electrical wires behind walls. To use a stud finder, follow these steps:
- Turn on the stud finder and place it against the wall.
- Slowly move the stud finder horizontally across the wall.
- When the stud finder detects a stud, it may also detect electrical wires that run along the studs.
- If the stud finder beeps or indicates the presence of electrical wires, mark the area.
Examining Outlet and Switch Boxes
Outlet and switch boxes are common locations for electrical wires. To locate electrical wires using outlet and switch boxes, follow these steps:

- Turn off the power to the circuit you will be working on at the circuit breaker.
- Remove the cover plate from the outlet or switch box.
- Using a non-contact voltage tester, check for the presence of electrical wires.
- If the voltage tester indicates the presence of electrical wires, mark the area.
Tracing Circuit Routes
Another way to locate electrical wires is by tracing circuit routes. This method is useful if you have access to the electrical panel. Follow these steps:
- Turn off the power to the circuit you will be working on at the circuit breaker.
- Identify the circuit breaker that corresponds to the area you want to drill.
- Follow the route of the circuit from the electrical panel to the area you want to drill.
- Look for signs of electrical wires, such as junction boxes or conduit.
- If you find junction boxes or conduit, mark the area.
Consulting Building Plans or Blueprints
If you have access to building plans or blueprints, they can provide valuable information about the location of electrical wires. Follow these steps:
- Retrieve the building plans or blueprints for the area you want to drill.
- Look for electrical drawings or symbols that indicate the location of electrical wires.
- Refer to the legend or key on the plans to interpret the electrical symbols.
- If the plans indicate the location of electrical wires, mark the area accordingly.
| Method | Advantages | Disadvantages |
|---|---|---|
| Stud Finder | Quick and easy to use | May not detect all electrical wires |
| Outlet and Switch Boxes | Reliable method if wires are present in the boxes | Requires access to the boxes |
| Tracing Circuit Routes | Provides a clear path to follow | May require access to the electrical panel |
| Consulting Building Plans or Blueprints | Precise information if available | May not be accessible or up-to-date |
Avoiding Pipes and Plumbing
When drilling into a wall, it’s important to be aware of any pipes or plumbing that may be running behind it. Hitting a water pipe or damaging plumbing can lead to costly repairs and potential water damage. Here are some tips to avoid pipes and plumbing while drilling:
1. Use a Stud Finder
A stud finder is a device that can help identify the location of any studs or frame behind the wall. It can also detect pipes and plumbing, as they often run alongside or through the studs. Use a stud finder to locate the studs and avoid drilling near them.

2. Check Building Plans
If you have access to the building plans or blueprints, check them to determine the location of any pipes or plumbing running through the wall. These plans can provide valuable information about the layout of the plumbing system, allowing you to drill safely away from any potential hazards.
3. Look for Visual Clues
Examine the area where you plan to drill for any visual clues that might suggest the presence of pipes or plumbing behind the wall. Look for water supply lines leading to faucets, drain pipes, or any signs of previous plumbing work. Avoid drilling in areas where these clues are present.
4. Try a Hole Pilot
A hole pilot is a small device that can be used to detect the presence of pipes or plumbing behind the wall. It works by emitting a signal that can be detected by a handheld device. Place the hole pilot on the wall and scan the area to check for any hidden pipes or plumbing before drilling.
5. Use Caution and a Small Drill Bit
If you’re unsure about the presence of pipes or plumbing, it’s best to proceed with caution. Start by using a small drill bit to create a pilot hole. This will help you determine if there are any obstacles behind the wall. If you encounter resistance or hear a strange noise, stop drilling immediately and reassess the location.
Remember, it’s always better to be safe than sorry when it comes to drilling into a wall. Taking the time to avoid pipes and plumbing can save you from costly repairs and potential water damage.
Checking for Structural Supports
Before drilling into a wall, it’s important to check for structural supports to ensure that you do not damage any important components of the building. Here are a few steps to follow:
Step 1: Look for Electrical Outlets and Switches
Start by identifying any electrical outlets or switches on the wall. These are typically attached to the wooden framing behind the drywall and can serve as a guide for where it is safe to drill. Avoid drilling directly into or near an electrical outlet or switch.
Step 2: Use a Stud Finder
A stud finder is a handheld device that detects the location of wooden studs within the walls. These studs provide the main support for the wall and it is best to drill into them for maximum stability. Slowly move the stud finder across the surface of the wall and mark the locations where it beeps or lights up, indicating the presence of a stud.
Step 3: Knock on the Wall
Another simple way to determine if there are wooden studs is to gently tap on the wall. The sound will be hollow between the studs and solid when you hit a stud. By tapping along the wall, you can identify the general location of the studs and avoid drilling into them.
Step 4: Check for Baseboards or Crown Molding
If the wall has baseboards or crown molding, they are usually attached to the studs. By locating these decorative elements, you can get a better idea of where the studs are located. Be careful not to damage the molding when drilling.
Step 5: Consult Building Plans
If you have access to the building plans or blueprints, they can provide valuable information about the location of structural supports. Look for any indications of stud placement or wall framing. This can be especially useful in older buildings where the construction may not follow modern standards.
By following these steps and taking the time to check for structural supports, you can ensure that you drill safely and avoid any unnecessary damage to the wall or building.
Measuring and Marking the Spot
Before drilling a hole in the wall, it is important to accurately measure and mark the spot where you want to place the hole. This will ensure that your drilling is precise and the hole is in the desired location. Here are some steps to help you measure and mark the spot:
1. Gather the necessary tools
Before you begin, gather the tools you will need for measuring and marking the spot. These may include a measuring tape or ruler, a pencil or marker, and a level.
2. Identify the location
Decide where you want to place the hole in the wall. Consider factors such as the purpose of the hole, the layout of the room, and any existing fixtures or structures that may affect the placement.
3. Measure the spot
Use a measuring tape or ruler to measure the distance from the nearest reference point, such as a corner or another object, to the spot where you want to drill the hole. Take accurate measurements to ensure the hole is placed precisely.
4. Mark the spot
Using a pencil or marker, make a small dot or mark on the wall at the measured spot. This will serve as a guide for drilling.
5. Check the level
Place a level against the mark on the wall to ensure that it is straight and level. Adjust the mark if necessary.
6. Double-check the measurements
Before drilling, double-check your measurements to ensure accuracy. Use the measuring tape or ruler to confirm the distance from the reference point to the mark.
7. Prepare the drilling area
Clean the area around the mark to remove any dust, debris, or flaking paint. This will help ensure a clean and precise drilling process.
By following these steps to measure and mark the spot, you can ensure that your drilling is accurate and the hole is in the perfect location in the wall.
Drilling with Precision
1. Measure Twice, Drill Once
Before you start drilling, it’s important to measure the location where you want to place your hole. Use a tape measure or a ruler to carefully determine the exact measurements. Take these measurements down and double-check them to ensure accuracy.
2. Use a Level
Using a level is crucial to drilling with precision. Place the level against the wall where you want to drill and adjust it until the bubble is centered. This will guarantee that your hole will be straight and level.
3. Mark the Spot
Once you have determined the exact location for your hole, use a pencil or a marker to mark the spot. Make sure the mark is clearly visible and easy to identify.
4. Start with a Small Hole
When drilling into a wall, it’s always best to start with a small hole. This will allow you to test the drill’s position and adjust if necessary. Use a small drill bit to create a pilot hole before drilling the actual hole.
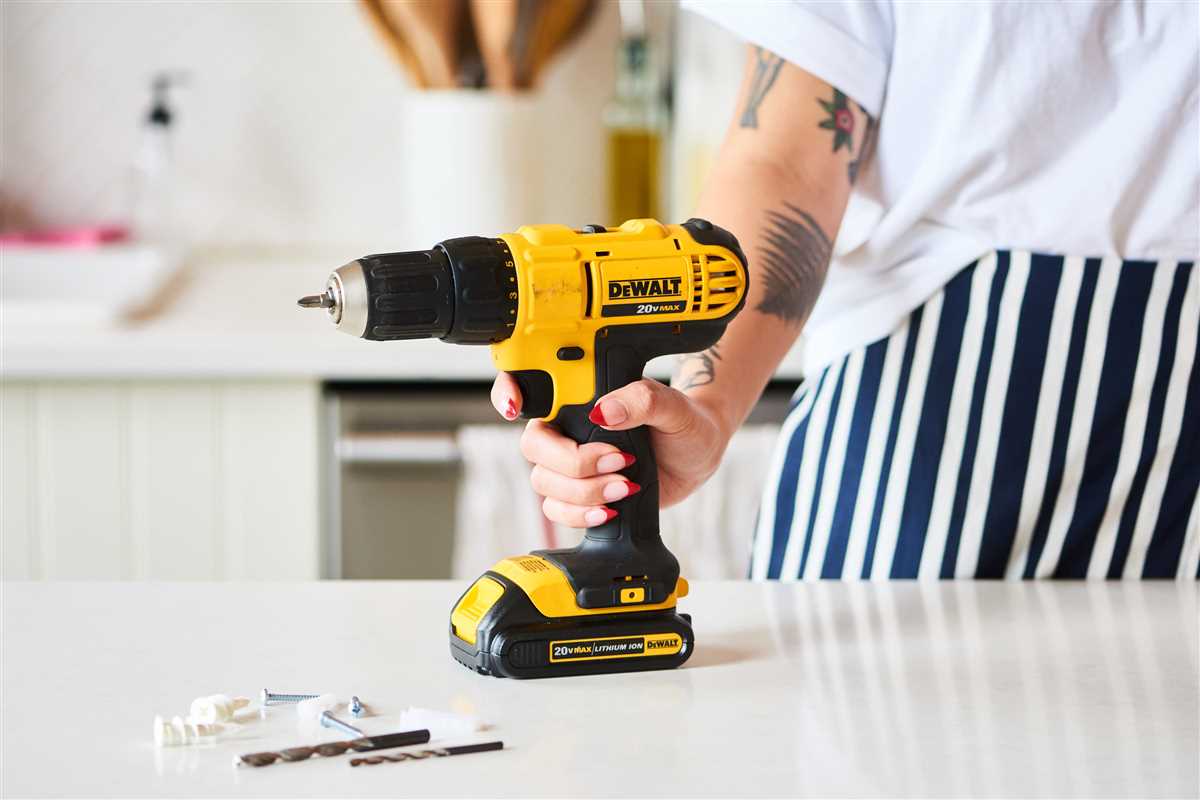
5. Secure the Drill
Before you start drilling, make sure the drill is securely held in place. Use both hands to hold the drill steady and apply even pressure. This will prevent the drill from slipping or causing damage to the wall.
6. Drill Slowly and Steadily
When you are ready to drill, start slowly and apply gentle pressure. Avoid rushing or applying too much force, as this can cause the drill to become unstable and damage the wall. Move the drill in a straight line and maintain a steady pace to ensure precision.
7. Clear the Dust
As you drill, dust and debris may accumulate around the hole. Use a vacuum cleaner or a cleaning brush to clear away the dust. This will ensure that the hole is clean and ready for any installation or mounting.
8. Measure Depth
If you need to drill a hole to a specific depth, use a drill bit with a depth indicator or attach a piece of tape to the drill bit at the desired depth. This will help you drill the hole to the correct depth without going too far.
9. Check Your Work
After drilling, check your work to ensure that the hole is in the right location and the correct size. Use a tape measure or ruler to measure the hole’s dimensions and compare them to your initial measurements.
10. Use Anchors if Needed
If you are mounting something heavy on the wall, it’s important to use anchors to secure it properly. Check the weight of the object and choose the appropriate anchor to ensure stability and prevent any accidents or damage.
Following these steps will help you drill with precision and achieve accurate results. Always double-check your measurements and take your time to ensure a job well done.
FAQ:
Why is it important to find wall studs?
It is important to find wall studs because they provide a secure anchor for screws and nails. If you attempt to hang something heavy on a wall without hitting a stud, there is a higher chance that the object may fall or damage the wall. By locating the studs, you can ensure that your drilling is done in a secure area.
Can I drill anywhere on the wall?
No, you cannot drill anywhere on the wall. It is important to determine the purpose of the hole and consider the structure of the wall. If you are planning to hang something heavy or use a large screw, it is recommended to drill into a stud. If you drill into just the drywall, it may not provide enough support and the object could fall. If you are unsure where the studs are located, it is better to use alternative methods to find them or consult a professional.
How do I ensure that the hole will be straight?
To ensure that the hole will be straight, you can use a level. Place the level on the wall vertically or horizontally, depending on the orientation of the hole. Adjust the position of the level until the bubble is centered, which indicates that it is level. Once the level is in the correct position, use a pencil or marker to mark the spot for drilling. This will help guide you to keep the hole straight.
Video:


Meet Harrison Clayton, a distinguished author and home remodeling enthusiast whose expertise in the realm of renovation is second to none. With a passion for transforming houses into inviting homes, Harrison's writing at https://thehuts-eastbourne.co.uk/ brings a breath of fresh inspiration to the world of home improvement. Whether you're looking to revamp a small corner of your abode or embark on a complete home transformation, Harrison's articles provide the essential expertise and creative flair to turn your visions into reality. So, dive into the captivating world of home remodeling with Harrison Clayton and unlock the full potential of your living space with every word he writes.


