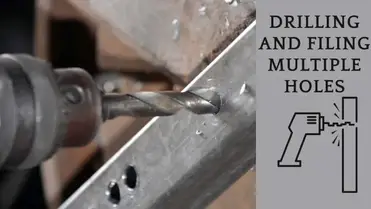
How to enlarge a hole using basic drill bits

Drilling holes is a common task, but what do you do when the hole you drilled is just slightly too small? Enlarging the hole may seem like a daunting task, but with the right tools and techniques, it can be easily accomplished. In this article, we will guide you through the process of enlarging a hole using basic drill bits.
Before you begin, it is important to choose the right drill bit for the job. For enlarging a hole, you will need a drill bit that is slightly larger than the original hole. Start by measuring the size of the existing hole, and then select a drill bit that is one or two sizes larger. It is also recommended to use a drill bit made from a high-speed steel or cobalt for better performance and durability.
With the proper drill bit selected, it’s time to start enlarging the hole. Begin by securing the workpiece firmly in place using clamps or a vise. This will prevent any movement or slipping during the drilling process. Next, align the drill bit with the existing hole and start drilling slowly. Apply steady pressure and let the drill bit do the work. If you encounter any resistance, stop drilling and check if the drill bit is properly aligned.
As you continue drilling, periodically stop and check the size of the hole. You can use a caliper or measuring tape to ensure that the hole is being enlarged to the desired size. If you need to enlarge the hole further, simply switch to a larger drill bit and repeat the process. Take your time and be patient, as rushing the process can lead to mistakes or damage to the workpiece.
Enlarging a hole using basic drill bits is a simple yet essential skill for any DIY enthusiast or professional. By following these steps and using the right tools, you can easily achieve the desired hole size. Remember to always wear safety goggles and work in a well-ventilated area. Happy drilling!

The Basics of Enlarging Holes with Drill Bits
Enlarging holes is a common task when it comes to carpentry, DIY projects, or any kind of construction work. Whether you need to make a hole larger to accommodate a larger screw or bolt, or you simply made a mistake while drilling and need to correct it, knowing how to enlarge a hole using basic drill bits is a valuable skill.
Step 1: Gather the Necessary Tools
Before you begin, gather the tools and materials you’ll need:
- A drill with different-sized drill bits
- Safety glasses
- Work gloves
- Clamps (if necessary)
- Sandpaper or a file (optional)
Step 2: Assess the Size Difference
Identify the desired final hole size and measure the current hole size. This will help you determine the amount you need to enlarge the hole.
Step 3: Choose the Correct Drill Bit
Select a drill bit that corresponds to the desired final hole size. If the size difference is significant, you may need to use multiple drill bits to gradually enlarge the hole.

Step 4: Secure the Workpiece
If necessary, secure the workpiece using clamps to ensure stability and prevent slips or accidents.
Step 5: Drill a Pilot Hole
If the hole you need to enlarge is small, it can be helpful to drill a pilot hole using a smaller drill bit. This will guide the larger drill bit and prevent it from slipping or wandering off course.
Step 6: Enlarge the Hole
With the appropriate drill bit, align the tip with the center of the existing hole and gently apply pressure. Start drilling at a slow speed to ensure accuracy and control. Gradually increase the speed as you continue to drill, but be careful not to apply too much pressure, as this can cause the bit to overheat or break.
Step 7: Test the Size
Periodically stop drilling and test the size of the hole using a screw or bolt that will go into the enlarged hole. Continue drilling until the desired size is achieved.

Step 8: Smooth the Edges (Optional)
If the edges of the enlarged hole are rough or uneven, you can use sandpaper or a file to smooth them out. This step is optional, but it can make the final result look neater and cleaner.
Step 9: Clean Up
After you have finished enlarging the hole, clean up any debris or dust that may have accumulated. This will help prevent any potential hazards and ensure a clean work area.
Step 10: Safety First!
Always remember to wear safety glasses and work gloves when working with drill bits and power tools. They will protect your eyes and hands from any potential injuries.
Selecting the Right Drill Bit Size
When it comes to enlarging a hole using basic drill bits, one of the most important factors to consider is the size of the drill bit. Choosing the right size drill bit is crucial for achieving the desired hole size without causing any damage.
Drill Bit Size Measurement
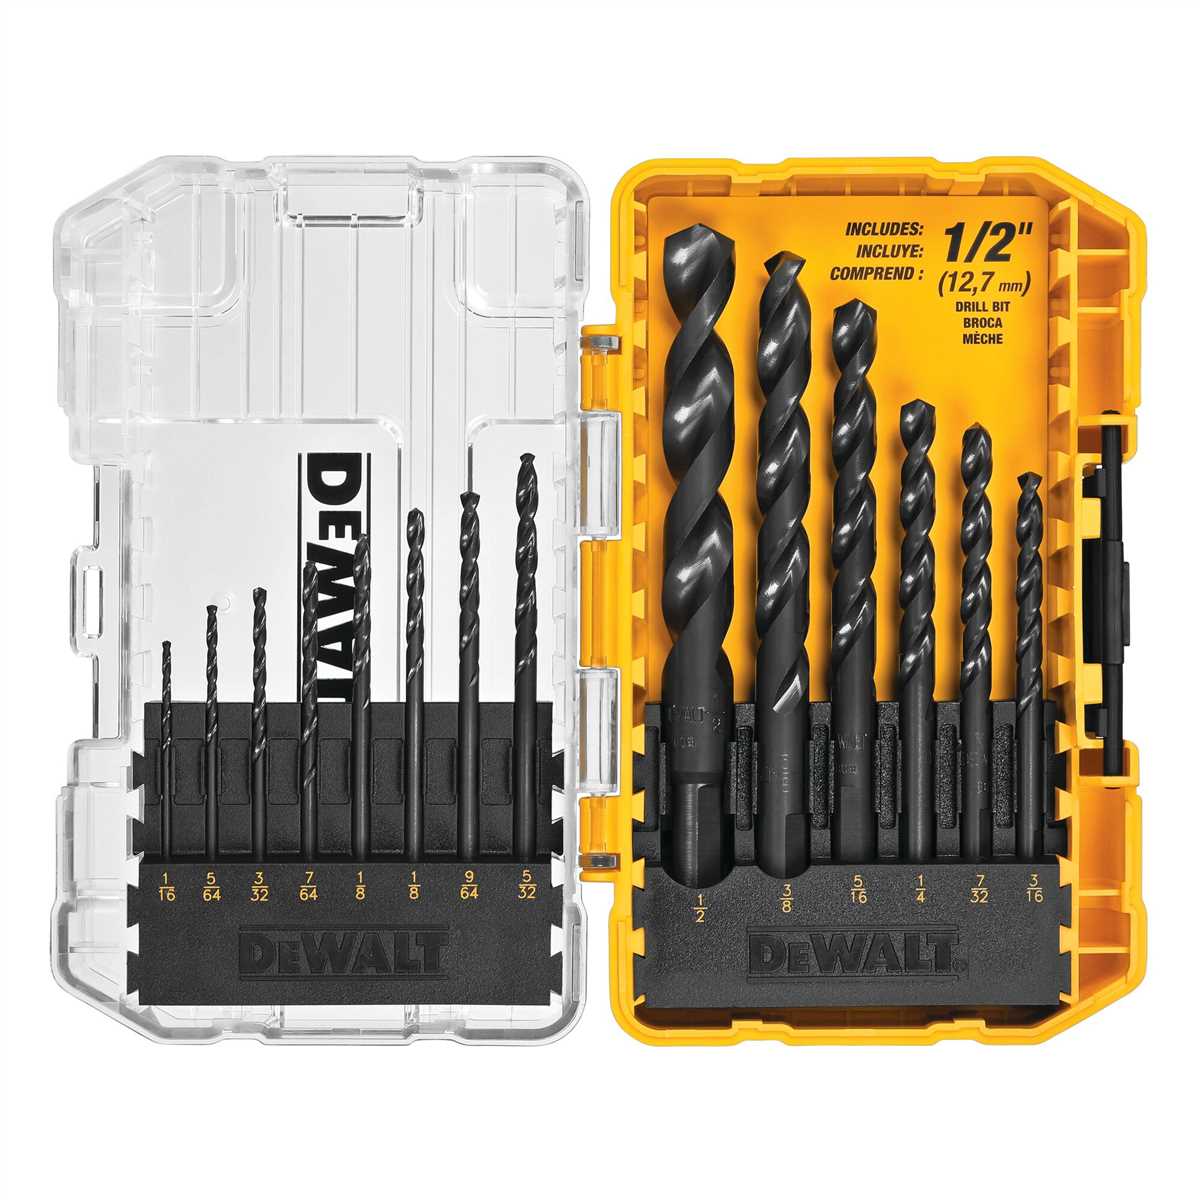
Drill bits are typically measured in terms of their diameter, which refers to the width of the hole that the bit can create. The standard unit of measurement for drill bit sizes is inches or millimeters.

Drill bits come in a variety of sizes, ranging from very small diameters, such as 1/16 inch or 1.6 millimeters, to much larger diameters, such as 1 inch or 25 millimeters. The selection of the right size drill bit depends on the specific requirements of the project.
Considerations for Selecting Drill Bit Size
There are several factors to consider when selecting the right drill bit size:
- Project Requirements: Determine the desired hole size based on the requirements of your project. Measure the existing hole or the size of the fastener you need to use as a reference.
- Material Thickness: Consider the thickness of the material you will be drilling into. To create a hole of the appropriate size, the drill bit should have a diameter slightly larger than the thickness of the material.
- Fastener Size: If you are enlarging a hole to accommodate a specific fastener, make sure to select a drill bit size that matches the diameter of the fastener. This will ensure a secure and snug fit.
Using Drill Bit Size Guides
To assist in selecting the right drill bit size, you can use drill bit size guides. These guides provide information about the standard drill bit sizes and their corresponding diameters. They can help you find the appropriate drill bit size for your project based on the desired hole size or the size of the fastener you are using.
Drill bit size guides can be found online or in hardware stores and typically include tables or charts that list the drill bit sizes in both inches and millimeters.
Conclusion
Choosing the right drill bit size is essential for enlarging a hole using basic drill bits. Consider the project requirements, material thickness, and fastener size when selecting the appropriate drill bit size. Utilize drill bit size guides to ensure accuracy and precision in achieving the desired hole size.

Preparing the Work Area
Before you start enlarging a hole using basic drill bits, it is important to properly prepare your work area. This will ensure safety and make the task easier to complete. Here are some steps to follow:
1. Clear the Area
Remove any obstacles or clutter from the work area. This will prevent accidents and interference while drilling.
2. Use Protective Gear
Wear appropriate protective gear such as safety goggles, gloves, and a dust mask. This will protect you from any potential flying debris or dust particles released during the drilling process.
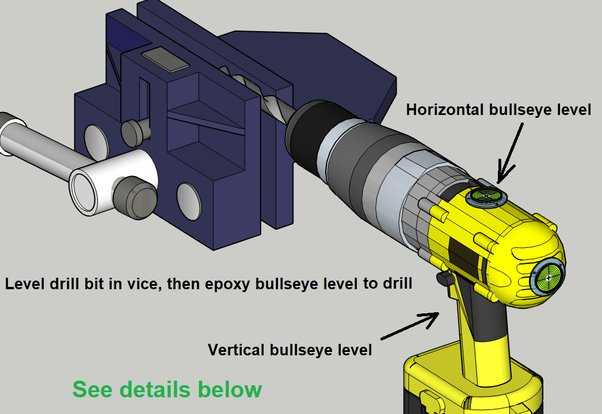
3. Secure the Workpiece
Make sure the workpiece is properly secured or clamped down. This will prevent it from moving or rotating while you are drilling, ensuring accurate results and preventing accidents.
4. Mark the Hole
Using a pencil or marker, clearly mark the area where you need to enlarge the hole. This will serve as a guide and help you stay on track during the drilling process.
5. Determine the Depth
Measure the desired depth of the enlarged hole and mark it on the drill bit. This will help you know when to stop drilling and prevent you from going too deep.
6. Plan for Dust Collection
If necessary, set up a dust collection system or use a dust bag attached to the drill to minimize the amount of dust generated during drilling. This will make the work area cleaner and safer.
7. Organize Drill Bits
Have all the necessary drill bits organized and within reach. This will save you time from searching for the right size during the drilling process.
By following these steps, you will be well-prepared to successfully enlarge a hole using basic drill bits. Remember to always prioritize safety and choose the appropriate drill bit for the material you are working with.
Securing the Material
Before you begin enlarging a hole, it’s important to secure the material you are working on. This will help prevent any damage or accidents while using the drill.
Here are a few steps you can take to ensure the material is secure:
- Place the material on a sturdy work surface. Use clamps or a vice to hold it in place if necessary.
- Make sure the material is level and stable. If it is uneven or wobbly, it can be difficult to accurately enlarge the hole.
- Consider using a backing board for extra support. This can help prevent any tear-out or splintering on the other side of the material while drilling.
By taking these precautions, you can ensure that the material is secure and stable while you work on enlarging the hole.
Marking the Desired Hole Size
Before you start drilling, it is important to mark the desired hole size on the material. This will help you ensure accuracy and prevent drilling larger than necessary holes.
Here are the steps to properly mark the desired hole size:
- Measure the required hole diameter: Use a measuring tape, caliper, or a ruler to determine the exact diameter of the hole you want to create. This measurement will depend on the specific project and the size of the fastener or object that will fit into the hole.
- Choose an appropriate drill bit: Select a drill bit with a diameter slightly smaller than the desired hole size. This will allow you to enlarge the hole gradually and accurately. It is always better to start with a smaller drill bit and gradually increase the size than to start with a larger bit and risk drilling a hole that is too big.
- Mark the center of the hole: Use a pencil or a marker to make a small dot on the material at the exact center of the hole. This will serve as a guide for drilling and help you maintain accuracy throughout the process.
- Mark the boundaries of the hole: Using the measurement you took earlier, mark the outer boundaries of the hole on the material. This can be done by making small dots or using a straight edge to draw a circle around the center point.
- Double-check the markings: Before you start drilling, take a moment to double-check all the markings. Make sure the center point is accurately marked, and the boundaries of the hole are properly aligned.
By following these steps and accurately marking the desired hole size, you can ensure precision and minimize any mistakes while drilling.
Using Pilot Holes
When attempting to enlarge a hole using drill bits, it is important to consider the use of pilot holes. A pilot hole is a smaller-sized hole that is drilled before attempting to enlarge the hole to the desired size. This technique helps to guide the larger drill bit, reduces the risk of the bit slipping or wandering, and prevents the wood or material from splitting.
Here are the steps to follow when using pilot holes:
- Select the appropriate pilot drill bit: Choose a drill bit that is slightly smaller than the desired final hole size. This will help guide the larger drill bit and minimize the risk of the hole becoming too large or out of alignment.
- Mark the center point: Use a pencil or a center punch to mark the center of the hole you want to enlarge.
- Create the pilot hole: Place the tip of the pilot drill bit on the marked center point and drill a hole to the desired depth. Make sure to hold the drill steady and apply consistent pressure.
- Switch to the larger drill bit: Once the pilot hole is created, switch to the larger drill bit that will be used to enlarge the hole. Carefully place the drill bit into the pilot hole, making sure it is aligned correctly.
- Enlarge the hole: Begin drilling with the larger bit, applying steady pressure. Use a slower drill speed if necessary to prevent overheating or causing damage to the material. Take breaks if needed to remove debris and allow the drill bit to cool down.
- Check the hole size: Periodically check the size of the hole to ensure it is being enlarged to the desired size. Stop drilling once the hole reaches the desired diameter.
Using pilot holes when enlarging a hole is a simple yet effective technique that can help achieve clean and accurate results. It is especially useful when working with delicate or brittle materials that are prone to splitting or cracking.
Drilling in Stages
When enlarging a hole using basic drill bits, it is often necessary to drill in stages. This means starting with a smaller drill bit and gradually increasing the size until the desired hole diameter is achieved. Drilling in stages is a common technique used to prevent the drill bit from getting stuck or causing damage to the material.
Step 1: Choose the Right Drill Bit
Before drilling in stages, it is important to select the appropriate drill bit. The size of the initial hole will depend on the size of the final hole you want to achieve. For example, if you want to enlarge a hole from 1/4 inch to 1/2 inch, you will need to start with a 1/4 inch drill bit.
Step 2: Start with a Small Hole
Begin by drilling a small hole using the chosen drill bit. Use steady pressure and make sure the drill bit is aligned with the desired hole position. Take your time and let the drill bit do the work. Once the small hole is drilled, remove any wood or debris from the material and proceed to the next step.
Step 3: Gradually Increase the Hole Size
Swap the small drill bit for a larger one. This should be slightly larger than the initial hole size. For example, if the first hole was 1/4 inch, use a 3/8 inch drill bit for the next stage. Repeat the drilling process, applying steady pressure and removing any debris as you go. Continue this process, gradually increasing the hole size, until the desired diameter is reached.
Step 4: Smooth the Edges
After drilling in stages and achieving the desired hole size, it is important to smooth the edges. Use sandpaper or a file to remove any rough edges or burrs around the hole. This will ensure a neat and clean finish and prevent any potential injuries.
Drilling in stages is a simple yet effective technique for enlarging holes using basic drill bits. It allows for more control and reduces the risk of damaging the material or getting the drill bit stuck. Remember to choose the right drill bit, start with a small hole, gradually increase the size, and smooth the edges for a professional-looking result.
Removing Debris
When enlarging a hole using basic drill bits, it is important to remove debris to ensure clean and precise results. Here are some methods to effectively remove debris from the hole:
1. Blowing out the Debris
One simple method is to blow out the debris using a can of compressed air or a handheld air blower. This method works well for smaller holes and can quickly remove loose debris.
2. Vacuuming the Debris
For larger holes or when dealing with a significant amount of debris, using a vacuum cleaner equipped with a narrow nozzle attachment can be an effective way to remove the debris. Move the nozzle around the hole, making sure to suction up as much debris as possible.
3. Using a Brush
A brush with stiff bristles can be used to sweep away small particles of debris that may be clinging to the walls of the hole. Gently brush the walls of the hole in a circular motion to dislodge any remaining debris, then use a vacuum or compressed air to remove it.
4. Flushing with Water
When working with materials that produce fine dust, such as drywall or brick, flushing the hole with water can help wash away the debris. Use a small amount of water and carefully pour it into the hole, allowing it to flow through and carry away the debris. Be mindful of any electrical components that may be present and avoid using excessive amounts of water.
5. Inspecting the Hole
After removing the initial debris, it is important to inspect the hole to ensure no remaining debris is present. Use a flashlight or other source of light to illuminate the hole and visually check for any remaining debris. If necessary, repeat the above methods until the hole is clean.
By effectively removing debris during the process of enlarging a hole, you can ensure that the final result is clean, accurate, and ready for further use.
Testing the Enlarged Hole Size
Once you have successfully enlarged the hole using basic drill bits, it is important to test the size to ensure it meets your requirements. Testing the hole size is crucial, especially if it needs to fit a specific component or if precision is necessary.
Methods of Testing
There are several methods you can use to test the size of the enlarged hole:
- Calipers: Use a set of calipers, preferably digital, to measure the diameter of the hole. This provides accurate measurements and allows you to compare the size with the required specifications.
- Gauges: Use a set of hole gauges to check the size of the hole. Simply insert each gauge into the hole until you find the one that fits snugly without any gaps.
- Precision Templates: If you have access to precision templates or components that need to fit into the enlarged hole, try inserting them to check if they fit properly. This method ensures that the enlarged hole is of the correct size and shape.
Criteria for a Successful Enlarged Hole
When testing the enlarged hole size, keep the following criteria in mind:
- The hole should be the exact size required, neither too small nor too large.
- The hole should be free from burrs or rough edges that could affect the fit or performance of any components.
- The hole should be centered and aligned properly.
Adjustments and Re-Drilling
If the enlarged hole does not meet the desired requirements, adjustments and re-drilling may be necessary. This can include re-drilling to achieve a larger size or smoothing rough edges using a deburring tool or sandpaper.
| Test Method | Measurement | Result |
|---|---|---|
| Calipers | 10.2mm | Within tolerance |
| Gauges | 6mm gauge fits snugly | Successful |
| Precision Template | Component fits properly | Successful |
By following these testing methods and criteria, you can ensure that the enlarged hole meets your requirements and is ready for its intended purpose.
FAQ:
What is the easiest way to enlarge a hole using basic drill bits?
The easiest way to enlarge a hole using basic drill bits is to use a step drill bit. This type of drill bit has multiple stepped sizes, allowing you to gradually increase the size of the hole as you drill.
Can I use a regular drill bit to enlarge a hole?
Yes, you can use a regular drill bit to enlarge a hole. All you need to do is drill around the edges of the existing hole, gradually increasing the size of the hole.
What should I do if I don’t have a step drill bit?
If you don’t have a step drill bit, you can use a regular drill bit to enlarge the hole. Start by drilling a series of small holes around the edges of the existing hole, and then gradually increase the size of the hole by drilling larger holes.
What is the best technique to enlarge a hole using a drill bit?
The best technique to enlarge a hole using a drill bit is to use a circular motion while drilling. Start by drilling at a slow speed, and gradually increase the speed as you drill. This will help prevent the drill bit from getting stuck or jammed in the hole.
Are there any specific safety precautions I should take when enlarging a hole with a drill bit?
Yes, there are a few safety precautions you should take when enlarging a hole with a drill bit. First, always wear safety goggles to protect your eyes from flying debris. Second, make sure to secure the material you are drilling into to prevent it from moving or slipping. Finally, be cautious of any electrical wiring or pipes that may be present behind the material.
Can I use a drill press to enlarge a hole?
Yes, you can use a drill press to enlarge a hole. A drill press provides more stability and control, which can be helpful when drilling larger holes. Simply secure the material on the drill press table, set the desired size on the drill bit, and slowly lower the drill bit into the hole.
What materials can I enlarge a hole in using a drill bit?
You can enlarge a hole in a variety of materials using a drill bit, including wood, plastic, metal, and even concrete. Just make sure to use the appropriate drill bit for the material you are working with, as different materials require different types of drill bits.
Video:


Meet Harrison Clayton, a distinguished author and home remodeling enthusiast whose expertise in the realm of renovation is second to none. With a passion for transforming houses into inviting homes, Harrison's writing at https://thehuts-eastbourne.co.uk/ brings a breath of fresh inspiration to the world of home improvement. Whether you're looking to revamp a small corner of your abode or embark on a complete home transformation, Harrison's articles provide the essential expertise and creative flair to turn your visions into reality. So, dive into the captivating world of home remodeling with Harrison Clayton and unlock the full potential of your living space with every word he writes.


