How to drill tiles without cracking them

Tiles are often used as a decorative and functional element in bathrooms, kitchens, and other areas of the home. However, drilling through tiles can be a tricky task, as they are fragile and prone to cracking or chipping. Whether you need to install a towel rack, hang a mirror, or add additional plumbing fixtures, it’s important to know how to drill tiles without damaging them.
One of the most important factors to consider when drilling tiles is the type of tile you are working with. Ceramic tiles are the most common, but you may also encounter porcelain, glass, or natural stone tiles. Each type requires a different approach and set of tools to successfully drill through without causing any damage.
Another crucial step to avoid cracking tiles is to choose the right drill bit. Using a regular drill bit can create a lot of pressure on the tile, leading to cracks. Instead, opt for a carbide-tipped or diamond-tipped drill bit specifically designed for drilling through tiles. These bits are designed to dissipate heat and reduce the risk of cracking.
Finally, it’s important to use the right technique when drilling through tiles. Start by marking the spot where you want to drill with a pencil or marker. Then, use a small bit to create a pilot hole. This will help guide the larger drill bit and prevent it from slipping. Apply gentle and steady pressure while drilling, and avoid using excessive force or speed, as this can increase the risk of cracking. If you’re drilling through glass tiles, consider using a lubricant, such as water or oil, to reduce friction and keep the tile cool.
Choosing the Right Tools
When it comes to drilling tiles without cracking them, using the right tools is crucial. Here are some tools that you should consider:

1. Diamond-Tipped Drill Bits
One of the most important tools for drilling tiles is a diamond-tipped drill bit. These drill bits are specially designed to cut through the hard surface of tiles without cracking or chipping them. Diamond-tipped drill bits are available in various sizes, so make sure to choose the right size for your project.
2. Masking Tape
Using masking tape can help prevent the drill bit from slipping on the smooth surface of the tiles. Before drilling, place a piece of masking tape over the area where you want to drill. This will provide some grip and reduce the chances of cracking the tile.
3. Water Cooling System
Drilling through tiles generates a lot of heat, which can cause the tiles to crack. To prevent this, consider using a water cooling system. This can be as simple as spraying water on the tile as you drill or using a specialized water cooling attachment for your drill. The water helps to dissipate the heat and keeps the tiles cool.
4. Cordless Drill
Using a cordless drill allows for greater mobility and flexibility when drilling tiles. It eliminates the need for a power outlet, which can often be difficult to find in a bathroom or kitchen. Additionally, a cordless drill gives you more control and reduces the chances of accidentally cracking the tiles due to tangling cords.

5. Level
Having a level is essential to ensure that your holes are drilled straight and even. Crooked holes can not only be unsightly but can also cause the tiles to crack or break. Use a level to check and adjust the position of your drill before you start drilling.
6. Safety Equipment
Always prioritize safety when drilling tiles. Wear safety goggles to protect your eyes from any debris that may be produced during drilling. Additionally, consider wearing gloves to protect your hands and using ear protection if the noise level is high.
By choosing the right tools and taking the necessary precautions, you can successfully drill tiles without cracking them.
Understanding the Tile Material
Before drilling into tiles, it is important to understand the type of tile material you are working with. Different types of tile materials require different drilling techniques to avoid cracking.

Ceramic Tile
Ceramic tiles are one of the most common types of tiles used in homes. They are made from clay and are hardened through the firing process. Ceramic tiles are generally easy to drill into, but precautions should still be taken to prevent cracking.
- Use a carbide-tipped drill bit specifically designed for ceramic tiles.
- Start drilling at a slow speed and gradually increase the speed to avoid excessive heat.
- Apply light pressure while drilling to prevent the tile from cracking.
- Use a lubricant such as water or oil to keep the drill bit cool and prevent overheating.
Porcelain Tile
Porcelain tiles are similar to ceramic tiles but are made from a finer clay and fired at a higher temperature. They are denser and more durable than ceramic tiles, but they can be more challenging to drill into without cracking.
- Use a diamond-tipped drill bit specifically designed for porcelain tiles.
- Start drilling at a slow speed and use steady, even pressure.
- Use a lubricant such as water or oil to cool the drill bit and prevent overheating.
- Drill at a slight angle to reduce the risk of cracking.
Natural Stone Tile
Natural stone tiles, such as marble or granite, are harder and more brittle than ceramic or porcelain tiles. Special care must be taken when drilling into natural stone to avoid cracking or damaging the tiles.
- Use a diamond-tipped drill bit designed for drilling into natural stone.
- Start drilling at a slow speed and apply even pressure to avoid cracking.
- Use a lubricant such as water or oil to keep the drill bit cool.
- Consider using a drill guide or template to ensure precise drilling and avoid slippage.
Understanding the type of tile material you are working with is crucial for drilling into tiles without cracking them. By choosing the right drill bit and following the proper drilling techniques, you can successfully make holes in tiles for various purposes without damaging them.
Using the Correct Drill Bit
When drilling into tiles, it is essential to use the correct drill bit to avoid cracking or damaging them. Here are some tips to help you choose the right drill bit for the job:

1. Diamond-tipped drill bits
Diamond-tipped drill bits are specifically designed for drilling into hard materials such as tiles, ceramics, and glass. They have a high level of hardness and a sharp cutting edge, which allows them to cut through the tough surface of the tile without causing cracks or chips.
2. Carbide-tipped drill bits
Carbide-tipped drill bits are another good option for drilling into tiles. They are made from tungsten carbide, which is a very hard and durable material. These bits have a sharp cutting edge that can easily penetrate the tile surface without causing any damage.
3. Lubricate with water
When drilling into tiles, it’s important to keep the drill bit and the tile cool. To prevent overheating, it is recommended to lubricate the drilling area with water. This will help reduce friction and heat buildup, which can lead to cracks or breakage.
4. Start with a small pilot hole
Before drilling the final hole, it is advisable to start with a small pilot hole. This will help prevent the tile from cracking when the larger drill bit is used. To create a pilot hole, use a smaller-sized drill bit and apply gentle pressure to gradually penetrate the tile surface.
5. Slow and steady drilling
When drilling into tiles, it is important to maintain a slow and steady drilling speed. Applying excessive force or drilling too quickly can cause the tile to crack or chip. Take your time and apply gentle pressure to allow the drill bit to cut through the tile gradually.

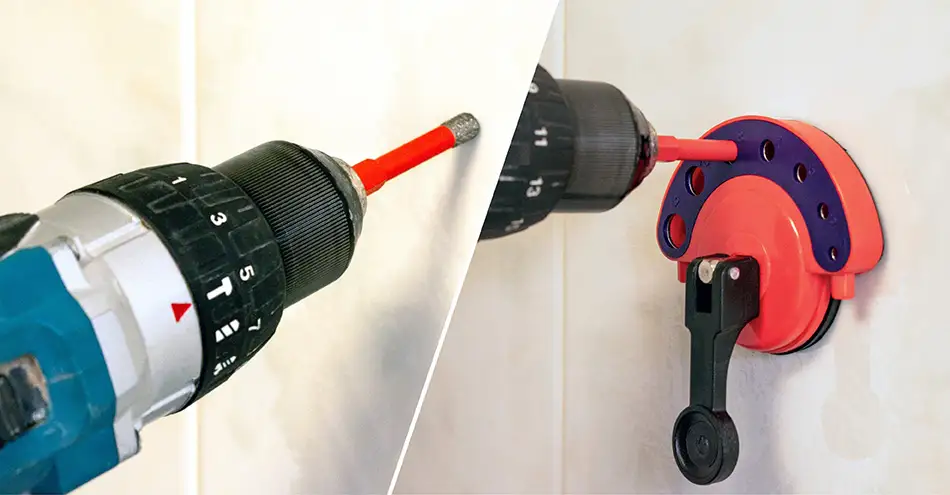
6. Use a guide
Using a drilling guide or template can help ensure that the holes are drilled accurately and in the desired location. It also provides additional support and stability, which can prevent the tile from cracking or shifting during the drilling process.
7. Practice on spare tiles
If you are unsure about drilling into tiles, it is always a good idea to practice on spare tiles first. This will give you an opportunity to get a feel for the drilling process and make any necessary adjustments before working on the actual tiles.
By following these tips and using the correct drill bit, you can successfully drill into tiles without cracking or damaging them. Remember to take your time, use appropriate lubrication, and apply gentle pressure to ensure a successful drilling experience.
Preparing the Tiles
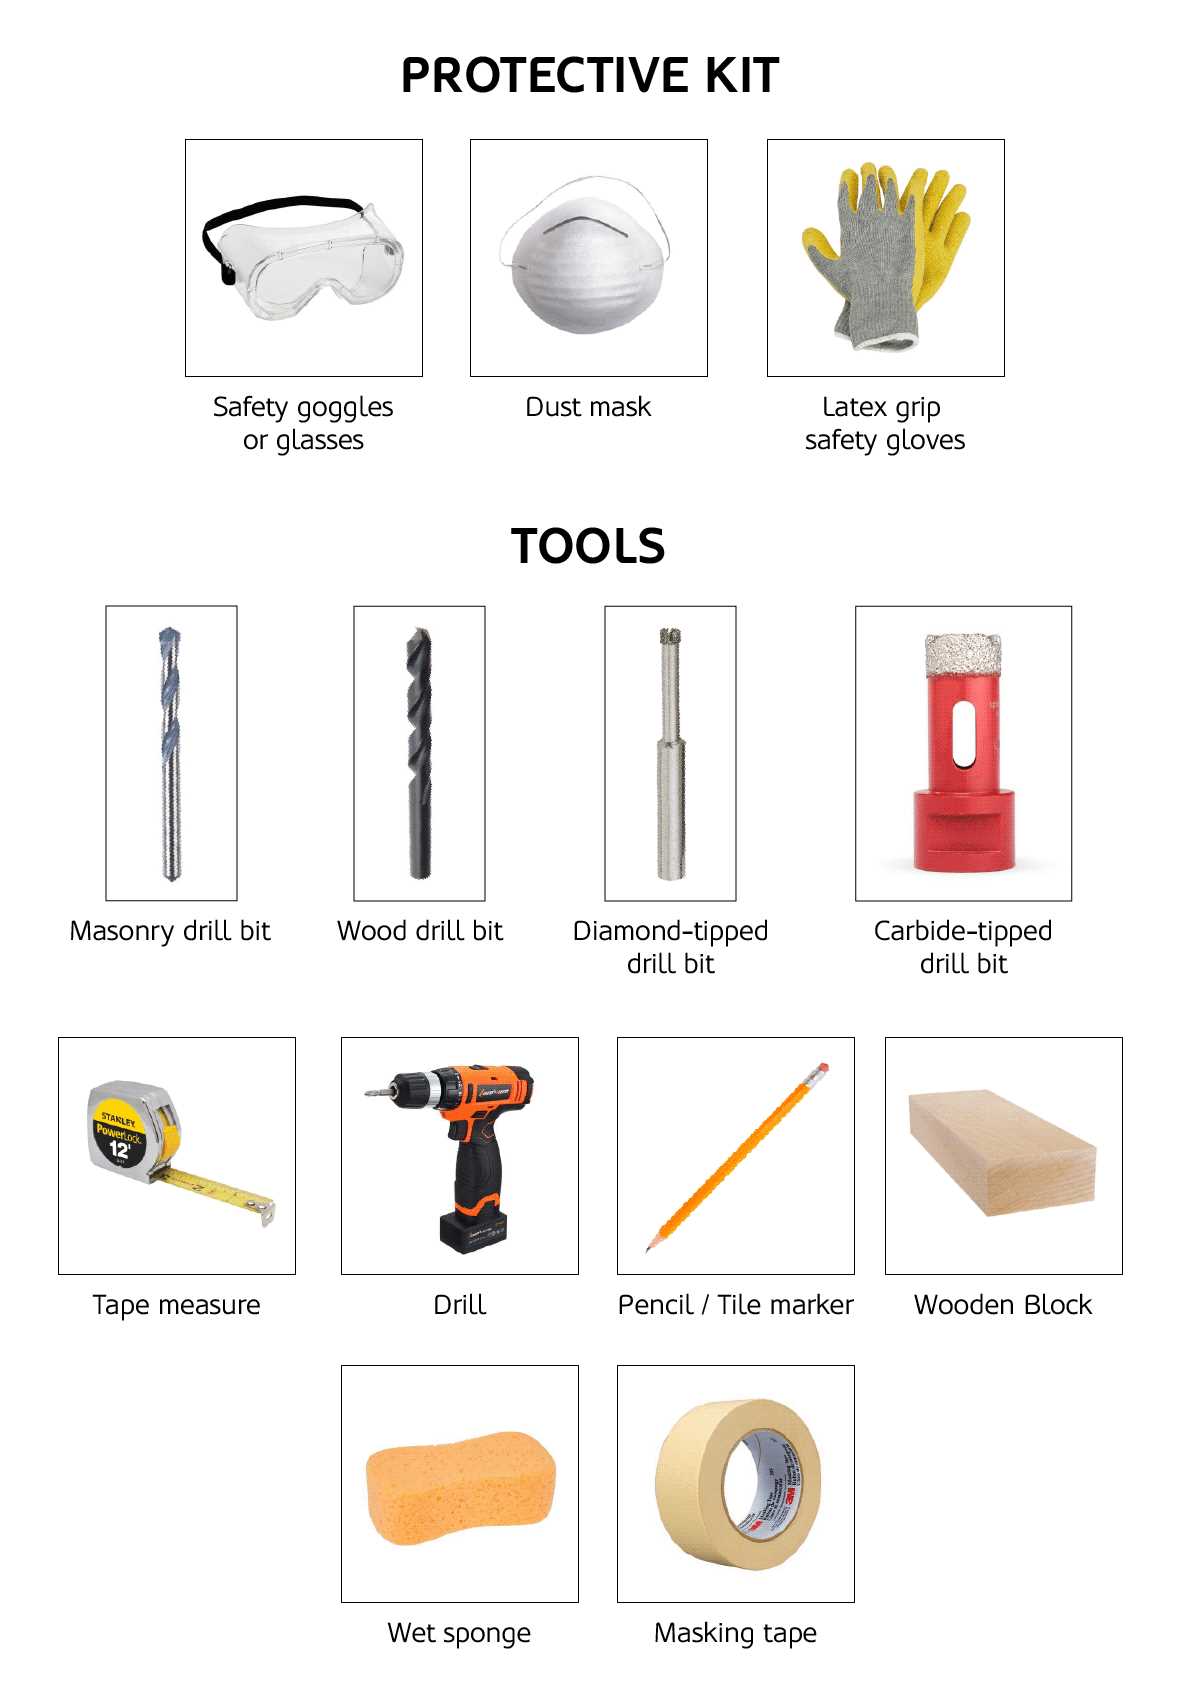
1. Gather the necessary tools
Before you begin drilling into the tiles, make sure you gather all the necessary tools:
- Drill
- Diamond tile bit
- Masking tape
- Water spray bottle
- Ruler or measuring tape
- Marker or pencil
2. Mark the drilling spots
Using a ruler or measuring tape, measure and mark the spots on the tiles where you want to drill. It’s important to be accurate with your measurements to ensure the holes are in the right place.
3. Apply masking tape
To avoid the drill bit from slipping and to protect the surface of the tiles, apply a piece of masking tape over the spot you marked for drilling.
This will provide some friction and prevent the drill bit from scratching or damaging the tiles.
4. Get your materials ready
Before you start drilling, prepare a water spray bottle filled with water. This will help to keep the drill bit and tiles cool during the drilling process and reduce the risk of cracking.
5. Secure the tiles
If you’re drilling into a wall, make sure the tiles are properly secured. It’s best to have someone hold a wooden board behind the tiles to provide support and prevent them from cracking under the pressure.
If you’re drilling into floor tiles, use clamps to secure them to prevent any movement that could cause damage.
6. Start drilling
Once everything is prepared, start drilling slowly and with light pressure. Allow the drill bit to do the work and avoid applying excessive force.
Remember to keep the drill bit and tiles lubricated with water by spraying it periodically during the drilling process.
7. Clean up
After drilling the required holes, remove the masking tape and clean up any debris or dust that may have accumulated.
This will help to prevent any damage to the tiles and keep the surface clean for further installations or finishes.
Marking the Drill Hole
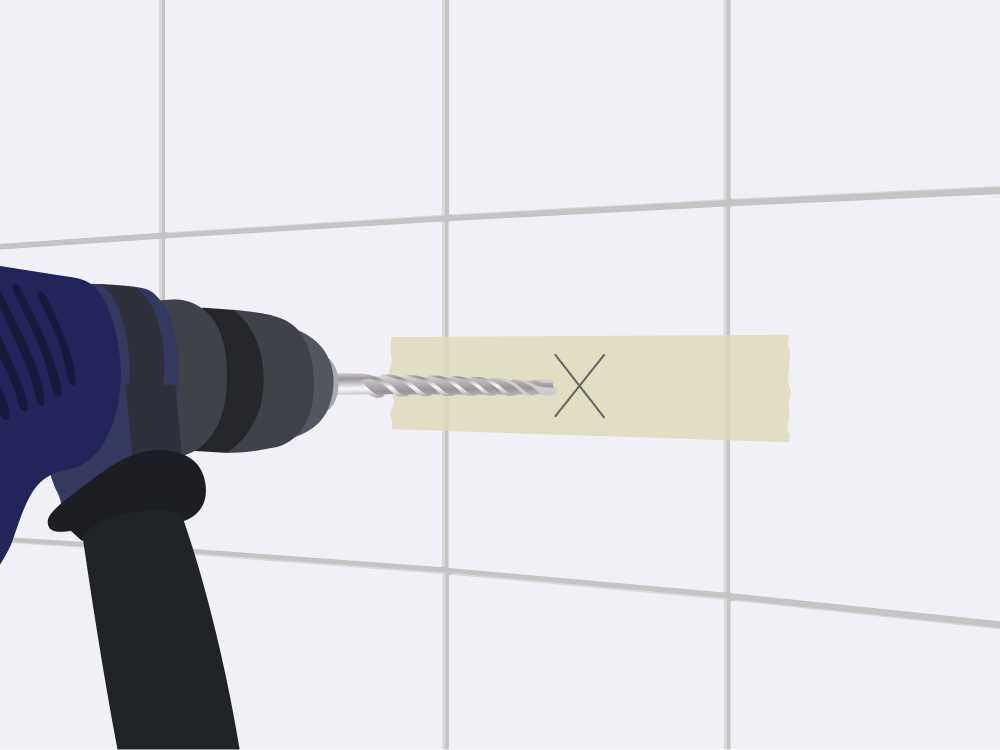
Before drilling into tiles, it’s important to mark the spot where you want the hole to be. This will help ensure accurate drilling and reduce the chances of cracking the tiles.
To mark the drill hole, you can use a pencil or a marker to make a small dot on the tile surface. It’s recommended to use a pencil or a marker with a fine tip to create a precise mark.
Measure the exact location where you want to drill the hole and mark it with a dot. If you are drilling multiple holes, make sure to measure and mark each location individually to ensure accuracy.
In some cases, you may want to use a template or a guide to mark the drill hole. This can be especially helpful if you need to drill multiple holes in a straight line or in a specific pattern. You can create a template by placing a piece of paper or cardboard on the tile and marking the hole location through it. This will help ensure consistency and accuracy in your drilling.
Once you have marked the drill hole, double-check the location to ensure it’s in the desired spot. This is an important step to prevent any mistakes or drilling in the wrong spot.
Remember to be gentle when marking the tile surface to avoid scratching or damaging the tiles. Apply light pressure to create a clear and visible mark without causing any harm to the tile.
After marking the drill hole, you are ready to proceed with drilling the tiles using the appropriate techniques and tools.
Protecting the Tile Surface
When drilling tiles, it is essential to take precautions to protect the surface of the tile from cracking or chipping. Here are some steps you can take to ensure that your tiles remain intact:
1. Mark the drilling point
Before drilling, mark the exact point where you want to make the hole. This will help you maintain precision and minimize any accidental damage to the tile surface.
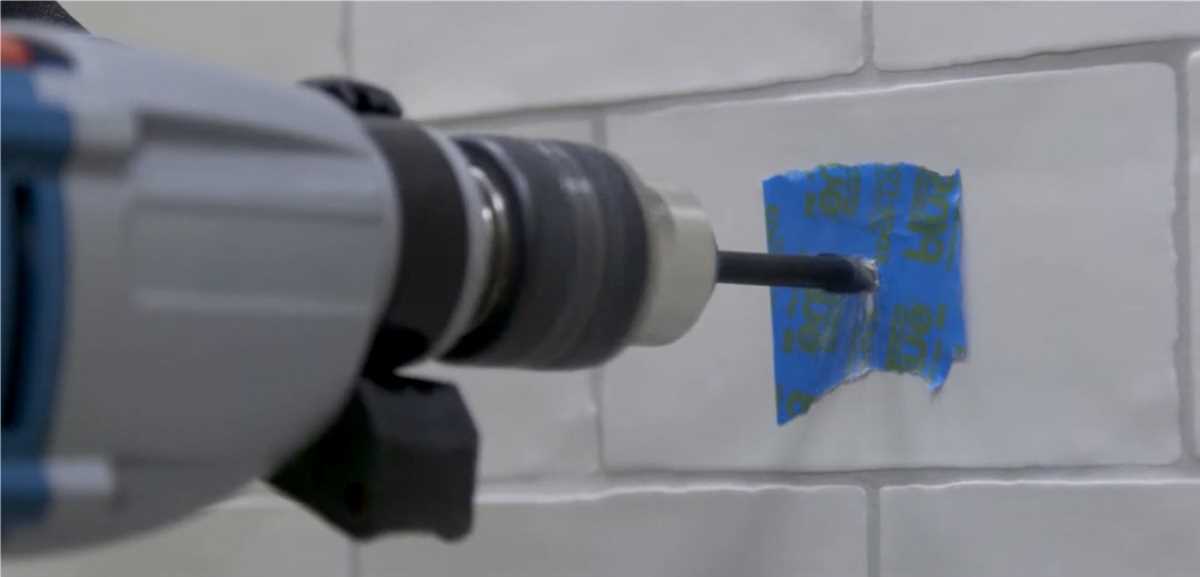
2. Use masking tape
Applying masking tape over the area where you will be drilling can provide an added layer of protection. The tape can absorb some of the vibrations and prevent the drill bit from slipping, reducing the risk of cracking or chipping the tile.
3. Start with a small pilot hole
Begin by drilling a small pilot hole using a drill bit specifically designed for tiles. This will help prevent the tile from cracking under the pressure of a larger drill bit. Make sure to use a slow speed setting on your drill to minimize the risk of damage.
4. Gradually increase the drill bit size
Once you have the pilot hole, you can gradually increase the size of the drill bit until you reach the desired hole diameter. This incremental approach helps to distribute the pressure evenly and reduces the chances of damaging the tile.
5. Keep the area cool
Drilling generates heat, which can increase the likelihood of cracking or damaging the tile. To prevent overheating, it is recommended to periodically pause drilling and spray a small amount of cool water on the drill bit and the tile surface.
6. Use a tile drill guide or template
Using a tile drill guide or template can help you maintain accuracy and prevent the drill bit from wandering, which can result in tile damage. These tools allow you to align and guide the drill bit precisely.
7. Use a diamond-tipped drill bit
When drilling tiles, it is best to use a diamond-tipped drill bit. These drill bits are specifically designed for tile drilling and have a better ability to cut through the tile without causing damage. Make sure to select the appropriate size and type of diamond-tipped drill bit for the job.
8. Go slow and steady
Drilling tiles requires patience and a steady hand. Avoid applying excessive force or rushing the process, as this can cause the tile to crack. Remember to maintain a slow and controlled speed throughout the drilling process.
9. Clean up the debris
After drilling, make sure to clean up any debris left behind on the tile surface. Use a soft cloth or brush to remove any dust or particles that could scratch or damage the tile.
By following these steps and taking precautions, you can successfully drill tiles without cracking or damaging them. Remember, practice makes perfect, so don’t be discouraged if you encounter some challenges along the way.
Drilling Techniques
Drilling into tiles can be a challenging task, as they are prone to cracking. However, by following the right drilling techniques, you can successfully drill into tiles without any damage.
1. Use the Right Drill Bit
Choosing the right drill bit is crucial when drilling into tiles. Use a carbide-tipped or diamond-tipped drill bit specifically designed for drilling into hard materials like tiles. These drill bits have sharp edges that can penetrate the tile surface without causing cracks.
2. Mark the Spot
Before drilling, mark the spot on the tile where you want to drill. Use a pencil or masking tape to make a visible mark. This will serve as a guide and help prevent the drill bit from wandering while drilling.
3. Start with a Pilot Hole
Starting with a pilot hole is highly recommended when drilling into tiles. This small hole will help guide the drill bit and prevent it from slipping. Use a small-sized drill bit to create the pilot hole, then gradually increase the drill bit size for the desired hole diameter.
4. Apply Steady Pressure
When drilling into tiles, it’s important to apply steady pressure rather than using excessive force. Push the drill bit gently but firmly into the tile surface, allowing the drill bit to cut smoothly. Applying too much force can cause the tile to crack.
5. Drill at a Slow Speed
Drilling at a slow speed is crucial for drilling into tiles. Set your drill to a low speed setting to reduce the risk of cracking the tile. High speeds can generate excessive heat, which can damage the tiles.
6. Use a Cooling Lubricant
To prevent overheating and potential damage to the tiles, it’s advisable to use a cooling lubricant while drilling. Apply a few drops of water or a suitable lubricant on the drill bit to keep it cool during the drilling process.
7. Use a Backer Board
Using a backer board can provide additional support and stability while drilling into tiles. Place a piece of scrap wood or a backup material behind the tile to help prevent cracking. The backer board will absorb any excess pressure and protect the tile.
8. Maintain a Proper Angle
While drilling, make sure to maintain a proper drilling angle. Hold the drill perpendicular to the tile surface to prevent any slippage or lateral movement. This will ensure a clean and precise hole without any cracks.
By following these drilling techniques, you can confidently drill into tiles without the fear of cracking or damaging them. Remember to always wear protective eyewear and work slowly and patiently for the best results.
Starting with Slow Speed
When drilling tiles, it is important to start with a slow speed to minimize the risk of cracking. This is especially true for brittle or delicate types of tiles. Here are some steps to follow when starting with a slow speed:
- Choose the right drill bit: Use a drill bit specifically designed for drilling through tiles. These bits typically have a carbide tip or a diamond tip, which are excellent for cutting through hard materials like tile.
- Mark the drilling spot: Use a pencil or a marker to mark the exact spot where you want to drill. Double-check your measurements and make sure the spot is clear of any obstructions.
- Secure the tile: If drilling through a wall tile, use painter’s tape to secure the tile in place and prevent it from moving while drilling. For floor tiles, make sure they are firmly in place before proceeding.
- Use a low-speed setting: Set your drill to a low speed setting. This will help reduce the amount of pressure and heat generated during drilling, minimizing the risk of cracking or damaging the tile.
- Apply gentle pressure: Hold the drill steady and apply gentle pressure as you start drilling. Avoid putting too much force, as this can also increase the chances of cracking the tile.
- Use a lubricant: Applying a small amount of water or lubricant to the drilling spot can help keep the drill bit cool and prevent overheating. This can also make the drilling process smoother.
- Drill at a slight angle: To prevent the drill bit from slipping or sliding off the tile, drill at a slight angle initially. Once the hole starts to form, you can gradually increase the angle and drill straight down.
By following these steps and starting with a slow speed, you can decrease the likelihood of cracking or damaging your tiles while drilling. Remember to always wear safety goggles and work slowly and carefully to ensure the best results.
Applying Steady Pressure
To successfully drill tiles without cracking them, it is important to apply steady pressure throughout the drilling process. Here are some tips for applying steady pressure:
1. Use a Marker
- Before drilling, use a marker to mark the spot where you want to drill the hole. This will help you stay on track and apply the pressure accurately.
2. Start Slowly
- Begin drilling at a slow speed to ensure stability and control. This will allow you to gradually increase the pressure without putting excessive force on the tile.
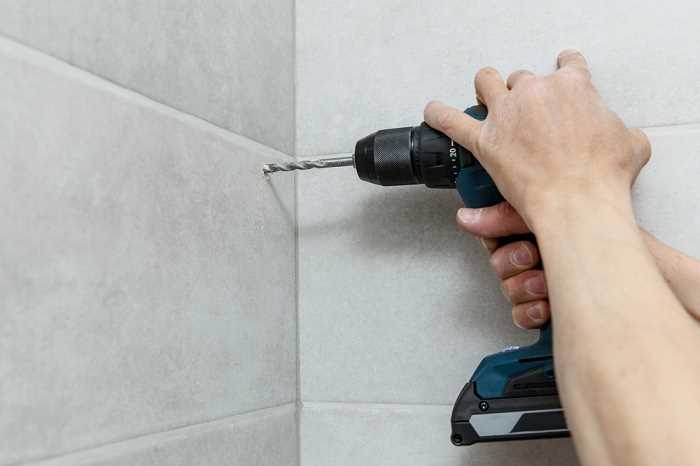
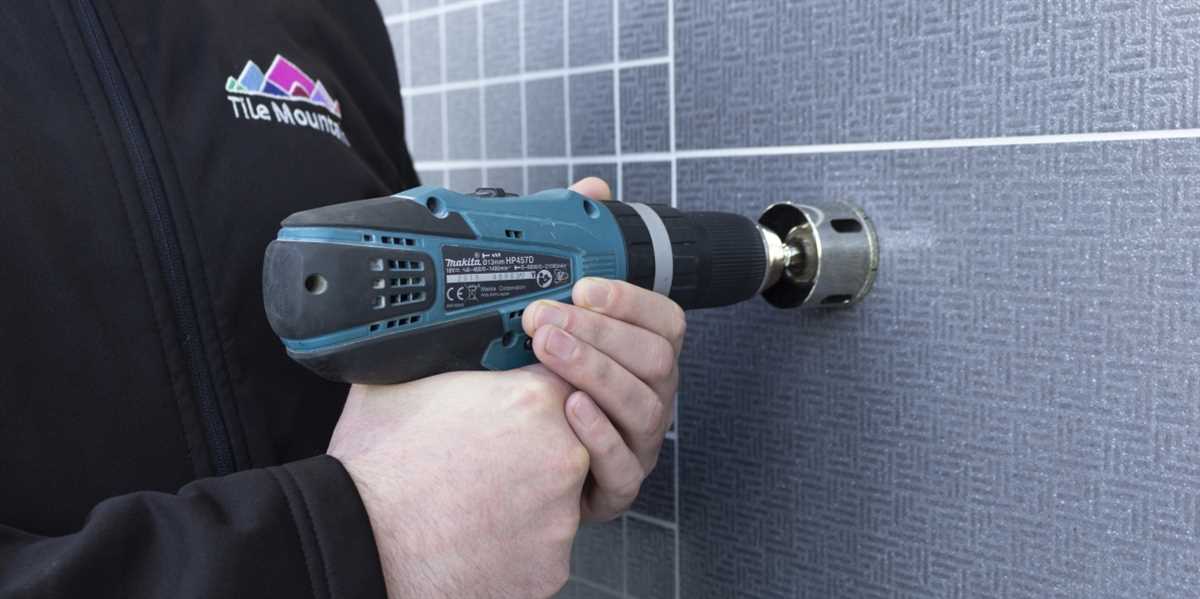
3. Maintain a 90-degree Angle
- Hold the drill at a 90-degree angle to the tile surface. This will provide the best drilling position and minimize the risk of cracking. Use a level or square to ensure the correct angle.
4. Apply Even Pressure
- Apply even and constant pressure while drilling. Avoid pressing too hard or too lightly, as this can cause the tile to crack. A consistent and steady pressure will help prevent any damage.
5. Use a Masonry Bit
- Choose the right type of drill bit, such as a masonry bit, for drilling into tiles. These bits are designed to drill into hard materials like ceramic, porcelain, or stone tiles. Using the correct drill bit will make the drilling process smoother and reduce the risk of cracking.
6. Lubricate the Drill Bit
- Apply a small amount of water or oil to the drill bit’s tip to act as a lubricant. This will help keep the bit cool and prevent heat from building up, reducing the chance of cracking the tile.
7. Take Breaks
- If you notice any signs of overheating or feel like the pressure is becoming uneven, take breaks during the drilling process. This will give the tile and drill bit a chance to cool down and prevent any damage from occurring.
By following these tips and applying steady pressure, you can successfully drill into tiles without cracking them. Remember to practice caution and take your time to ensure the best results.
FAQ:
Is it possible to drill tiles without cracking them?
Yes, it is possible to drill tiles without cracking them if you follow the correct technique and use the right tools. By using a high-quality drill bit, applying masking tape, drilling at a slow speed, keeping the drill bit cool with water, and using light pressure, you can minimize the risk of cracking the tiles.
Can I use a regular drill bit to drill tiles?
No, using a regular drill bit to drill tiles is not recommended. Regular drill bits are not designed to withstand the hardness of tiles and can easily crack them. It is best to use a carbide-tipped drill bit that is specifically designed for drilling through tiles.
Does the size of the drill bit matter when drilling tiles?
Yes, the size of the drill bit does matter when drilling tiles. It is best to use a drill bit that is slightly larger than the size of the screw or anchor you plan to use. This will help prevent the tile from cracking and ensure a secure fit for the screw or anchor.
What should I do if I accidentally crack a tile while drilling?
If you accidentally crack a tile while drilling, you can try repairing it with a clear epoxy adhesive. Clean the cracked area, apply the adhesive, and press the pieces together. Allow the adhesive to dry completely before using the tile again. If the crack is too severe, you may need to replace the tile.
Can I drill tiles with a hammer drill?
Yes, you can use a hammer drill to drill tiles, but you need to be extra cautious. Hammer drills are powerful and can easily crack the tiles if too much pressure is applied. It is recommended to use a regular drill with a hammer function or use a carbide-tipped drill bit designed for hammer drills.
Do I need to wear any protective gear when drilling tiles?
Yes, it is important to wear protective gear when drilling tiles. Safety glasses or goggles are necessary to protect your eyes from flying debris. Additionally, wearing a dust mask can help you avoid inhaling any dust particles that may be released during the drilling process.
Video:


Meet Harrison Clayton, a distinguished author and home remodeling enthusiast whose expertise in the realm of renovation is second to none. With a passion for transforming houses into inviting homes, Harrison's writing at https://thehuts-eastbourne.co.uk/ brings a breath of fresh inspiration to the world of home improvement. Whether you're looking to revamp a small corner of your abode or embark on a complete home transformation, Harrison's articles provide the essential expertise and creative flair to turn your visions into reality. So, dive into the captivating world of home remodeling with Harrison Clayton and unlock the full potential of your living space with every word he writes.


