How to drill through sheet metal: a comprehensive guide

Drilling through sheet metal can be a challenging task if you don’t have the right tools and techniques. Whether you’re a professional or a DIY enthusiast, it’s essential to know the proper way to drill through sheet metal to avoid damaging the material and getting inaccurate results. In this comprehensive guide, we will walk you through step-by-step instructions on how to successfully drill through sheet metal.
Step 1: Choose the Right Drill Bit
The first and most crucial step in drilling through sheet metal is selecting the right drill bit. For thinner metals, such as aluminum or brass, a high-speed steel (HSS) bit is suitable. For thicker metals, like steel or stainless steel, a cobalt bit or a titanium-coated bit would be a better choice. These types of bits are designed to withstand the heat and friction generated during drilling, ensuring a clean and precise hole.
Pro Tip: It’s essential to check the manufacturer’s recommendations for the correct drill bit size and type for the specific sheet metal you’re working with.
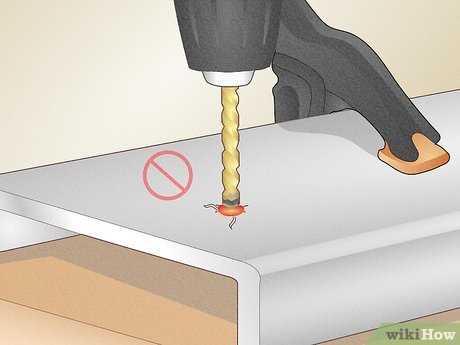
Step 2: Mark and Secure the Sheet Metal

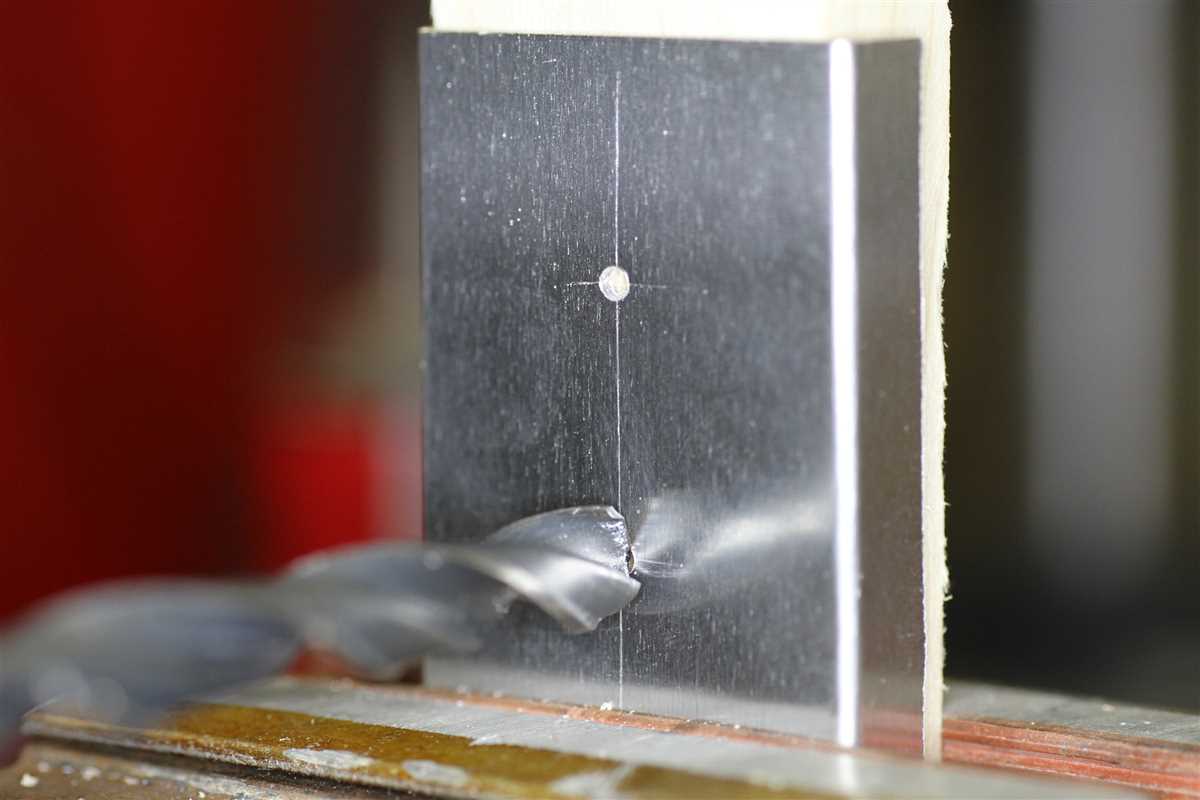
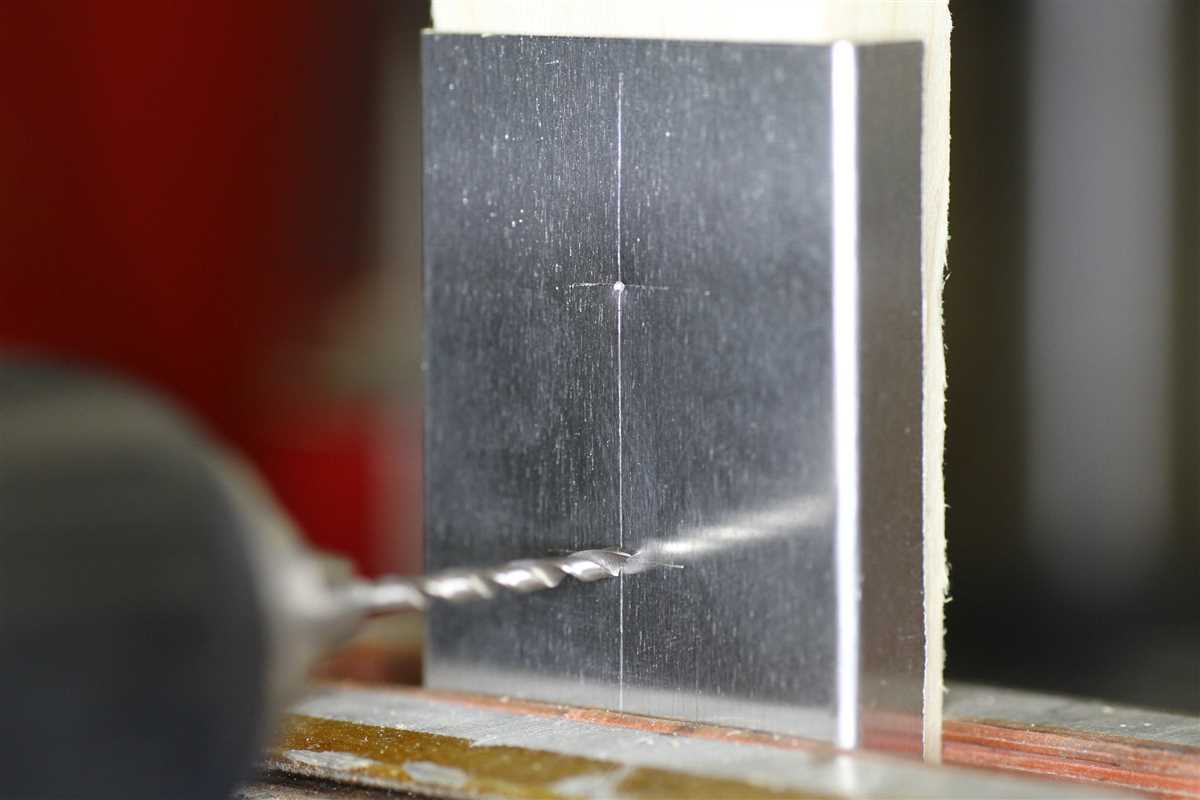
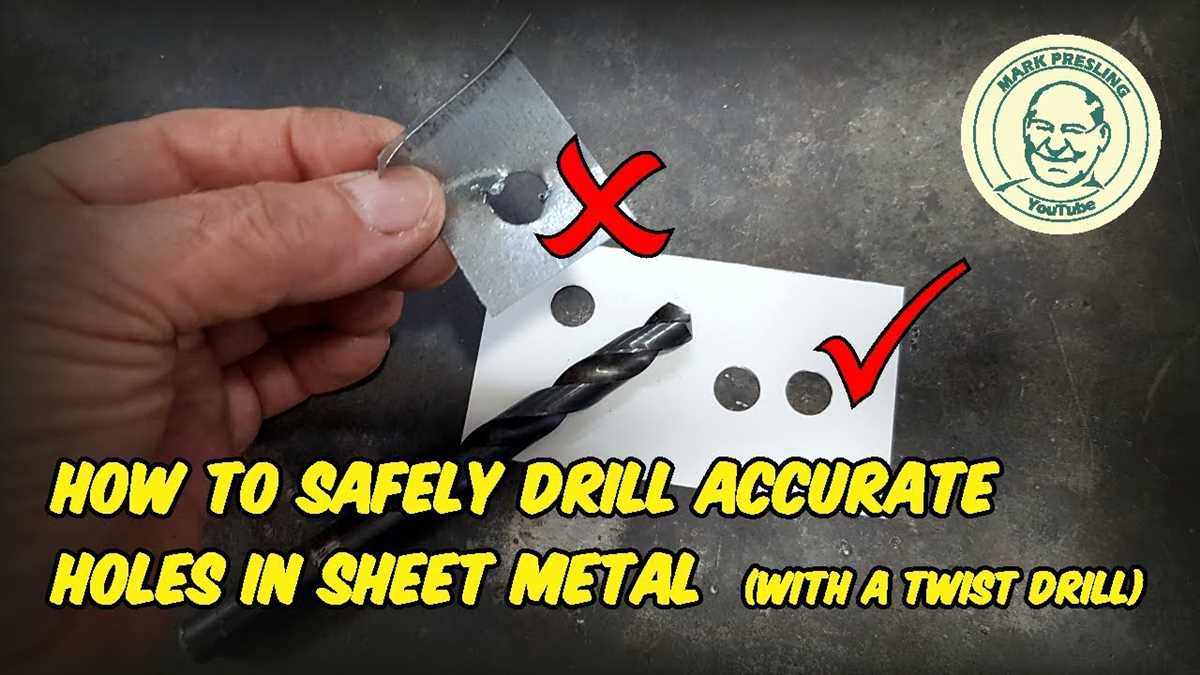
Before drilling, it’s crucial to mark the location of the hole on the sheet metal accurately. This can be done by using a center punch to create a small indentation, which will prevent the drill bit from wandering during drilling. Once marked, secure the sheet metal to a workbench or another stable surface using clamps or vises to ensure stability and prevent vibrations.
Pro Tip: For delicate or thin sheet metal, you can place a piece of scrap wood underneath to provide support and prevent bending or warping of the material.
Step 3: Use the Right Drilling Technique
When drilling through sheet metal, it’s essential to use the right drilling technique to avoid damaging the material and getting inaccurate holes. Start drilling at a slow speed to create a pilot hole, then gradually increase the speed as you progress. Apply a steady and consistent pressure to allow the drill bit to cut through the metal gradually.
Pro Tip: To prevent overheating and extend the lifespan of the drill bit, it’s recommended to use cutting fluids or lubricants specifically designed for metalworking.
Step 4: Dealing with Burr and Edge Clean-Up

After drilling through the sheet metal, you may encounter burrs or rough edges around the hole. To clean up the edges, use a deburring tool or a file to remove any sharp edges and smooth out the surface. This step is essential to ensure the hole is smooth and free from any imperfections.
Pro Tip: For a more polished finish, you can use sandpaper or a fine-grit sanding block to gently smooth and refine the edges of the hole.
By following these steps and using the proper tools and techniques, you can successfully drill through sheet metal with precision and accuracy. Remember to always prioritize safety by wearing protective eyewear and gloves when working with power tools. Happy drilling!
How to Drill Through Sheet Metal: A Comprehensive Guide
Introduction
Drilling through sheet metal can be a challenging task if you are not familiar with the proper techniques and tools to use. However, with the right approach, you can achieve clean and precise holes without damaging the sheet metal. This comprehensive guide will walk you through the steps to successfully drill through sheet metal.
Tools and Materials Needed
- Power drill
- Drill bits for metal
- Center punch
- Clamps
- Safety goggles
- Gloves
- Workbench or sturdy surface
Step-by-Step Instructions
- Prepare the sheet metal: Place the sheet metal on a workbench or a sturdy surface. Ensure that it is securely clamped down to prevent movement during the drilling process.
- Mark the drilling spot: Use a center punch to create a small indentation at the spot where you want to drill the hole. This will help the drill bit stay in place and prevent it from wandering.
- Choose the right drill bit: Select a drill bit specifically designed for metal drilling. The size of the drill bit should match the diameter of the hole you want to create.
- Put on safety gear: Wear safety goggles to protect your eyes from flying metal chips and gloves to protect your hands.
- Start drilling: Position the drill bit on the marked spot and apply steady pressure. Start drilling at a slow speed to avoid overheating the drill bit and the sheet metal. Increase the speed gradually as you go deeper into the metal.
- Use cutting fluid: If you are drilling through thick or hard sheet metal, applying cutting fluid can help lubricate the drill bit and keep it cool.
- Remove metal chips: Periodically stop drilling to remove metal chips from the hole. This will prevent clogging and ensure smooth and steady drilling.
- Finish the hole: Continue drilling until you have reached the desired depth. Slow down the drill speed as you approach the final stages to prevent any damage to the backside of the sheet metal.
Tips and Warnings
- Always double-check the clamping of the sheet metal to avoid any movement while drilling.
- Take breaks as needed to prevent overheating of the drill bit.
- Avoid excessive pressure on the drill to prevent the bit from breaking or the sheet metal from warping.
- Wear proper protective gear, including safety goggles and gloves, to prevent injuries.
By following these step-by-step instructions and taking necessary precautions, you can successfully drill through sheet metal without any difficulties. Remember to always prioritize safety and take your time to achieve clean and precise holes.

Choosing the Right Drill Bit
When it comes to drilling through sheet metal, selecting the right drill bit is crucial. The type of drill bit you choose can greatly affect the efficiency and quality of your work. Here are some important factors to consider when choosing a drill bit for sheet metal:
- Material: Different drill bits are designed to work with specific materials. For sheet metal, it is recommended to use high-speed steel (HSS) or cobalt drill bits. These types of drill bits are known for their hardness and ability to withstand high temperatures.
- Size: The size of the drill bit should match the size of the hole you want to drill. For sheet metal, smaller drill bits with diameters ranging from 1/16 inch to 1/4 inch are commonly used. However, the size may vary depending on your specific project requirements.
- Point Angle: The point angle of a drill bit refers to the angle between the cutting edge and the center axis of the bit. For sheet metal, drill bits with a 118-degree point angle are commonly used. This angle helps to reduce the chance of the drill bit wandering or slipping on the metal surface.
- Coating: Some drill bits come with a special coating that provides additional protection and enhances their performance. Titanium nitride (TiN) and Titanium aluminum nitride (TiAlN) coatings are commonly used for drilling through sheet metal. These coatings reduce friction and increase the lifespan of the drill bit.
In addition to these factors, it is important to regularly inspect your drill bits for any signs of wear or damage. Dull or damaged drill bits can lead to inefficient drilling and may cause damage to the sheet metal. Always use sharp and properly maintained drill bits for best results.
By considering these factors and choosing the right drill bit, you can ensure precise and efficient drilling through sheet metal. Remember to use appropriate drilling techniques and take necessary safety precautions while working with sheet metal.
Selecting the Appropriate Drill Speed
When drilling through sheet metal, it is important to select the appropriate drill speed. The speed at which the drill bit rotates can greatly affect the outcome of your drilling project. Choosing the wrong drill speed can result in damaged sheet metal or a less efficient drilling process.
Factors to Consider

- Sheet Metal Thickness: The thickness of the sheet metal being drilled will impact the drill speed. Thicker metal requires a slower drill speed, while thinner metal can tolerate a faster speed.
- Drill Bit Material: Different drill bit materials, such as high-speed steel or carbide, require different speeds for optimal performance.
- Drill Type: The type of drill being used may have specific speed recommendations for drilling through sheet metal. Check the manufacturer’s guidelines for the best results.
- Desired Hole Size: If you are drilling a larger hole, you may need to decrease the drill speed to ensure clean and precise cutting.
Determining the Drill Speed
To determine the appropriate drill speed for your sheet metal project, consult a drill speed chart. These charts provide recommended drill speeds based on factors such as material type, drill bit size, and sheet metal thickness. The chart will typically list the required speed in revolutions per minute (RPM).
| Sheet Metal Thickness (inches) | Drill Bit Size (inches) | Drill Speed (RPM) |
|---|---|---|
| 0.020 – 0.050 | 1/16 – 3/32 | 3500 – 4000 |
| 0.051 – 0.100 | 1/16 – 3/32 | 2500 – 3000 |
| 0.101 – 0.200 | 1/16 – 1/8 | 1500 – 2000 |
Keep in mind that these are general guidelines, and it is always a good idea to test on a scrap piece of sheet metal before committing to a specific drill speed. Adjust the speed as needed to achieve the desired outcome.
By selecting the appropriate drill speed, you can ensure clean and precise holes in your sheet metal while avoiding unnecessary damage. Take the time to research and understand the recommended drill speeds for your specific drilling project to achieve the best results.
Preparing the Sheet Metal
Before you begin drilling into the sheet metal, it’s important to properly prepare it to ensure the best results. Here are some steps to follow:
- Clean the surface: Start by cleaning the sheet metal surface thoroughly to remove any dirt, grease, or debris. This will help the drill bit to grip the metal better and prevent any interference during drilling.
- Mark the drilling points: Use a marker or a center punch to mark the exact points where you want to drill the holes. This will help you ensure accuracy and precision.
- Use a pilot hole: For larger holes, it’s recommended to first drill a pilot hole. A pilot hole serves as a guide for the larger drill bit and helps prevent the sheet metal from warping or bending.
- Support the sheet metal: Place a scrap of wood or a backing plate underneath the sheet metal to provide support and prevent it from bending or vibrating excessively during the drilling process.
- Secure the sheet metal: Use clamps or vices to firmly hold the sheet metal in place. This will prevent it from moving or shifting while you drill and help maintain accuracy.
By properly preparing the sheet metal before drilling, you’ll increase your chances of achieving clean and precise holes without damaging the material. Take your time with these steps to ensure the best results.

Securing the Sheet Metal
Once you have drilled the necessary holes in the sheet metal, it’s important to properly secure it to ensure its stability and structural integrity. There are several methods you can use to secure the sheet metal, depending on your specific project requirements and preferences.
Self-tapping screws
One common method of securing sheet metal is by using self-tapping screws. These screws have a sharp point and threads that can cut into the metal, creating their own threads as they are driven into the material. Self-tapping screws are easy to use and provide a strong and reliable bond.
Rivet nuts
Rivet nuts, also known as threaded inserts, are another popular option for securing sheet metal. These inserts have an internally threaded hole and can be inserted into a pre-drilled hole in the sheet metal using a specialized tool. Once installed, you can use a bolt or screw to secure the sheet metal to the insert. Rivet nuts provide a strong and durable connection and can be easily replaced if needed.
Welding
For projects that require a permanent and extremely secure connection, welding can be used to secure the sheet metal. Welding involves melting the edges of the metal pieces together using high heat, creating a strong and permanent bond. Welding requires specialized equipment and skills, so it may not be suitable for all DIY projects.
Clamps
If you need a temporary or adjustable connection, clamps can be used to secure the sheet metal. Clamps hold the sheet metal in place while allowing for easy removal or adjustment. There are various types of clamps available, such as C-clamps, bar clamps, or spring clamps, depending on the size and shape of the sheet metal.
Adhesives
In some cases, adhesives can be used to secure lightweight sheet metal. There are specific adhesives designed for bonding metal surfaces, such as epoxy or metal bonding adhesives. It’s important to choose an adhesive that is suitable for the specific type of metal and to follow the manufacturer’s instructions for proper application and curing.
Conclusion
Securing sheet metal is an important step in many DIY projects. Self-tapping screws, rivet nuts, welding, clamps, and adhesives are all methods that can be used to secure sheet metal, depending on the project requirements. Consider the strength, permanence, and adjustability needed for your specific project when choosing a method of securing the sheet metal.
Marking the Drill Hole Location
Before you start drilling through sheet metal, it is important to mark the exact locations where you want the holes to be. This will ensure accuracy and prevent any potential damage to the material.
Here are the steps to mark the drill hole locations on sheet metal:
- Measure and mark the desired location for the hole using a measuring tape or ruler. Use a pencil to make the marks on the sheet metal, as pencil marks are easier to remove compared to other types of markers.
- Ensure that the sheet metal is securely clamped or held in place to prevent it from moving during the marking process.
- Double-check the measurements and marks to make sure they are accurate. Use a square or a level to ensure that the marks are straight and aligned properly.
- If you need to mark multiple hole locations, use a template or jig to ensure consistency and accuracy. This can be especially helpful when drilling holes in a pattern or a specific layout.
Remember to take your time and be as precise as possible when marking the drill hole locations. Any mistakes or inaccuracies at this stage can affect the quality and functionality of the final product.
Applying Lubrication
When drilling through sheet metal, it is important to use lubrication to reduce friction and heat buildup. This can help extend the life of your drill bit and prevent the metal from warping or distorting. There are several types of lubricants that can be used for this purpose.
Types of lubricants
1. Cutting oil: Cutting oil is a popular choice for lubricating metal during drilling. It is specifically designed for metalworking applications and provides excellent lubrication for smooth drilling. Cutting oil can be applied directly to the drilling area using a brush or squirt bottle.
2. WD-40: WD-40 is a multipurpose lubricant that can also be used for drilling through sheet metal. It helps reduce friction and prevents the drill bit from overheating. WD-40 can be sprayed onto the surface of the metal prior to drilling.
3. Tap Magic: Tap Magic is a high-performance cutting fluid that is commonly used in metalworking. It provides superior lubrication and cooling properties, making it ideal for drilling through sheet metal. Tap Magic can be applied directly to the drilling area or used with a spray bottle.
How to apply lubrication
To apply lubrication when drilling through sheet metal, follow these steps:
- Clean the surface: Before applying any lubricant, make sure the surface of the metal is clean and free from debris. Use a brush or cloth to remove any dirt or grime.
- Apply the lubricant: Depending on the type of lubricant you are using, apply it directly to the drilling area or use a brush or spray bottle. Make sure to cover the entire drilling area with a thin, even layer.
- Start drilling: Once the lubricant has been applied, you can start drilling through the sheet metal. The lubricant will help reduce friction and heat buildup, making the drilling process smoother and more effective.
- Reapply if necessary: Depending on the size and complexity of your drilling project, you may need to reapply lubricant during the drilling process. If you notice increased friction or heat, stop drilling and apply more lubricant before continuing.
Benefits of lubrication
The main benefits of applying lubrication when drilling through sheet metal include:
- Reduced friction: Lubrication reduces friction between the drill bit and the metal surface, making drilling easier and more efficient.
- Prevention of heat buildup: Lubrication helps dissipate heat generated during drilling, preventing the drill bit from overheating and becoming dull.
- Extended tool life: By reducing friction and heat, lubrication can extend the life of your drill bit, saving you money on replacements.
- Prevention of metal distortion: The lubricant acts as a barrier between the drill bit and the metal, preventing the metal from warping or distorting during drilling.
By following these guidelines and applying lubrication when drilling through sheet metal, you can ensure smooth and successful drilling operations.
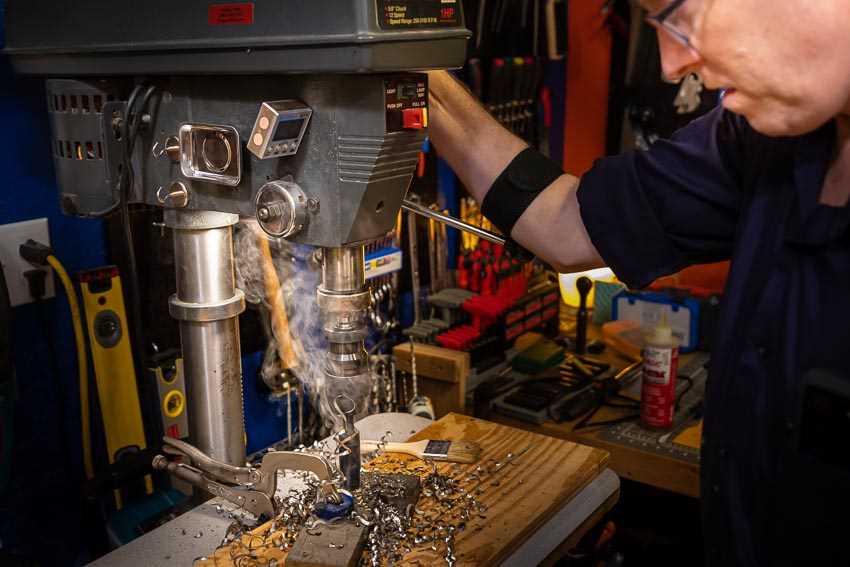
Starting the Drilling Process
Before you begin drilling through sheet metal, it’s important to gather all the necessary tools and equipment. Here are some steps to follow when starting the drilling process:
- Prepare the work area: Clear the surface where you will be drilling, ensuring there are no obstructions or debris that could interfere with the drilling process.
- Wear safety gear: Put on safety glasses and work gloves to protect your eyes and hands from any potential hazards.
- Mark the drilling points: Use a pencil or a marker to mark the precise locations where you want to drill holes in the sheet metal. This will help ensure accuracy and prevent any mistakes.
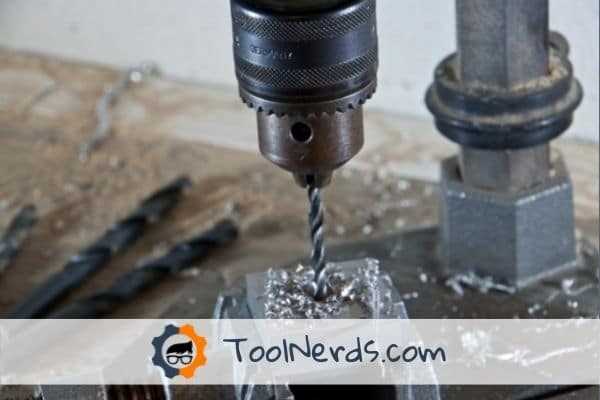
- Select the appropriate drill bit: Choose a drill bit specifically designed for drilling through sheet metal. High-speed steel (HSS) or cobalt drill bits are commonly recommended for this purpose.
- Secure the sheet metal: Place the sheet metal on a stable surface or clamp it securely before drilling. This will prevent it from moving or vibrating during the drilling process, resulting in more accurate holes.
- Start with a pilot hole: To avoid damaging the sheet metal, start by drilling a small pilot hole at each marked point. This will provide a guide for the larger drill bit and reduce the risk of the metal sheet slipping or tearing.
- Apply cutting lubricant: To ease the drilling process and extend the life of your drill bit, apply a small amount of cutting lubricant or a cooling agent to the drilling area. This will help reduce friction and heat buildup.
- Set the drill on a low speed setting: When drilling through sheet metal, it’s best to use a low speed setting on your drill to prevent overheating and ensure better control.
- Keep a steady hand: Hold the drill with a firm grip and maintain a steady pressure while drilling. It’s important to avoid forcing the drill or applying excessive pressure, as this could lead to damage or breakage.
- Clear away metal shavings: As you drill, periodically stop to remove any metal shavings, dust, or debris that may have accumulated. This will help maintain the drill’s effectiveness and prevent any clogging or jamming.
By following these steps, you can start the drilling process with confidence and reduce the risk of errors or accidents when working with sheet metal.
Finishing and Cleaning Up
Once you have successfully drilled through the sheet metal, it is important to finish and clean up the area to ensure a professional and polished look. Here are some steps you can follow:
- Deburring: Use a deburring tool or a metal file to remove any sharp edges or burrs that may be present around the drilled hole. This will not only make the hole safer to handle but also prevent any damage to the surrounding area or other materials.
- Smoothing: Use sandpaper or a sanding block to smooth out the drilled hole and the surrounding area. This will help remove any rough edges or imperfections and ensure a clean and even finish.
- Cleaning: Use a clean cloth or rag to wipe away any debris or dust that may have accumulated during the drilling process. This will help ensure a clean and tidy work area.
- Painting or Coating: If desired, you can paint or coat the drilled hole and the surrounding area to provide added protection and a finished look. Make sure to choose a paint or coating that is suitable for metal and follow the manufacturer’s instructions for application.
- Inspecting: Finally, inspect the drilled hole and the surrounding area to ensure that everything is in order. Check for any remaining burrs or sharp edges, as well as any signs of damage or irregularities. Make any necessary adjustments or touch-ups as needed.
By following these steps, you can effectively finish and clean up after drilling through sheet metal, creating a professional and polished result.
FAQ:
What tools do I need to drill through sheet metal?
You will need a power drill, drill bits designed for metal, a center punch, a hammer, and safety equipment such as gloves and safety glasses.
What is the best drill bit for drilling through sheet metal?
The best drill bits for sheet metal are made of high-speed steel. They have a sharp point and a flute design that helps remove chips while drilling.
Do I need to use lubricant when drilling through sheet metal?
Yes, using lubricant is highly recommended when drilling through sheet metal. It helps reduce friction and heat, making the drilling process easier and preventing the drill bit from dulling.
How do I prevent the sheet metal from bending or warping while drilling?
To prevent the sheet metal from bending or warping, you can place a piece of scrap wood beneath it. This will provide support and distribute the pressure evenly while drilling.
Video:


Meet Harrison Clayton, a distinguished author and home remodeling enthusiast whose expertise in the realm of renovation is second to none. With a passion for transforming houses into inviting homes, Harrison's writing at https://thehuts-eastbourne.co.uk/ brings a breath of fresh inspiration to the world of home improvement. Whether you're looking to revamp a small corner of your abode or embark on a complete home transformation, Harrison's articles provide the essential expertise and creative flair to turn your visions into reality. So, dive into the captivating world of home remodeling with Harrison Clayton and unlock the full potential of your living space with every word he writes.


