How to Drill Through a Stud in a Wall: A Step-by-Step Guide

Drilling through a stud in a wall may seem like a daunting task, but with the right tools and technique, it can be easily accomplished. Whether you’re hanging a heavy picture frame or installing a wall-mounted shelf, drilling through a stud is essential to ensure a secure and sturdy attachment. In this step-by-step guide, we will walk you through the process of locating and drilling through a stud in a wall.
Step 1: Gather the necessary tools.
Before you start drilling, make sure you have all the necessary tools on hand. You will need a stud finder, a drill, an appropriate drill bit, measuring tape, and a pencil. It’s important to use the right drill bit for the job, depending on the material of the stud (wood, metal, or concrete).
Step 2: Locate the stud.
Use the stud finder to locate the position of the stud in the wall. Start by placing the stud finder on the wall and moving it horizontally until it indicates the presence of a stud. Mark the edges of the stud with a pencil to clearly identify its position.
Step 3: Measure and mark the drilling point.
Measure the desired location for drilling on the stud and mark it with a pencil. Make sure to take into consideration the size and weight of the object you will be attaching to the wall. It’s recommended to drill through the center of the stud for maximum stability.
Step 4: Drill through the stud.

Attach the appropriate drill bit to your drill and carefully align it with the marked point on the stud. Start drilling at a slow speed to create a pilot hole, then gradually increase the speed to drill through the stud. Use moderate pressure and be careful not to apply too much force, as this can cause the bit to wander or break.
Step 5: Secure the object to the wall.
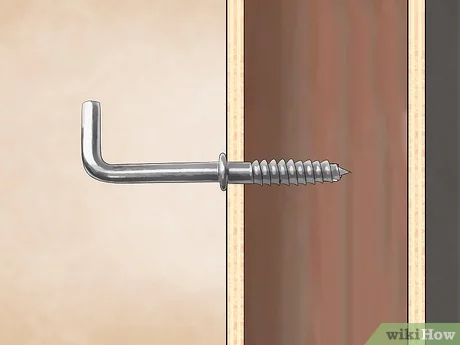
Once you have drilled through the stud, you can now proceed to attach your object to the wall. Insert an appropriate wall anchor into the hole to provide extra support. Then, use screws or nails to securely fasten the object to the stud. Make sure to tighten them properly to ensure a strong and stable attachment.
By following these step-by-step instructions, you can confidently drill through a stud in a wall and secure your objects with ease. Remember to always exercise caution and use the appropriate tools and techniques for the specific job at hand. With practice, drilling through studs will become a simple and routine task in your DIY projects.
Why Drilling Through a Stud Is Important
When it comes to drilling a hole in a wall, it is crucial to identify and drill through a stud. A stud is a vertical beam within the wall that provides structural support. Drilling through a stud ensures that whatever is mounted on the wall will be securely attached and will not come loose over time.
Here are a few key reasons why drilling through a stud is important:
-
Strength and Stability:
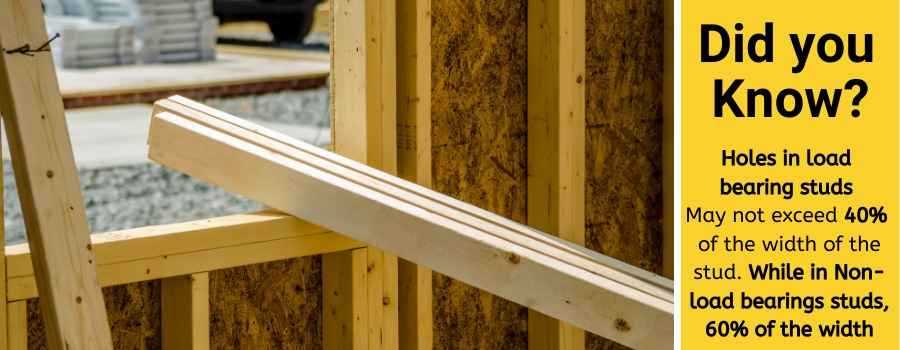
Studs are typically made of solid wood or metal and are designed to bear the weight of the wall and any attached fixtures. By drilling through a stud, you can take advantage of its strength and stability to securely mount shelves, cabinets, or other heavy objects.
-
Avoiding Damage:
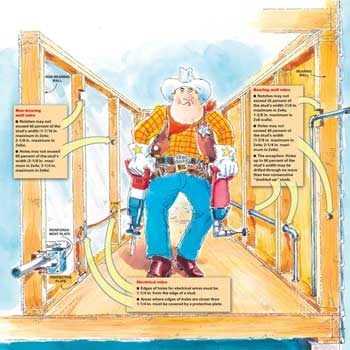
Drilling through a stud helps you avoid damaging the wall. When you drill into a stud, you are less likely to accidentally hit any electrical wires or pipes that run through the wall. This can save you from expensive repairs and potential hazards.
-
Durability:
Mounting objects on a wall using studs increases the durability of the installation. By distributing the weight across multiple studs, the load is evenly distributed, reducing stress on the wall and minimizing the chances of the object coming loose or causing damage.
It is worth noting that not all walls are constructed with studs evenly spaced. Studs are usually placed 16 or 24 inches apart, but there can be variations depending on the building’s construction. It is important to use a stud finder or measure from known points to locate the exact position of the stud before drilling.

In summary, drilling through a stud is important for strength, stability, avoiding damage, and ensuring durability. Taking the time to locate and drill through a stud will guarantee a secure and long-lasting installation for any object mounted on the wall.
Tools Needed for Drilling Through a Stud
Before you begin drilling through a stud in a wall, make sure you have the following tools:
- Power drill: A power drill is essential for drilling through a stud. Choose a drill with enough power and a variable speed setting for the job.
- Drill bit: You’ll need a drill bit that is appropriate for the size of hole you want to create. A 3/8-inch drill bit is commonly used for drilling through studs.
- Stud finder: Use a stud finder to locate the position of the stud before drilling. This will help prevent damage to the wall and ensure you drill in the right spot.
- Measuring tape: A measuring tape can be used to mark the desired location for drilling. Measure and mark the position of the stud using the measurements provided by the stud finder.
- Pencil or marker: Use a pencil or marker to make the marks on the wall for drilling. This will help guide your drill and ensure accurate placement.
- Protective eyewear: Safety should always be a priority when drilling. Wear protective eyewear to prevent any debris from getting into your eyes.
- Masking tape: Applying masking tape to the wall can help prevent any damage or splintering that may occur during drilling.
- Vacuum cleaner or brush: After drilling, use a vacuum cleaner or brush to remove any dust or debris that may have accumulated around the drilled hole.
Having these tools on hand will make the process of drilling through a stud in a wall much easier and safer. Now that you have the necessary tools, you can proceed to the next steps of the drilling process.
Step 1: Locate the Stud
Before you start drilling through a stud in a wall, you need to locate its position. This is an important step to ensure that you’re drilling in the right spot and avoiding any electrical wiring or plumbing behind the wall.

Here are a few methods you can use to locate a stud:
- Knocking: Gently tap the wall with your knuckles and listen for a solid, hollow sound. The stud will produce a more solid sound compared to the hollow spaces between studs.
- Using a stud finder: This handheld device uses sensors to detect changes in density behind the wall, allowing you to locate the position of the stud. Follow the instructions provided with the stud finder for the most accurate results.
- Visual clues: Look for visual clues on the wall, such as nail heads or electrical outlets. Most studs are placed 16 or 24 inches apart, so once you’ve located one stud, you can measure from there to find the others.
Once you’ve located the position of the stud, use a pencil or marker to mark the spot. This will serve as your drilling guide.
Step 2: Mark the Drilling Point
Before you start drilling, it’s important to accurately mark the spot where you want to drill through the stud. This will ensure that you drill in the right place and avoid damaging any electrical wires or pipes that may be behind the wall. Here’s how to mark the drilling point:
- Locate the stud: Use a stud finder to locate the position of the stud. Move the stud finder across the wall until it indicates the presence of a stud. Once you have found the stud, mark its edges with a pencil.
- Measure and mark: Measure the distance from the edge of the stud to the desired drilling point. Use a tape measure or ruler to ensure accuracy. Make a small mark with a pencil on the stud to indicate the exact drilling point.
- Double-check: Take a step back and double-check the marked drilling point. Make sure it aligns with your intended location and is at the correct height. If necessary, adjust the mark accordingly.
By properly marking the drilling point, you can ensure that you drill through the stud in the right place, preventing any accidental damage and ensuring a secure installation.
Step 3: Prepare the Drill
Before you begin drilling into the wall, you need to make sure your drill is properly prepared. Follow these steps to get your drill ready:
Gather Your Materials
Before starting the drilling process, gather all the necessary materials:
- A power drill with a compatible drill bit for the project
- Safety goggles to protect your eyes from debris
- A stud finder to locate the studs in the wall
- Masking tape to mark the spot where you’ll be drilling
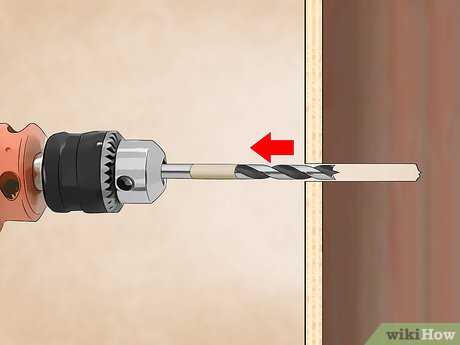
Attach the Correct Drill Bit
Choose a drill bit that is appropriate for the material you are drilling through and for the size of hole you need. Make sure the drill bit is securely attached to the drill. Refer to the drill’s instructions if you’re unsure about how to attach the bit.
Adjust the Drill Settings
Most drills have adjustable settings for speed and torque, which can be helpful depending on the material you’re drilling through. Select the appropriate setting for your project. If you’re unsure, start with a lower speed and gradually increase as needed.
Secure the Stud Finder
Follow the instructions provided with your stud finder to ensure it is properly secured and calibrated. This will help you accurately locate the studs in the wall and avoid drilling into them.
Mark the Stud Location
Use the stud finder to locate the edges of the stud in the wall. Once you’ve determined the position, mark it with a piece of masking tape. This will serve as a visual guide for where to drill.
Put on Safety Gear
Before you start drilling, put on your safety goggles to protect your eyes from any debris that may be produced during drilling.
Step 4: Drill Through the Stud
Now it’s time to drill through the stud. Make sure you have a sturdy drill bit that is appropriate for the material of the stud (usually wood or metal).
Here’s how to do it:
- Mark the spot on the wall where you want to drill the hole.
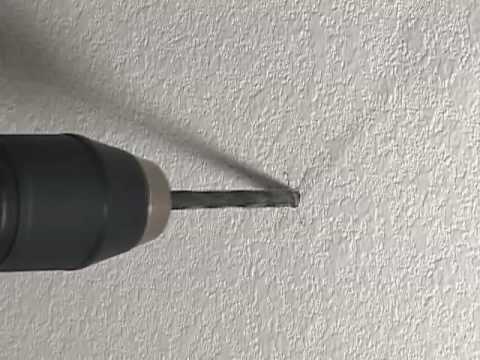
- Hold the drill perpendicular to the wall, with the bit lined up with the marked spot.
- Apply steady pressure to the drill and start drilling. Make sure to keep the drill straight and avoid angling it.
- As you drill, periodically pull the drill bit back slightly to remove any debris that may get stuck in the hole.
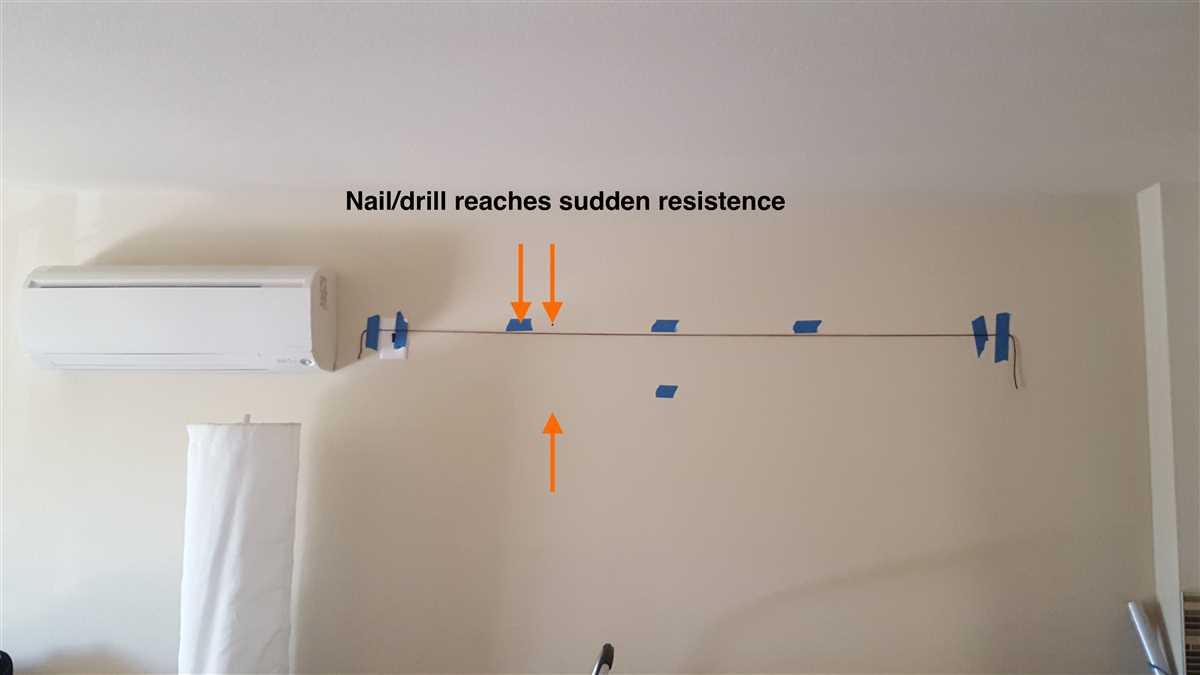
- Continue drilling until you have penetrated through the stud. You will feel a slight change in resistance once you have drilled through.
- Once you have drilled through the stud, remove the drill from the wall.
Tip: To avoid splintering the wood or damaging the wall, it can be helpful to place a piece of scrap wood behind the stud while drilling.
Drilling through a stud can be a bit challenging, but with the right technique and tools, you’ll be able to get the job done. Make sure to always exercise caution and wear safety goggles when operating power tools.
Step 5: Secure the Fixture or Mounting
Once you have drilled through the stud and created the necessary hole for your fixture or mounting, the next step is to secure it in place. This will ensure that the fixture or mounting remains stable and does not move or come loose over time.
Here are the steps to secure your fixture or mounting:
- Gather the necessary tools: Depending on the type of fixture or mounting you are working with, you may need a screwdriver, screws, bolts, or any other hardware that came with your fixture or mounting.
- Align the fixture or mounting: Place the fixture or mounting over the hole you drilled in the stud. Make sure it is properly aligned and positioned as desired. Use a level to ensure that it is straight.
- Attach the fixture or mounting: Using the screws, bolts, or other hardware provided, attach the fixture or mounting to the stud. Make sure to follow any instructions provided by the manufacturer for proper installation.
- Tighten the hardware: Once the fixture or mounting is attached, use a screwdriver, wrench, or other appropriate tool to tighten the hardware and secure it in place. Be careful not to overtighten, as this could damage the fixture or mounting or cause it to become unstable.
- Test the stability: After securing the fixture or mounting, gently test it to ensure that it is secure and stable. Apply a small amount of pressure to see if it moves or feels loose. If it does, you may need to tighten the hardware further or make adjustments to ensure proper stability.
Following these steps will help ensure that your fixture or mounting is properly secured and will remain stable over time. It is important to read and follow any instructions provided by the manufacturer for proper installation and maintenance of your specific fixture or mounting.
Additional Tips and Safety Precautions
1. Use the Right Drill Bit
Make sure to select the appropriate drill bit for the material you are drilling through. For drilling through wood studs, a standard twist bit or a spade bit will work well. However, if you are drilling through metal studs, you will need a specialized metal cutting bit.
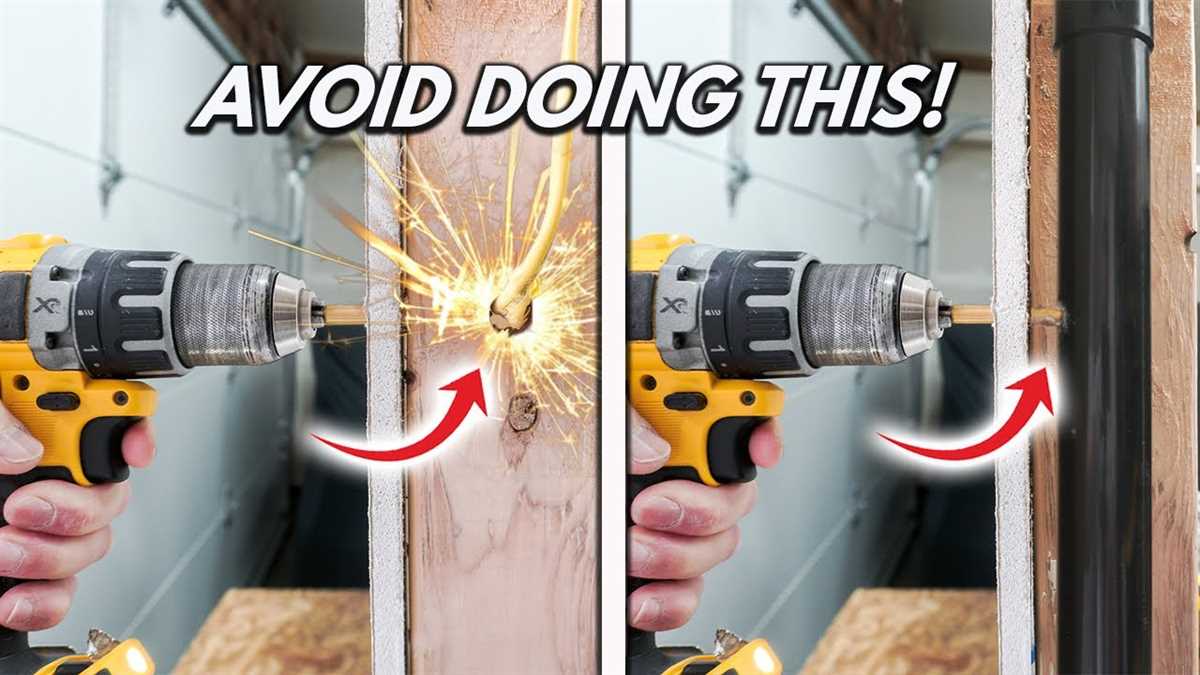
2. Check for Electrical Wiring
Before drilling into a wall, it is essential to check for any electrical wiring or plumbing lines that may be hidden behind the stud. Use a stud finder with a built-in wire detector to identify any potential hazards.
3. Mark the Drill Location
Before drilling, mark the exact location where you want to drill the hole. This will help ensure accuracy and prevent any accidental drilling in the wrong spot.
4. Secure the Stud
When drilling through a stud, it is important to secure it properly to prevent it from moving or spinning. Use clamps or other suitable methods to hold the stud firmly in place.
5. Start with a Pilot Hole
For easier drilling and more precise results, start by drilling a small pilot hole through the stud. This will help guide the larger drill bit and prevent it from wandering off track.
6. Use Proper Technique
When drilling through the stud, apply steady pressure and maintain a slow and controlled drilling speed. Avoid excessive force, as it can cause the drill bit to bind or break.
7. Clean the Hole
Once the hole is drilled, remove any debris or wood shavings from the hole using a brush or vacuum. This will make it easier to insert screws or other fasteners into the hole.
8. Wear Safety Gear
Always wear appropriate safety gear, including safety glasses or goggles, gloves, and a dust mask when drilling through studs. This will protect you from flying debris and dust.
9. Double-Check Your Measurements
Before drilling, double-check your measurements to ensure accuracy. It is better to spend a few extra moments verifying your measurements than to end up with a misplaced hole.
10. Practice on Scrap Material
If you are new to drilling, it may be helpful to practice on a scrap piece of wood or metal before drilling through the stud. This will allow you to familiarize yourself with the drilling process and fine-tune your technique.
11. Seek Professional Help if Needed
If you are unsure about drilling through a stud or if you encounter any difficulties during the process, it is best to seek professional help. A licensed contractor or handyman can assist you in completing the task safely and effectively.
12. Be Mindful of Fire Hazards
When drilling through walls, be mindful of any potential fire hazards. Avoid drilling near electrical outlets, switches, or other components that could spark or ignite flammable materials.
13. Follow Manufacturer’s Instructions
Always refer to the manufacturer’s instructions and guidelines for your specific drill and drill bits. This will ensure that you are using the tool correctly and reduce the risk of accidents or damage.
14. Take Breaks and Rest
If you are drilling multiple holes or if the drilling process is prolonged, make sure to take regular breaks and rest your hands to prevent fatigue or strain injuries.
15. Clean Up Properly
After completing your drilling project, clean up any debris, dust, or shavings and dispose of them safely. This will help maintain a clean and safe work environment.
FAQ:
What tools do I need to drill through a stud in a wall?
To drill through a stud in a wall, you will need a power drill, drill bits (preferably a bit designed for cutting through wood), a stud finder, and a pencil or marker to mark the spot where you want to drill.
Can I use any type of drill bit to drill through a stud?
While it is possible to use a regular drill bit to drill through a stud, it is better to use a bit designed for cutting through wood. These bits have a special design that allows them to handle the density of the wood without getting dull or overheating.
How do I find the exact location of the stud?
You can use a stud finder to locate the edges of the stud. Once you find the edges, mark them with a pencil or marker. Then, measure the distance between the marks to find the center of the stud. This is where you should drill your hole.
What precautions should I take while drilling through a stud?
When drilling through a stud, it is important to wear safety glasses to protect your eyes from any flying debris. You should also make sure to hold the drill steady and apply constant pressure while drilling to avoid slipping or causing any damage to the stud. Furthermore, it is always a good idea to check for any electrical wires or plumbing pipes before drilling to avoid any accidents.
Video:


Harrison Clayton
Meet Harrison Clayton, a distinguished author and home remodeling enthusiast whose expertise in the realm of renovation is second to none. With a passion for transforming houses into inviting homes, Harrison's writing at https://thehuts-eastbourne.co.uk/ brings a breath of fresh inspiration to the world of home improvement. Whether you're looking to revamp a small corner of your abode or embark on a complete home transformation, Harrison's articles provide the essential expertise and creative flair to turn your visions into reality. So, dive into the captivating world of home remodeling with Harrison Clayton and unlock the full potential of your living space with every word he writes.


