How to drill through a brick wall: a step-by-step guide

Drilling through a brick wall may seem like a daunting task, but with the right tools and techniques, it can be a relatively straightforward process. Whether you’re hanging a shelf, mounting a TV, or installing a new light fixture, knowing how to drill through a brick wall is a valuable skill for any DIY enthusiast or homeowner.
Before you begin, it’s important to gather the necessary tools and materials. You’ll need a power drill, a masonry drill bit, masking tape, a pencil, a hammer, a dust mask, safety goggles, and ear protection. Additionally, it’s a good idea to have a level and a tape measure on hand to ensure accurate measurements and alignment.
The first step in drilling through a brick wall is to determine the precise location for the hole. Use a tape measure to measure and mark the desired location with a pencil. If you’re installing a fixture that requires multiple holes, use a level to ensure they are aligned correctly. Once you have marked the spot, use masking tape to create a barrier around the area to prevent the drill from slipping.
Next, attach the appropriate masonry drill bit to your power drill. It’s important to choose a drill bit specifically designed for masonry work, as regular drill bits may not be strong enough to penetrate the brick. Put on your safety gear, including a dust mask, safety goggles, and ear protection, as drilling through brick can create a fair amount of dust and noise. Position the drill bit on the marked spot and hold it steady, making sure to keep it level. Apply steady pressure as you begin drilling, keeping the drill straight and perpendicular to the wall. Take your time and let the drill do the work, allowing the bit to slowly penetrate the brick.
Once you have drilled through the brick, it’s important to remove any dust or debris to ensure a clean and secure fit for your fixture or anchor. Wipe away any loose debris with a brush or cloth, and use a vacuum or blow dryer to remove any remaining dust. You can also use a blow gun attachment on your air compressor to blow out the hole. This will help create a clean and secure surface for your screws or anchors.

In conclusion, drilling through a brick wall is a task that can be accomplished with the right tools, preparation, and technique. By following this step-by-step guide, you’ll be able to tackle any DIY project that requires drilling into brick walls with confidence and ease.
Getting Started
1. Evaluate the wall
Before you start drilling, it’s important to evaluate the wall to determine its composition and thickness. This will help you choose the appropriate tools and techniques for the job. Use a stud finder or knock on the wall to locate any studs, pipes, or electrical wiring that may be hidden behind the wall.
2. Gather the necessary tools
Next, gather all the necessary tools and materials for the job. This may include:
- Drill
- Masonry drill bits
- Hammer
- Masonry anchors
- Safety goggles
- Dust mask
3. Choose the right drill and bits
When drilling through a brick wall, it’s important to use a drill that is suitable for masonry work. A rotary hammer drill or an impact drill with a masonry drill bit is recommended for this task. Make sure the drill bit is the correct size for the anchor or screw you will be using.

4. Mark the drilling spots
Using a pencil or marker, mark the spots on the wall where you will be drilling. Measure and mark the desired height or position for the anchors or screws.
5. Prepare the work area
Clear the area around the wall and protect nearby furniture or objects that may be damaged by dust or debris. Place a drop cloth or tarp on the floor to catch any falling debris.
6. Put on safety gear
Before you start drilling, put on safety goggles to protect your eyes from flying debris and a dust mask to prevent inhalation of dust particles.
Gathering the Necessary Tools
Before you begin drilling through a brick wall, it’s important to gather all the necessary tools and equipment. Having the right tools will make the process much easier and ensure that you achieve the desired results. Here are the essential tools you’ll need:
- Hammer drill: A hammer drill is specifically designed for drilling through tough materials like brick. It combines rotation with a hammering action to create a hole in the brick.
- Masonry drill bits: Ordinary drill bits won’t work for drilling into brick. You’ll need masonry drill bits that are made of hardened steel and have a carbide tip to cut through the brick effectively.
- Dust mask: Drilling into brick can create a lot of dust, which can be hazardous to inhale. Wear a dust mask to protect your lungs.
- Safety goggles: Protect your eyes from flying debris by wearing safety goggles.
- Measuring tape: Use a measuring tape to ensure that you drill the holes in the right location and at the correct depth.
- Masonry anchors and screws: If you plan to hang anything on the wall, you’ll need masonry anchors and screws to secure it in place.
- Pencil and masking tape: Mark the drilling locations on the wall using a pencil and masking tape. This will help guide your drilling and ensure accuracy.
- Vacuum or brush: After drilling, you’ll need to clean up the dust and debris. Use a vacuum or brush to remove any residue from the drilled holes and surrounding area.
Having all of these tools ready before you start drilling will save you time and make the process much smoother. Once you have everything gathered, you’re ready to move on to the next step: preparing the drill and wall.

Preparing the Workspace
Before you start drilling through a brick wall, it is important to properly prepare your workspace to ensure a safe and efficient process. Follow these steps to set up your workspace:
- Gather the necessary tools: Make sure you have all the tools you need for the job, including a drill, masonry drill bit, masking tape, safety goggles, dust mask, and a vacuum cleaner or brush to clean up the debris.
- Choose the right location: Identify the area on the brick wall where you want to drill. Ensure there are no electrical wires or pipes hidden behind the chosen spot. You can use a stud finder or a wire detector to help you locate any hidden objects.
- Mark the drilling spot: Use masking tape to mark the exact spot where you plan to drill. This will provide a visual guide and help prevent the drill from slipping during the drilling process.
- Clear the workspace: Remove any obstacles or loose objects from the surrounding area to create a clean and clutter-free workspace. This will minimize the risk of accidents and allow for easier access to the drilling spot.
- Protect the area: Cover any nearby surfaces or objects that you want to protect from debris or potential damage. Use a drop cloth or plastic sheeting to cover furniture, floors, or windows in close proximity to the drilling spot.
- Put on safety gear: Safety should always be a top priority. Put on a pair of safety goggles to protect your eyes from flying debris and a dust mask to prevent inhalation of any dust particles.
By properly preparing your workspace, you set the foundation for a successful drilling process. Taking these necessary precautions will help ensure your safety and the integrity of the wall.
Marking the Drill Hole
Before you start drilling, you need to mark the spot where you want to make the hole in the brick wall. This will help ensure accuracy and prevent any damage to surrounding areas. Here is a step-by-step guide on how to mark the drill hole:
- Measure and plan: Determine the exact location where you want to drill the hole. Use a tape measure and pencil to mark the spot. Take into consideration any other fixtures or objects that may be near the area.
- Create a pilot hole: To ensure accuracy, it is recommended to make a small pilot hole before drilling the actual hole. Use a nail or a small drill bit to create the pilot hole at the marked spot.
- Mark the center of the hole: Once the pilot hole is created, use a pencil or a marker to mark the center of the hole. This will serve as a guide when positioning the drill bit during drilling.
- Use a level: Place a level horizontally and vertically on the marked spot to ensure that it is perfectly level. Adjust the position if necessary.
- Secure masking tape: To prevent any damage to the brick surface, secure a piece of masking tape over the marked spot. This will help protect the brick and provide a cleaner hole.
By following these steps, you can accurately mark the drill hole on a brick wall, ensuring that your drilling process goes smoothly and without any unnecessary damage.
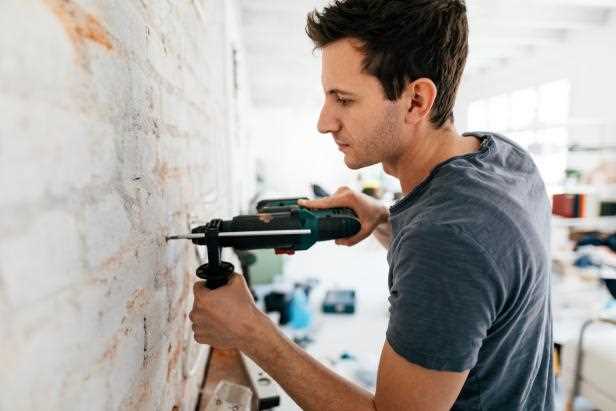
Drilling the Pilot Hole
Once you have marked the spot where you want to drill your hole, it’s time to start drilling the pilot hole. The pilot hole will act as a guide for the larger drill bit that you’ll be using later.

Step 1: Prepare your tools
- Gather all the necessary tools for the job: safety goggles, ear protection, a power drill with a masonry drill bit, and a hammer.
- Put on your safety goggles and ear protection to protect yourself from any flying debris or loud noise.
Step 2: Choose the right drill bit
When drilling into brick, it’s important to use a masonry drill bit. These bits are specifically designed to penetrate the hard surface of the brick without getting damaged.
Step 3: Position your drill
- Hold the drill firmly with both hands and position it perpendicular to the wall.
- Make sure the drill bit is lined up with the marked spot on the wall.
Step 4: Start drilling

- Slowly start drilling into the brick using a low speed setting on your drill.
- Apply steady pressure, but don’t push too hard or the bit may get stuck or break.
- Allow the drill bit to do the work and let it gradually penetrate the brick.
- Continue drilling until you have achieved the desired depth for your pilot hole.
Step 5: Clean up
Once you have finished drilling the pilot hole, remove the drill bit from the hole and clean up any debris that may have been generated during the drilling process.
Step 6: Check the pilot hole
Inspect the pilot hole to make sure it is straight and the correct size for your larger drill bit. If necessary, make any adjustments before moving on to the next step.
Step 7: Proceed to drilling the final hole
Now that you have a pilot hole, you can proceed to drill the final hole using a larger drill bit, if needed. This larger hole will accommodate the anchor or screw that you will be using to secure your item to the wall.
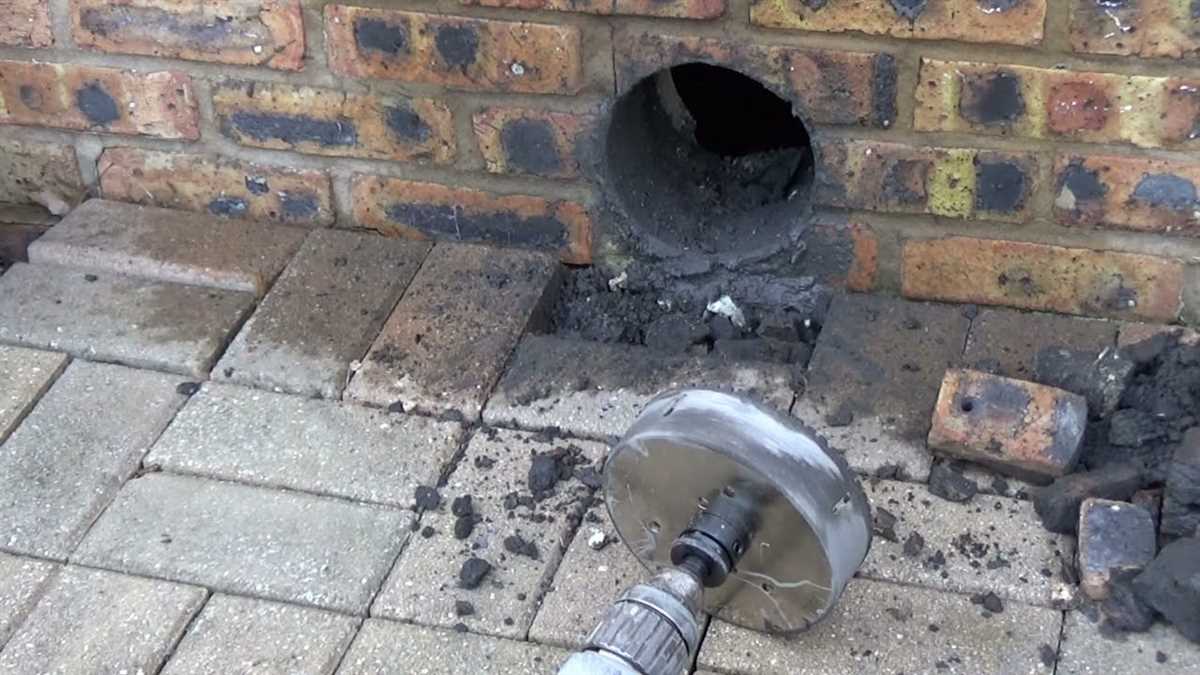
Drilling the Final Hole
Once you have determined the appropriate location for your hole and have prepared the area by removing any obstacles or obstructions, it is time to start drilling the final hole in the brick wall. Follow these steps to ensure a successful drilling process:
Step 1: Prepare the Drill
Insert the appropriate drill bit into your power drill. For drilling through brick walls, it is recommended to use a masonry drill bit that is designed to handle the hardness of the brick. Make sure the drill bit is securely attached to the drill.
Step 2: Mark the Hole Location
Using a pencil or marker, mark the exact spot where you want to drill the hole. Double-check the measurements to ensure accuracy.
Step 3: Securely Position the Drill
Hold the drill firmly with both hands and position it perpendicular to the wall, aligning the drill bit with the marked spot. Apply gentle pressure to keep the drill steady throughout the drilling process.
Step 4: Start Drilling
Switch on the drill and begin drilling into the brick wall. Start with slow and steady motion to create a shallow guide hole. Once the guide hole has been established, you can increase the drilling speed and pressure to penetrate deeper into the brick.
Step 5: Maintain Coolness
Drilling through brick walls can generate heat. To avoid overheating and damaging the drill bit, periodically withdraw the bit from the hole to allow it to cool down. You can also spray water on the drill bit to keep it cool during the drilling process.
Step 6: Monitor Depth
As you drill, periodically check the depth of the hole by measuring the length of the drill bit or using a depth gauge. This will help you ensure that you are drilling to the desired depth without going too far.
Step 7: Clean the Hole
Once you have drilled the final hole, remove the drill from the wall and clean out any debris or dust from the hole. You can use a brush or a vacuum cleaner to achieve a clean and clear hole.
Following these steps will help you successfully drill through a brick wall and create the final hole you need. Remember to always wear appropriate safety gear, such as goggles and gloves, when drilling and handling power tools.
Cleaning up and Finishing
After successfully drilling through a brick wall, it is important to clean up the work area and finish off any remaining tasks to ensure a neat and professional outcome. Here are the steps for cleaning up and finishing:
1. Remove Any Debris
- Use a brush or broom to sweep away any loose debris or dust that may have accumulated during the drilling process.
- Dispose of the debris properly, following your local waste disposal guidelines.
2. Clean the Drill and Drill Bit
- Wipe down the drill and the drill bit with a clean cloth or rag to remove any dust or residue.
- If there is a significant amount of dust or debris on the drill bit, you can use a brush or compressed air to clean it more thoroughly.
3. Patch Any Holes
- If you drilled multiple holes, evaluate if any of them need to be patched.
- Use a suitable patching compound or mortar mix to fill in the holes.
- Follow the manufacturer’s instructions for the patching compound and allow it to dry completely.
- Sand down the patched area until it is smooth and flush with the surrounding brick surface.
4. Apply a Waterproof Sealant (optional)
If the drilled holes are located in an area prone to moisture or water intrusion, it may be beneficial to apply a waterproof sealant. This will help prevent water damage and increase the longevity of the drilled holes.
5. Touch Up the Surrounding Surface (optional)
If the drilling process caused any damage or marks on the surrounding bricks, you can touch up the surface by applying a matching brick paint or stain. This will help blend the drilled holes with the rest of the wall and create a more seamless finish.
6. Clean Up the Work Area
- Dispose of any remaining materials or packaging properly.
- Wipe down the work area, removing any dust, debris, or fingerprints.
- Store the drill and equipment in a safe and organized manner.
By following these steps, you can ensure a clean, professional-looking result after drilling through a brick wall.
Troubleshooting and Safety Tips
1. Troubleshooting
If you encounter any issues or difficulties while drilling through a brick wall, consider the following troubleshooting tips:
- Check drill bit size: Make sure you are using the correct drill bit size for the task at hand. Using the wrong size can cause the drill bit to slip or become stuck.
- Monitor drill speed: Maintain a consistent and appropriate drill speed for the type of brick being drilled. Too high of a speed can cause the drill bit to overheat, while too slow of a speed may not make progress.
- Keep drill steady: Ensure that the drill is held securely and kept steady while drilling. Unsteady drilling can lead to inaccurate holes or damage to the drill or the surrounding area.
- Clear debris: Periodically stop drilling to remove debris from the hole. Accumulated debris can make drilling more difficult and hinder progress.
2. Safety Tips
When drilling through a brick wall, it is important to prioritize safety to prevent accidents or injuries. Keep in mind the following safety tips:
- Wear protective gear: Always wear safety glasses to protect your eyes from flying debris. Additionally, use gloves to provide better grip and protect your hands from sharp edges.
- Use a dust mask: Brick dust can be harmful when inhaled, so it’s important to wear a dust mask to prevent respiratory issues.
- Secure the work area: Make sure the area around the wall is clear of obstructions and secure any loose items that could potentially fall during drilling.
- Use caution near electrical wires and pipes: Before drilling, check for the presence of electrical wires or pipes behind the brick wall. Avoid drilling in those areas to prevent damage or injury.
- Keep children and pets away: Ensure that children and pets are kept at a safe distance from the drilling area to prevent accidents.
By troubleshooting any issues and following these safety tips, you can confidently drill through a brick wall while minimizing risks and ensuring a successful outcome.
FAQ:
What tools do I need to drill through a brick wall?
To drill through a brick wall, you will need a hammer drill, masonry drill bit, safety goggles, ear protection, dust mask, and a vacuum or broom to clean up the debris.
What type of drill bit should I use for drilling through a brick wall?
For drilling through a brick wall, it is recommended to use a masonry drill bit, which is specifically designed for drilling through hard materials like brick and concrete.
Can I use a regular drill to drill through a brick wall?
No, a regular drill is not suitable for drilling through a brick wall. You will need a hammer drill, which has a hammering action that helps to break through the tough brick surface.
How do I mark the spot on the wall where I want to drill?
To mark the spot on the wall where you want to drill, use a pencil or marker to make a small dot or cross. You can also use a level or measuring tape to ensure the mark is in the correct position and straight.
Do I need to wear protective gear while drilling through a brick wall?
Yes, it is important to wear protective gear while drilling through a brick wall. Safety goggles will protect your eyes from flying debris, ear protection will reduce the noise from the drill, and a dust mask will prevent you from inhaling any dust or particles.
What should I do to prevent the drill bit from overheating?
To prevent the drill bit from overheating while drilling through a brick wall, it is recommended to periodically stop and apply water or coolant to the drilling area. This will help to keep the drill bit cool and prevent it from getting damaged.
Do I need to clean up the debris after drilling through a brick wall?
Yes, it is important to clean up the debris after drilling through a brick wall. Use a vacuum or broom to remove any dust, brick fragments, or debris from the drilling area. This will help to keep the work area clean and safe.
Video:


Meet Harrison Clayton, a distinguished author and home remodeling enthusiast whose expertise in the realm of renovation is second to none. With a passion for transforming houses into inviting homes, Harrison's writing at https://thehuts-eastbourne.co.uk/ brings a breath of fresh inspiration to the world of home improvement. Whether you're looking to revamp a small corner of your abode or embark on a complete home transformation, Harrison's articles provide the essential expertise and creative flair to turn your visions into reality. So, dive into the captivating world of home remodeling with Harrison Clayton and unlock the full potential of your living space with every word he writes.


