How to Drill Out a Storage Cylinder Lock: Step-by-Step Guide

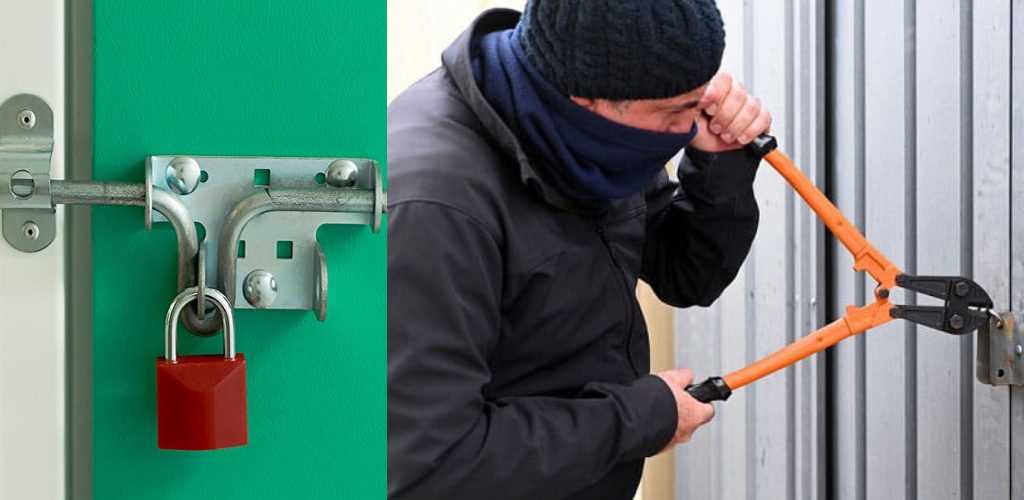
If you find yourself locked out of your storage cylinder, drilling out the lock may be your only option. While it is not the ideal solution, it can be a necessary last resort when all else fails. Drilling out a storage cylinder lock requires precision and patience, as well as the right tools and techniques. In this step-by-step guide, we will walk you through the process of drilling out a storage cylinder lock, ensuring that you can regain access to your belongings efficiently and safely.
Step 1: Gather the necessary tools
Before you begin, it is essential to gather the appropriate tools for the job. You will need a drill with various drill bits, including a metal drill bit specifically designed for drilling into locks. Additionally, have a screwdriver, lubricant, and a pair of pliers on hand. These tools will help you navigate the lock while drilling.
Step 2: Identify the lock type and position
Examine the lock on your storage cylinder to determine the type of lock and its position. Storage cylinders often have pin and tumbler locks or wafer locks. Understanding the lock type will help you know where to apply pressure and control the drilling process more effectively.

Step 3: Lubricate the lock
Before you start drilling, apply a generous amount of lubricant to the lock. This will help reduce friction and heat buildup while drilling, making the process smoother and preventing damage to the drilling tools.
Step 4: Start drilling
Begin by drilling a small pilot hole into the center of the lock. Gradually increase the size of the drill bit until it matches the size of the cylinder pins or tumblers. Take caution not to drill too deeply, as you risk damaging the internals of the lock or other important components.
Step 5: Break the pins or tumblers

Once the drill bit matches the size of the pins or tumblers, apply more pressure while drilling. The goal is to break the pins or tumblers inside the lock, allowing the cylinder to rotate freely. Take breaks during this process to clean away any debris and reapply lubricant as necessary.
Step 6: Remove the lock cylinder
After successfully drilling out the lock, use a screwdriver or pliers to turn the cylinder and unlock the storage cylinder. Without the resistance of the pins or tumblers, the lock should rotate freely, allowing you to regain access to your belongings.
Disclaimer: Drilling out a storage cylinder lock should be a last resort option, as it can permanently damage the lock and may require professional assistance to replace. It is always recommended to consult a locksmith or security expert before attempting this process.
Remember, drilling out a storage cylinder lock should only be done when you have exhausted all other options. If possible, seek professional help to avoid causing unnecessary damage. However, if you find yourself in a situation where drilling is the only option, following these step-by-step instructions will ensure a smoother and safer drilling process.
Gathering the Tools and Materials
Before you begin drilling out a storage cylinder lock, you will need to gather the necessary tools and materials. These items will help you remove the lock and successfully complete the task. Here is a list of what you will need:

- Drill: You will need a drill with a set of drill bits. It is recommended to have a few different sizes on hand to accommodate the different parts of the lock.
- Screwdriver: A screwdriver will be needed to remove any screws holding the lock in place.
- Hammer: A hammer may be necessary to tap the drill bit into the lock, especially if it is particularly stubborn or tightly secured.
- Pliers: Pliers will come in handy for removing any broken or damaged pieces of the lock that may be left behind after drilling.
- Protective Gear: It is crucial to wear gloves and safety glasses throughout the process to protect yourself from any potential injury or debris.
In addition to the tools, you may also need some materials to aid you in the drilling process:
- Lubrication: Applying a lubricant to the drill bit can help reduce friction and make drilling easier. You can use any type of lubricant, such as oil or WD-40.
- Cardboard or Cloth: Placing a piece of cardboard or cloth underneath the lock can help catch any metal shavings or debris created during the drilling process, making cleanup easier.
Having all of these tools and materials ready before you start will ensure a smoother and more efficient drilling process. It’s important to gather everything you need to avoid any interruptions or delays during the task.
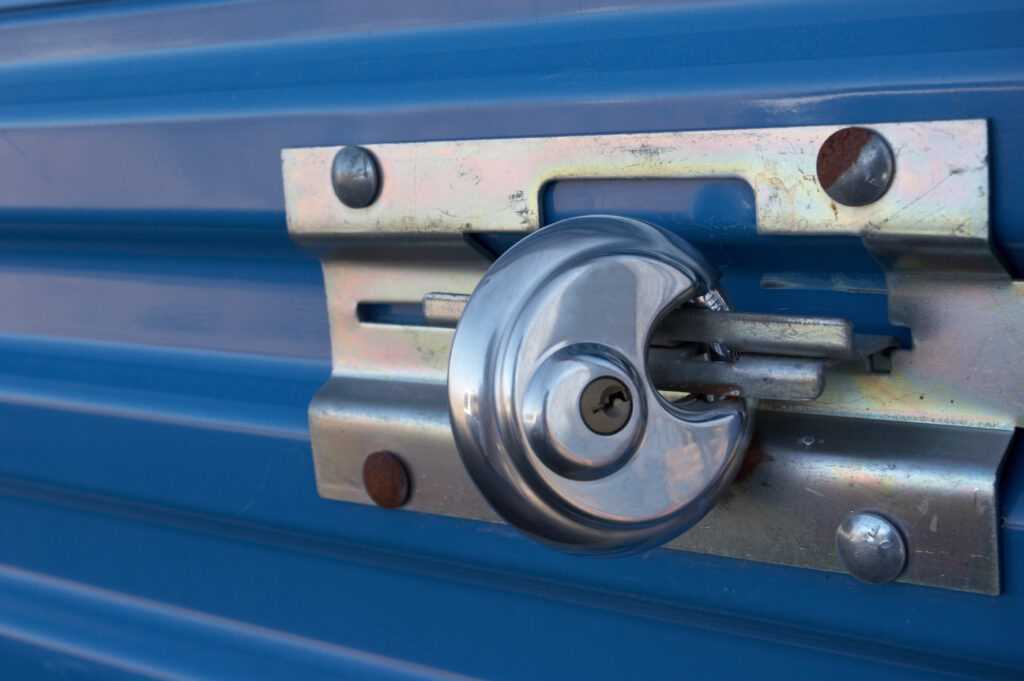
Examining the Lock and Cylinder
Before attempting to drill out a storage cylinder lock, it’s important to fully understand the lock and cylinder you are working with. By examining the lock and cylinder beforehand, you can gather important information that will assist you in the drilling process.
1. Identify the type of storage cylinder lock
There are several types of storage cylinder locks, including pin tumbler locks, wafer locks, tubular locks, and disc detainer locks. Each type has different components and mechanisms, so it’s crucial to identify the specific type of lock you are dealing with.
- Pin tumbler lock: These locks consist of pins that match up with corresponding key cuts.
- Wafer lock: Wafer locks have flat, spring-loaded wafers that align with the key when inserted.
- Tubular lock: Tubular locks have a series of pins arranged in a circular pattern.
- Disc detainer lock: Disc detainer locks have rotating discs that align with the notches of the key.
2. Determine the number of pins or discs
Once you have identified the type of lock, you should determine the number of pins or discs it contains. This information is crucial because it will dictate the drilling process. Pin tumbler locks typically have five or six pins, while disc detainer locks may have up to twelve discs.

3. Gather the necessary tools
After examining the lock and determining its type and number of pins or discs, gather the necessary tools. This may include a drill, drill bits, lubricant, screwdrivers, pliers, and a hammer. The exact tools needed will depend on the specific lock and cylinder.
4. Verify ownership
Before proceeding with drilling out the lock, it is essential to verify your ownership or legal access to the storage cylinder. Drilling out a lock without proper authorization can have legal consequences.
5. Take safety precautions
Before beginning the drilling process, it is essential to take appropriate safety precautions. This may include wearing safety goggles and gloves, ensuring the area is well-ventilated, and securing the workpiece in a stable position.
| Lock Type | Key Features |
|---|---|
| Pin tumbler lock | Pins and key cuts align to unlock |
| Wafer lock | Flat, spring-loaded wafers align with the key |
| Tubular lock | Pins arranged in a circular pattern |
| Disc detainer lock | Rotating discs align with key notches |
By examining the lock and cylinder, identifying the type and number of pins or discs, gathering the necessary tools, verifying ownership, and taking safety precautions, you can prepare yourself for the drilling process. Remember to approach drilling out a lock with caution and only do so within legal boundaries.
Preparing the Area
Gather your tools and materials

Before you start drilling out the storage cylinder lock, it’s important to gather all the necessary tools and materials. Here’s a list of what you’ll need:
- Power drill
- Drill bits (start with a smaller bit and gradually increase the size if needed)
- Protective eyewear
- Work gloves
- Penetrating oil
- Hammer
- Flathead screwdriver
- Needle-nose pliers
- Lock lubricant or graphite powder
Clear the area
Make sure the area around the storage cylinder lock is clear of any obstacles or debris. This will give you enough space to work and reduce the risk of accidents.
Take safety precautions
Prioritize safety while working with power tools. Wear protective eyewear to shield your eyes from any flying debris, and use work gloves to protect your hands. Make sure you are working in a well-ventilated area, and if necessary, use a mask to avoid inhaling any dust or particles.
Apply penetrating oil
If the lock is rusty or stuck, apply penetrating oil to loosen it up. Spray the oil directly into the keyhole and around the lock mechanism. Allow it to sit for a few minutes to penetrate and loosen any debris or rust.
Use a hammer and screwdriver to remove the cylinder retaining clip
Some storage cylinder locks have a retaining clip that holds the cylinder in place. To remove it, use a hammer and a flathead screwdriver. Place the screwdriver against the clip and gently tap it with the hammer until it comes loose. Use needle-nose pliers to completely remove the clip.
Apply lock lubricant or graphite powder
Before starting the drilling process, apply lock lubricant or graphite powder to the keyhole. This will help reduce friction and make the drilling process smoother.
By following these steps and preparing the area properly, you’ll be ready to proceed with drilling out the storage cylinder lock.
Marking the Drill Points
Before you start drilling out the storage cylinder lock, it’s essential to mark the drill points. These are the areas where you will be drilling into the lock to create holes and remove the pins and tumblers.
Follow these steps to mark the drill points properly:
- Examine the lock: Take a close look at the storage cylinder lock to identify the areas where the drill points should be placed. Typically, these points are where the pins and tumblers are located.
- Prepare the lock: Clean and remove any obstructions or dirt from the lock using a lubricant or cleaning solution. This will ensure a better drilling experience and prevent any damage to the drill bits.
- Mark the drill points: Use a permanent marker or a center punch to mark the precise spots where you will drill into the lock. It’s crucial to be accurate and avoid drilling into the wrong areas.
- Space the drill points: Depending on the type of storage cylinder lock, you may need to place multiple drill points. Make sure to space them evenly to distribute the force when drilling.
Remember, marking the drill points correctly is essential to ensure a successful drilling process and prevent any damage to the lock or surrounding areas.
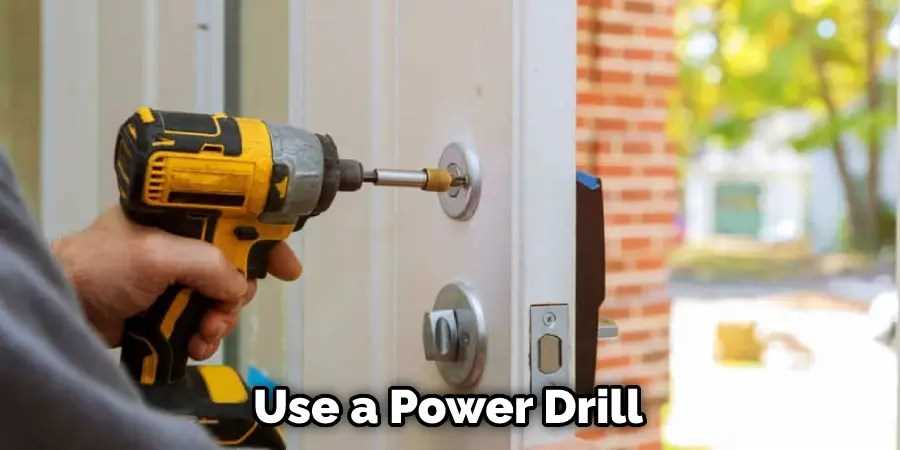
Drilling the Pilot Holes
Before you start drilling into the storage cylinder lock, it is important to create pilot holes. Pilot holes will help guide your drill bit and prevent it from slipping or wandering off course. Follow these steps to drill the pilot holes:
- Choose the appropriate drill bit size. The size of the pilot holes should match the size of the drill bit you will be using for the main drilling.
- Set your drill to a low-speed setting. This will help you have better control over the drill and prevent damaging the lock or the surrounding area.
- Locate the center of the lock cylinder. You can use a ruler or measuring tape to find the center, or you can visually estimate the position.
- Place the tip of the drill bit on the center of the lock cylinder and apply light pressure. Make sure the drill bit is perpendicular to the surface of the lock.
- Start drilling slowly. Apply consistent pressure while rotating the drill in a clockwise motion. Continue drilling until you reach the desired depth for the pilot holes.
- Repeat the process for the remaining pilot holes. For a standard lock cylinder, it is recommended to create at least three pilot holes, evenly spaced around the lock.
Once you have drilled the pilot holes, you will be ready to move on to the next step of drilling out the storage cylinder lock. Remember to take your time and be patient, as rushing the process may result in damage to the lock or your equipment.
Enlarging the Holes with Successively Larger Drill Bits
Once you have made your initial pilot hole, you will need to gradually enlarge it using successively larger drill bits. This will allow you to create a larger opening in the storage cylinder lock.
Here is a step-by-step guide on how to enlarge the holes using successively larger drill bits:
- Choose a drill bit that is slightly larger than your pilot hole. It should fit comfortably into the hole without any wobbling.
- Place the drill bit into the pilot hole and align it perpendicular to the surface of the storage cylinder lock.
- Begin drilling slowly and steadily, applying even pressure to the drill. Make sure to hold the drill firmly and maintain control throughout the process.
- Once the drill bit has gone through the lock, remove it and replace it with a larger drill bit.
- Repeat steps 2-4 with the larger drill bit, gradually increasing the size of the hole.
- Continue this process with successively larger drill bits until you have achieved the desired size for the hole.
Here are some tips to keep in mind:
- Make sure to use the correct size and type of drill bits for your specific storage cylinder lock.
- Take breaks during the drilling process to prevent overheating of the drill bit and the lock.
- Wear safety goggles and gloves to protect yourself from any flying debris or sharp edges.
- Use a lubricant, such as WD-40, to reduce friction and make drilling easier.
By following these steps and tips, you will be able to successfully enlarge the holes in a storage cylinder lock using successively larger drill bits.
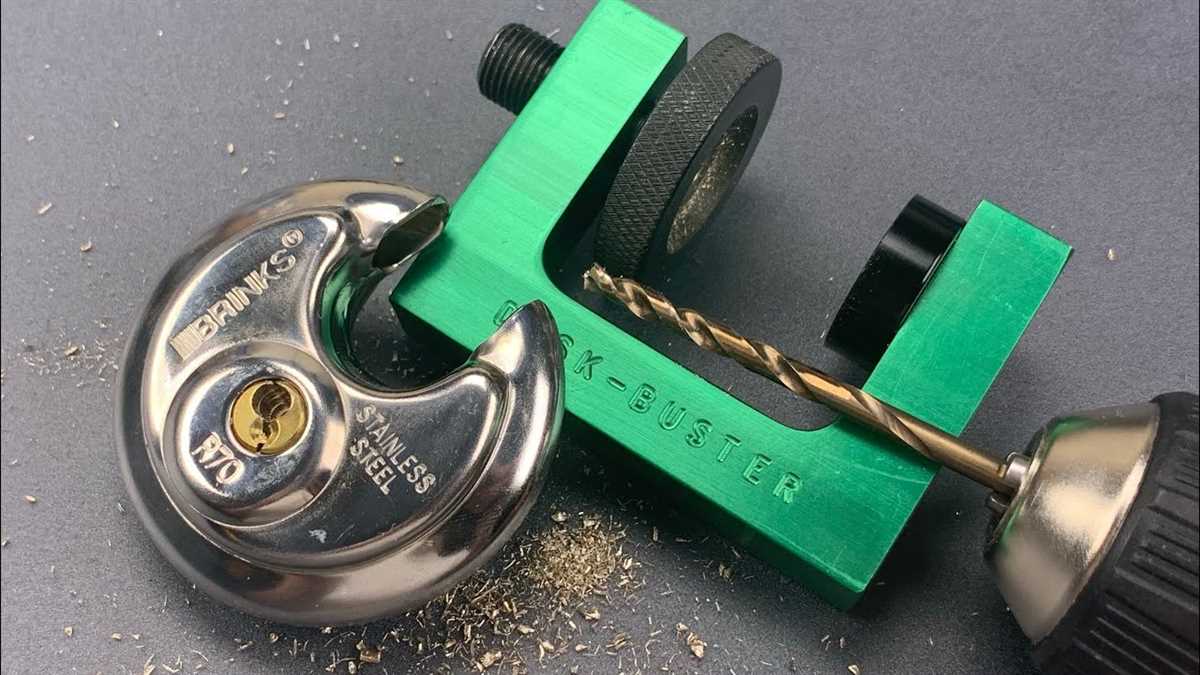
Removing the Lock Cylinder
Before you start removing the lock cylinder, make sure you have all the necessary tools on hand. You will need a drill with a metal-cutting drill bit, a screwdriver or a drill set to reverse mode, and a pair of pliers. It’s also a good idea to have a container or a bag to collect any metal shavings that may come off during the drilling process.
Here is a step-by-step guide to removing the lock cylinder:
- Begin by inserting the metal-cutting drill bit into the lock cylinder. The size of the drill bit will depend on the specific lock cylinder you are working with, so make sure you have the right size.
- Position the drill bit at a slight angle toward the top of the lock cylinder. This angle will help guide the drill bit into the pins inside the lock cylinder.
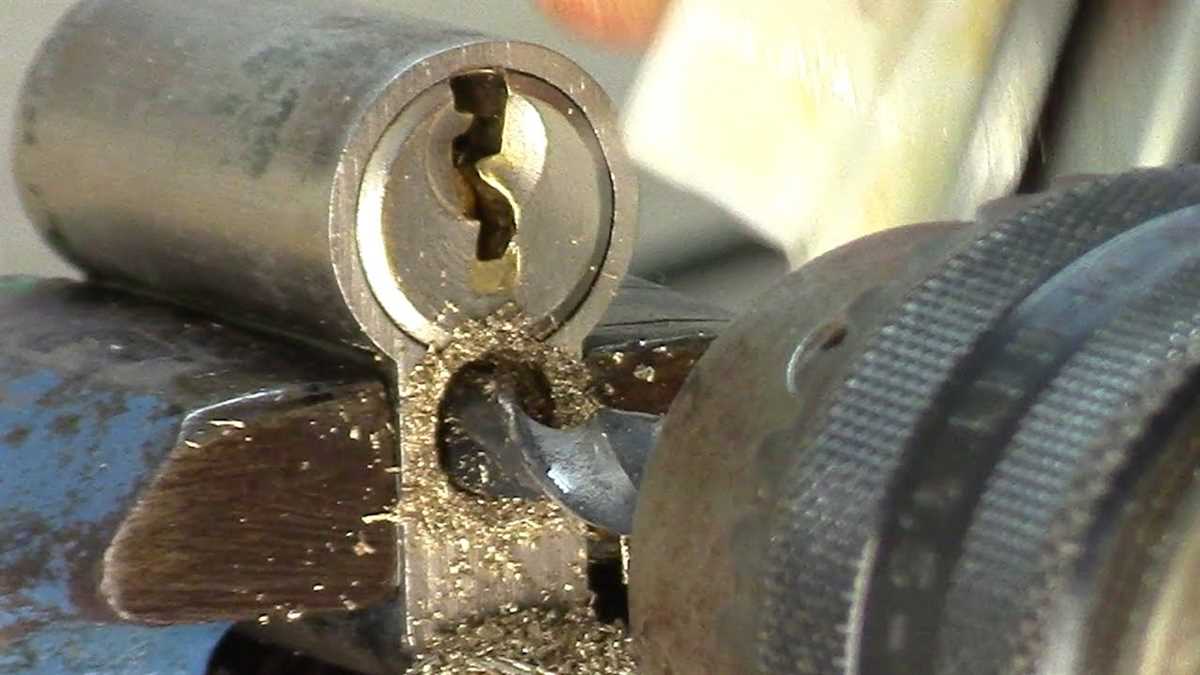
- Start drilling slowly and apply moderate pressure. It’s important to maintain control and not rush through this step. The goal is to drill through the pins inside the lock cylinder without damaging the surrounding mechanism.
- As you drill, you may feel some resistance or hear clicking sounds. This is normal and indicates that you are hitting the pins inside the lock cylinder.
- Continue drilling until you have completely drilled through all the pins. At this point, you should feel little to no resistance when turning the drill bit.
- Once you have drilled through the pins, switch the drill to reverse mode or use a screwdriver to rotate the lock cylinder counterclockwise. This will help disengage the lock cylinder from the mechanism.
- If the lock cylinder doesn’t immediately come out, you can use the pliers to gently pull it out. Be careful not to apply too much force as it may cause further damage to the lock mechanism.
- Finally, inspect the drilled-out lock cylinder and remove any remaining metal shavings. Clean the surrounding area to ensure smooth operation for the replacement lock cylinder.
Note: Removing a lock cylinder by drilling should only be done if all other methods fail or if you have the necessary skills and knowledge to do so. It’s always recommended to consult a professional locksmith if you are unsure or uncomfortable with the process.
Replacing the Lock Cylinder
Replacing the lock cylinder is a relatively straightforward process that can be completed with a few simple tools. Follow these steps to replace the lock cylinder:
- Start by removing the old lock cylinder. Use a screwdriver or a drill to remove any retaining screws that may be holding the cylinder in place.
- If there are no retaining screws, insert the key into the lock and turn it clockwise to remove the cylinder.
- Once the old lock cylinder is removed, take the new lock cylinder and insert it into the lock housing.
- Align the keyway of the new cylinder with the keyway of the lock housing.
- Push the new lock cylinder all the way into the lock housing until it is flush with the surface.
- If there are retaining screws, use a screwdriver or a drill to secure the new lock cylinder in place.
- Test the new lock cylinder by inserting the key and turning it to ensure that it operates smoothly.
It is important to note that when replacing a lock cylinder, it is recommended to use a lock cylinder of the same brand and model as the original one to ensure proper fit and function.
If you are unsure about how to replace the lock cylinder or if you encounter any difficulties during the process, it is recommended to consult a professional locksmith for assistance.
FAQ:
What tools do I need to drill out a storage cylinder lock?
You will need a power drill, a drill bit, a hammer, a chisel, and safety goggles.
Can I use any drill bit to drill out the storage cylinder lock?
No, you need to use a drill bit that is specifically designed for drilling metal.
Is it difficult to drill out a storage cylinder lock?
It can be challenging, especially if you don’t have experience with drilling. It requires precision and patience.
Can I reuse the lock after drilling it out?
No, once you have drilled out the lock, it will be damaged and cannot be reused.
Are there any alternative methods to drill out a storage cylinder lock?
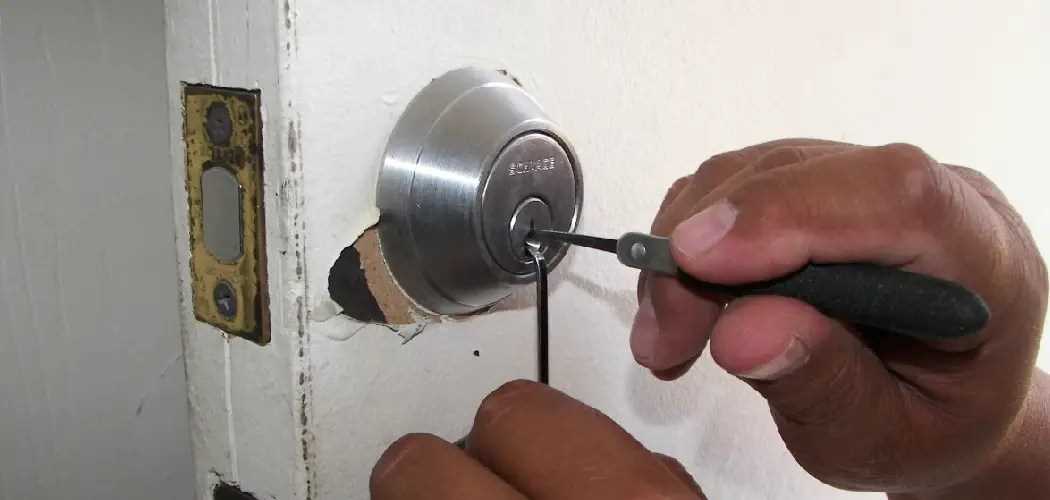
Yes, you can try picking the lock or calling a professional locksmith for assistance.
Video:


Meet Harrison Clayton, a distinguished author and home remodeling enthusiast whose expertise in the realm of renovation is second to none. With a passion for transforming houses into inviting homes, Harrison's writing at https://thehuts-eastbourne.co.uk/ brings a breath of fresh inspiration to the world of home improvement. Whether you're looking to revamp a small corner of your abode or embark on a complete home transformation, Harrison's articles provide the essential expertise and creative flair to turn your visions into reality. So, dive into the captivating world of home remodeling with Harrison Clayton and unlock the full potential of your living space with every word he writes.


